Pie crust is the foundation of many beloved desserts and savory dishes, celebrated for its flaky, tender texture and buttery flavor. It’s the perfect vessel for a wide range of pie fillings, from sweet fruits and rich custards to savory meats and vegetables. The popularity of pie crust lies in its versatility and the comforting, nostalgic feelings it evokes—every bite of a well-made pie recipes is a trip down memory lane. When it comes to making pie crust, the choice between butter and shortening can significantly impact the final product.
Butter: Butter is prized for its rich flavor and ability to create exceptionally flaky layers. The water content in butter evaporates during baking, creating steam that puffs up the dough, resulting in a light, airy texture. However, butter can be challenging to work with as it softens quickly, making the dough more difficult to handle, especially in warm kitchens. Shortening: Shortening, on the other hand, is all about ease and consistency. It has a higher melting point than butter, making the dough more manageable and less likely to melt or become sticky. Shortening yields an incredibly tender crust due to its 100% fat content, which coats the flour particles and inhibits gluten formation. While it lacks the distinct flavor of butter, it produces a reliably tender and flaky crust.
Many bakers opt for a combination of butter and shortening to harness the best qualities of both fats. The butter provides flavor and flakiness, while the shortening ensures tenderness and ease of handling. This hybrid approach often results in a pie crust that is both flavorful and perfectly textured, making it a favorite choice for pie enthusiasts. Whether you’re a fan of all-butter crusts, shortening-based doughs, or a mix of both, mastering pie crust is a rewarding endeavor that opens the door to endless culinary creations.
Why is this the best recipe?
Flakiness: The use of cold shortening creates a flaky texture, as the shortening melts during baking, leaving behind layers of tender, airy dough. This flakiness is one of the most desired qualities in a pie crust. Tenderness: Shortening has a high fat content without water, which means it prevents gluten formation better than butter, resulting in a more tender crust that melts in your mouth. Ease of Use: This recipe is straightforward and doesn’t require special techniques or equipment. The ingredients are common, and the method is simple, making it accessible for both novice and experienced bakers. Versatility: The pie crust is versatile enough to be used for both sweet and savory pies. The addition of sugar is optional, allowing you to customize the dough based on the type of pie you’re making. Consistency: Shortening has a higher melting point than butter, which means it’s more forgiving in warm kitchens and produces consistent results. The dough is easier to handle and roll out without becoming too soft or sticky. Customization: This recipe provides a perfect base for customization. You can add herbs, spices, or zest to the dough to complement specific fillings. The ability to tweak the flavor and texture makes this a go-to recipe for a wide variety of pies.
Ingredients and substitutes
All-Purpose Flour: Provides the structure of the crust. The gluten in the flour forms a network that holds the dough together. Whole wheat flour (for a heartier crust), gluten-free flour blend (for a gluten-free option). Salt: Enhances the flavor of the crust. Sea salt, kosher salt (adjust quantity slightly as they have different saltiness levels). Sugar (Optional): Adds a slight sweetness and helps with browning. Honey or maple syrup (reduce liquid in the recipe slightly), or omit entirely for savory pies. Vegetable Shortening: Creates a tender, flaky texture by inhibiting gluten formation and providing a stable fat that is easy to work with. Any solid vegetable fat such as Crisco, Shortbrite, Dalda, etc works well. Butter (for more flavor and flakiness), lard (for a very flaky crust with a slightly different flavor), margarine (for a non-dairy option). My personal preference is half butter and half shortening. If you don’t have vegetable shortening you can make an all-butter pie crust. Ice Water: Helps bind the dough together without melting the fat, ensuring a flaky texture. Cold milk or buttermilk (adds richness), cold vodka (evaporates during baking for an extra flaky crust).
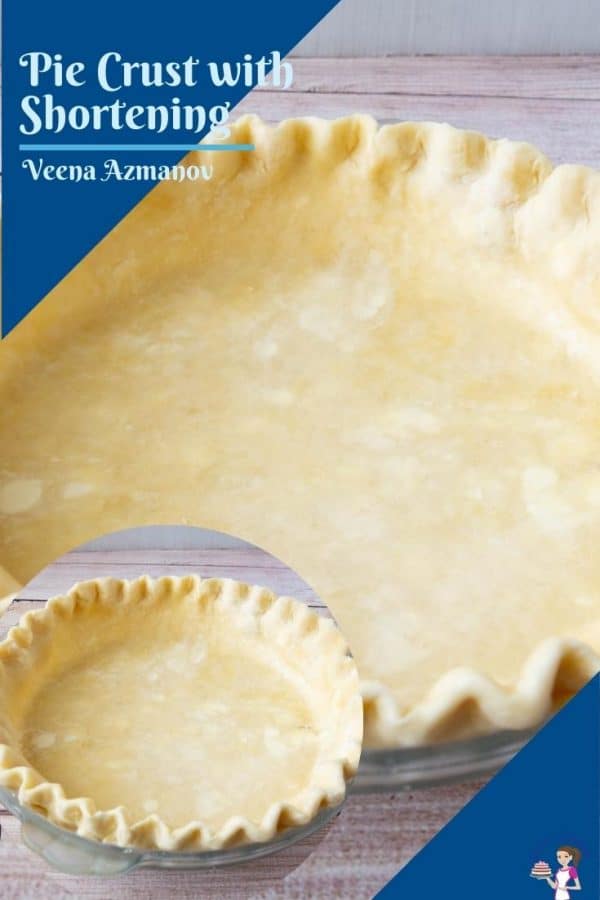
Step by step: Pie crust with shortening
Mix Dry Ingredients: In a large bowl, whisk together the flour, salt, and sugar (if using). Cut in Shortening: Add the cold, cut-up shortening to the flour mixture. Using a pastry cutter, two knives, or your fingers, cut the shortening into the flour until the mixture resembles coarse crumbs with some pea-sized pieces remaining. Add Ice Water: Sprinkle the ice water over the flour mixture, one tablespoon at a time, while gently tossing the mixture with a fork or your hands. Continue adding water until the dough starts to come together but is not sticky. It should hold together when pressed.
Form the Dough: Divide the dough into two equal parts. Flatten each portion into a disc, wrap in plastic wrap, and refrigerate for at least 1 hour or up to 2 days. This allows the gluten to relax and the shortening to firm up, making the dough easier to roll out. Roll Out the Dough: On a lightly floured surface, roll out one disc of dough to fit your pie pan. Start from the center and work your way out, keeping the dough as circular as possible. If the dough cracks or breaks, patch it together by pressing gently. Transfer to Pie Pan: Carefully lift the rolled-out dough and place it into the pie pan, gently pressing it into the bottom and sides. Trim the excess dough, leaving about a 1-inch overhang.
For a Single-Crust Pie: After fitting the dough into the pie plate, trim the excess dough, leaving about a 1-inch overhang. Fold the edges under and crimp as desired. Chill for at least 30 minutes more before baking. This helps prevent shrinkage and maintains the crust’s shape during baking. If the recipe calls for a pre-baked crust, prick the bottom and sides with a fork to prevent puffing, then line with parchment paper and fill with pie weights or dried beans. Bake for 15 minutes for a partially baked crust; add the filling, and bake until done. For a prebaked pie crust, bake for 15 minutes with pie weights, then remove the pie weights and bake for another 15 to 20 minutes until lightly golden.
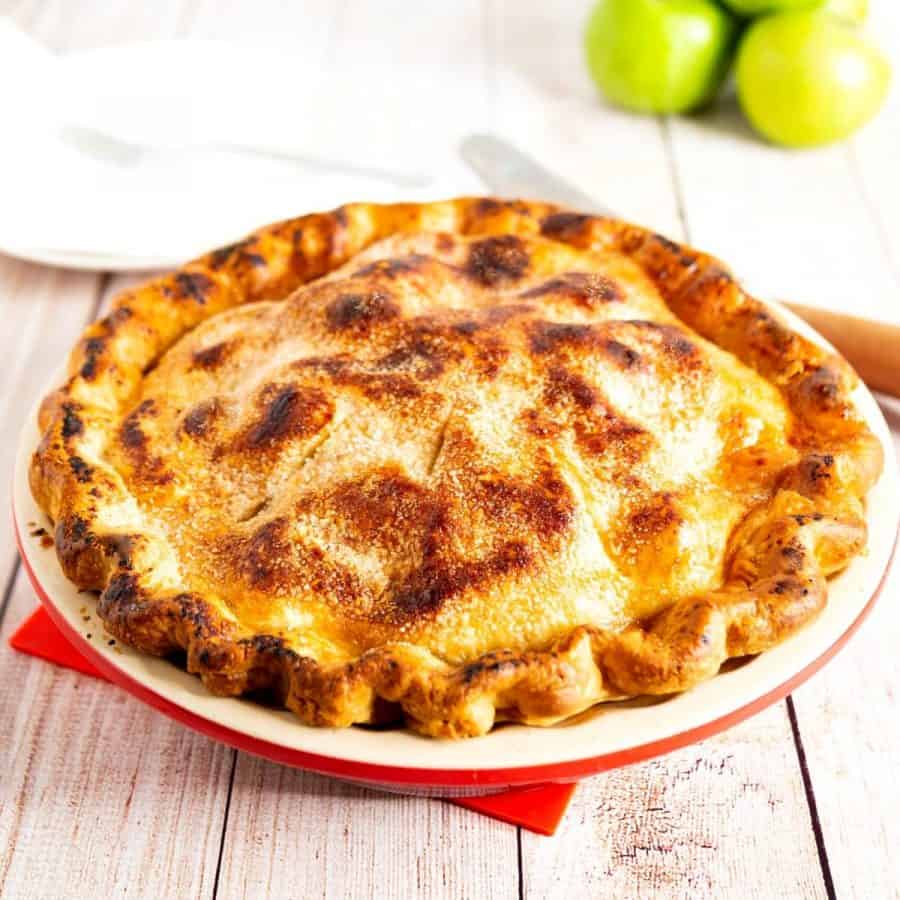
For a Double-Crust Pie: Roll the first dough, line the pan, trim the edges and keep chilled. Roll out the second disc of dough in the same manner. Fill the bottom crust with your desired filling, then place the second rolled-out dough on top. Trim the excess dough, leaving about a 1-inch overhang. Fold the edges under and crimp as desired to seal. Cut a few slits in the top crust to allow steam to escape. Bake at 375°F (190°C) for about 45-55 minutes or until the crust is golden brown and the filling is bubbly.
How to Blind Bake a Pie Crust
Prepare the Dough: Roll out your chilled pie dough on a lightly floured surface to about 1/8 inch thickness. Carefully transfer the rolled-out dough to your pie pan, gently pressing it into the bottom and sides. Leave a slight overhang of dough around the edges. Trim and Crimp the Edges: Trim the excess dough, leaving about a 1-inch overhang. Fold the overhang under itself and crimp the edges using your fingers or a fork to create a decorative border. Chill the Dough: Place the prepared pie crust in the refrigerator for at least 30 minutes to firm up. This helps prevent shrinking during baking. Preheat the Oven: Preheat your oven to 375°F (190°C). Place a baking sheet in the oven to preheat as well. The hot baking sheet helps set the bottom crust quickly. Line with Parchment Paper: Remove the chilled pie crust from the refrigerator. Line the inside of the crust with parchment paper or aluminum foil, making sure the paper or foil extends up the sides and covers the edges. Add Pie Weights: Fill the lined crust with pie weights, dried beans, or uncooked rice. This prevents the crust from puffing up and helps it maintain its shape. Bake the Crust: Place the pie pan on the preheated baking sheet in the oven. Bake for 15-20 minutes, or until the edges of the crust start to turn light golden brown. Remove Weights and Paper: Carefully remove the pie pan from the oven. Lift out the parchment paper or foil along with the pie weights. Be cautious as the weights will be hot. Bake Until Lightly Golden: Return the crust to the oven and bake for an additional 5-7 minutes, or until the bottom of the crust looks dry and is just starting to turn a light golden color. This ensures the bottom crust is partially baked and won’t get soggy when you add the filling. Cool the Crust: Remove the pie crust from the oven and let it cool slightly on a wire rack before adding your filling. The crust is now ready to be filled and baked according to your pie recipe.
Tips for Success in Making Pie Crust
Keep Everything Cold: Cold ingredients are crucial for a flaky crust. Use chilled flour, shortening, and water. You can even chill your bowl and utensils before starting. This prevents the fat from melting into the flour too soon. Don’t Overwork the Dough: Handle the dough as little as possible. Overmixing or over-kneading can develop too much gluten, making the crust tough instead of tender. Mix just until the dough comes together. Use a Light Touch: When rolling out the dough, use a light touch to avoid compressing the dough too much. Roll from the center outwards, rotating the dough frequently to maintain an even thickness. Chill the Dough: After mixing, chill the dough for at least 1 hour before rolling it out. This relaxes the gluten and firms up the fat, making the dough easier to handle and less likely to shrink during baking. Proper Rolling Technique: Flour your work surface and rolling pin lightly to prevent sticking. If the dough starts to soften or stick, return it to the fridge for a few minutes. Roll out the dough to about 1/8 inch thickness for an even bake. Use Pie Weights for Blind Baking: When pre-baking (blind baking) a pie crust, use pie weights or dried beans to keep the crust from puffing up and shrinking. Line the crust with parchment paper before adding the weights. Seal the Edges: For double-crust pies, seal the edges well to prevent leaks. You can use a fork or your fingers to crimp the edges. For single-crust pies, folding the overhanging dough under itself creates a sturdy edge. Ventilation: If making a double-crust pie, cut slits or create a decorative pattern in the top crust to allow steam to escape. This prevents the filling from becoming too watery and helps the crust bake evenly. Egg Wash for a Golden Finish: For a beautifully golden and shiny crust, brush the top with an egg wash (a beaten egg mixed with a tablespoon of water or milk) before baking. Monitor Baking Temperature: Start baking your pie at a higher temperature (around 425°F / 220°C) for the first 15 minutes to set the crust, then reduce the temperature to 375°F / 190°C to finish baking. This helps achieve a crisp bottom crust and evenly cooked filling. Preventing Soggy Bottoms: To avoid a soggy bottom crust, bake your pie on the lower rack of the oven. You can also preheat a baking sheet in the oven and place your pie pan on it for extra heat on the bottom. Let It Rest: Allow the pie to cool completely before cutting into it. This helps the filling set properly and prevents it from running out when sliced.
Buttercream Basics – Frosting 101 Recipe for Double Pie Crust Best EVER Homemade Fondant Comfort in a Crust: Chicken Pot Pie with Pie Crust Recipe Discover the Secret to Bakery Style Frosting
Frequently asked questions
Did you LIKE this recipe? Save it for later. You can find my recipes on Pinterest. Follow me on Facebook, Twitter, and Instagram.Subscribe, and I’ll send you new recipes right to your inbox. Thank you for sharing - Save for later