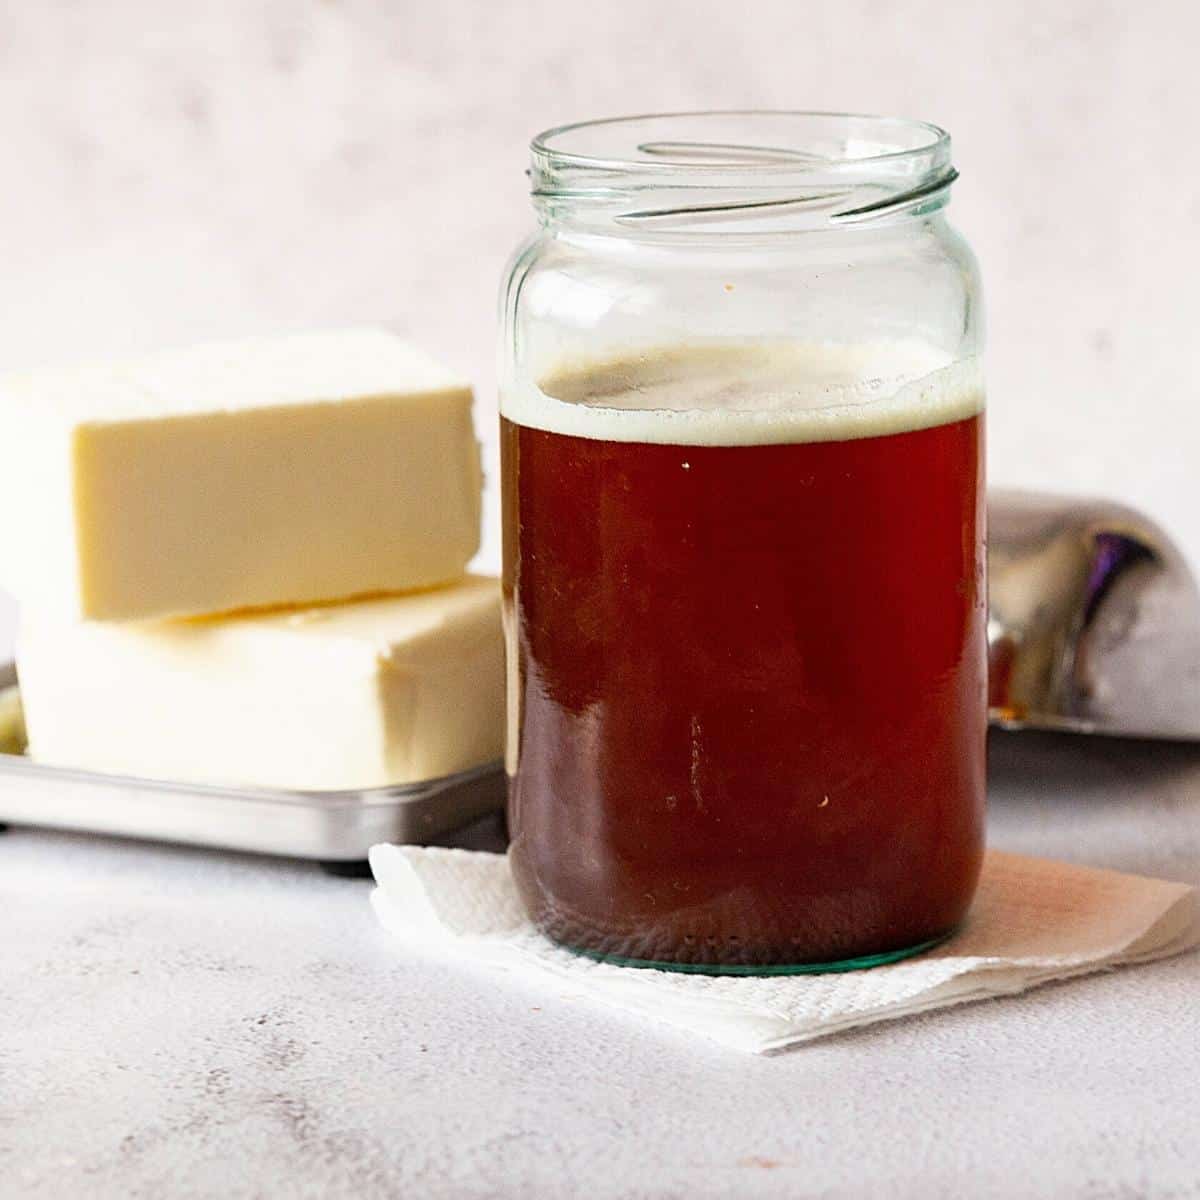
If you’ve never tried brown butter, you are seriously missing out. The intense nutty flavor and aroma you get when adding brown butter to baked goods is one that will get everyone asking you for the recipe. I took this cake a few weeks ago to friends, and no one believed that this rich, wonderful flavor and aroma comes from just butter. That’s how amazing just one little trick of browning butter can do.
Why make this cake
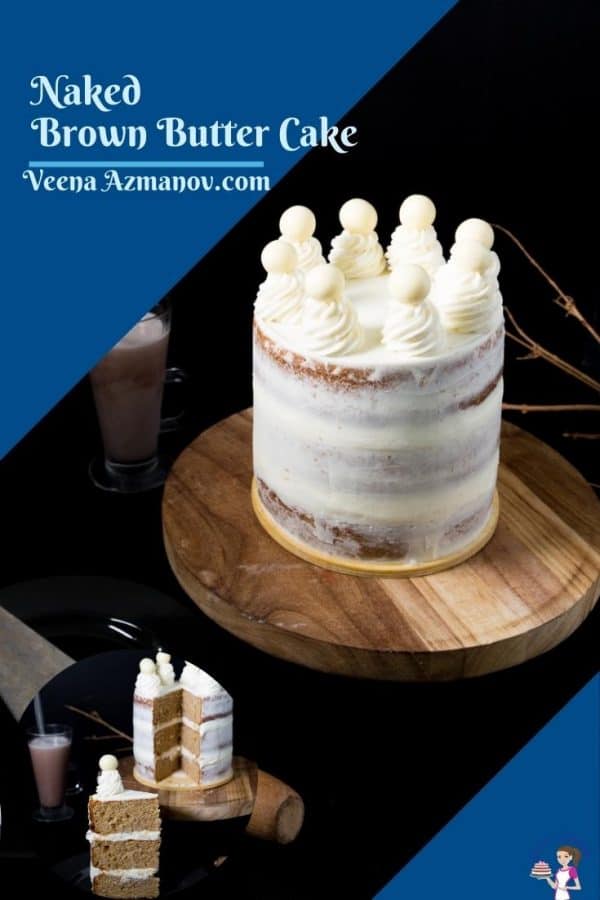
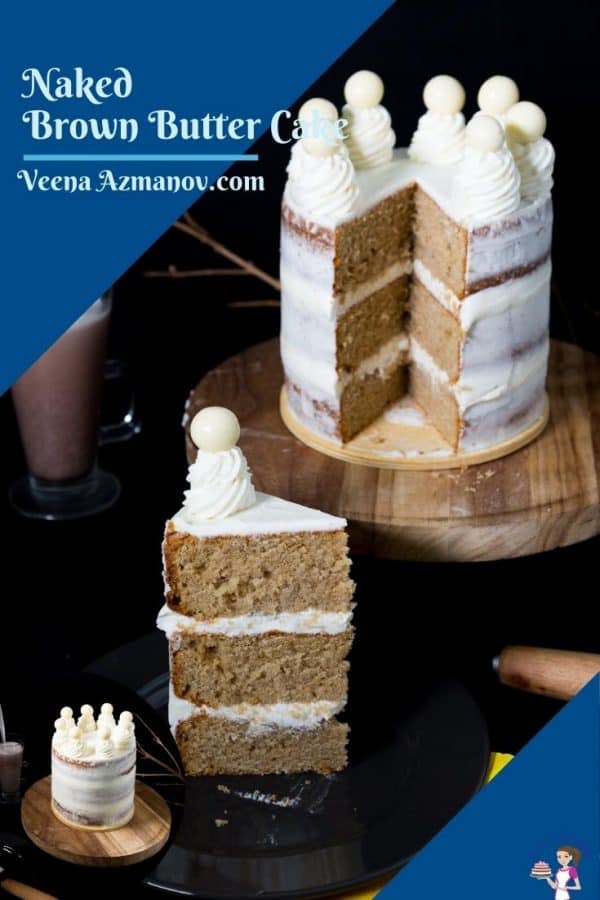
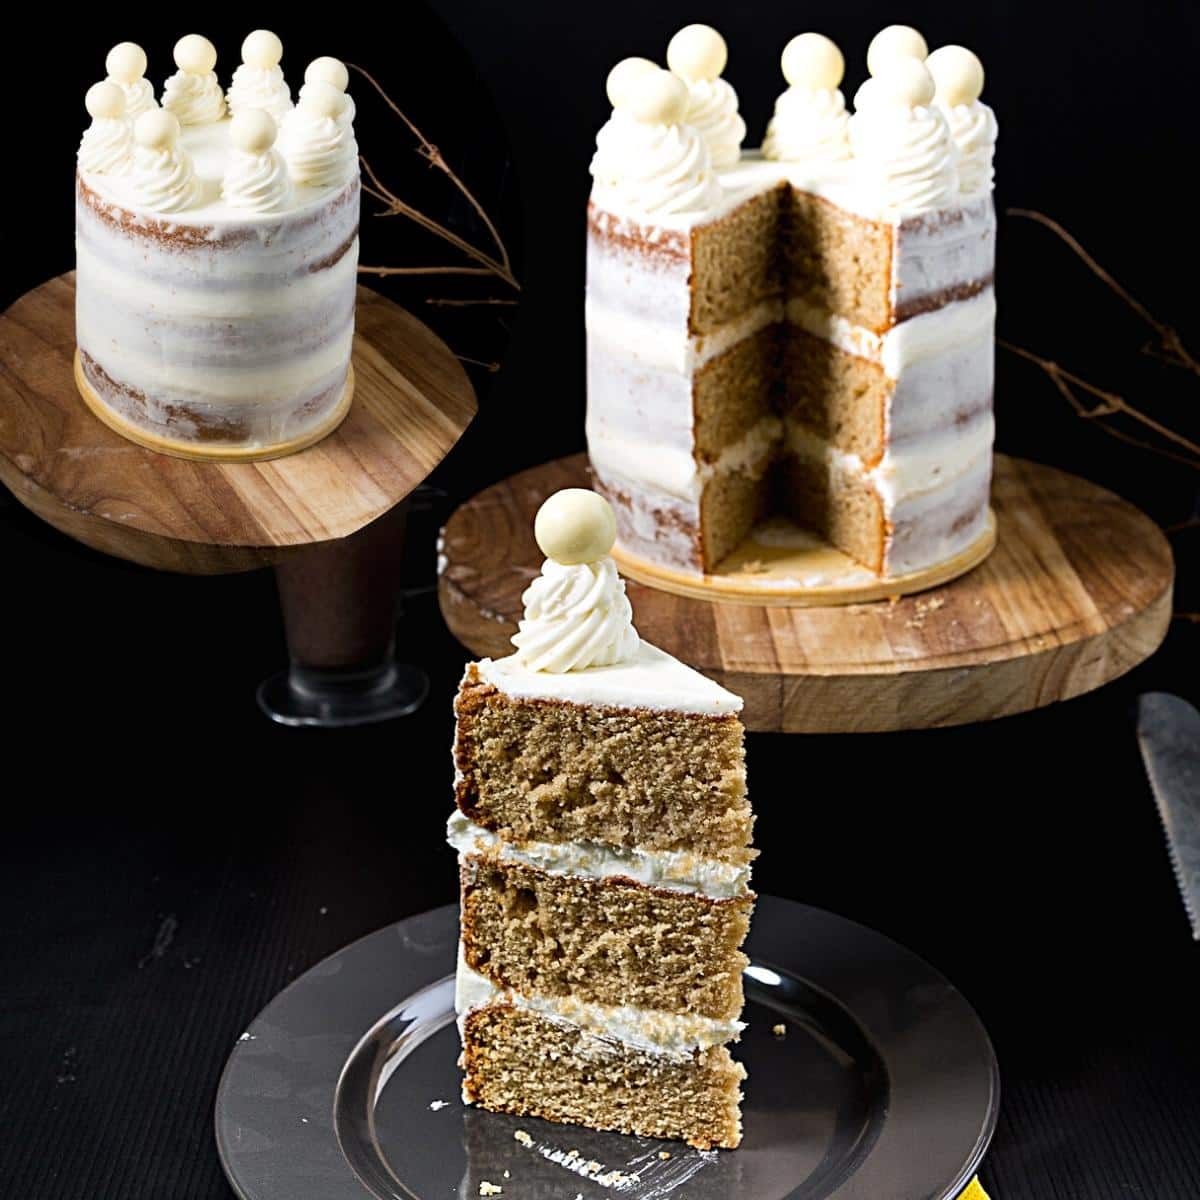
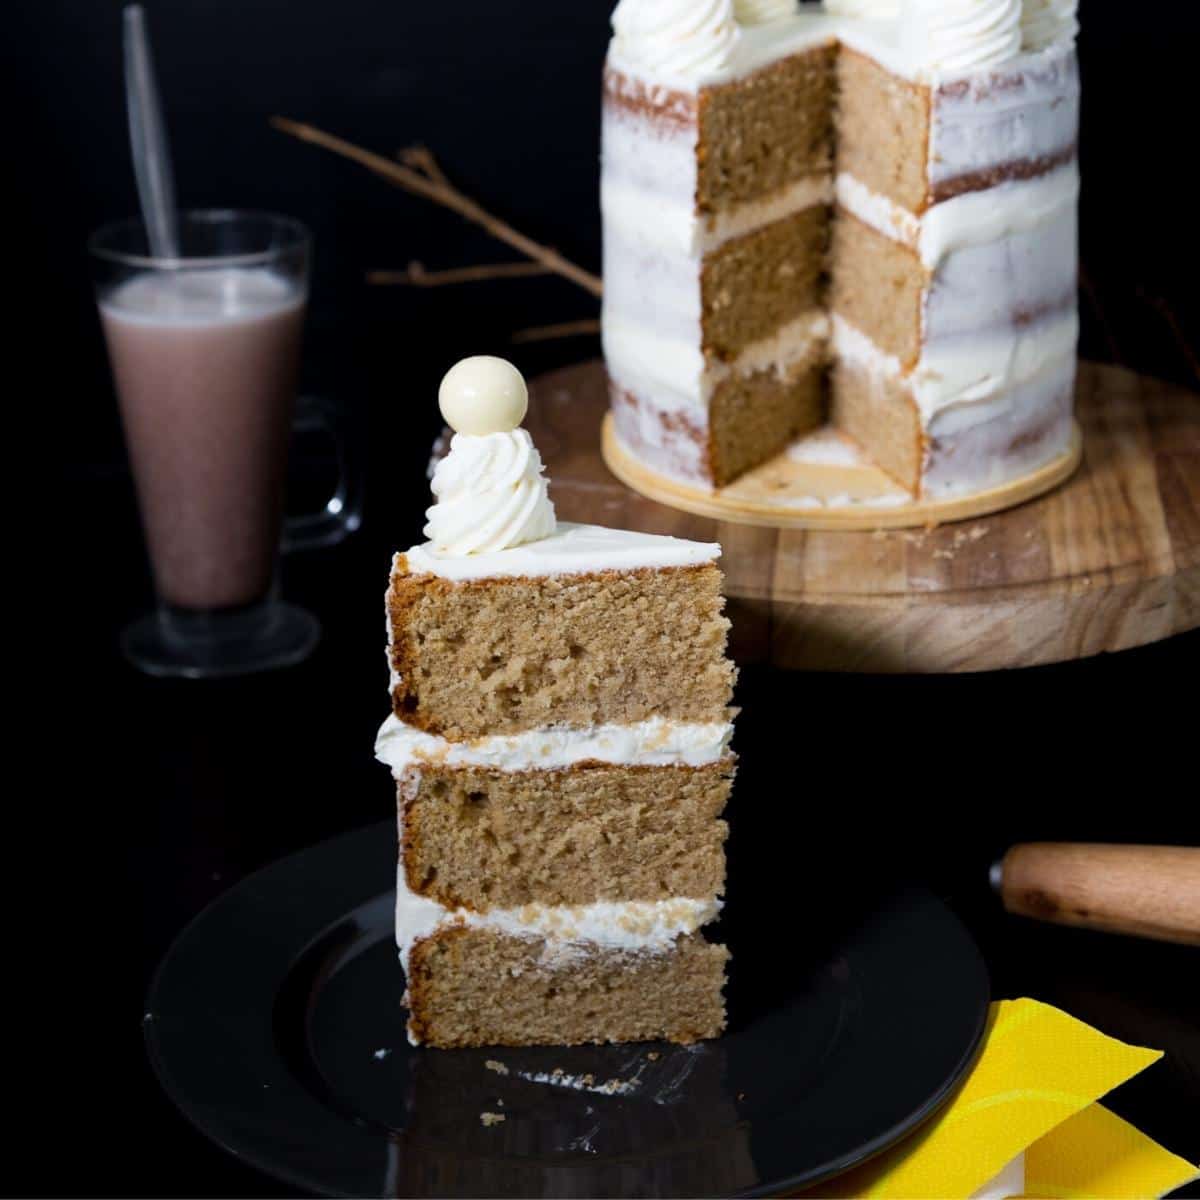
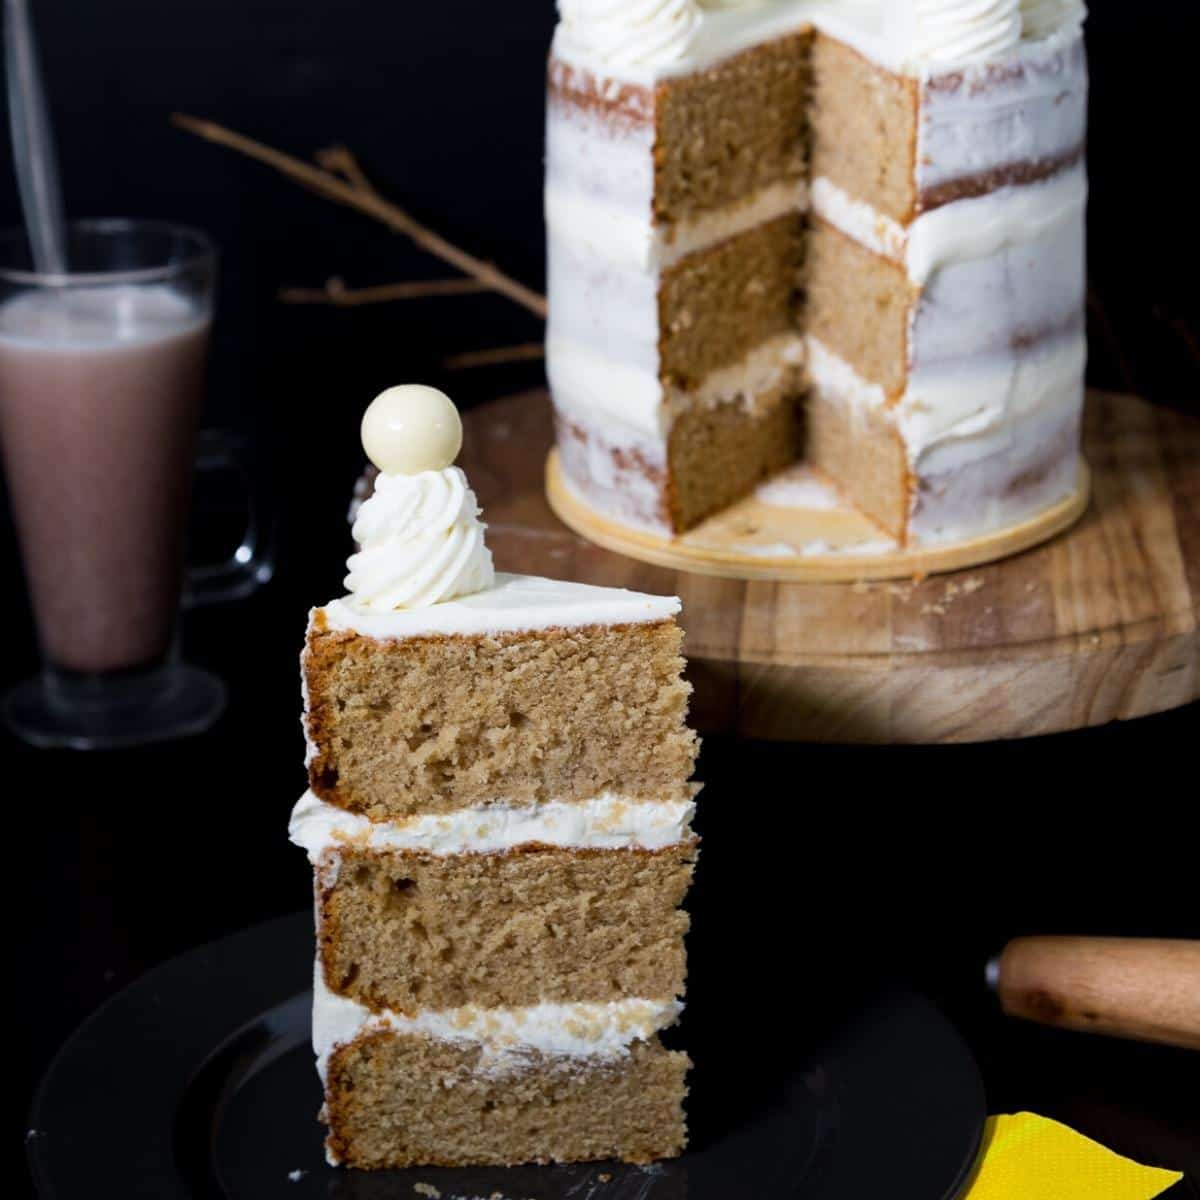
This cake is a straightforward and easy recipe that uses a standard process of creaming butter and sugar. But, instead of regular butter, we use brown butter. The cake is light and airy, as you can see below from the cut layer. Today, I am making a 6-inch round cake but you have given you suggestions for other cake pans as well. I wanted to use this cake as a light dessert, so I’ve lightly frosted it with my whipped cream buttercream recipe which is my classic buttercream with extra whipped cream. Y You can also enhance the flavor of brown butter in this cake by using brown butter buttercream by simply switching regular butter with brown butter in any of your favorite buttercream recipes. Of course, you can also make American, Swiss, Italian, French, or German buttercream too. See my list of 50 plus buttercream frostings here.
Brown butter cake
Cake
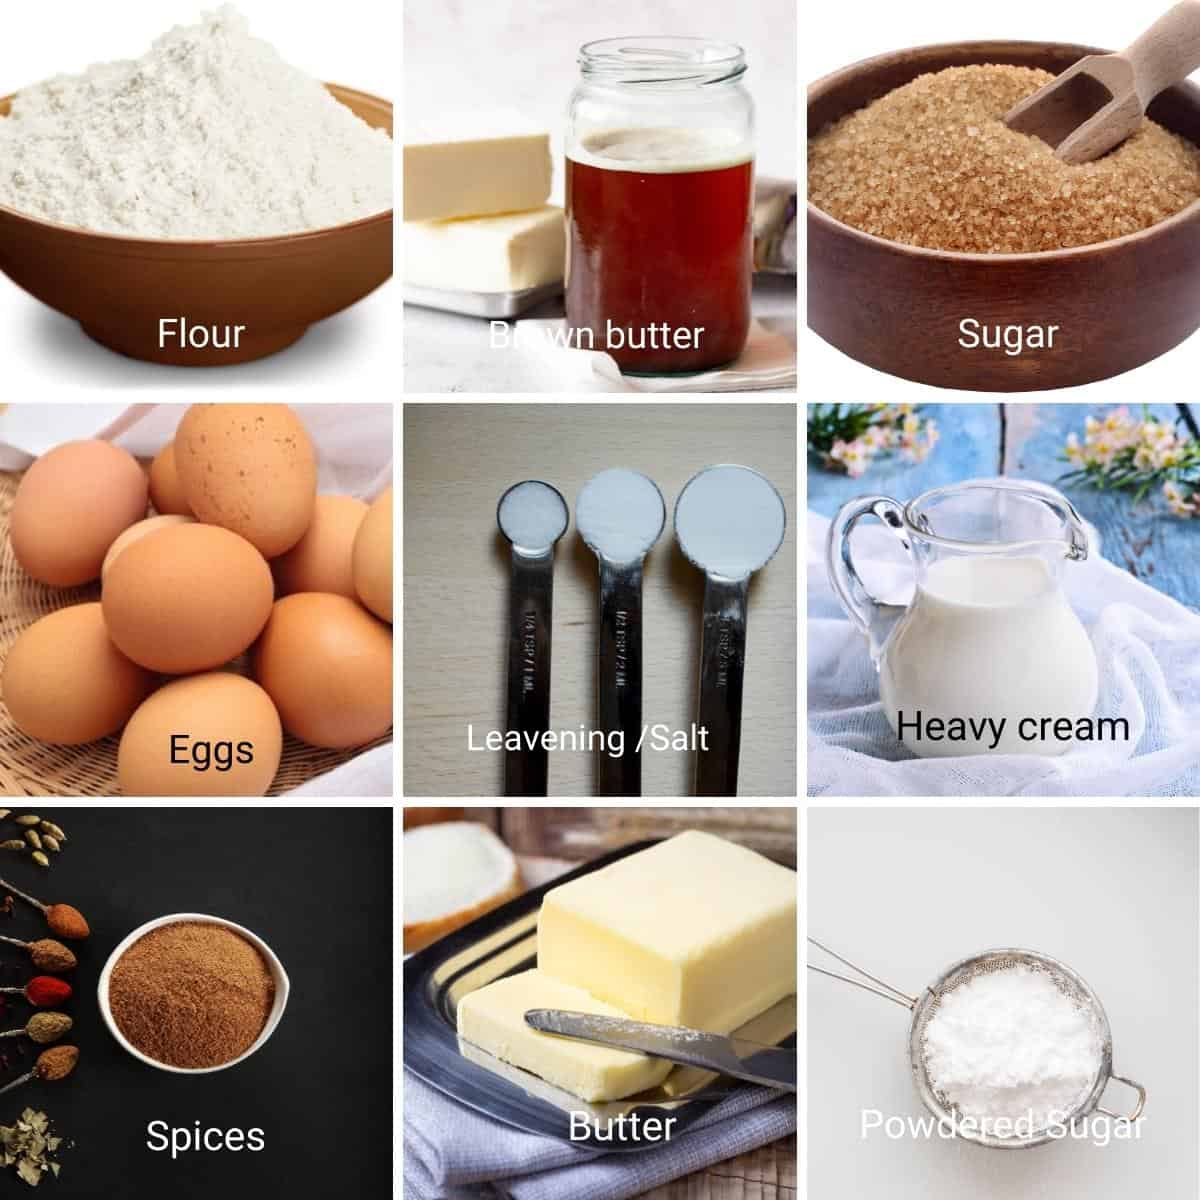
Oven – Preheat the oven to 325°F/ 165°C/ Gas Mark 3 Pan – Grease with oil spray and line 3 x 6-inch round cake pans or 2 x 7-inch round cake pans. Dry ingredients – In a bowl combine flour with baking powder, nutmeg, and salt – set aside. Wet ingredients – In the bowl of a stand mixer with the paddle attachment, cream the brown butter and sugars until light and fluffy. Add the eggs one at a time. Followed by the vanilla extract. Dry to wet – Next, add the flour mixture along with the heavy cream. Scrape the bottom and sides of the bowl to ensure you have a smooth mixture. Bake – Divide batter equally between the prepared baking pans. Bake for 30 to 35 minutes or until a skewer inserted in the center comes clean.Pro tip – I like to use cake strips to ensure my layer cakes bake flat. Cool – When baked cool in the baking pan for 5 minutes. Invert and cool on a wire rack completely before you frostingPro tip – I like to cool my cakes overnight before frosting. Warm cakes will melt the frosting.
Whipped cream buttercream frosting
Cream – In a bowl of a stand mixer with the paddle attachment cream the butter until smooth. Add salt and vanilla – mix a minute longer, until well combined Sugar – Then, add the powdered sugar one cup at a time. Once all the powdered sugar has been incorporated. Gradually add the whipping cream while the mixer is still running. Whip – Continue to mix on medium-high for 2 to 3 minutes more until you have a light and fluffy buttercream. The cream in the mixture will whip and give you almost stiff peaks.Pro tip– If the buttercream is too soft, you haven’t whipped enough. However, If the butter is melting chill the bowl for 10 minutes then whip again. (this can happen in warmer temperatures)
Assemble
Prepare simple syrup – cool completely before using.Pro tip– Simple syrup is just sugar water that has been boiled and cooled. Used to keep cake layers moist. Level – Using a bread knife or cake leveler cut the domes off the cake layers. Brush each layer with the cooled simple syrup Stack – Place a cake layer on the cake board or cake stand Top with a big dollop of buttercream – spread evenly using a straight-edge spatula. Then top the second cake layer on top followed by more buttercream and the last layer. Chill – Place the cake in the fridge to chill for 10 to 15 minutes.Pro tip – Chilling the cake at this point will ensure the layers don’t move when you frost the outside. Though, if you leave the cake uncovered in the fridge for too long it can dry out. So, 10 minutes is all you need. Crumb coat – Smear the remaining buttercream around and on top of the cake.Pro tip – A straight-edge spatula for the top, and offset spatula with bench scraper for the sides work better. Naked cake – to create a naked cake-effect scrape off as much buttercream from the outside of the cake as possible with a bench scraper Swirls – Place any remaining frosting in a piping bag with a star tip and pipe a border or swirls on top of the cake. Enjoy!
Storage
Due to the whipping cream in the frosting once decorated, the cake can stay at room temperature for a few hours. It can stay in the fridge for up to 4 to 5 days. Once cut, always cover the cut side of the cake with plastic wrap, so the cake does not dry out. Since this cake is lightly frosted, you will need to ensure the whole cake is wrapped well before being refrigerated.
Creative ways to decorate a layer cake
One easy and classic option is a naked cake! Simply dust the top with powdered sugar and serve with fresh berries or a dollop of whipped cream. If you’re looking for something a bit more unique, try layering sliced strawberries, raspberries, or peaches over the top of the cake for a fruity twist. For a more formal occasion, consider using a piping bag and frosting to decorate the cake with intricate designs or personalized messages. You can also add edible flowers or other decorations to give it a touch of elegance. Another fun option is to cut the cake into fun shapes and designs, such as squares or triangles, and serve on a platter with a variety of toppings and sauces. Whatever your choice for decorating and serving your vanilla cake, be sure to have fun and let your creativity shine.
Creative ways to serve layer cake
Mini Layer Cakes: Create mini layer cakes using a round cookie cutter to cut out small rounds from the cake layers. Stack them with layers of frosting in between for mini cake towers. Top each mini cake with a decorative frosting swirl, fresh fruit, or edible flowers. Naked Cake: Embrace the “naked cake” trend by frosting the cake layers thinly, allowing the layers to show through. Decorate with fresh berries, edible flowers, or a dusting of powdered sugar for a rustic and elegant look. Cake Push Pops: Serve the cake in push pop containers, alternating layers of cake and frosting. This makes for a fun and portable dessert that guests can enjoy on the go. Cake Parfaits: Layer chunks of vanilla cake with whipped cream, fruit compote, or chocolate ganache in clear glass containers to create visually appealing cake parfaits. Top with a dollop of whipped cream and a sprinkle of cake crumbs. Ice Cream Sandwiches: Slice the vanilla cake into thin layers and use them as the “bread” for ice cream sandwiches. Add a scoop of your favorite ice cream between two cake slices and roll the edges in fun toppings like mini chocolate chips or crushed nuts. Cake Truffles: Crumble the cake layers and mix them with frosting to create cake truffles. Roll the mixture into small balls, dip them in melted chocolate, and garnish with sprinkles, crushed nuts, or colored sugar. Cake Tiramisu: Substitute the traditional ladyfingers in tiramisu with layers of vanilla cake soaked in coffee and layered with mascarpone cheese mixture. Dust with cocoa powder for a delightful twist on a classic dessert. Cake Milkshakes: Blend chunks of vanilla cake with vanilla ice cream and milk to create cake milkshakes. Top with whipped cream and a mini slice of cake for a sweet and creamy treat. Cake Kabobs: Cut the cake into cubes and skewer them with fresh fruit pieces. Drizzle with a complementary sauce, such as caramel or chocolate, and serve as cake kabobs. Cake Fondue: Slice the cake into bite-sized cubes and serve with a warm chocolate or caramel fondue for dipping. Provide an assortment of toppings like chopped nuts, sprinkles, and shredded coconut for guests to coat their cake bites. Deconstructed Cake: Present the cake in a deconstructed form by serving cake cubes, frosting, and various toppings in separate bowls. Guests can build their own cake creations, allowing for customization.
Frequently asked questions
Thank you for sharing - Save for later
The process to make brown butter is surprisingly fast. It does not take long for butter to melt and for the solid to brown. Hence, you must exercise caution and never leave it unattended. Usually, it can take less than 30 seconds for the milk solids to go from brown to black. And if it happens, just strain the milk solids out. You can still use the butter as clarified butter.