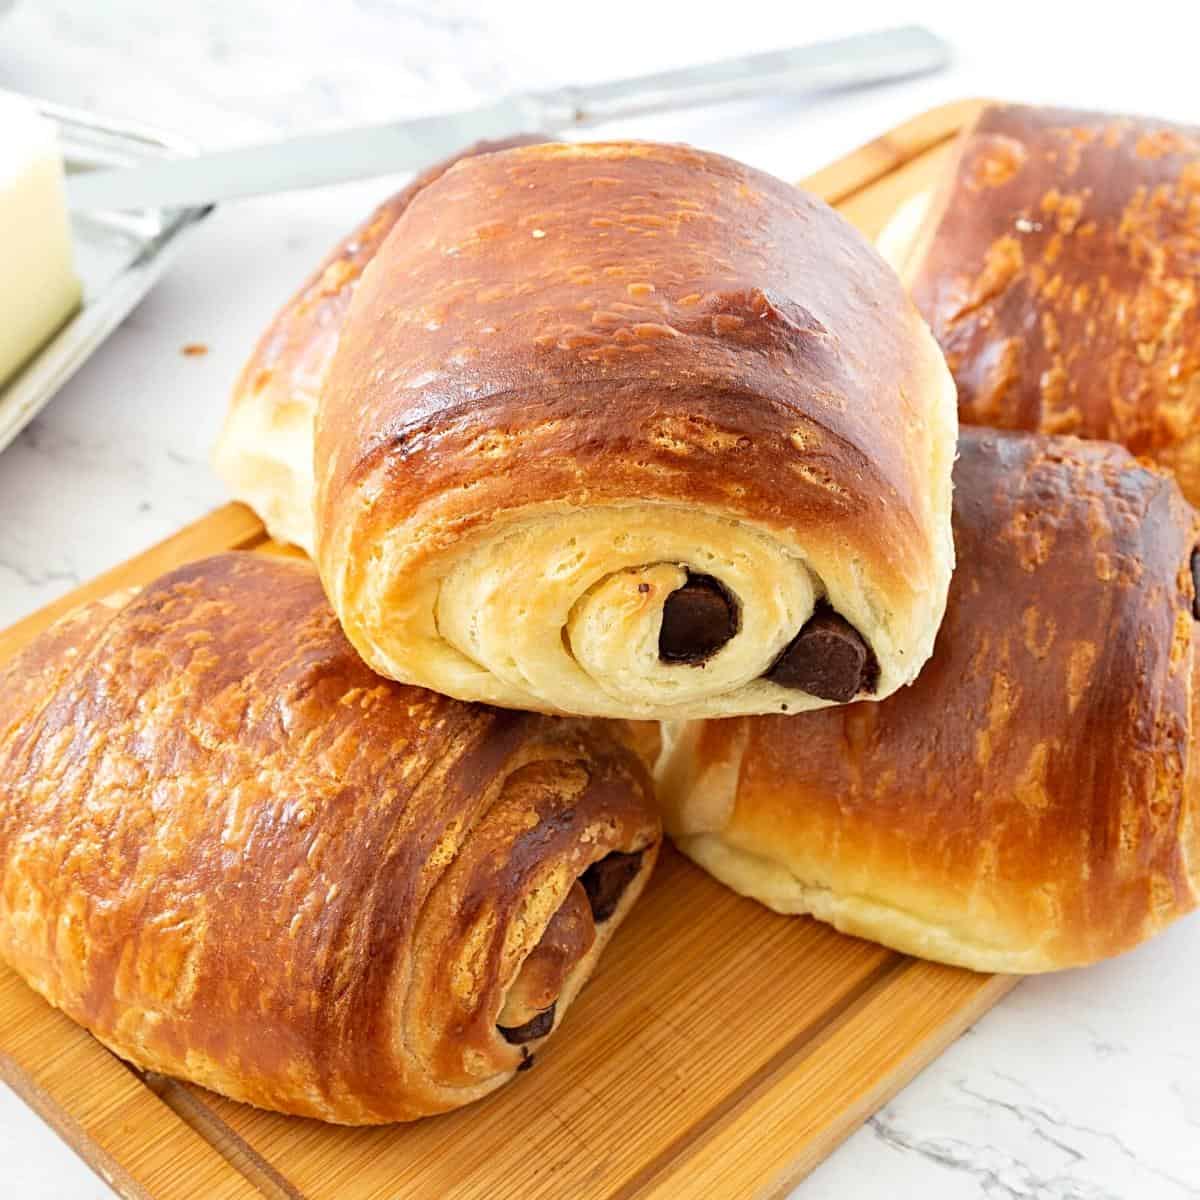
When I go out for breakfast or brunch, one of my favorite treats to have are chocolate croissants. It’s also a great dessert pastry to serve at a meeting. Don’t you think? It’s rich, buttery, flaky, and filled with chocolate, what’s not to like? And, if you’ve never made these yourself, you will be surprised how easy they are to make yourself.
Chocolate croissants recipe
Dough
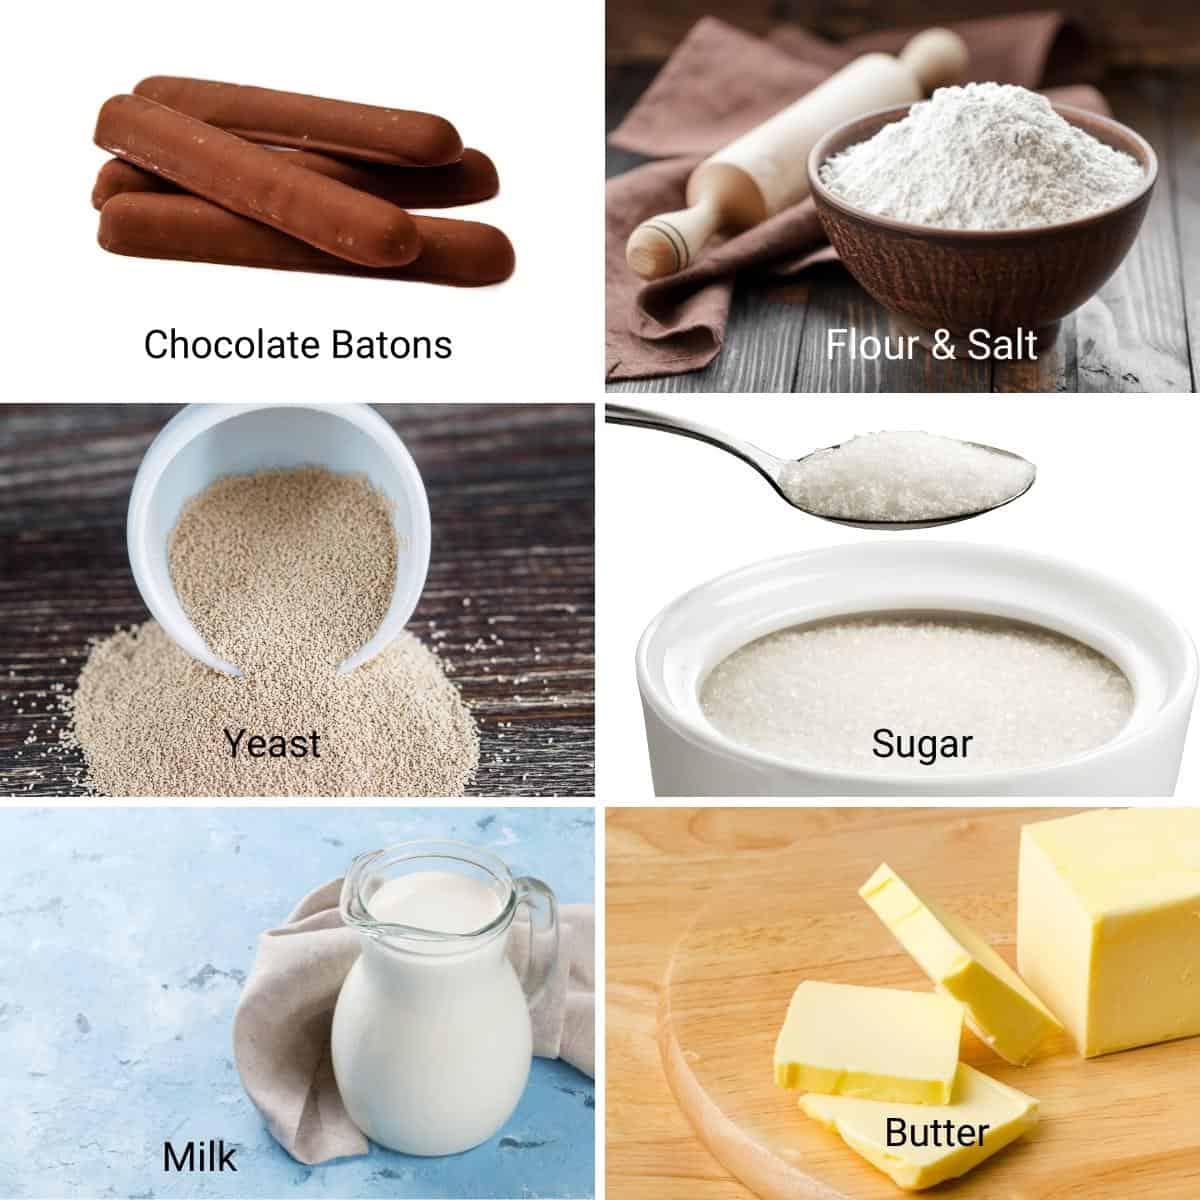
In the bowl of the stand mixer with the dough hook attachment, combine water, milk, and yeast. Add the sugar – combine well.Pro tip – You can let the yeast mixture sit for 3 to 5 minutes to foam up. But, not all varieties of yeast need to be activated.Add salt to the flour, then add the flour to the mixer bowl (see video).Pro tip – It is best to add salt directly to the yeast mixture as it slows the process of fermentation. So, we add it to the flour.Combine on medium-high speed until all flour is incorporated. You may or may not need the extra flour for kneading.Pro tip – A good indication that you have enough flour is that the dough leaves the sides of the bowl. Avoid adding too much four as it will make the dough stiff resulting in dense croissants
Knead on medium speed for 2 minutes, until you have a fairly smooth elastic dough.Next, add the room-temperature butter, one cube at a time. Once all the butter is in, knead for two minutes more.Pro tip – The dough should be soft, smooth, and elastic. Don’t over knead as we will still be laminating and rolling the dough a few more times.Remove the dough from the stand mixer and shape it into a ball. Place in a lightly oiled bowl. Cover and chill in the fridge for 30 minutes.Pro tip – Chilling will help to relax the gluten. The butter in the dough will chill making it easier to work.
Butter block
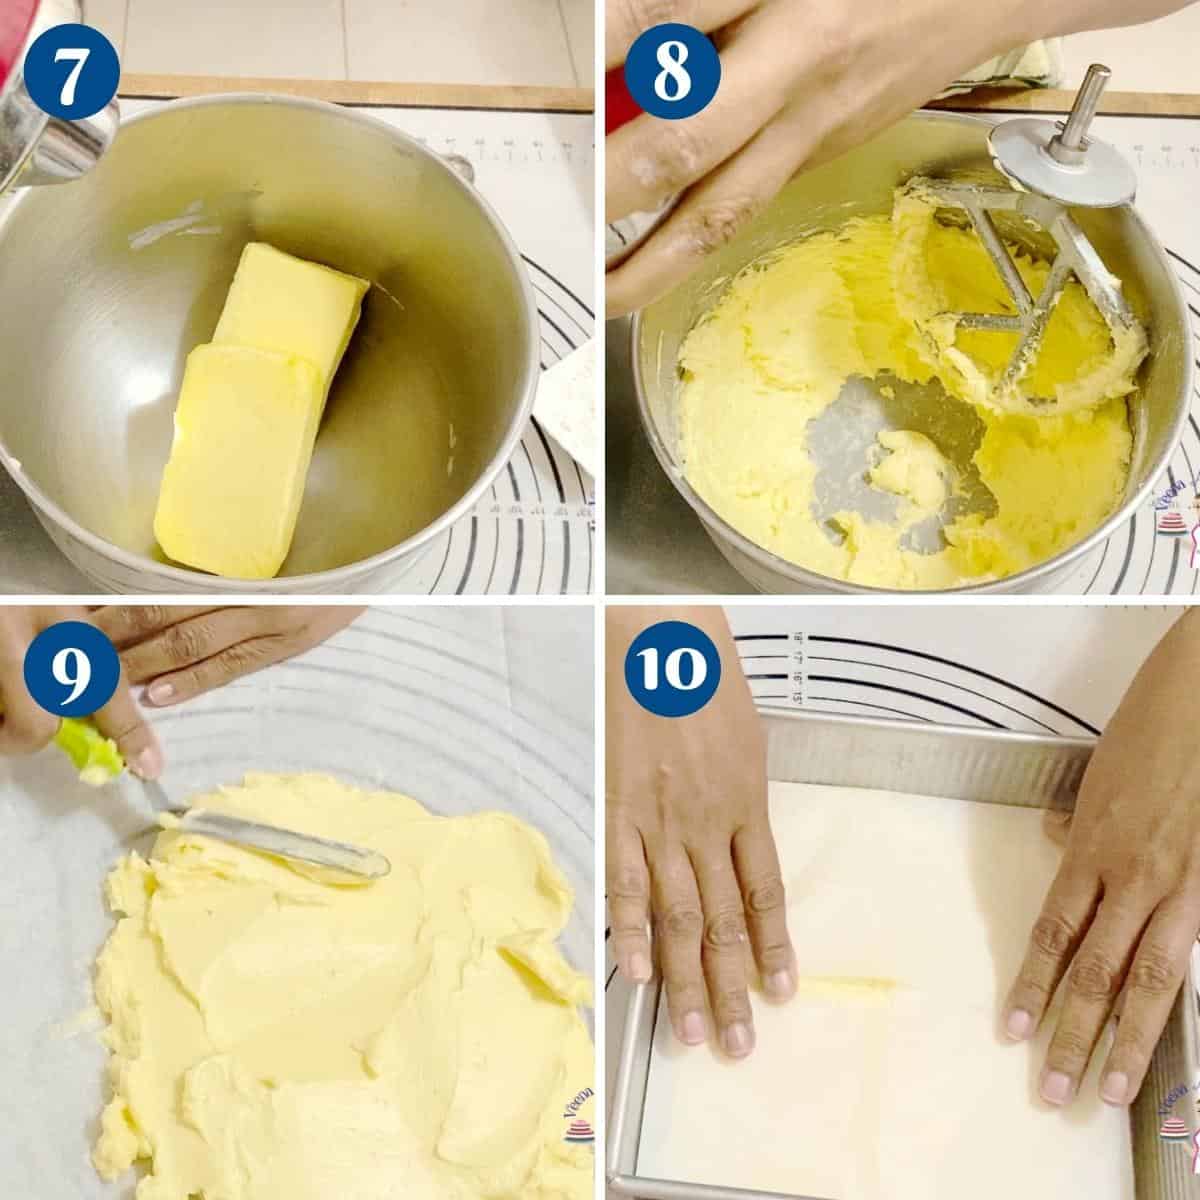
In the same stand mixer with the paddle attachment (no need to clean the mixer), add the butter.Cream for 30 seconds. Then, add the flour and cream for 30 seconds more.Pro tip – Cream the butter to ensure there are no lumps. But, don’t over mix as we do not want to whip air into the butter.Butter template – Use an 8-inch square baking pan or a ruler to measure the parchment paper. Fold it so you have an 8-inch square guide (see video).Pro tip – You can also line the 8-inch square baking pan with plastic wrap and create an 8-inch square block of butter.Transfer the butter onto the parchment paper. Use an offset spatula to spread the butter to an 8-inch square using the guide you created.Fold the paper over the butter – into an 8-inch square. Then, use the rolling pin to spread the butter into the corners. (see video)Pro tip – If the butter block is not a proper square, you will have gaps in your lamination.Place in the fridge for 20 to 30 minutes.Pro tip – The butter must be chilled but still flexible so that when we roll it spreads rather than cracks into the dough.
Laminate the dough
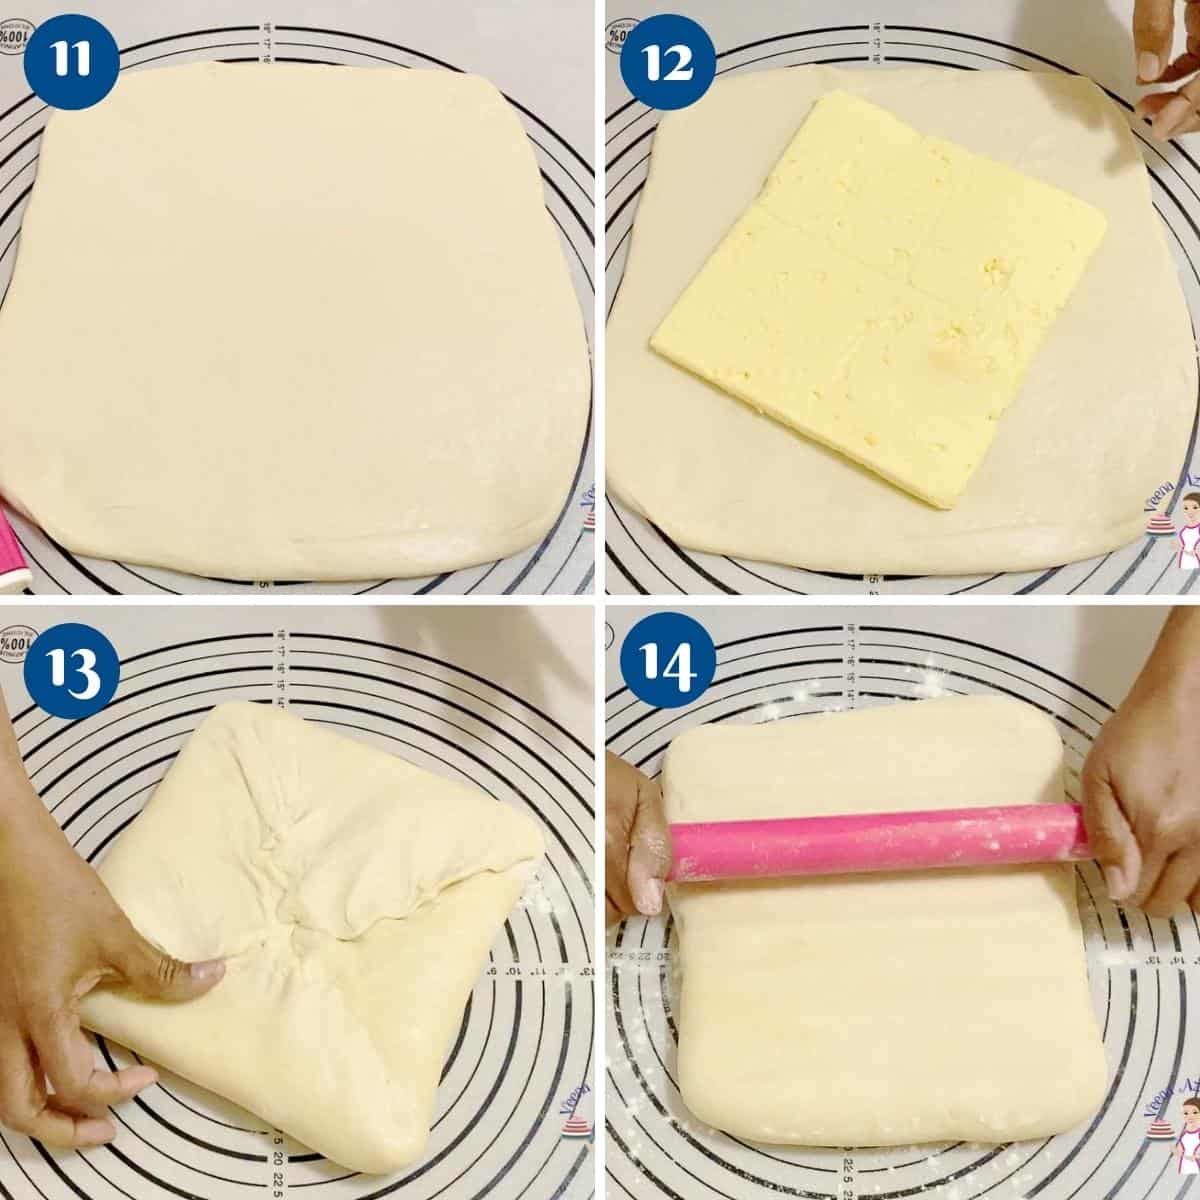
Remove the dough from the fridge onto a lightly floured surface. Roll to a 12 x 12-inch square.Place the chilled butter block diagonally on top of the dough. Then, fold the dough over – seal the edges well (see video).Pro tip – Try to seal the butter in the dough as much as possible so that it does not come out when rolling.
Now, roll in one direction so you have a long 10 x 20-inch rectangle. Dust off excess flour as you go.First fold – Fold the dough lengthways into thirds like a business letter (see video). Wrap and place into the fridge to chill for 30 minutes.Pro tip – Always turn the dough and roll lengthways. This will make it easier to roll and prevent the folds from opening when rolling.
Second fold – Roll the dough lengthways again with the short side facing you – (see video) to about 10 x 20-inch long again. Fold the dough into thirds again like a business letter (see video). Place in the fridge for 30 minutes if necessary.Pro tip – It is very important that the dough be well chilled before using. Otherwise, the thin layers will blend ruining all your effort.Third fold – Roll the dough again lengthways with the short side facing you to about 10 x 20-inches long. Fold the dough one last time into thirds again like a business letter (see video).Chill in the fridge for an hour or until well chilled. This can be chilled for up to 24 hours.
Measure the dough
Roll the dough onto a lightly floured surface to 6 x 12-inches. Divide into 2. Place one in the fridge while you work on the second one.Pro tip – Do not use too much flour when rolling and keep a dry brush to dust off excess flour.Roll the dough into a long rectangle about 8 x 24-inches.Pro tip – I always roll a bit extra so I can trim off the edges. This will open the edges and the layers will open during baking.Cut the edges on all sides. We need to cut 1/4 inch all around the sides of the dough, which will give you 6 x 24 inches.Pro tip – If you find that the dough is shrinking it means the gluten needs to relax. Let it rest on the counter for 10 minutes or in the fridge.Mark at every 4-inch so you have 4 x 6-inch rectangles (see video).Pro tip – A standard croissant is 4 x 6-inch but you can also make smaller or larger ones.
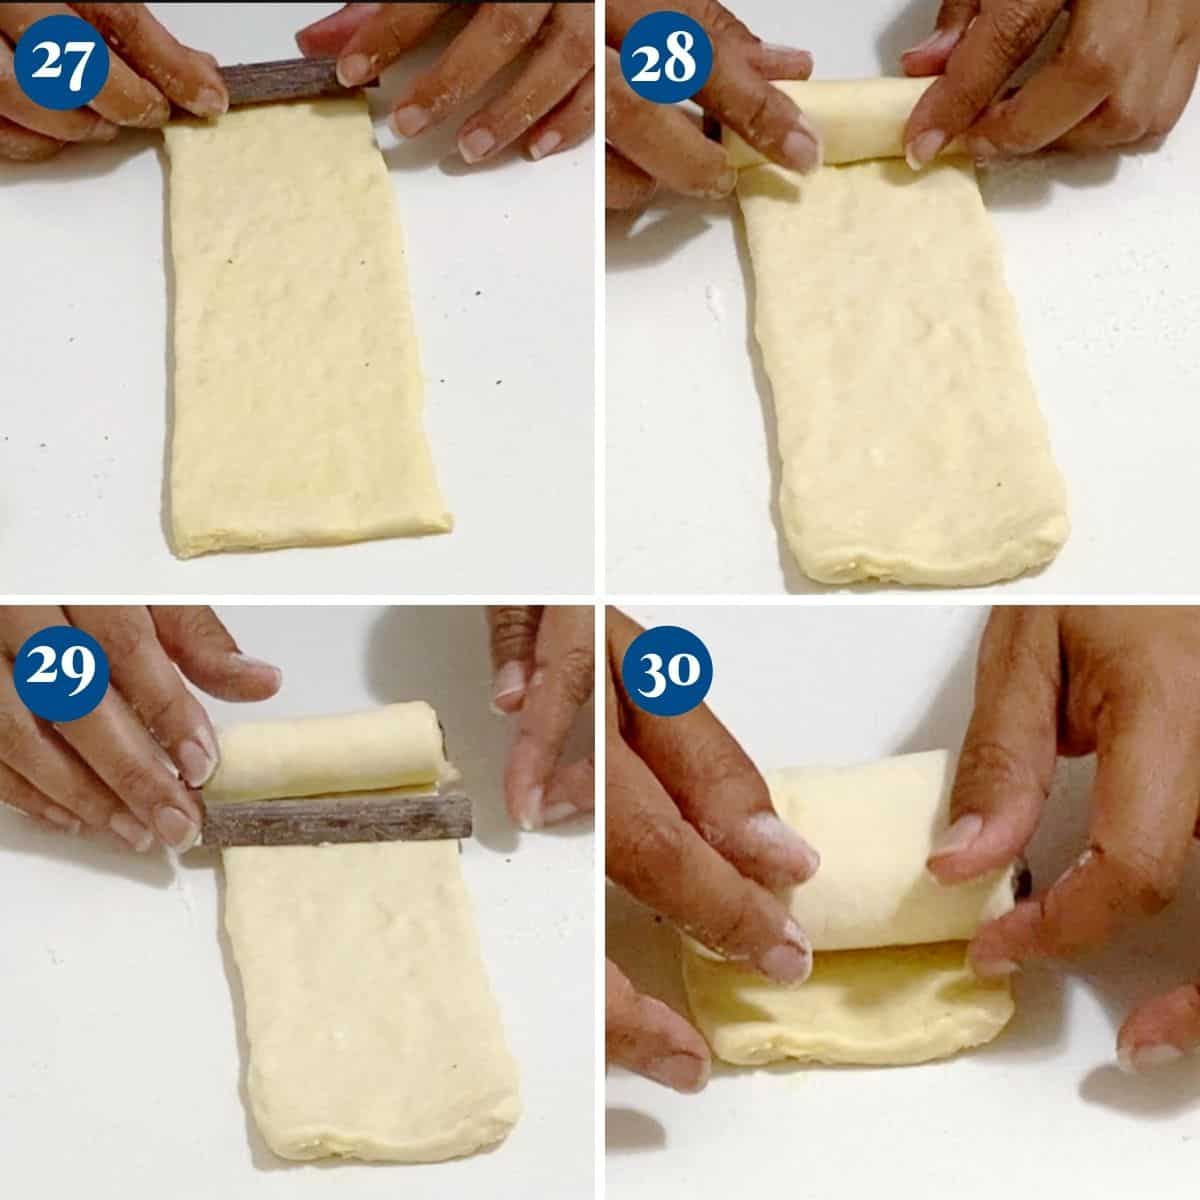
Shape the croissants
Take each rectangle. Stretch it lengthways slightly, then roll it with two batons as shown in the video.Pro tip – Do not stretch the dough too hard or you will break/lose those layers. Be gentle.Place the croissant on a baking sheet or sheet pan making sure the seams are on the bottom.Pro tip – If the edges are on top they will open, so make sure to tuck them under. If you press slightly they will sit well.
Proof and bake
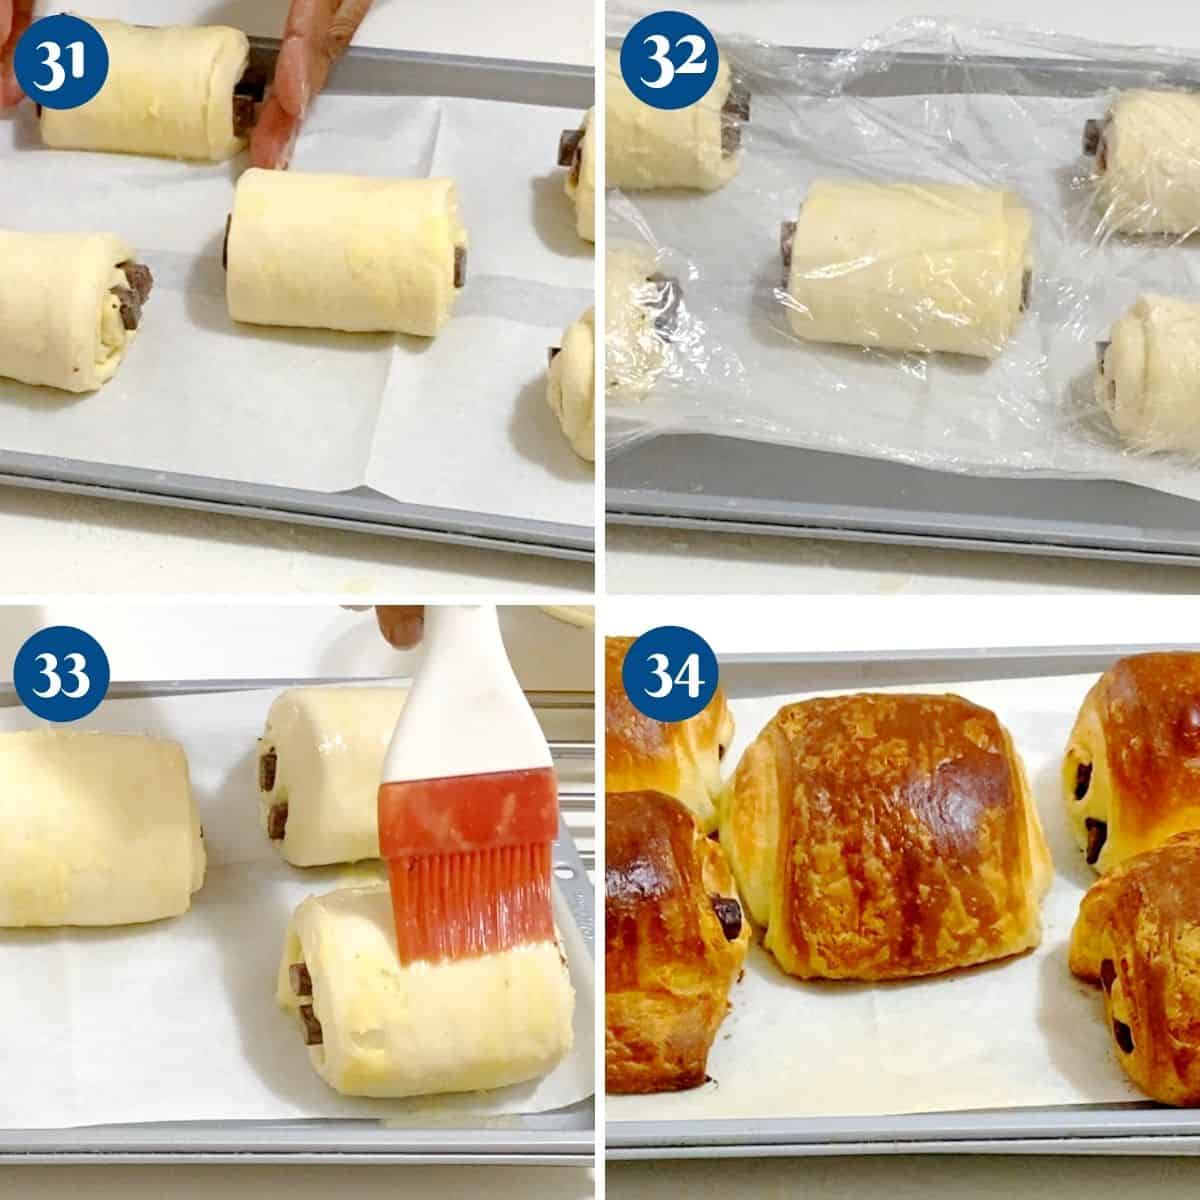
Cover and let proof at room temperature for an hour or until almost doubled in size. Then, place it into the fridge for 30 minutes.Pro tip – I find letting the last 30 minutes chill in the fridge works better for homemade baking. You can also cover and let the croissants prove in the fridge overnight for up to 12 hours.Preheat the oven to 400°F / 200°C / Gas mark 6. Brush the croissants with egg wash. Bake for 18 to 20 minutes or until golden brown.Pro tip – It is very important that the oven is preheated well for at least 10 minutes. Otherwise, the butter will melt baking a soggy pastry.Remove from the oven – cool on the pan for at least 10 minutes before serving.Enjoy!
Thank you for sharing - Save for later
Make and chill the dough – 10 + 30 minsMake and chill the butter block – 10 + 20 minutes Laminate the dough – 5 minutes First-fold then chill the dough – 30 minutes Second-fold then chill the dough – 30 minutesThird-fold then chill the dough – 60 minutes up to 48 hoursShape the croissants – 10 minutes Proof croissant – 60 minutesChill croissants – 30 minutesBake – 25 minutes