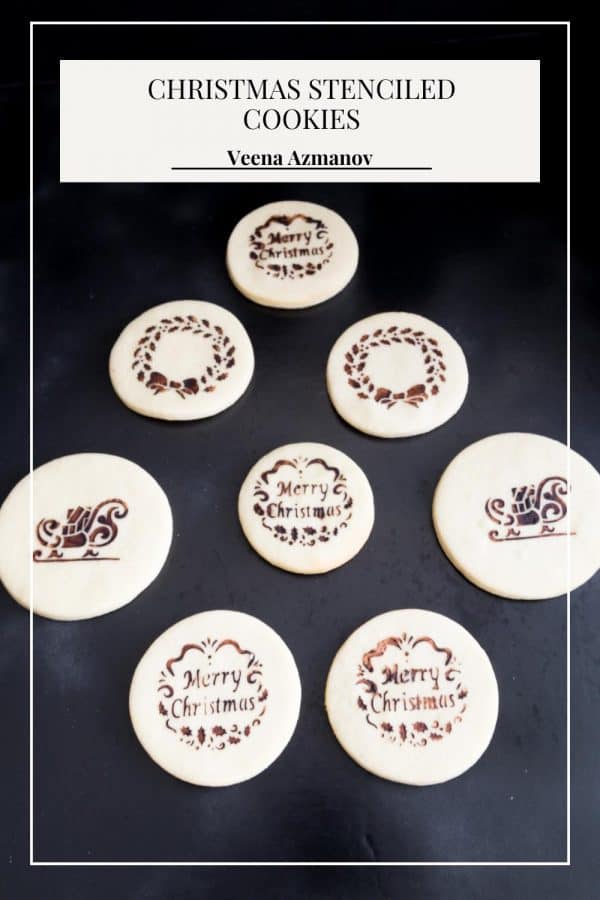
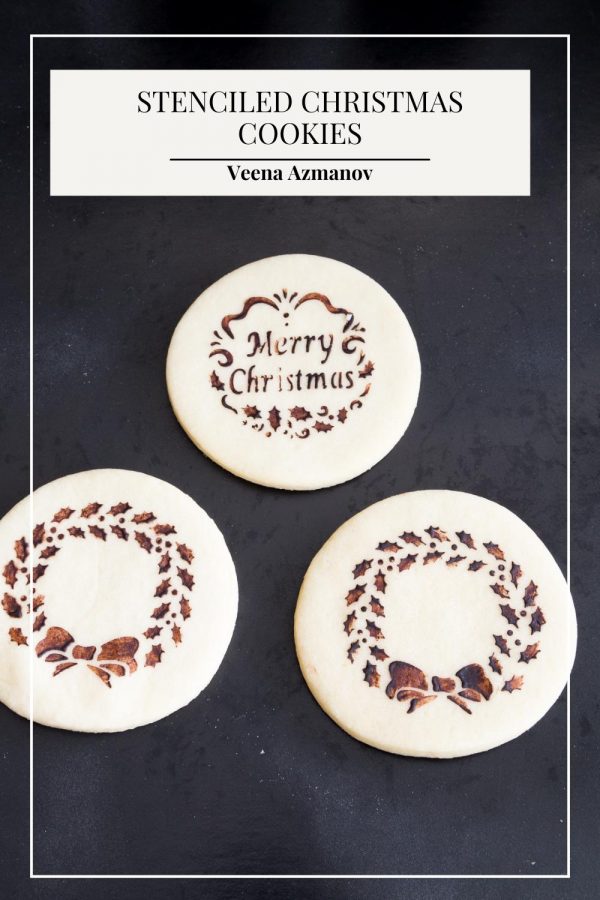
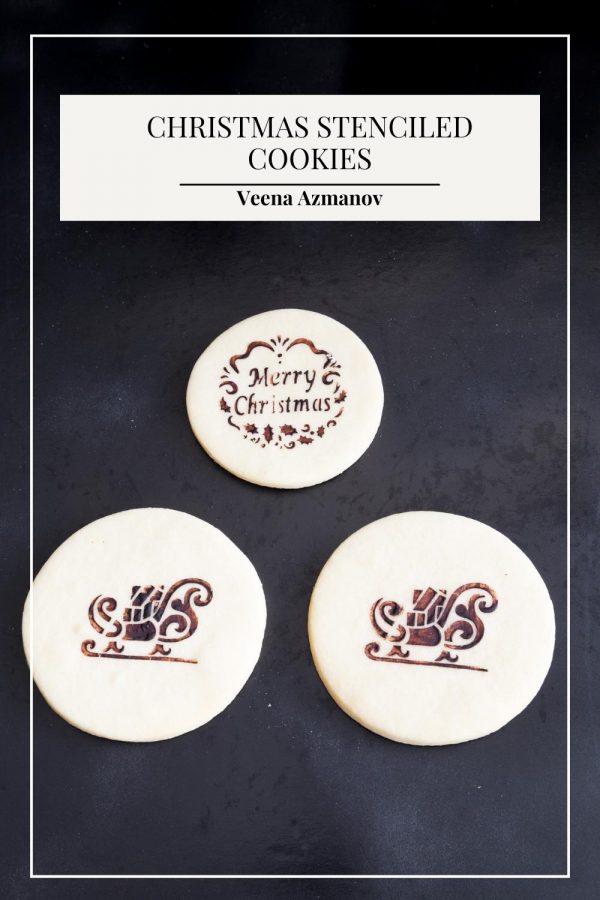
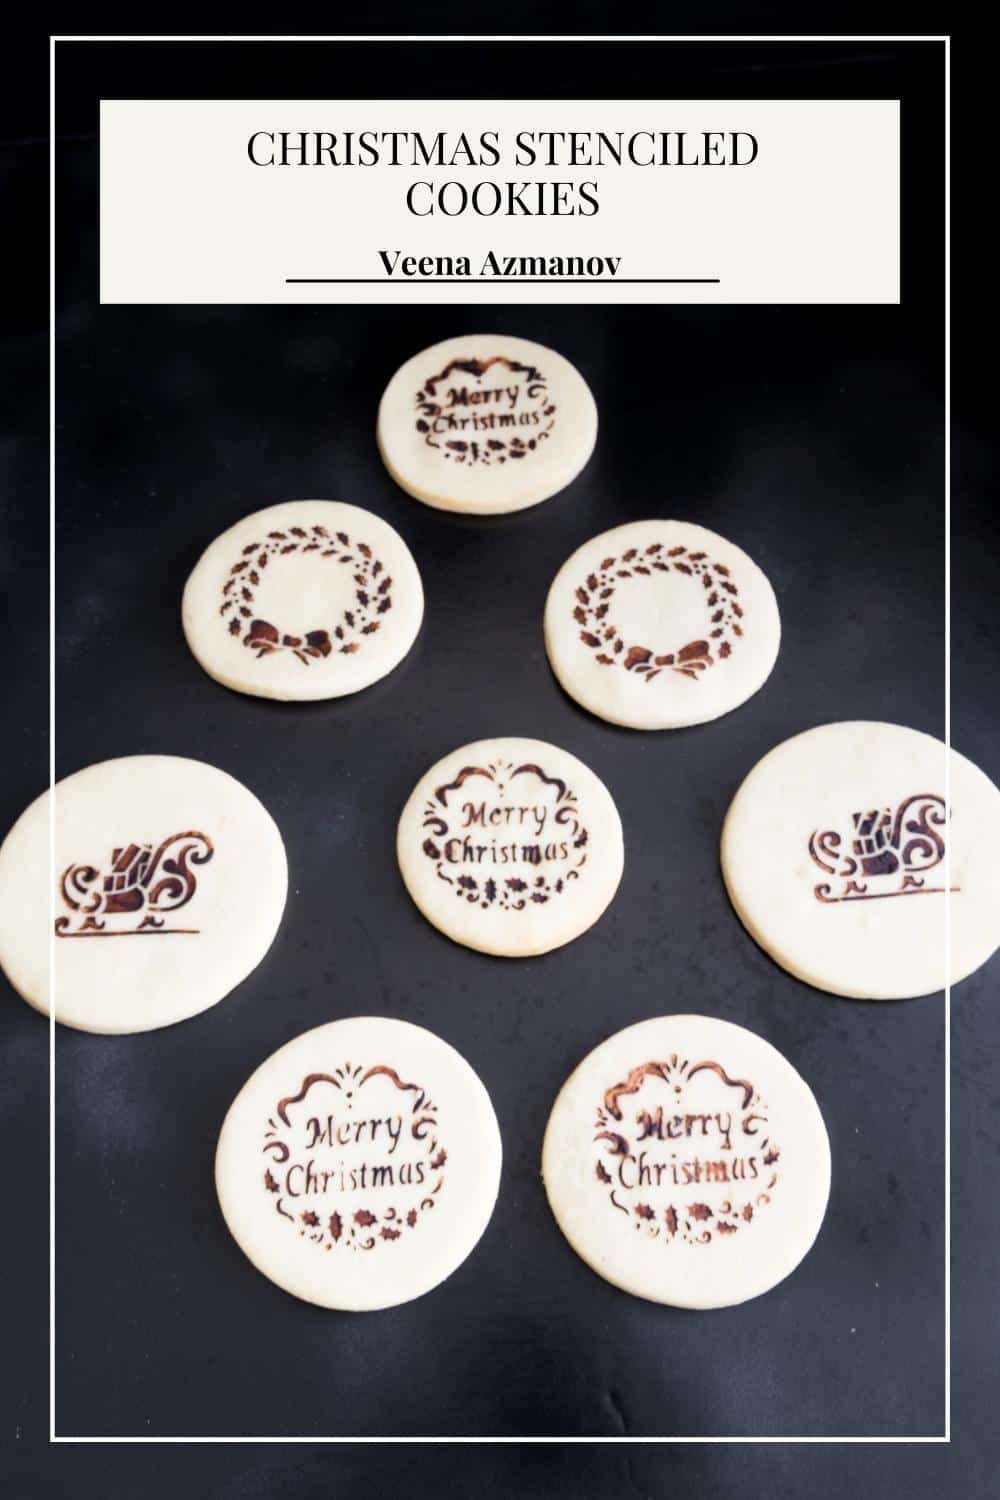
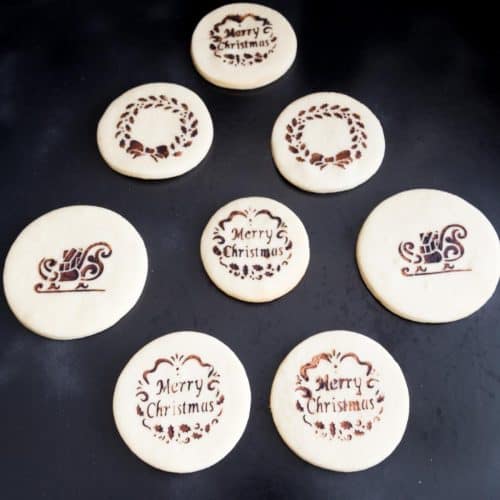
Choosing the Right Stencil
When it comes to stenciling, choosing the right stencil is crucial for achieving the perfect results. There are countless stencil designs available, ranging from traditional holiday motifs like snowflakes and reindeer to more whimsical patterns like Christmas trees and candy canes. The key is to select a stencil that fits the overall theme and aesthetic you want to achieve with your Christmas cookies.
Royal icing is the key to achieving perfectly stenciled Christmas cookies, but it’s not the only method you can use to create beautiful and intricate designs. While royal icing is the most popular choice for stenciling due to its smooth and glossy finish, other options can yield equally impressive results. One alternative method is using powdered sugar and a stencil brush. This technique involves lightly dusting the stencil with powdered sugar and gently tapping the brush over the stencil to transfer the design onto the cookie. It’s a more straightforward approach that requires less precision, making it an excellent option for beginners or those who prefer a more rustic look. If you use vanilla sugar cookies, then the cocoa paste is the simplest, most accessible, and most effective way to stencil. Another method worth exploring is airbrushing. With an airbrush gun and edible food coloring, you can create stunning gradients and intricate details with ease. This technique allows for more control over the intensity of the colors and can give your cookies a professional-looking finish. It’s important to note, however, that airbrushing requires some practice and familiarity with the equipment. If you’re feeling extra creative, you can even experiment with other edible materials like cocoa powder or colored sanding sugar. These materials can be dusted or sprinkled over the stencil to create different textures and effects on your cookies. It’s a fun and innovative way to add dimension and visual interest to your designs.
Consider the size and shape of your cookies when choosing a stencil. If you’re working with small cookies, intricate designs with fine details may also not appear, so opting for more extensive, bolder patterns might be a better choice. On the other hand, if you’re decorating more giant cookies, you have more room to play with and can experiment with intricate and bold stencil designs. Another factor to consider is the material of the stencil itself. Stencils made from flexible materials like plastic or silicone are ideal for achieving clean and precise lines. These types of stencils allow for easy removal without smudging or distorting the design. Additionally, look for stencils with a defined thickness that will prevent excessive bleeding or smudging of the icing or powdered sugar onto the surrounding areas of the cookie. While traditional stencil designs can be a great starting point, don’t be afraid to think outside the box and explore unique and unconventional stencil options. Look for stencils that reflect your personal style and interests. You can even create your own stencils using food-safe materials like cardboard or acetate sheets. This way, you can truly customize your cookies and make them stand out from the crowd.
Choosing the right cookie dough
To ensure your cookies look stunning and taste delicious, it’s crucial to select the right dough that complements your stencil designs. When it comes to choosing cookie dough for stenciling, there are a few factors to consider.
First and foremost, you’ll want a dough that holds its shape well during baking. This is especially important when using intricate stencil designs, as a dough that spreads too much can blur the details of your pattern. Look for cookie dough recipes that are specifically designed for cut-out or rolled cookies, as these tend to have a higher starch content, resulting in cookies that hold their shape beautifully. The texture of your cookie dough also plays a role in the final outcome of your stenciled cookies. Some stencils work better with softer doughs, while others require a sturdier base. If you’re using a stencil with fine details or delicate lines, a softer dough will help prevent the stencil from tearing or breaking when you apply pressure. On the other hand, if you’re working with a larger, more open stencil design, a slightly firmer dough can offer better support and prevent any unwanted stretching or distortion. Furthermore, the flavor of your cookie dough should complement your stencil designs and create a harmonious taste experience. Consider the flavor profiles of your chosen stencil patterns and select a cookie dough that complements or enhances those flavors. For example, if you’re using a stencil with festive holiday motifs like peppermint or gingerbread, consider using a corresponding dough flavor such as peppermint or gingerbread cookie dough. This attention to detail will elevate the overall taste and presentation of your finished cookies.
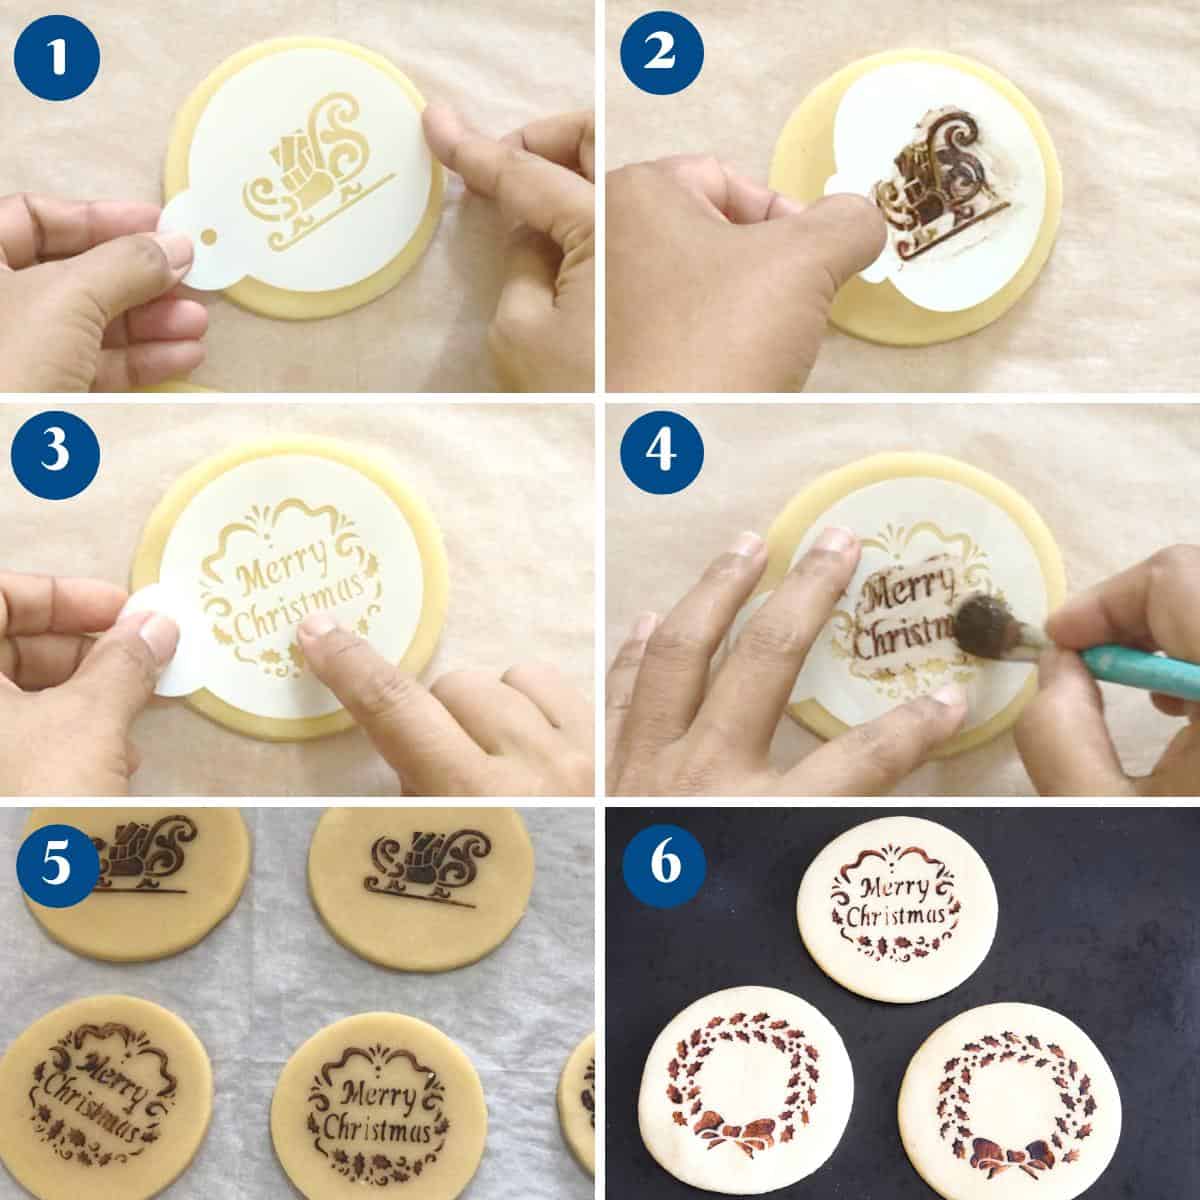
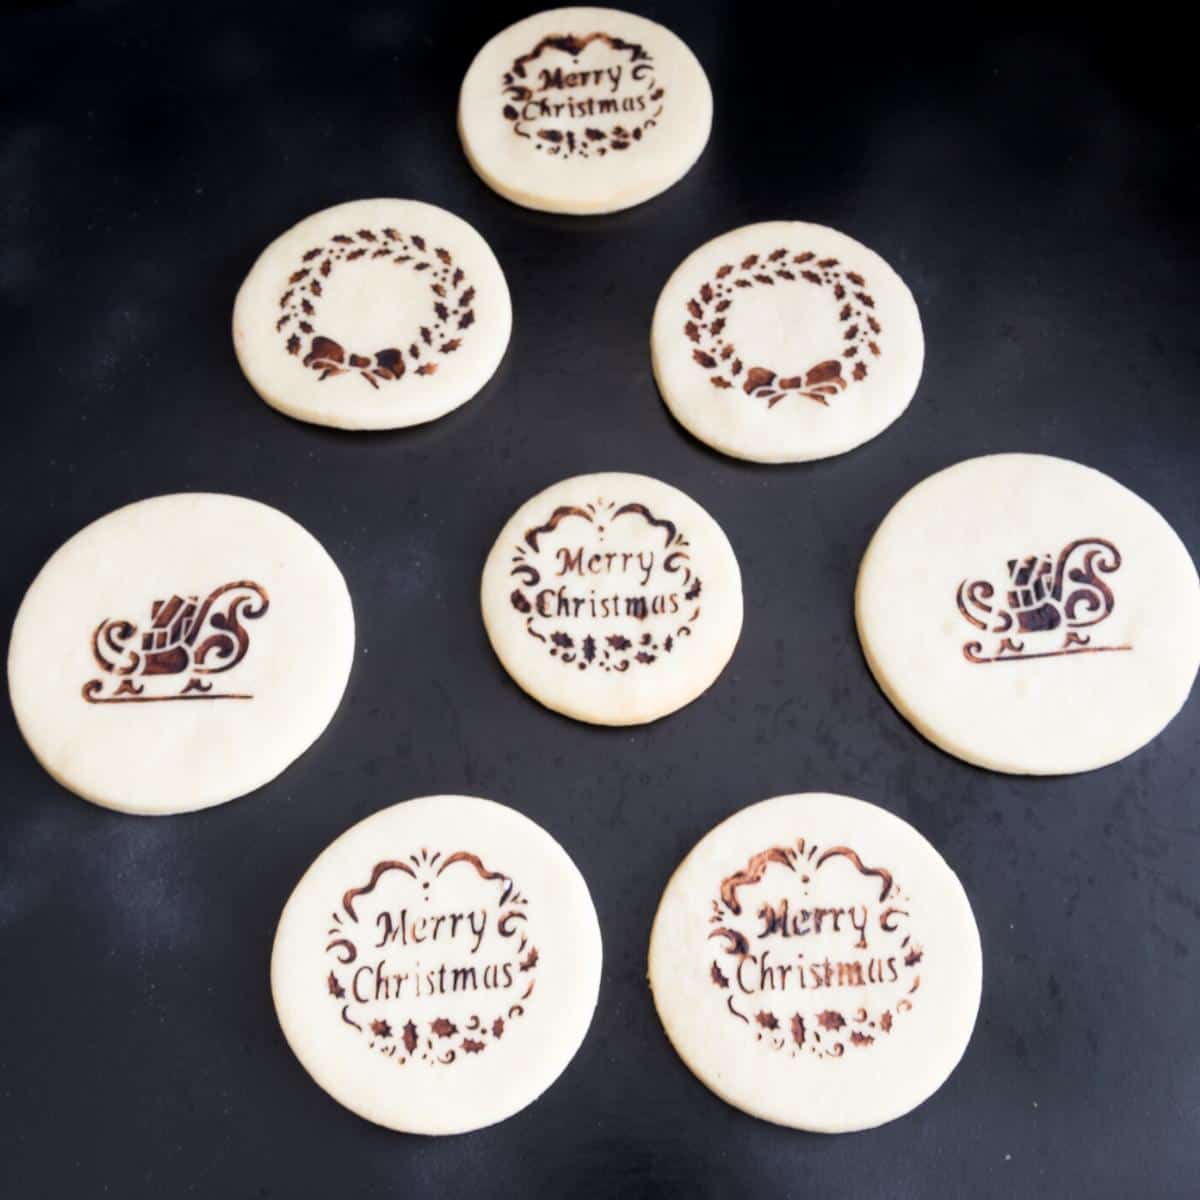
Applying the Stencil
Applying the stencil is where the magic truly happens, as you transform a simple cookie into a work of edible art. Follow these tips to ensure your stenciling process goes smoothly and yields professional-looking results.
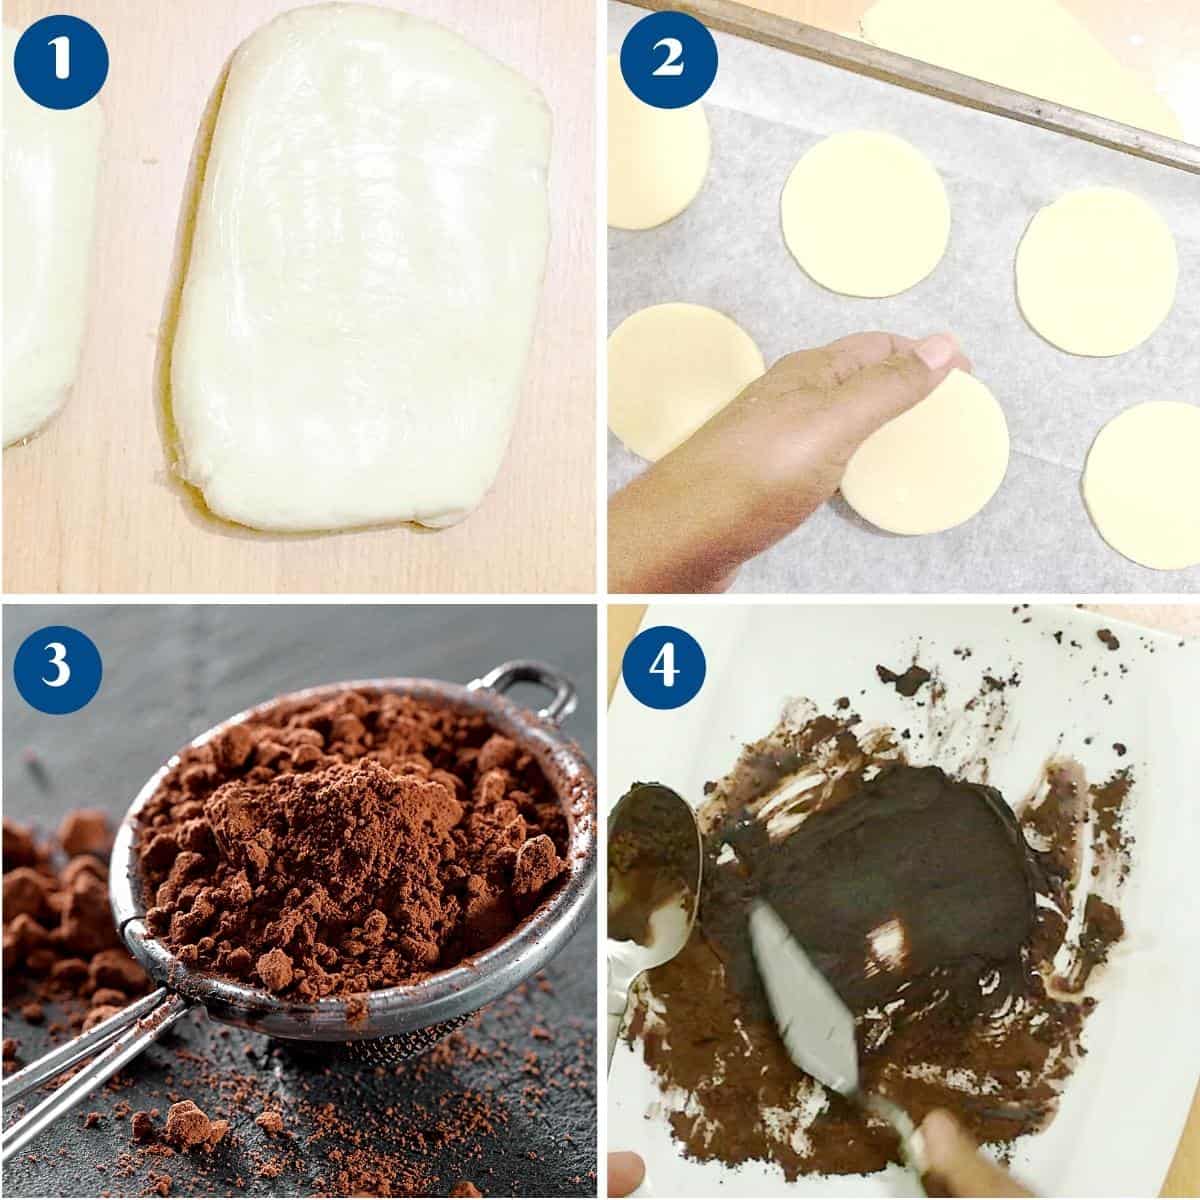
First, ensure your stencil is clean and free of crumbs or dried icing from previous use. A dirty stencil can leave unwanted marks or smudges on your cookies, detracting from the overall presentation. Take a few moments to carefully clean and inspect your stencil before placing it on your dough. To affix the stencil to your dough, gently press it down with your fingertips, ensuring it lays flat against the surface. It’s crucial to secure the stencil firmly to prevent any movement or shifting while you’re applying the icing or sugar. An easy way to achieve this is by using some edible adhesive spray, which will keep the stencil in place without leaving any residue. When it comes to applying the icing or sugar, less is more. Begin by evenly covering the design by sprinkling a small amount of powdered sugar or cocoa powder over the stencil. On the other hand, if you’re using icing or paste instead of powdered sugar, opt for a stiff consistency. This will help maintain the sharp edges and intricate details of the stencil. Using a small offset spatula or a palette knife, apply a thin layer of icing over the stencil, using smooth and even strokes. Be mindful not to apply too much pressure, as it may cause the icing to seep underneath the stencil.
Achieving crisp and professional-looking designs
One of the keys to achieving this is ensuring that the paste is evenly distributed across the stencil. This will help create a clean and uniform design for your cookies.
To achieve even distribution, gently tap the stencil on the surface of the icing or sugar. This will help the material settle into the openings and create a smooth layer. Then, using a straight edge like a bench scraper or a spatula, carefully spread the icing or sugar across the stencil in a thin and even layer. Take your time and make sure to cover all the openings completely. Once the stencil is completely covered, it’s time to remove it from the dough. Carefully lift it off, pulling straight up to avoid smudging the design. This step is crucial in maintaining the crispness of your designs. If you notice any smudging or imperfections, don’t worry. Remember, imperfections are part of the charm of homemade treats and add a touch of authenticity to your creations. If you’re not completely satisfied with the result, don’t fret. Practice makes perfect, and with patience and experimentation, you’ll soon master the art of perfectly stenciled Christmas cookies.
Tips and trouble shooting
To help you on your journey to cookie perfection, here are some tips and troubleshooting advice:
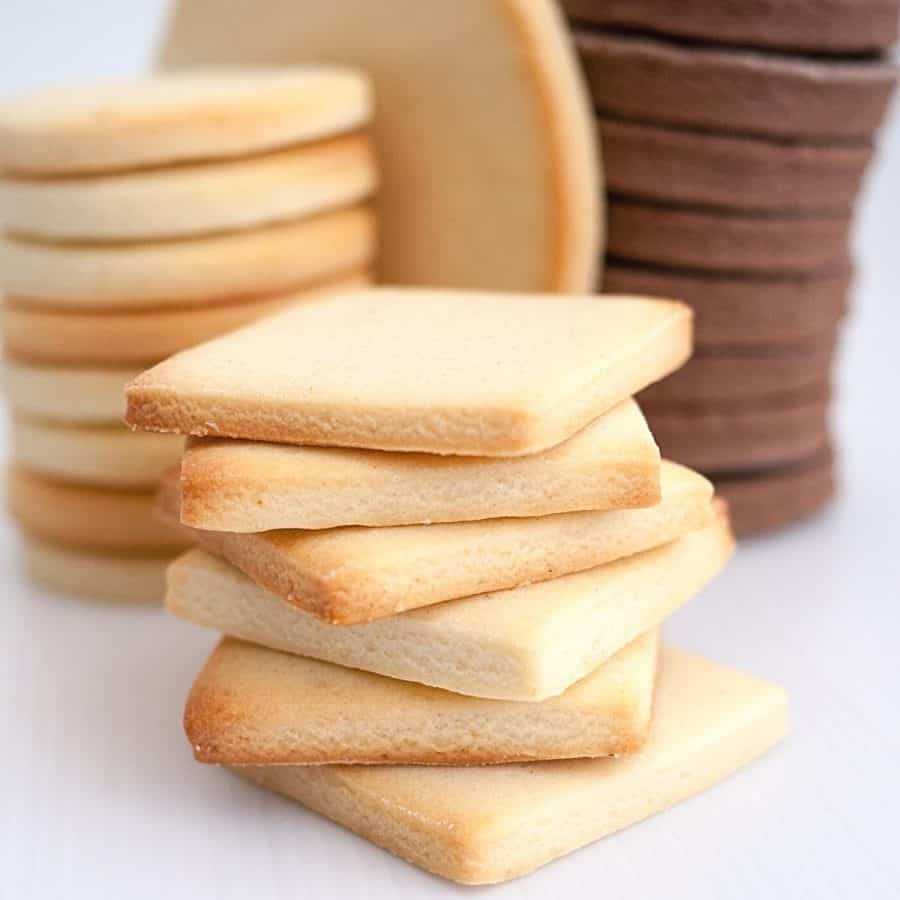
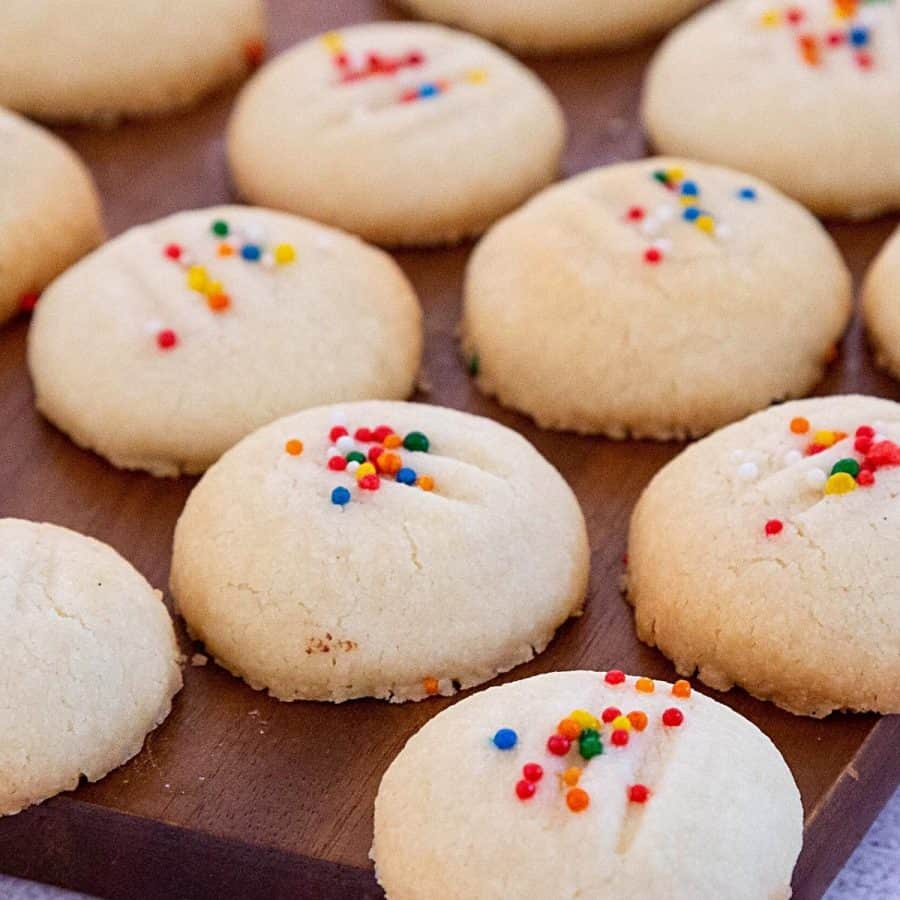
Sugar cookies recipe
Vanilla sugar cookies Classic vanilla sugar cookies Eggless vanilla sugar cookies. Chocolate sugar cookies, Eggless chocolate sugar cookies
Frequently asked questions
Did you LIKE this recipe? Save it for later. You can find my recipes on Pinterest. Follow me on Facebook, Twitter, and Instagram.Subscribe, and I’ll send you new recipes right to your inbox. Thank you for sharing - Save for later