Picture this: a rich, chocolatey cake that’s moist, decadent, and perfect for any special occasion. It’s the beloved chocolate mud cake, and it’s a fan favorite for a reason. But let’s face it, getting the perfect recipe for this layered dessert can be a bit challenging. That’s why we’ve created the ultimate guide to perfecting your chocolate mud cake recipe! From understanding what a mud cake is to choosing the right chocolate and baking techniques, we’ll give you everything you need to know to create a show-stopping cake every time. So get ready to satisfy your sweet tooth and impress your guests with our comprehensive guide to the perfect chocolate mud cake.
Step-by-step: Easy chocolate mud cake
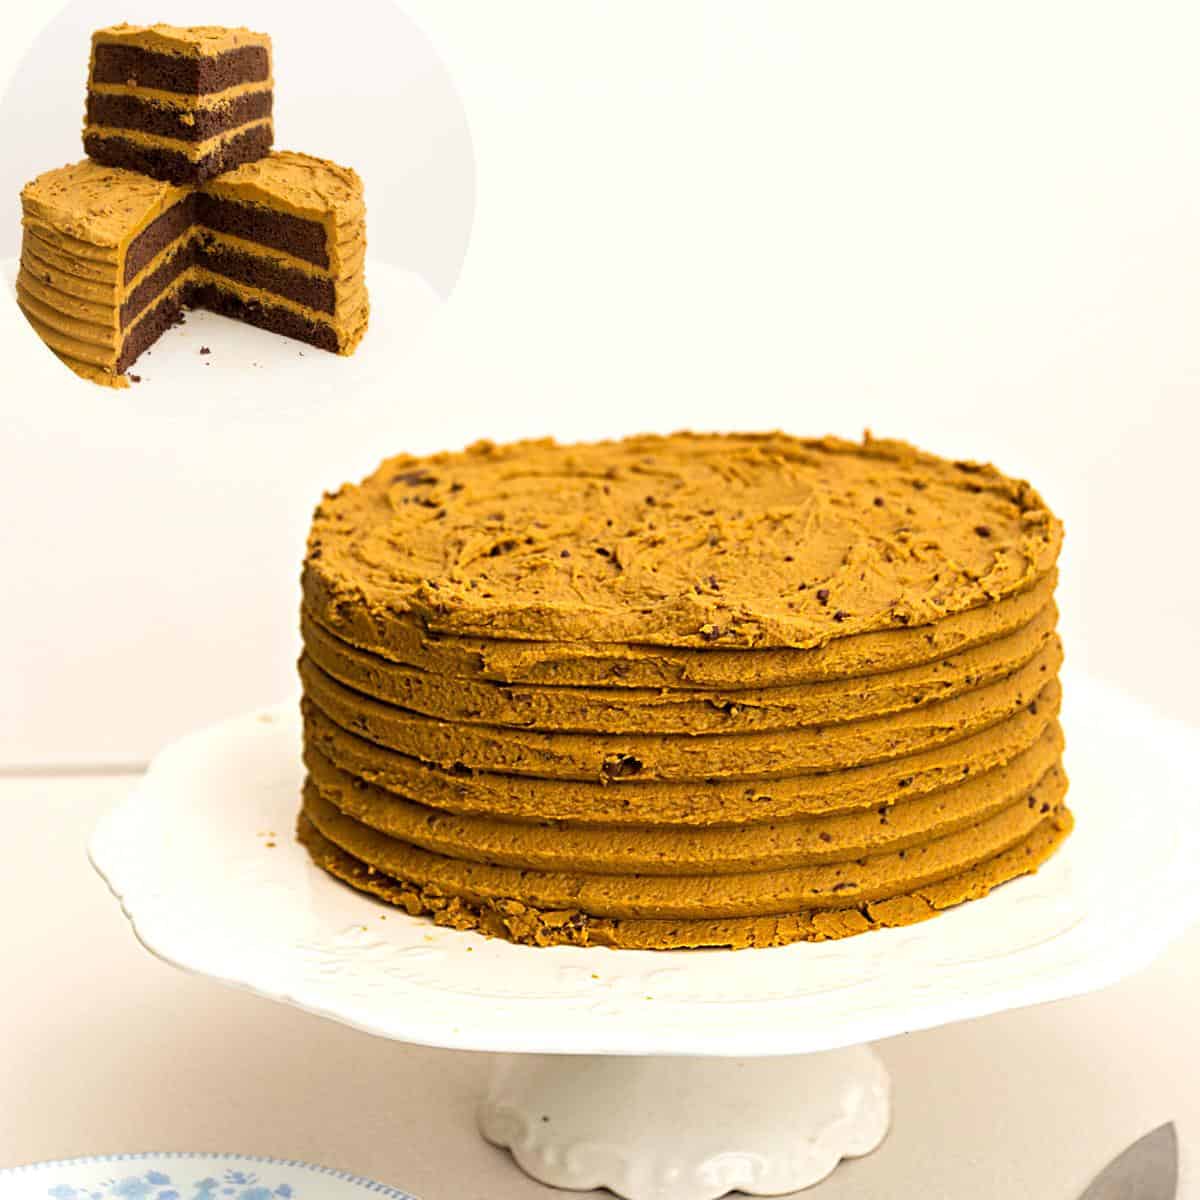
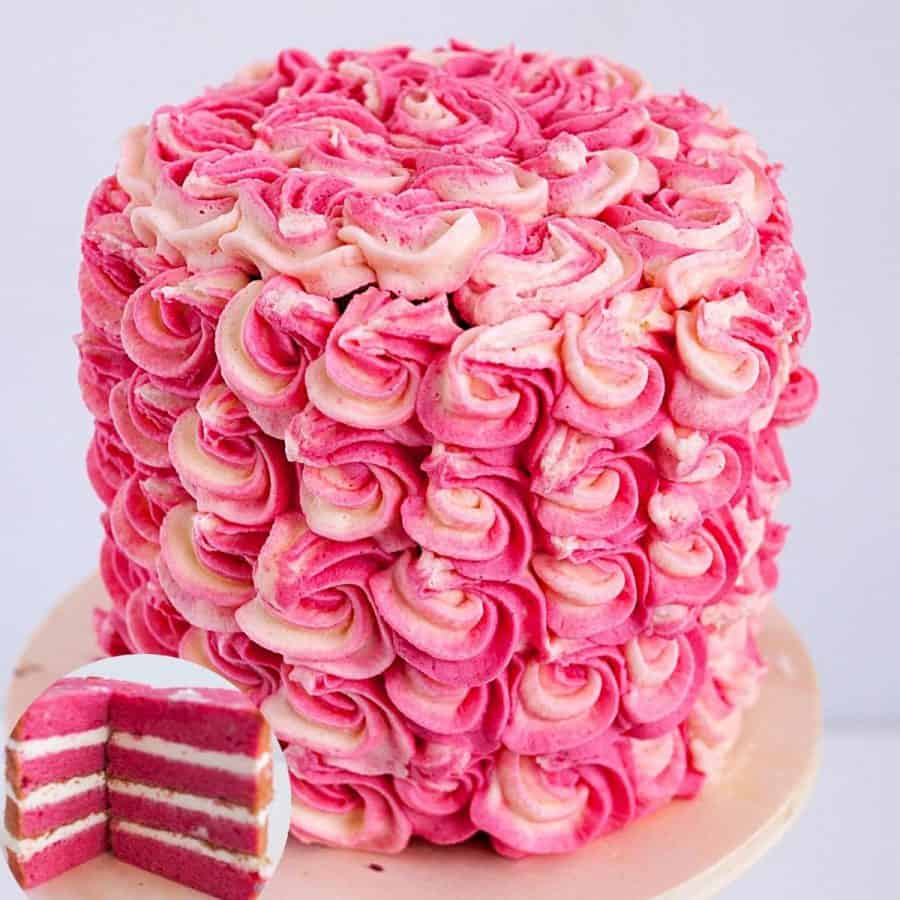
Mud cake
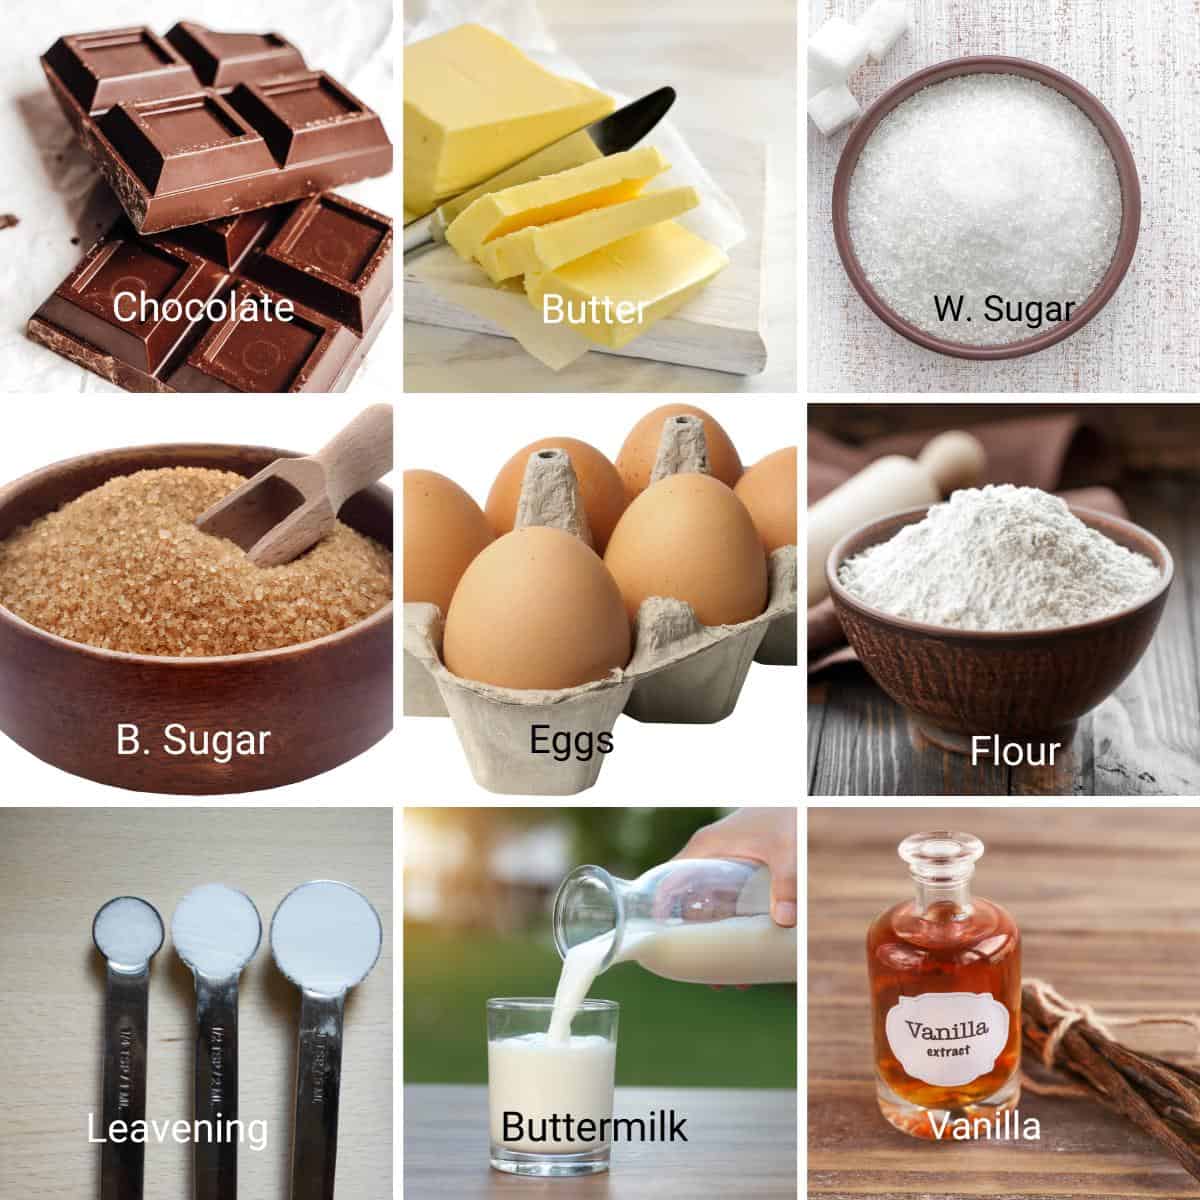
Oven – Preheat oven to 325℉/ 165℃ Gas mark 3. Grease and line 2 x 8-inch cake pans with parchment paper.Pro tip – I baked one 8-inch round cake and cut it horizontally into three layers. Dry ingredients – In a bowl, sift together the flour, baking powder, baking soda, cocoa powder, and salt. Melt – In a microwave-safe bowl, melt the butter and chocolate until smooth. Then add the sugars and stir until almost dissolved.Pro tip – you can also melt it on the stovetop in a bowl over a pot of simmering water. Wet ingredients – Then add the sugars and stir until almost dissolved. Add, the eggs one at a time followed by the vanilla extract and buttermilk. Combine well. Wet to dry – add the flour mixture to the chocolate mixture and combine well but do not over-mix. Bake – Pour the batter into your prepared baking pan/pans. Bake on the middle rack until a toothpick inserted in the center comes out clean.Pro tip – A single 8-inch round cake will take about 50 to 60 minutes. 2 x 8-inch layers will take 25 to 30 minutes. Cool – When baked, cool in the baking pans for 5 minutes. Then, invert and cool on a wire rack completely before you decorate.Pro tip – it is very important that the cakes are completely cooled before frosting. Otherwise, the frosting will melt on the warm cakes.
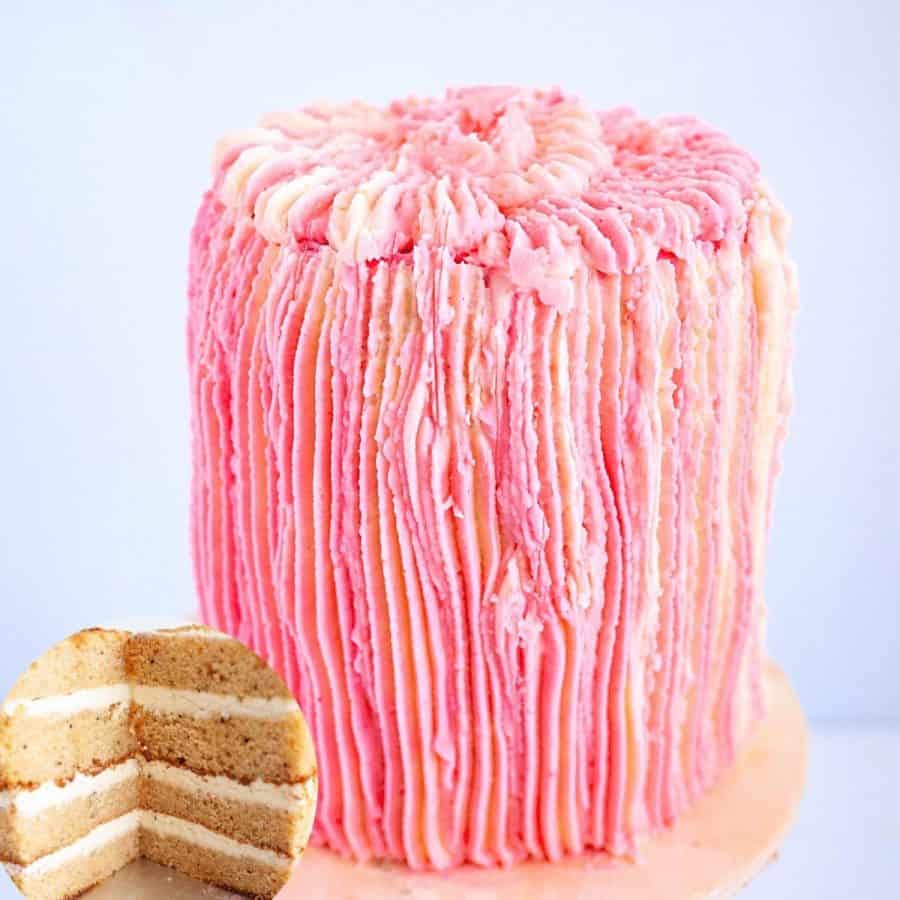
Frosting
Buttercream – In the bowl of a stand mixer with the paddle attachment cream the butter and salt until smooth. Then, add the powdered sugar and continue to whip until smooth light and fluffy. Chocolate buttercream – Melt the chocolate in a microwave-safe bowl until smooth. While still barely warm add it to the buttercream.Pro tip – The cold buttercream will seize some of the chocolate creating little shards in the buttercream while the rest will blend in smoothly. You can add the chocolate when completely cooled to get a smooth chocolate buttercream
Assemble
Level – Using a bread knife or cake leveler cut the domes off the cake layers. Then, torte the cake into layers. Brush each layer with the cooled simple syrup.Pro tip – if you baked two layers, you can split each layer horizontally to make four layers. Stack – Place a cake layer on the cake board or cake stand. Top with a big dollop of buttercream – spread evenly using a straight-edge spatula. Then, top the next cake layer on top followed by more buttercream and more layers. Chill for 15 minutes.Pro tip – Chilling the cake at this point will ensure the layers don’t move when you frost the outside. Frost – Next, spread the remaining frosting around and on top of the cake. Using a paddle motion when spreading will help smooth the frosting better.Pro tip – A straight-edge spatula for the top, an offset spatula, and a bench scraper for the sides work better.
Texture – I’ve used an icing comb to create a pattern on the outside but you can choose to create a smooth effect with a bench scraper or a rustic finish with a spatula. Pipe – Place any remaining frosting in a piping bag and with a round or star tip and pipe borders.Pro tip – I did not pipe any border because I didn’t have any more frosting left!!
Frequently asked questions
Creative ways to serve chocolate cakes
Warm with Ice Cream: Serve slices of the cake warm with a scoop of vanilla or chocolate ice cream for a delicious contrast of temperatures and flavors. Layered with Mousse: Create a layered dessert by alternating slices of cake with layers of chocolate mousse or whipped cream. Stuffed with Cream: Cut the cake into layers and fill it with a layer of sweetened whipped cream or chocolate ganache before stacking it back together. Trifle: Cube the cake and layer it in a trifle dish with layers of whipped cream, berries, and chocolate sauce for a beautiful and decadent dessert. Cake Pops: Crumble the cake, mix it with frosting, and form into balls. Dip the balls in melted chocolate and decorate with sprinkles or nuts for gluten-free cake pops. Mini Cakes: Cut the cake into mini rounds using a round cookie cutter. Stack the rounds with layers of frosting in between for individual mini cakes. Ice Cream Sandwiches: Cut the cake into squares and use them as the “bread” for ice cream sandwiches, filling with your favorite ice cream flavor. Mug Cakes: Make individual mug cakes by mixing a small amount of cake batter with some milk or water in a mug and microwaving for a quick and easy treat.
This type of cake is often layered with ganache or buttercream and is a popular choice for wedding cakes or any special occasion. Mud cakes are also known for their versatility as they can be customized to suit different tastes and preferences by adding different flavors such as coffee, caramel, or nuts.
if you’re a chocolate lover then this cake is guaranteed to satisfy your cravings like nothing else. It’s rich, fudgy, and oh-so-decadent – the perfect indulgence for any occasion! But what sets this particular recipe apart from the rest? For one, it’s incredibly easy to make. With just a handful of simple ingredients and a little bit of time, you’ll have a show-stopping dessert that looks and tastes like it was made by a professional. Plus, the recipe is super customizable. You can switch up the flavors and add-ins to suit your tastes – maybe a splash of coffee to make it mocha-flavored, or some chopped nuts to add some crunch. The possibilities are endless! So whether you’re looking to impress your friends and family with your baking skills or just want to treat yourself to something delicious, this mud cake recipe is definitely worth trying out. And as we dive into the ingredients and substitutes, you’ll see just how easy it is to make this dessert a reality., My absolute favorite frosting with this cake is Ganache and I shared that combination with you when I shared the chocolate ganache cake. But if too much chocolate is not what you want then try my Velvet Chocolate Buttercream instead. Today, I have frosted this with my caramel buttercream.
Once your cake has cooled completely, you can let your creativity run wild with toppings and frosting. A classic option is to cover the cake with a layer of chocolate ganache, which will give it a smooth and glossy finish. For a rustic look, try a sprinkle of powdered sugar or cocoa powder on top. You can even add fresh berries or edible flowers for a pop of color. When it comes to serving your cake, there are a few things to keep in mind. First, make sure you have a sharp knife for cutting even slices. You can also use a cake server or spatula to lift each piece out of the pan without damaging it. Adding a scoop of ice cream or whipped cream on the side can elevate the dessert even further.
If your cake came out dry, try adjusting the baking time or temperature. You might also want to add a tablespoon or two of extra butter or oil to the batter next time. If your cake has sunken in the middle, it may have been underbaked. Make sure to check the cake with a toothpick or knife before taking it out of the oven. If it’s not fully cooked, put it back in for a few more minutes. On the other hand, if your cake has risen too much in the middle, it may have too much baking powder or soda. Double check your recipe and measure carefully next time. If you find that your cake is too crumbly, try adding an extra egg or two to the batter. Alternatively, you can add a little more liquid to the recipe to help bind it together.
Thank you for sharing - Save for later