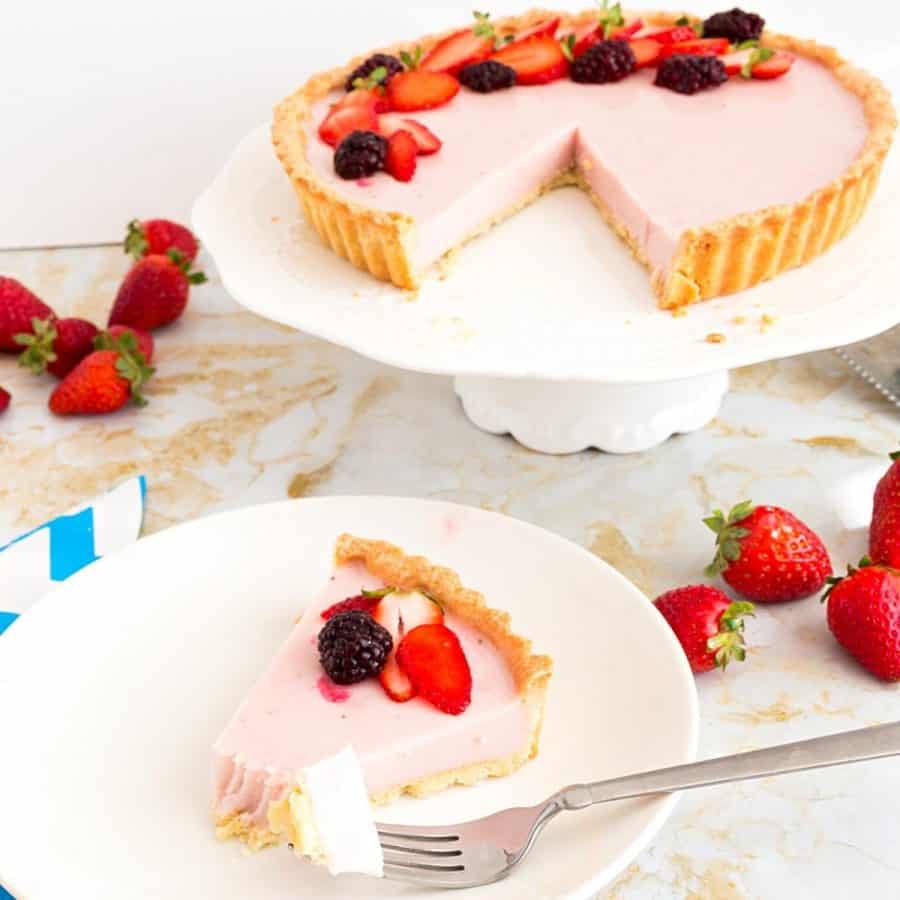
The two Italian desserts that are perfect for entertaining are panna cotta and Tiramisu. Am I wrong? Both can be made ahead, and they are as elegant as they are delicious. And the best part is that they are both so easy to make. We are a huge, dessert-loving family. So, making dessert at home is very common. And yet, you must see the big smile in the house when we have panna cotta in the fridge. It doesn’t matter what flavor. However, the most popular ones with my kids are vanilla, strawberry, blueberry, and mango. I recently made this as a strawberry panna cotta tart, and it was a huge hit with friends.
Why make this Panna Cotta
Quality Ingredients: Making your own homemade panna cotta allows you to select the finest ingredients, ensuring superior flavor and quality compared to store-bought alternatives. Customization: Homemade panna cotta offers endless opportunities for customization. You can adjust the sweetness, flavorings, and toppings to suit your taste preferences, making each batch uniquely yours. Control Over Texture: By making panna cotta from scratch, you have control over the texture of the dessert. You can adjust the gelatin-to-cream ratio to achieve your desired consistency, whether you prefer a firmer set or a softer, more delicate texture. Healthier Options: Homemade panna cotta can be made with healthier ingredients, such as low-fat dairy or alternative sweeteners, to cater to dietary preferences or restrictions. Cost-Effective: While panna cotta may seem like a gourmet dessert, making it at home can be more cost-effective than purchasing it from a bakery or restaurant. Plus, you can make larger batches to enjoy throughout the week or for special occasions. Satisfaction of Mastery: There’s a sense of accomplishment that comes with mastering the art of making panna cotta from scratch. With practice, you’ll develop the skills and confidence to create restaurant-quality desserts in the comfort of your own kitchen, impressing friends and family with your culinary prowess.
Ingredients and substitutes
Whipping Cream – I have used 38% fat for my whipping cream. You want to use a minimum of 32%, if not more, since low-fat creams will set into a very soft Panna Cotta. Whole milk – You also need to use whole milk, not low-fat. However, you can substitute it with almond milk if you prefer. Sugar – It is best to use castor or fine-grain white sugar. You want the sugar to dissolve easily without affecting the color of the mixture. Gelatin – It’s best to use unflavored gelatin so that the strawberry flavor shines beautifully. Strawberries – I have used fresh strawberries because they are in season. However, you can also use frozen strawberries for the puree. Just pulse and sieve them the same way.
Step-by-step: Strawberry panna cotta
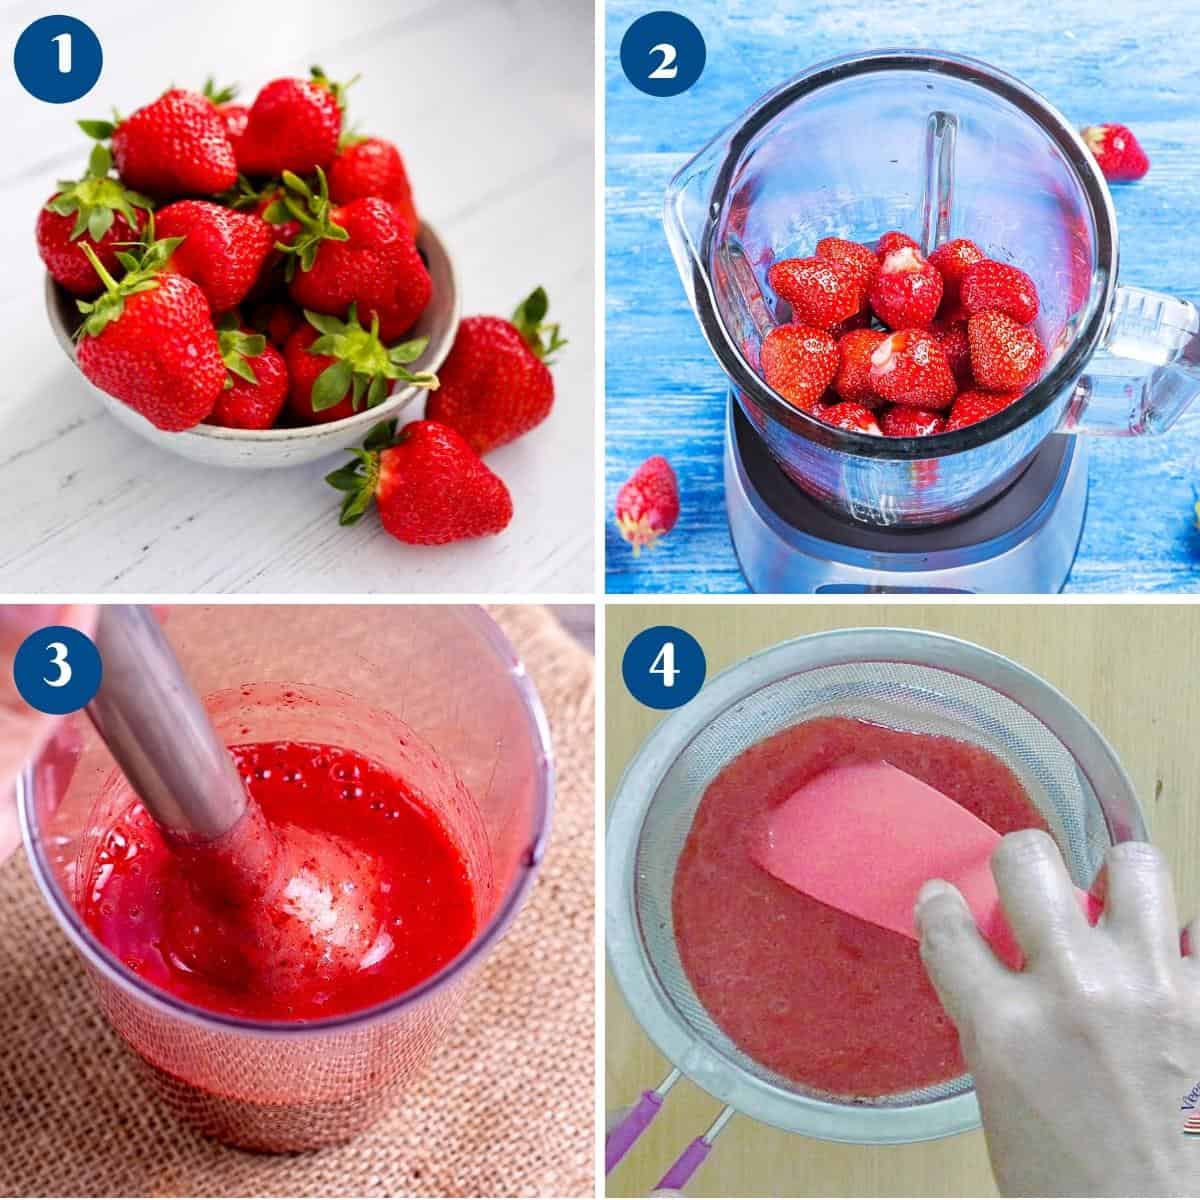
Strawberry puree
Pulse the strawberries in a food processor or blender until smooth. Pass through a fine mesh or sieve to remove seeds. Use the amount requested in this recipe.Pro tip – Use one cup for the panna cotta mixture and save the rest for the topping.
Prepare panna cotta
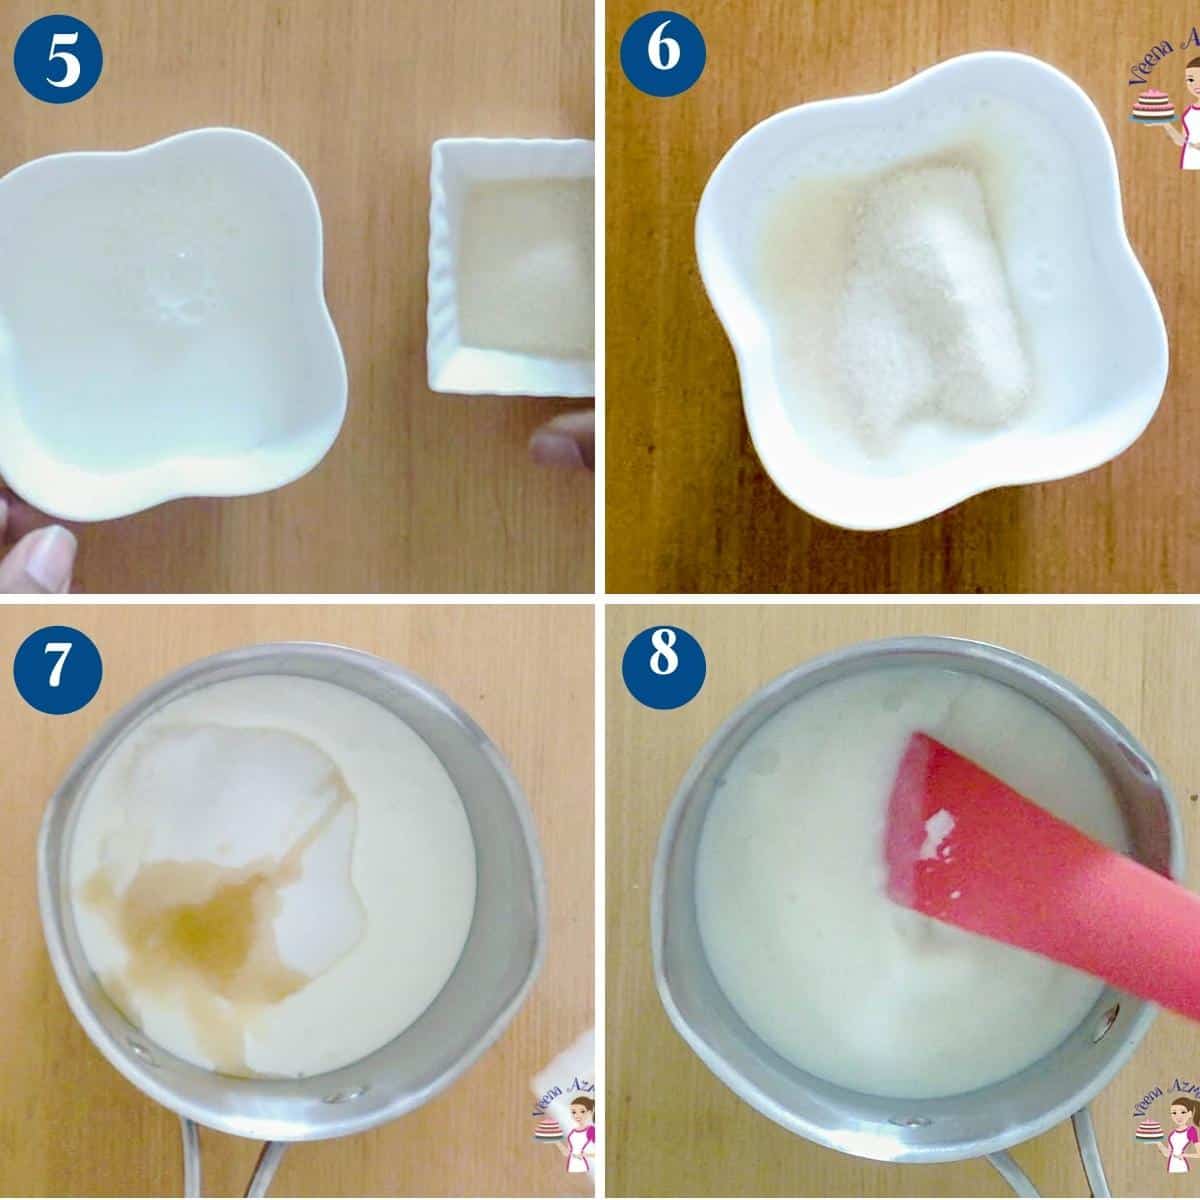
In a bowl, add the milk and sprinkle gelatin over the cold milk. Stir and set aside for 3 to 5 minutes.Pro tip – If you let the gelatin bloom/soak, it will dissolve easily and have a smoother consistency rather than grainy. In a heavy-bottom saucepan, heat the cream and sugar until the sugar dissolves and the cream comes to an almost boiling point. Add the vanilla extract and the soaked gelatin milk. Continue to cook until the gelatin is all dissolved and the mixture is well heated.
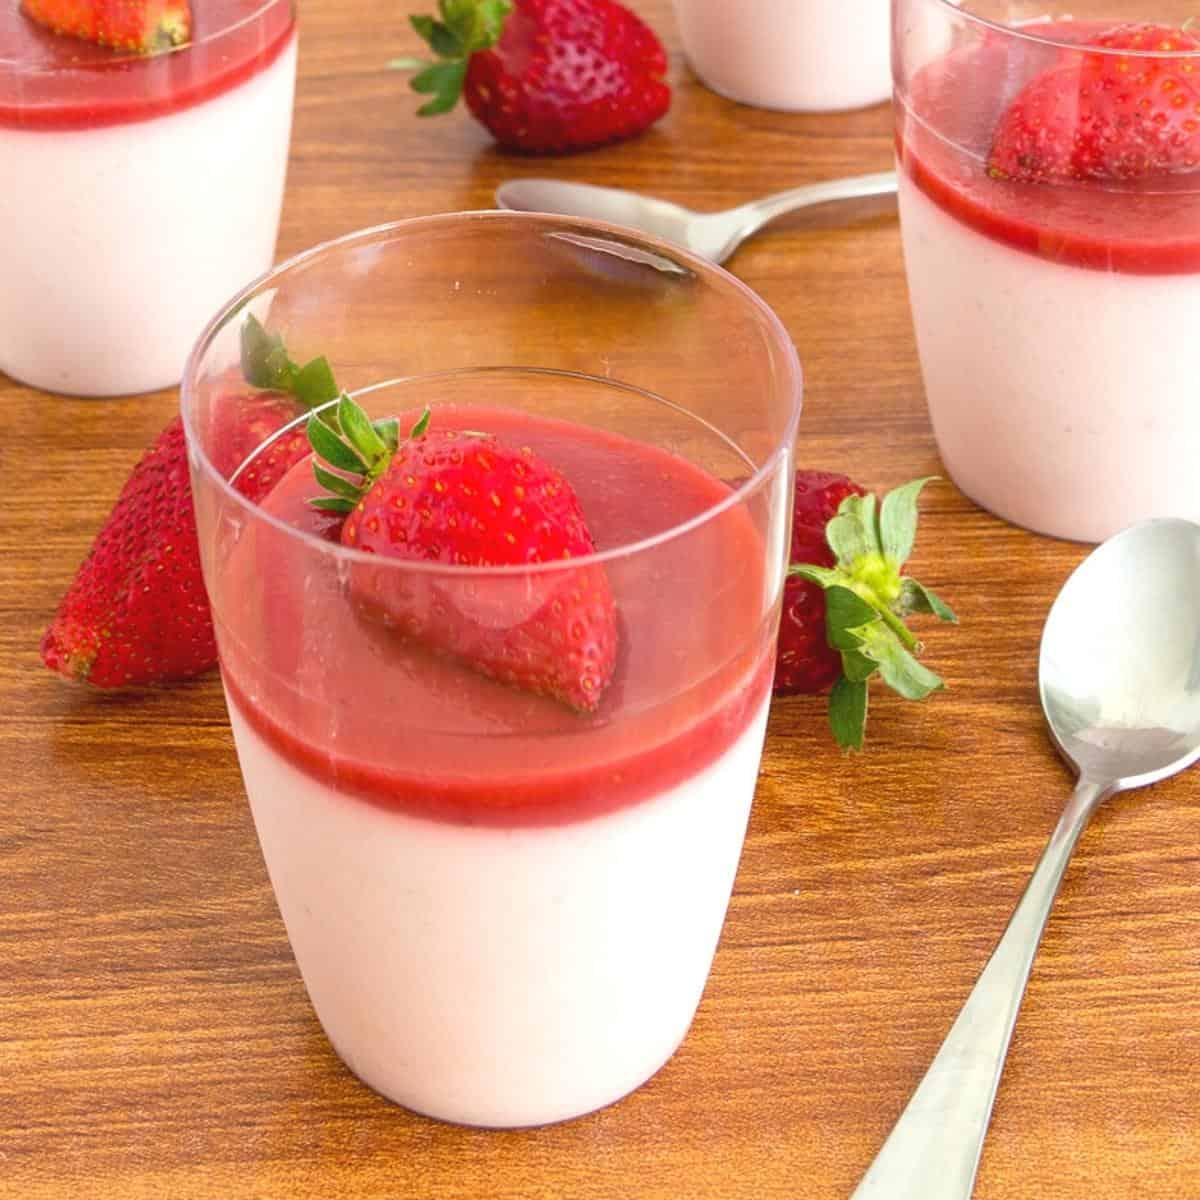
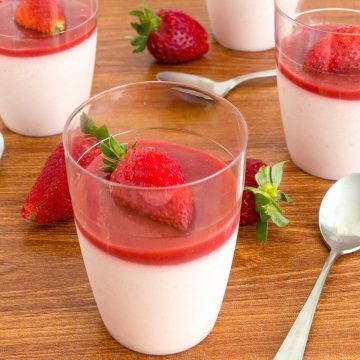
Take the mixture off the heat and add the strawberry puree. Sieve the mixture through a mesh.Pro tip – straining will remove any undissolved gelatin or remaining strawberry seeds. Let cool for five minutes. Then, gently pour the mixture into the cooled/partially frozen tart shell.Pro tip – I prefer to pour the mixture gently over the back of a spoon. That way, you won’t get any crumbs from the tart into the panna cotta mixture. Sieve the mixture through a mesh to get undissolved gelatin or remaining strawberry seeds. Gently pour the mixture into individual serving glasses. Let chill in the refrigerator for at least 4 hours.
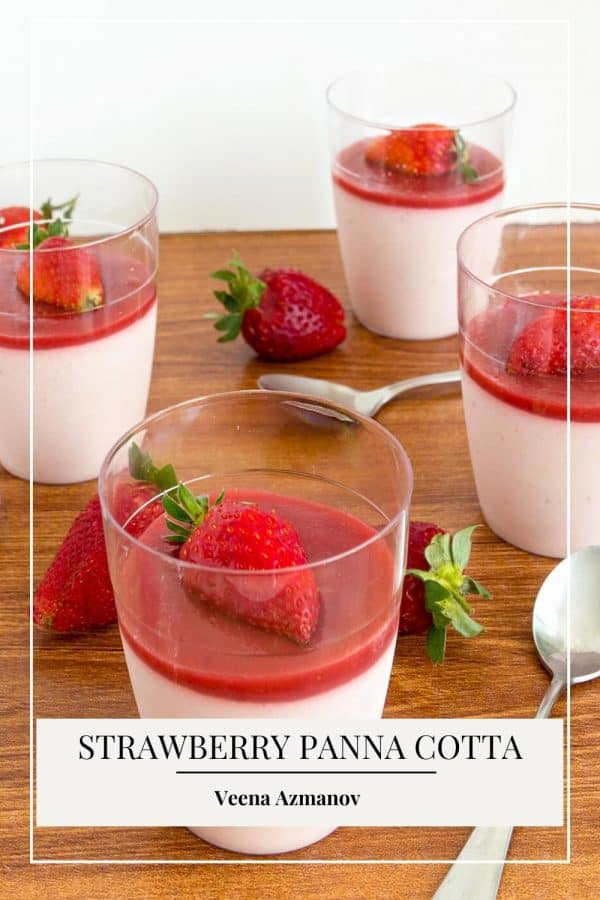
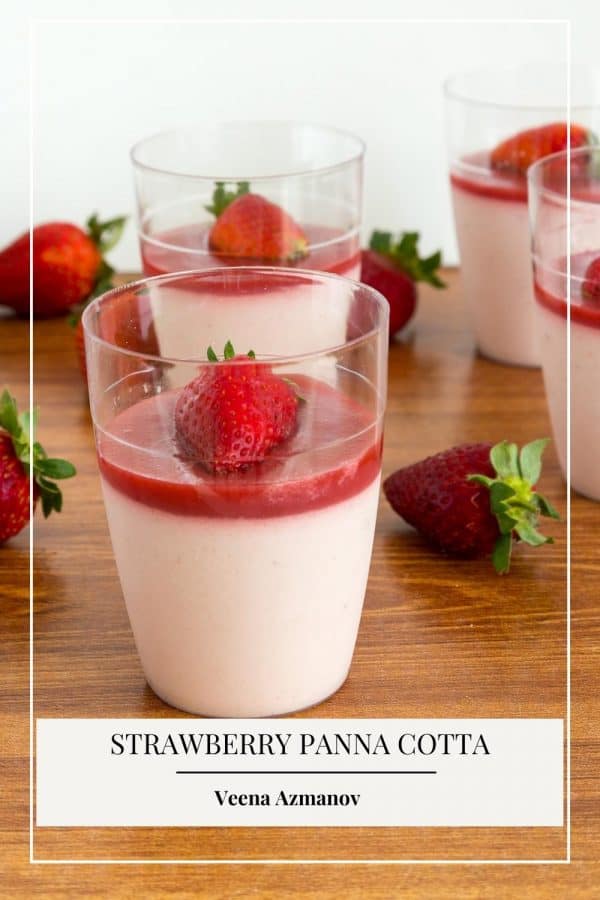
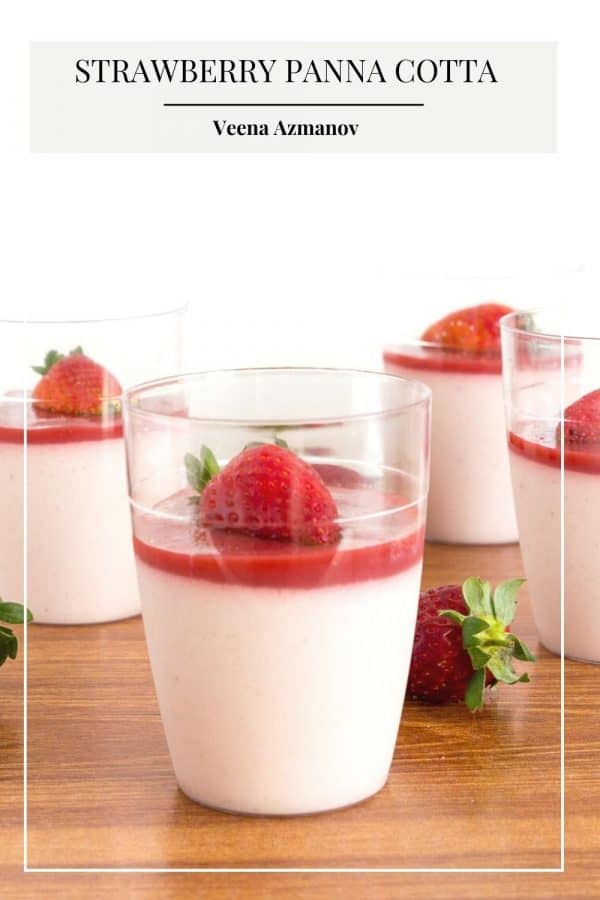
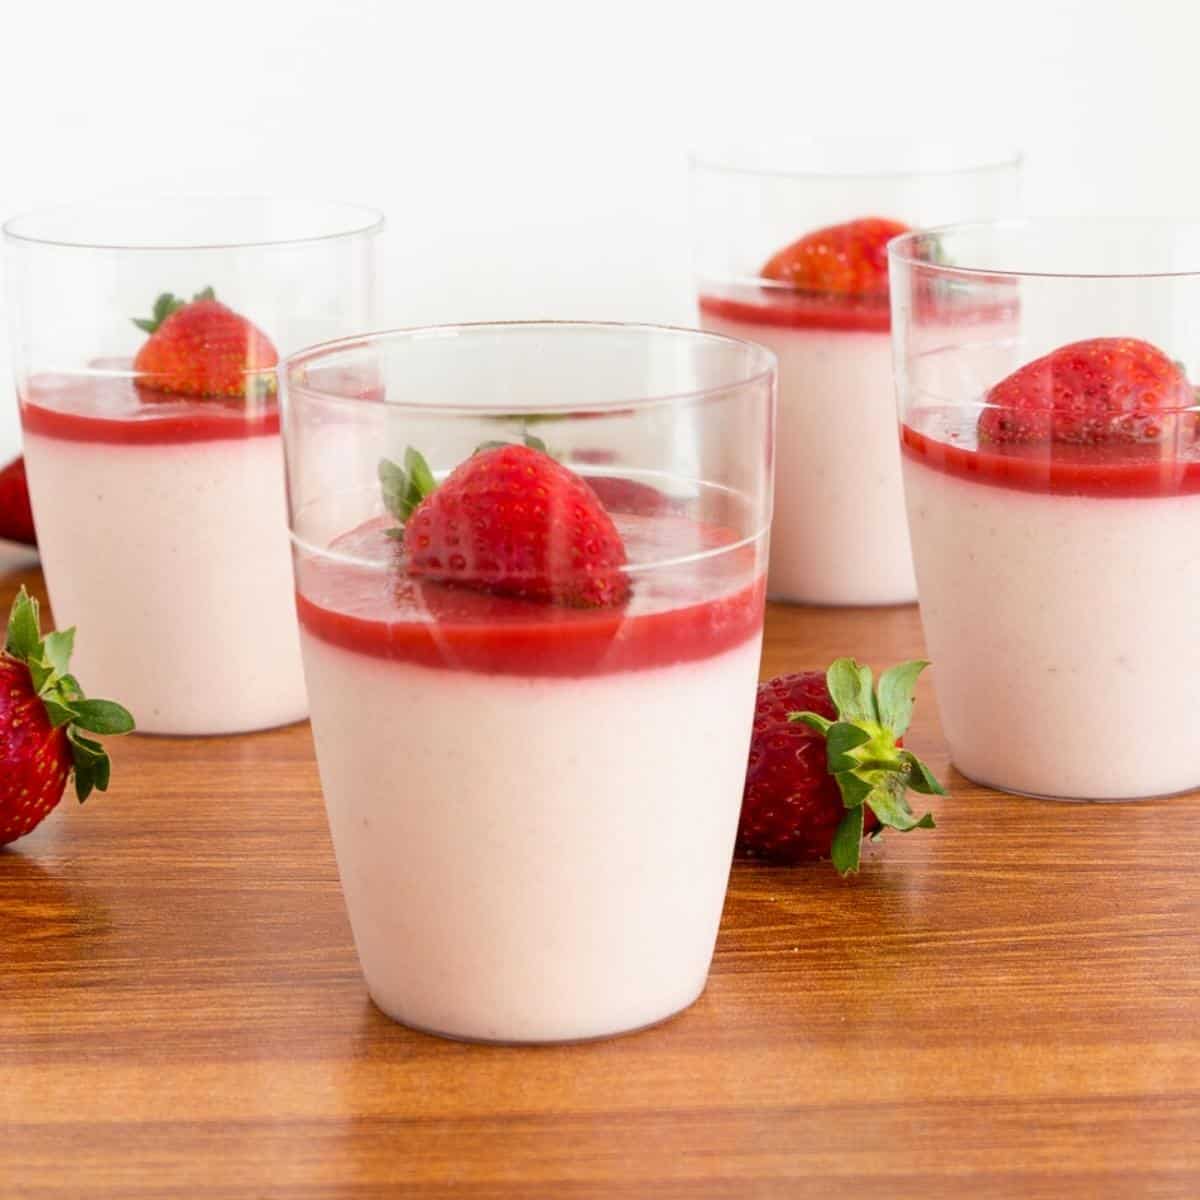
Top with jello & garnish
Divide the remaining strawberry puree between the chilled individual panna cotta. Garnish with fresh strawberries. Enjoy
Tips for success
Use High-Quality Ingredients: Opt for fresh, high-quality ingredients, such as heavy cream, whole milk, and fresh vanilla beans, to enhance the flavor and texture of your panna cotta. Proper Bloom of Gelatin: Bloom the gelatin properly by sprinkling it evenly over cold water and allowing it to soften for about 5-10 minutes. This step ensures that the gelatin dissolves evenly when heated, resulting in a smooth texture. Don’t Boil the Mixture: When heating the cream mixture, avoid boiling it, as this can cause the gelatin to break down and result in a less stable panna cotta. Heat the mixture just until it’s hot and steamy, then remove it from the heat. Strain the Mixture: After heating the cream mixture, strain it through a fine-mesh sieve to remove any lumps or undissolved gelatin. This step ensures a silky-smooth texture in the finished dessert. Chill Thoroughly: Allow the panna cotta to chill in the refrigerator for at least 4-6 hours, or preferably overnight, to ensure it sets properly. This step is crucial for achieving the desired firmness and texture. Unmold with Care: To unmold the panna cotta, run a knife around the edge of each ramekin to loosen it from the sides. Then, dip the bottom of the ramekin in hot water for a few seconds to help release the panna cotta. Invert the ramekin onto a serving plate and gently tap to release the dessert. Serve with Complementary Toppings: Garnish the panna cotta with fresh berries, fruit compote, or a drizzle of caramel sauce to add flavor and visual appeal. These toppings complement the creamy richness of the dessert and enhance the overall presentation.
Thank you for sharing - Save for later