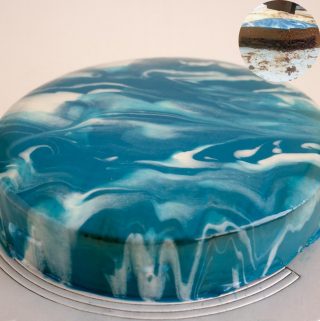
Rich, velvety layers of moist chocolate cake are sandwiched between light and airy chocolate mousse, creating a symphony of flavors and textures that will delight your senses. Topped with a glossy mirror glaze, this stunning dessert is as beautiful as it is delicious, making it the perfect centerpiece for any celebration or special occasion. Treat yourself to a slice of pure chocolate bliss with our decadent chocolate mousse cake. Elevate your desserts to a new level of elegance with our mesmerizing mirror glaze. This glossy, reflective coating transforms any cake or pastry into a work of art, captivating both the eyes and the taste buds. Made with a blend of sugar, water, condensed milk, and premium chocolate, our mirror glaze adds a luxurious finish to your creations, creating a stunning visual effect that is sure to impress. Whether you’re decorating a birthday cake, wedding cake, or simply indulging in a sweet treat, our mirror glaze is the perfect way to add a touch of sophistication to your desserts. The ultimate chocolate lover’s dream with our decadent creation featuring layers of rich chocolate mousse, indulgent chocolate torte, and a stunning mirror glaze. Each layer is a symphony of flavors and textures, from the light and airy mousse to the dense and fudgy torte, all topped with a glossy mirror glaze that adds a touch of elegance. Whether you’re celebrating a special occasion or simply craving a luxurious treat, our chocolate mousse, torte, and mirror glaze cake is sure to delight your senses and satisfy your chocolate cravings.
Why make this mousse cake
Rich Chocolate Flavor: The cake layers are made with cocoa powder, and the mousse and glaze use high-quality semisweet chocolate, resulting in a decadent chocolate flavor. Light and Airy Texture: The chocolate mousse is whipped with cream, creating a light and airy texture that contrasts beautifully with the rich cake layers. Beautiful Presentation: The mirror glaze gives the cake a stunning, glossy finish that looks professional and elegant, making it perfect for special occasions. Balanced Sweetness: The sweetness of the cake, mousse, and glaze is balanced well, ensuring a satisfyingly sweet dessert without being overpowering. Easy to Make: Despite its impressive appearance, this recipe is relatively simple to make, with clear instructions that even less experienced bakers can follow. Versatility: While this recipe uses a specific set of ingredients, it can be easily adapted to suit different tastes and dietary requirements, such as using gluten-free flour or adjusting the sweetness level of the mousse and glaze.
Step-by-step: Chocolate mousse cake
Chocolate insert
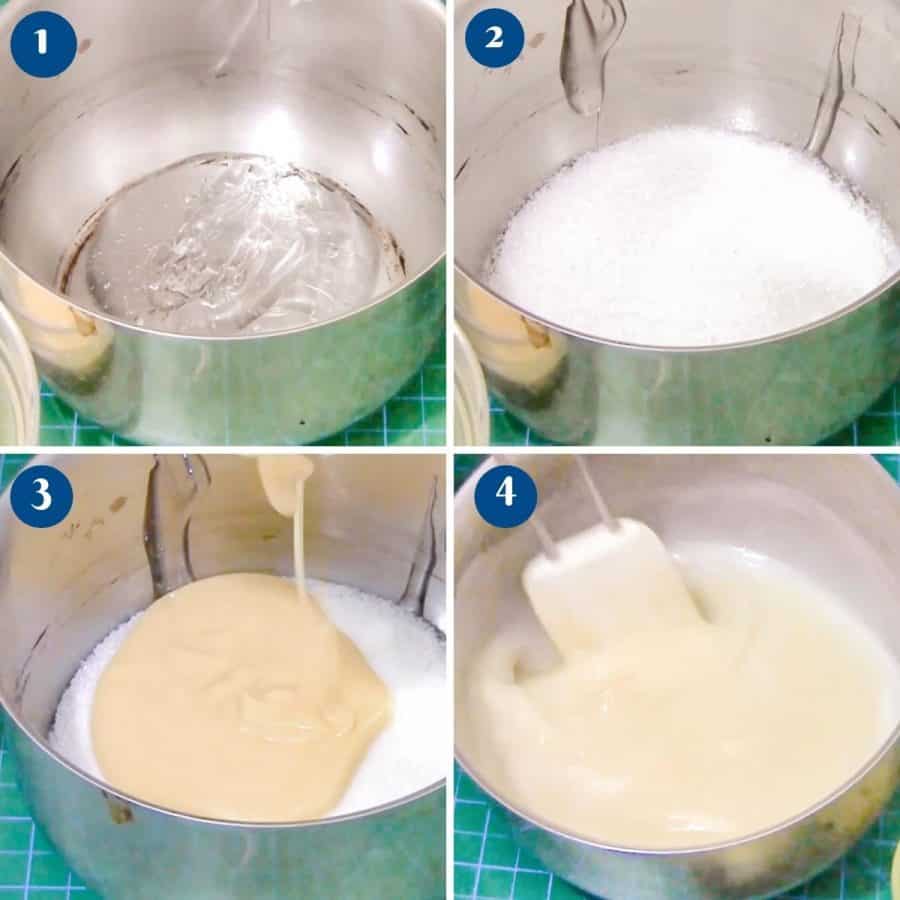
Preheat the oven to 300°F/ 150°C / Gas Mark 2 Line a 7-inch round springform cake pan with parchment paper on the inside and wrap with aluminum foil on the outsidePro-tip – the parchment on the inside is for easy removal and the foil will prevent water from getting into the pan when baked in a water bath (similar to a cheesecake) Melt the chocolate and butter in a microwave-safe bowl until all the chocolate has melted. Then, add the sugar and combine until all the sugar has almost dissolved.Pro tip – the heat in the chocolate will help dissolve the sugar and the sugar will help cool the chocolate before the eggs go in.
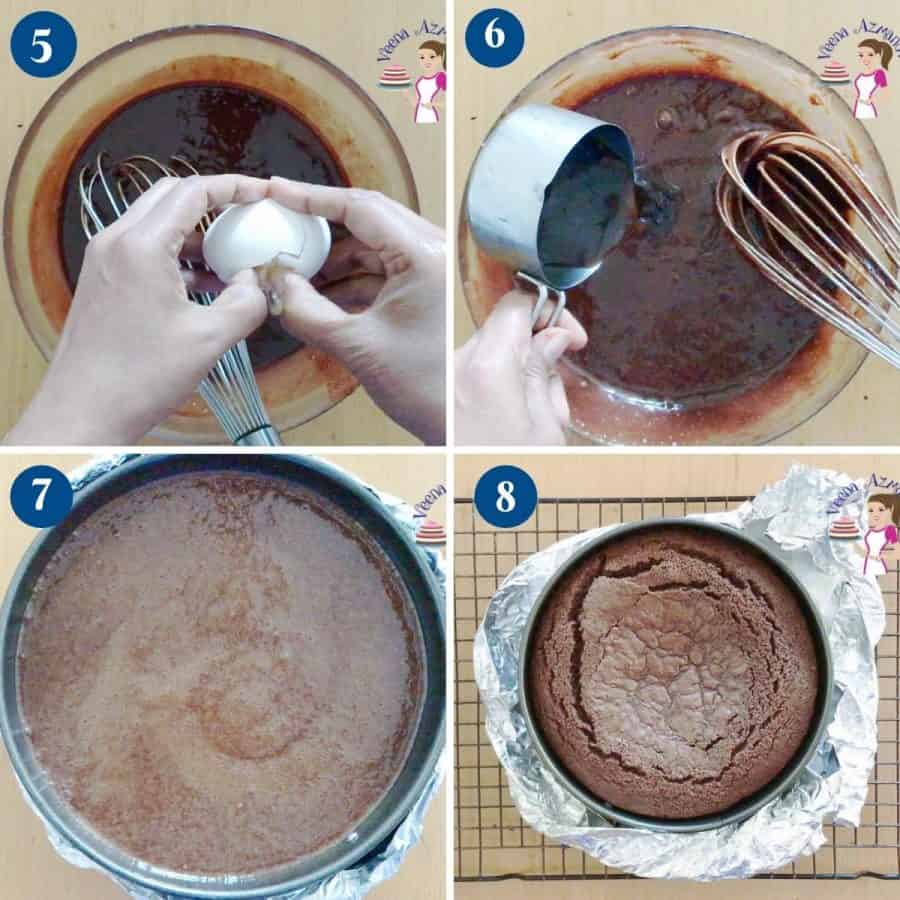
Next, add the eggs one at a time making sure to incorporate each egg before you add the next.Pro tip – adding eggs one at a time will emulsify with the butter better and incorporate easily. Finally, add the coffee/espresso mixture and vanilla extract.Pro tip – The color of your chocolate torte will depend on the chocolate you use. A higher percentage of cocoa will give a dark chocolate torte. Pour into the prepared baking pan. Place the pan in a baking tray on the center rack. Pour hot water on the outside of the pan – about 2 cups.Pro tip – the water outside the pan will create moisture in the oven preventing the cake from drying out. So the cake essentially bakes in a wet steam oven rather than dry air. Bake for about 50 to 60 minutes. When done the center should be almost set.Pro tip – It will continue to cook in the residue heat and will set further as it cools. Let cool in the pan for at least 10 minutes then cool completely before you wrap in plastic and chill in the fridge for at least 3 hours or until ready to use.Pro tip – the cake will be slightly puffed up when just baked, but it will sink as it cools.
Chocolate Mousse
Place a saucepan with 2-inches of water on medium heat. You will need 3 heat-proof bowls that can be set on the saucepan. Bowl 1 – In the first bowl, add the chocolate and butter. Place it over the saucepan with simmering water. Let the chocolate melt. Stirring when needed. Set aside to cool slightly.Pro tip – Chocolate can seize if any steam gets into it. So, keep the heat on medium to low and stir as necessary. Bowl 2 – In the second bowl, add the egg yolks and 2 tbsp of sugar. Combine well. Then, place it over the saucepan with simmering water. Using a whisk, stir continuously until all the sugar is melted and the yolks are barely warm. And set aside.Pro tip – You want the heat to be on medium to low (not high) to prevent the eggs from cooking. You don’t need a thermometer but as a guide, it should be about 149 F. and Bowl 3 – In the third bowl, add the egg whites and the remaining 2 tbsp of sugar. Place it over the saucepan with simmering water. Use a clean whisk to stir until all the sugar has melted. We want the mixture barely warm.Pro tip – Keep the heat on medium to low (not heigh) to prevent the eggs from cooking. You don’t need a thermometer but as a guide, it should be about 144 F.
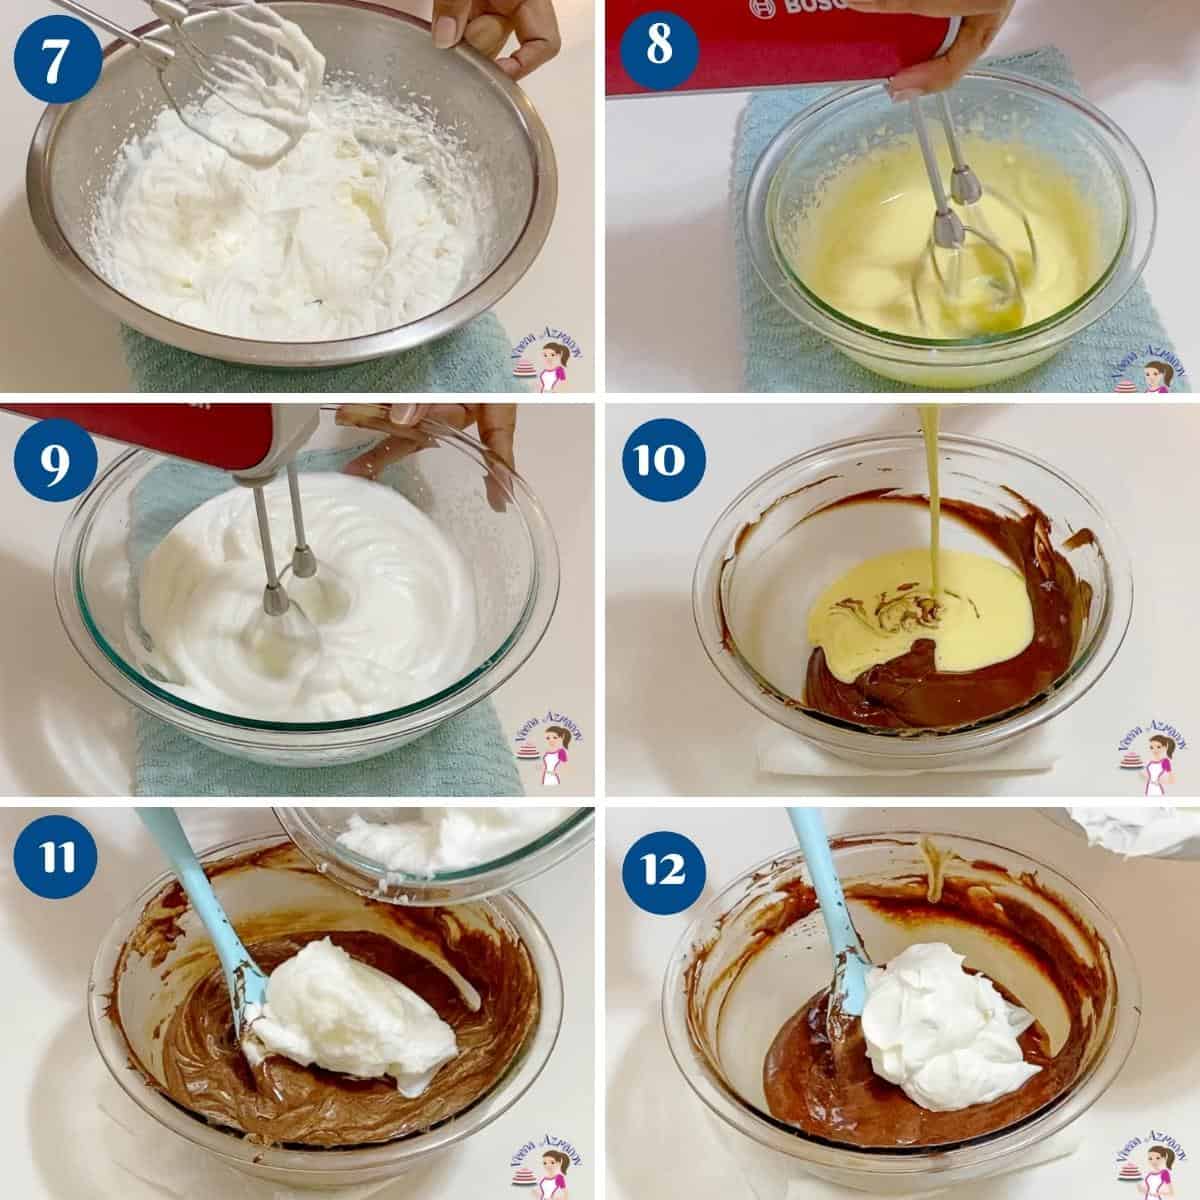
In the bowl of a stand mixer with the whisk attachment, whip the whipping cream with vanilla extract to almost stiff peaks – And set aside. Using the same mixer and whisk attachment (no need to clean the bowl), whip the egg yolks until light and fluffy – set aside. Clean the mixer bowl and whisk attachment as we need a clean grease-free bowl. Then whip the egg whites to stiff peaks – And set aside.Pro tip – It is very important to clean the bowl and whisk as any grease will prevent the egg whites from whipping to a stiff meringue. Combine First, add the whipped yolks to the chocolate mixture – fold gently but don’t overmix. Next, add the whipped cream to the chocolate mixture – fold gently but don’t overmix. Finally, add the whipped egg whites to the chocolate mixture – fold gently until you have no white streaks.
Assemble
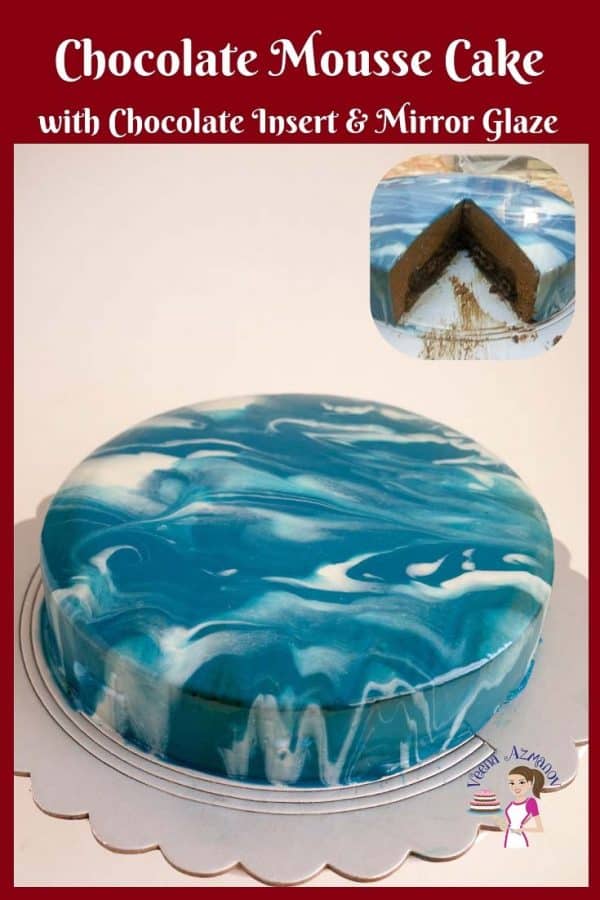
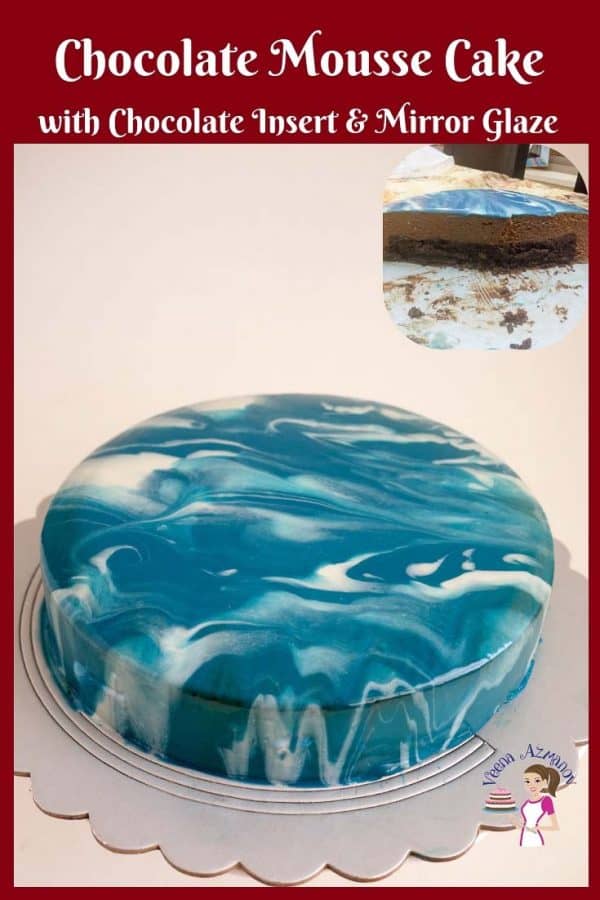
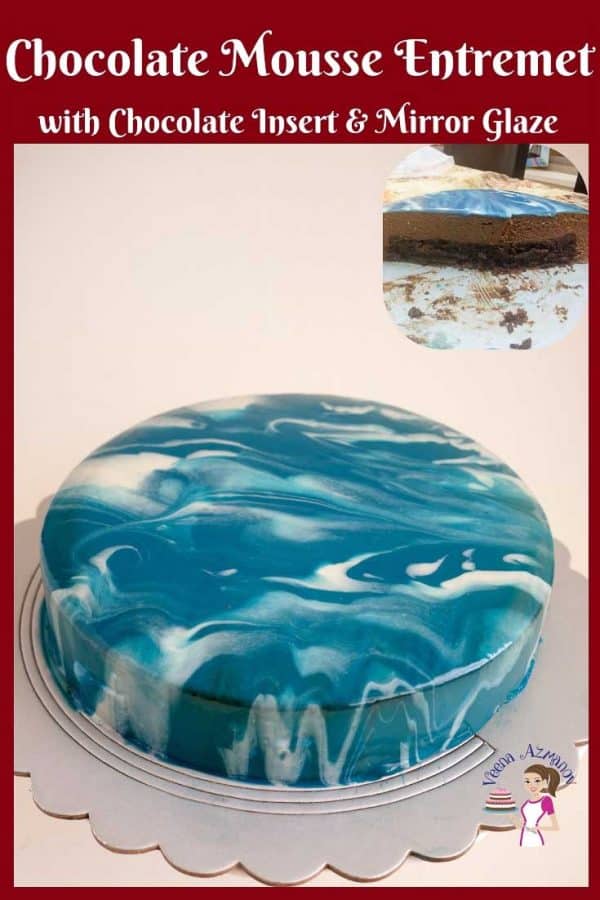
Line a 9″ springform pan with parchment paper on the bottom and a cake collar on the sides. Pour the chocolate mousse into the prepared pan. Then place the chilled chocolate insert in the mousse. Shake the pan and smooth the mousse around so it is a flat surface.Pro tip – chocolate insert is heavy so I prefer to place it on the bottom of the mousse cake but you can push it more towards the center if you prefer. Wrap the springform pan in plastic wrap and place it in the freezer for at least 6 hours or overnight until firmPro tip – make sure the pan is on a flat surface so the cake is leveled otherwise you will have a slanted mousse cake.
Mirror Glaze
Add half the water in a small bowl with gelatin and let it soak for 3 to 5 mins to bloom. Pro tip – it is important that the gelatin soak well or it can give you a very grainy glaze. In a heavy-based saucepan – add glucose, sugar, condensed milk, vanilla extract, and remaining water. Let come to a boil over low to medium heat.Pro tip – a heavy-bottom pan will prevent the condensed milk from scotching a the bottom. If it does do not scrape it as it will ruin the taste and texture of the glaze.
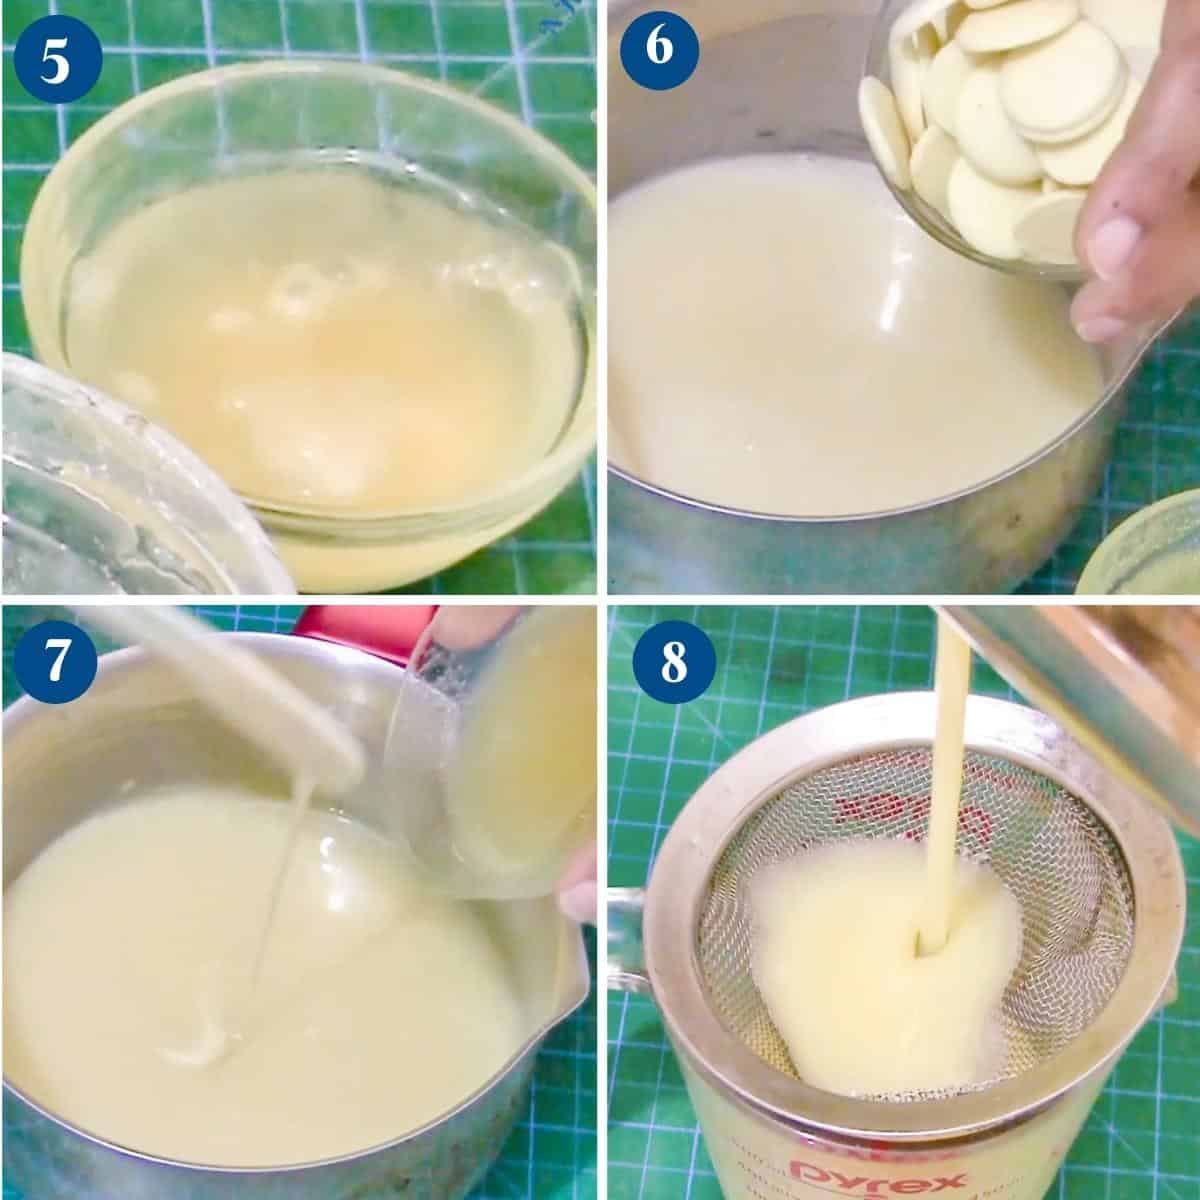
Once all the sugar has dissolved – and the mixture has come to a nice slow boil. Take it off the heat. Let rest for a minute before you add the white chocolate.Pro tip – the reason we let it cool a minute is so that the white chocolate does not split as soon as it is added to the boiling mixture. Next, add the soaked/bloomed gelatin – Let it meltPro tip -The heat in the mixture should be enough to melt the white chocolate. If not, use an immersion blender for just a few seconds
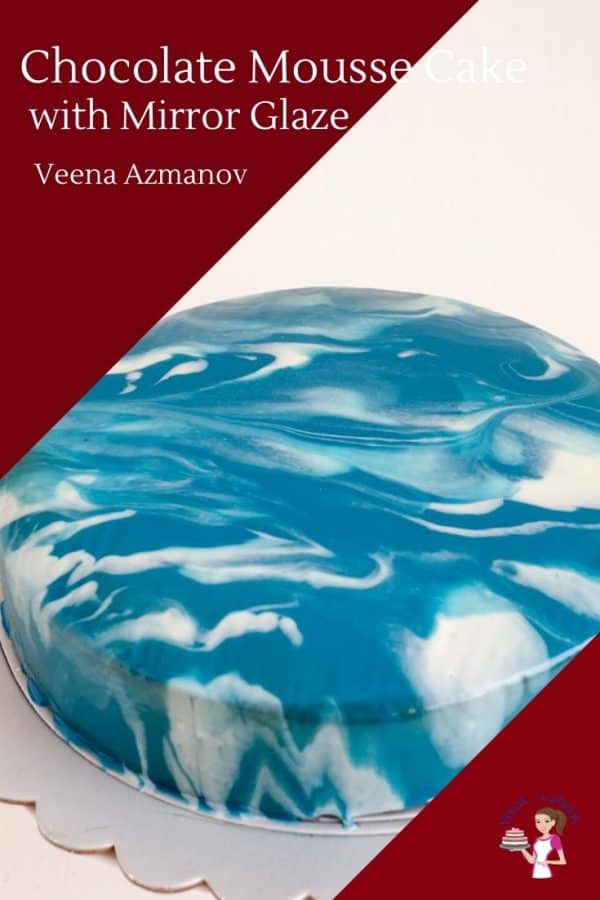
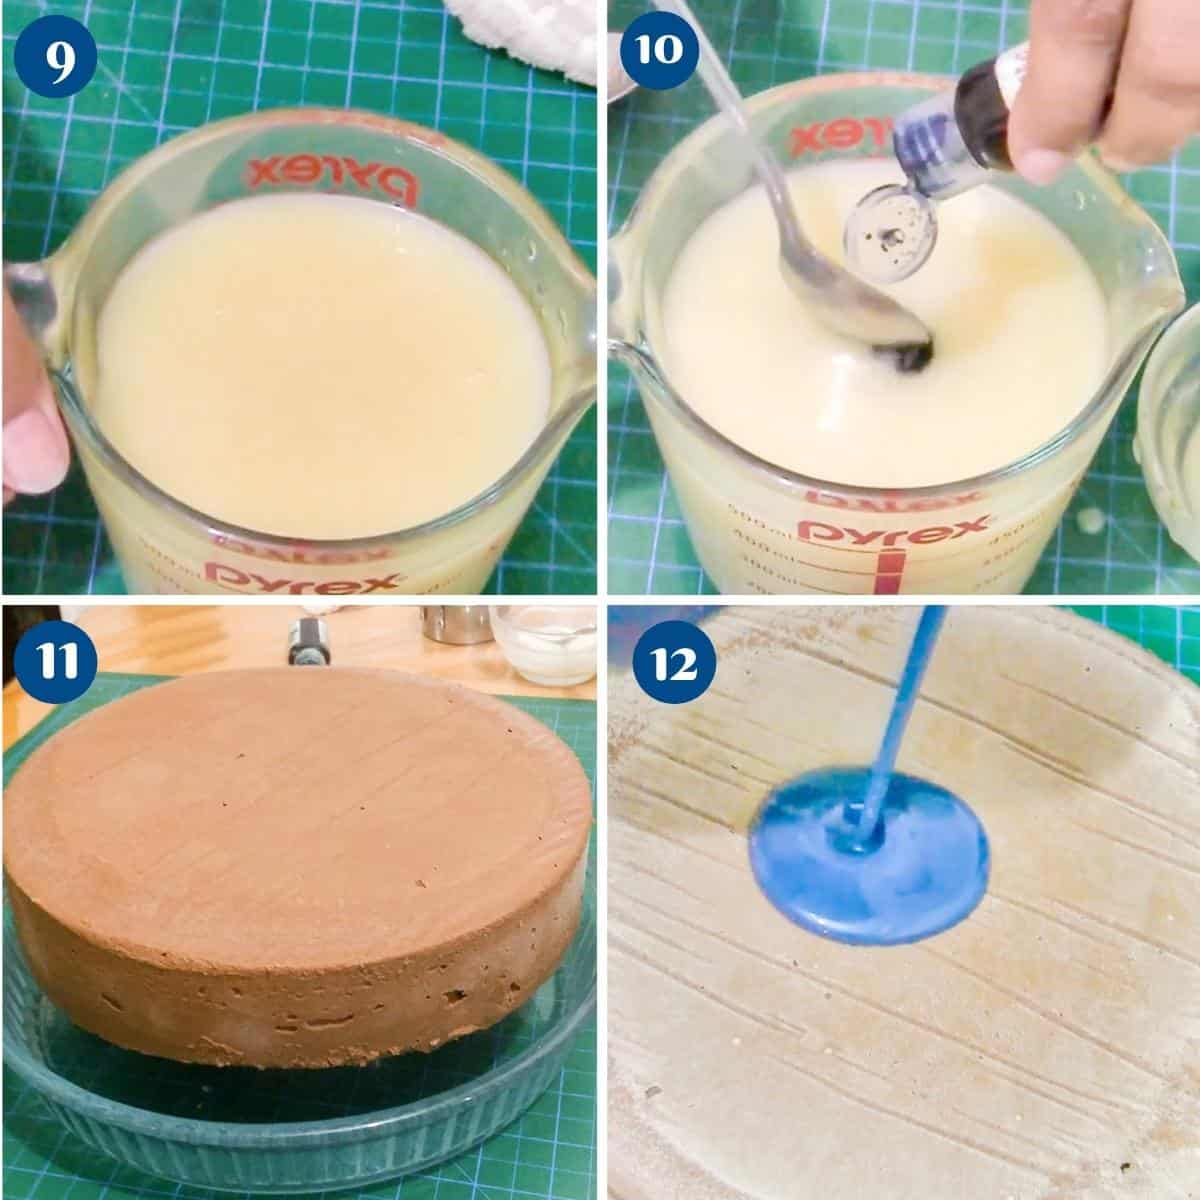
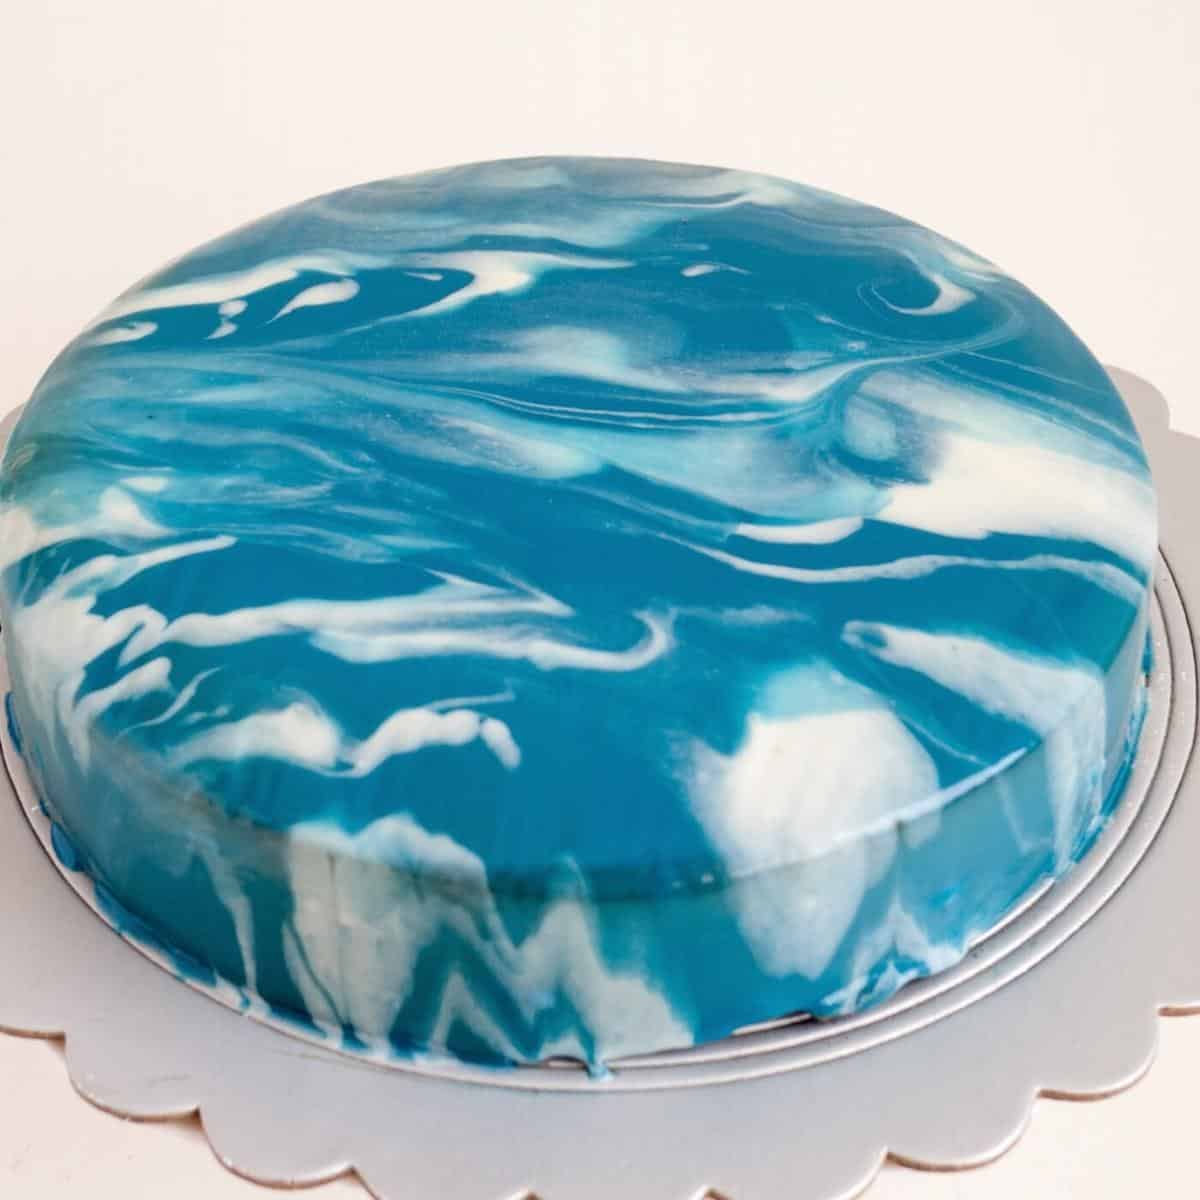
Strain the mixture through a sieve or mesh.Pro tip – we strain to remove any undissolved gelatin or unmelted chocolate. Divide the glaze into the number of colors you need for your project. Color the glaze with food gel colors. I made 1/4 cup water using titanium white gel food color and the rest I dyed into ice blue. Let the glaze come to almost room temperature between 90°to 95°FPro tip– You don’t want the glaze too hot as it can melt the dessert, but also, not too thick. It should be a pouring consistency otherwise it will not flow down the dessert.
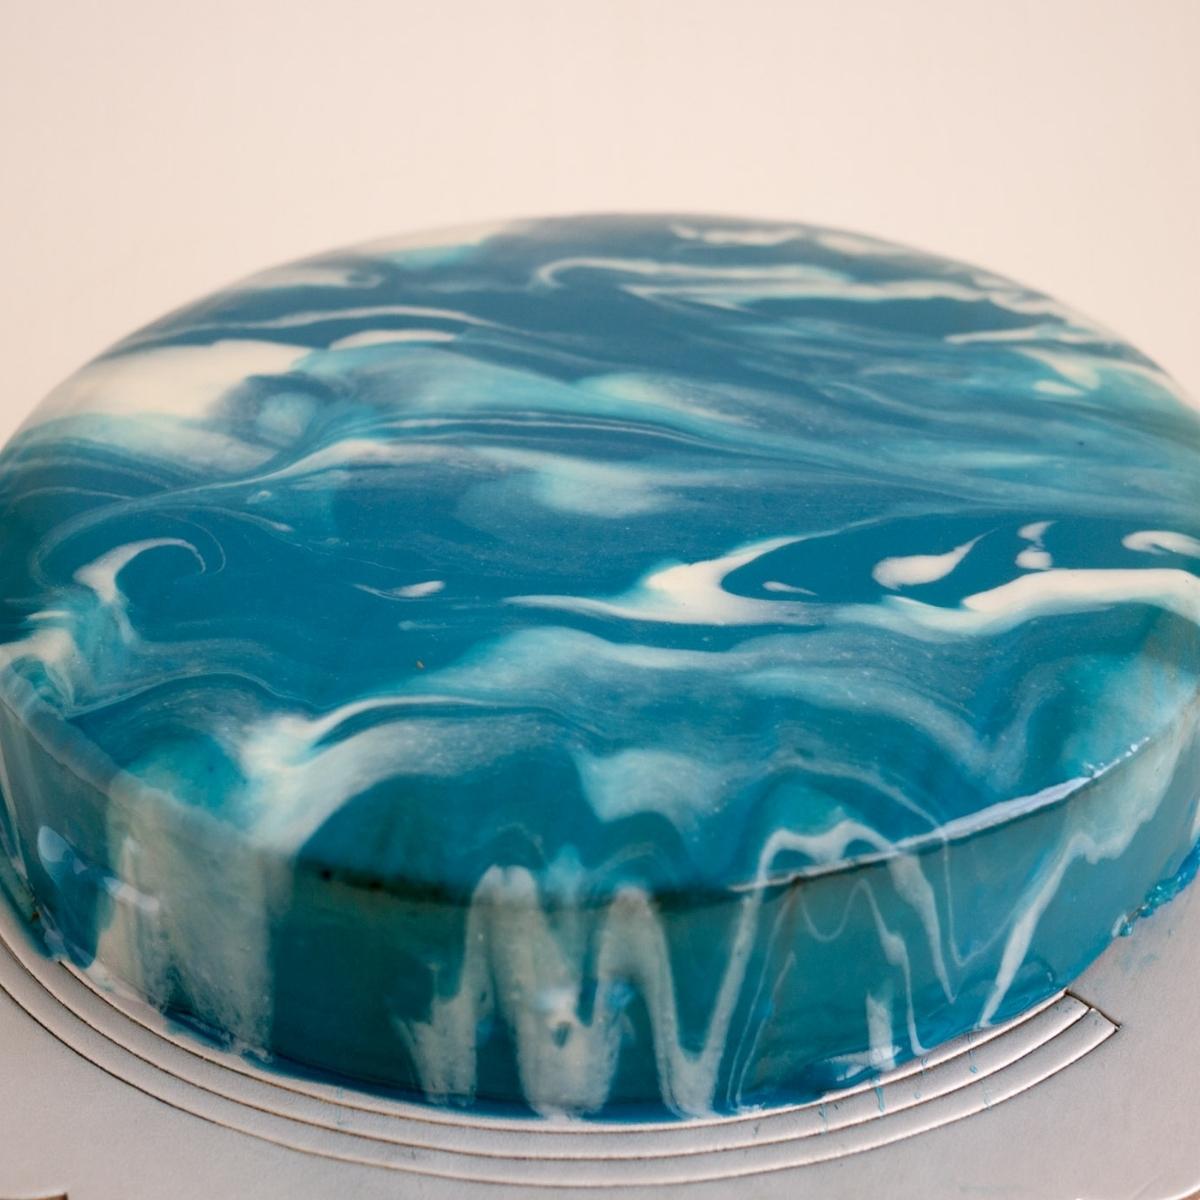
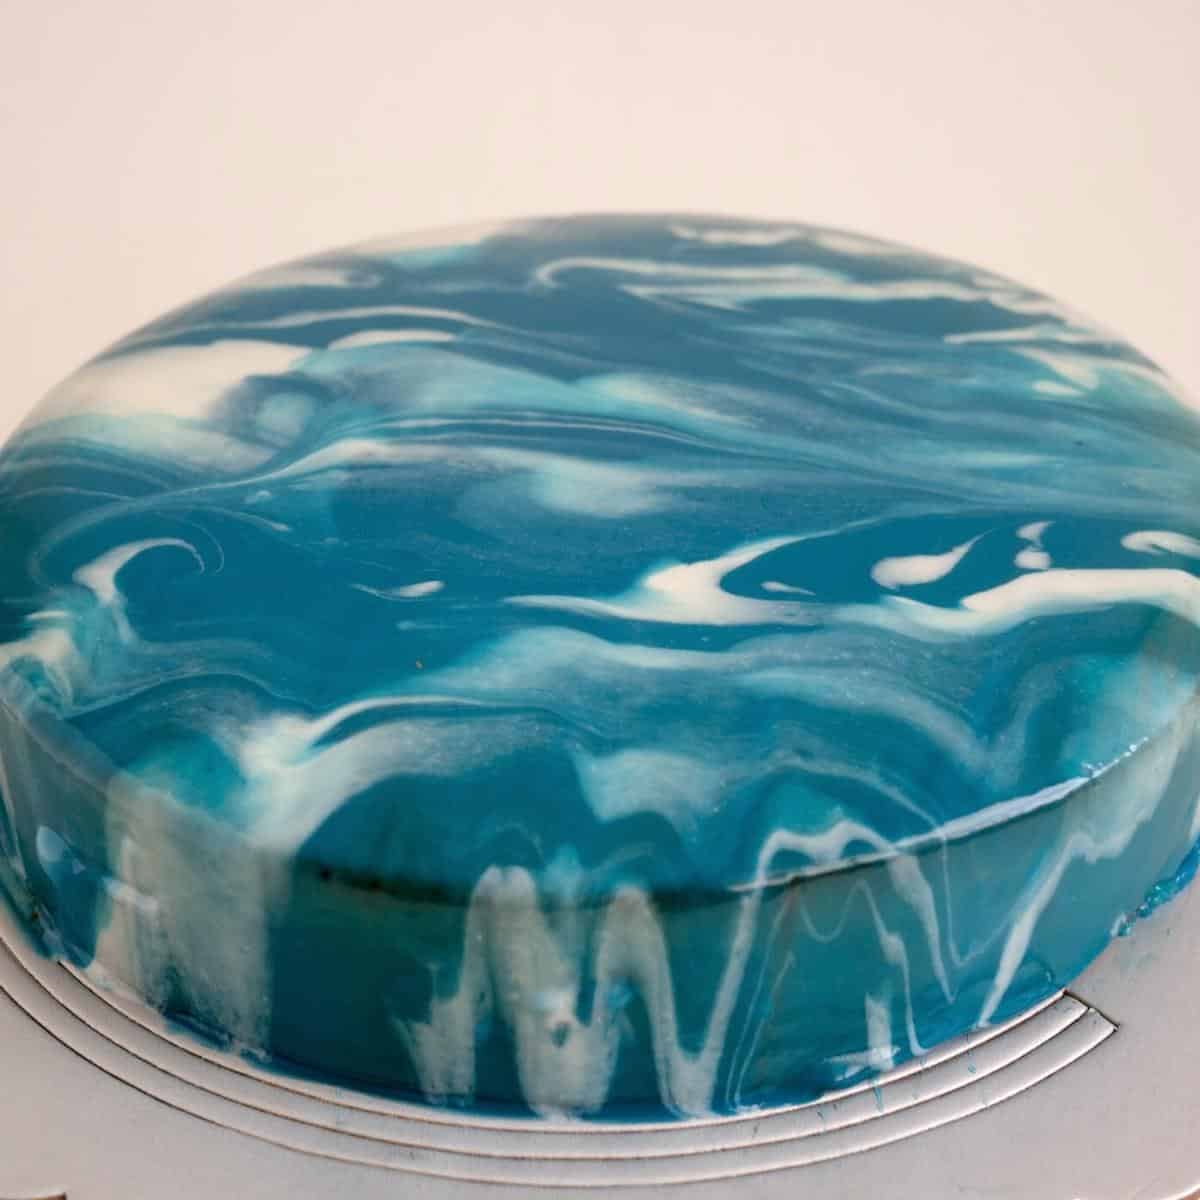
Pouring the glaze – place the frozen cake on a cooling rack over a large plate or baking sheet so the excess will drip down on the cake. Pour the glaze in a circular motion starting with one or two colors based on the desired effect. Use an off-set spatula to blend the colors.Pro tip – If you have air bubbles in the mirror glaze, hold the glaze a bit higher so the bubbles disperse before they flow down to the cake. Thawing – The cake needs to thaw in the fridge for at least 4 to 6 hours so it’s not hard when you serve.
Tips for Success
The chocolate you use will determine how delicious this cake turns out. Get a chocolate bar from the supermarket but pick one you would enjoy eating. NO cooking chocolate, and not compound chocolate. Plan this dessert in advance so you have enough to do the necessary steps The chocolate torte does not need to be frozen hard but since it delicate chilling it for at least 3 hours will make it easier to handle. The mousse must be prepared only after the torte is chilled because once prepared it does start to set. Also, the mousse cake must be frozen otherwise it will be difficult to mold out of the cake. Make sure the cake is frozen for a few hours so the glaze solidifies as soon as it hits the cold cake. The temperature of the glaze is important. You need the glaze to be pouring consistency at a temperature between 90 to 95 F. Glazes made with perishable ingredients like this one with condensed milk should always be refrigerated. Plan the colors you are going to use in advance and take note that both white chocolate, gelatine, and condensed milk are not white. So you are starting off with an off-white base. Some colors don’t do well with this base. You may need more. Mirror glaze is not white so if you need white you will need to use white gel food color also called titanium oxide. Once glazed the cake must be left in the fridge to thaw so the moose is not too cold to cut. Other pans for this cake. You can also use a silicone mold to set the mousse as I did in my chocolate mousse heart cake
Creative variations
Fruit Infusion: Add a layer of fruit compote or fresh fruit slices between the chocolate mousse layers for a refreshing and fruity twist. Nutty Crunch: Incorporate chopped nuts, such as hazelnuts or almonds, into the chocolate mousse for added texture and flavor. Liqueur Infusion: Add a splash of your favorite liqueur, such as Grand Marnier or Kahlua, to the chocolate mousse for a sophisticated flavor boost. Flavored Mirror Glaze: Experiment with different flavors for the mirror glaze, such as raspberry, orange, or coffee, to complement the chocolate mousse. Layered Colors: Create a multi-colored effect by dividing the mirror glaze into separate batches and adding different food coloring to each batch before pouring over the cake. Textured Finish: Instead of a smooth mirror glaze, try creating a textured finish using a comb or spatula for a more artistic and unique look. Frozen Variation: Turn the cake into a frozen dessert by freezing each layer before assembling, creating a refreshing and creamy treat.
Classic chocolate mousse, Eggless, or Vegan chocolate mousse Blackberry mousse (eggless) Chestnut mousse (eggless) Classic Mango Mouse – vegetarian mango mousse Vegan mango coconut cream mousse (vegan, vegetarian) Classic strawberry mousse See all mousse recipes
Frequently asked questions
Thank you for sharing - Save for later