Gluten-free cakes are cakes made without gluten, a protein found in wheat, barley, and rye. People with celiac disease or gluten sensitivity must avoid gluten to prevent adverse health effects. Gluten-free cakes use alternative flours, such as rice flour, almond flour, or coconut flour, to achieve a similar texture and taste to traditional cakes. These cakes are made for individuals who follow a gluten-free diet due to medical reasons or personal choice. They are suitable for people with celiac disease, gluten intolerance, or wheat allergies. Additionally, some people choose to consume gluten-free products as part of a healthy lifestyle or to support digestive health. A gluten-free chocolate cake is a chocolate cake made without any gluten-containing ingredients. Instead of using wheat flour, which contains gluten, these cakes are typically made with gluten-free flour blends, such as those made from rice flour, almond flour, or a combination of gluten-free flours. Other ingredients, such as cocoa powder, sugar, eggs, oil, and leavening agents, are used to create a moist and flavorful cake that is safe for those with celiac disease or gluten intolerance to enjoy.
Why is this the best chocolate cake
Moist and Fluffy Texture: Despite being gluten-free, this cake has a moist and fluffy texture that rivals traditional cakes. Rich Chocolate Flavor: The combination of cocoa powder, coffee, and hot water creates a rich and intense chocolate flavor that chocolate lovers will appreciate. Easy to Make: This recipe uses simple ingredients and is straightforward to make, making it accessible to both novice and experienced bakers. Versatile: The cake can be enjoyed on its own or paired with various frostings, fillings, and toppings to suit different preferences. Bakery-Style Frosting: The chocolate frosting is reminiscent of the frosting used in bakeries, adding a professional touch to the cake. Gluten-Free and Delicious: Even those who are not gluten-free will enjoy this cake, as it’s so delicious that you won’t miss the gluten.
Ingredients & substitutes
Step-by-step: Gluten-Free Chocolate Cake
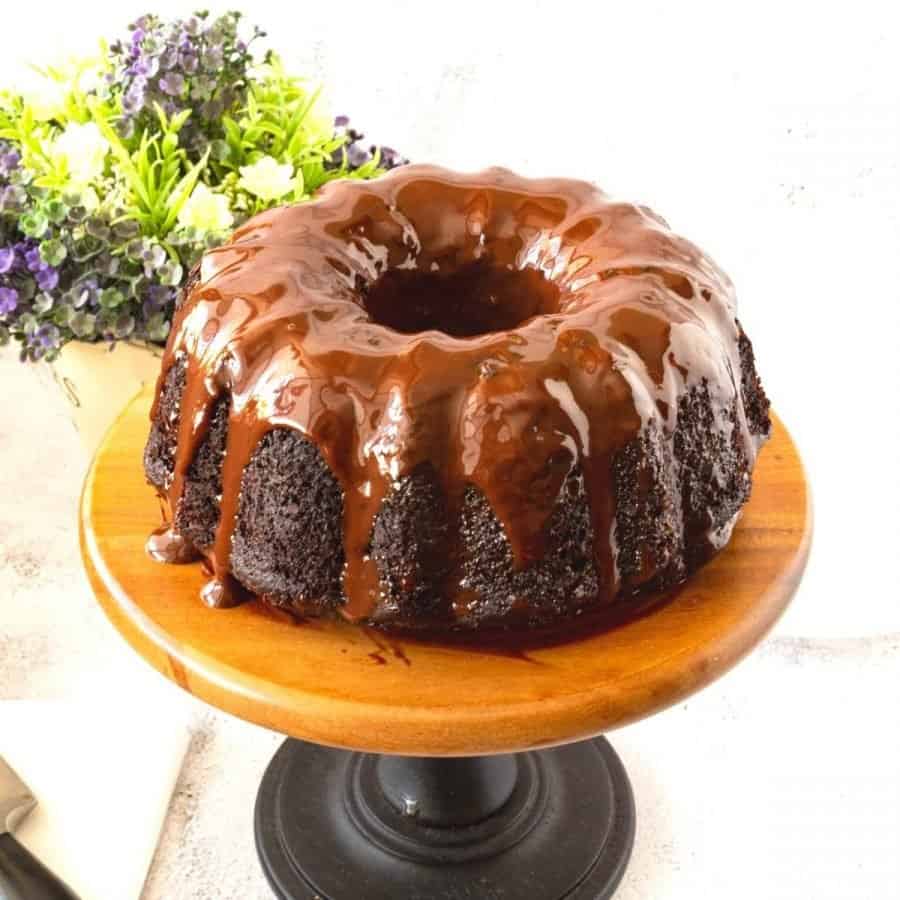
Gluten-free chocolate cake
Prep – Preheat your oven to 350°F /175°C/ Gas Mark 4 and grease two 8-inch round cake pans. Coffee mixture – Gradually combine the coffee, cocoa powder and hot water – set aside to cool until barely warm. Dry ingredients – Whisk together the gluten-free flour, xanthan gum (if using), cocoa powder, baking soda, baking powder, and salt in a large bowl. Wet ingredients – Whip the eggs with both white and brown sugar. Gradually add the vegetable oil and vanilla extract. Then, add in the coffee mixture. Wet to dry – Sift the dry ingredients into the wet ingredients until well combined without any lumps. Bake – Divide the batter evenly between the prepared cake pans. Bake in the preheated oven for 30-35 minutes or until a toothpick inserted into the center of the cakes comes out clean. Cool – Allow the cakes to cool in the pans for 10 minutes, then transfer them to a wire rack to cool completely.
Bakery style frosting
In a large bowl, beat the softened butter until creamy. Gradually add the powdered sugar, cocoa powder, and salt, beating until smooth and fluffy. Add the vanilla extract and heavy cream or milk. Beat on high speed for 3-4 minutes, adding more cream or milk as needed for desired consistency.
Assemble
Level – Place one cake layer on a serving plate or cake stand and level the top if necessary. You can moisten the cake layers with sugar syrup or coffee. Frost – Spread a layer of frosting over the top. Place the second cake layer on top and frost the top and sides of the cake with the remaining frosting. Decorated – Put the remaining frosting in a piping bag with a star piping tip. I choose to put chocolate-coated nuts on each swirl.
Tips for Success
Use a Good Quality Gluten-Free Flour Blend: Not all gluten-free flour blends are created equal. Look for one that is specifically formulated for baking cakes for the best results. Ensure Your Ingredients are at Room Temperature: This helps them mix together smoothly and evenly. Sift Your Dry Ingredients: Sifting helps to aerate the flour and cocoa powder, resulting in a lighter texture. Mix Thoroughly: Gluten-free batters can be a bit more delicate, so make sure to mix until everything is well combined, but avoid overmixing. Use Fresh Leavening Agents: Baking soda and baking powder can lose their potency over time, so make sure yours are fresh for the best rise. Don’t Overbake: Gluten-free cakes can dry out quickly if overbaked. Keep an eye on them and remove from the oven as soon as a toothpick inserted into the center comes out clean. Let the Cakes Cool Completely Before Frosting: This will ensure that the frosting doesn’t melt or slide off the cake. Chill Your Cake Layers Before Frosting: Chilling the cakes for about 30 minutes in the refrigerator can make them easier to handle and frost. Use a Pastry Bag for Frosting: For a bakery-style finish, use a pastry bag fitted with a large round tip to apply the frosting in swirls or other decorative patterns. Store the Cake Properly: Store any leftovers in an airtight container at room temperature for up to a few days, or in the refrigerator for longer storage.
Troubleshooting
Creative variations
Creative ways to serve chocolate cakes
Warm with Ice Cream: Serve slices of the cake warm with a scoop of vanilla or chocolate ice cream for a delicious contrast of temperatures and flavors. Layered with Mousse: Create a layered dessert by alternating slices of cake with layers of chocolate mousse or whipped cream. Stuffed with Cream: Cut the cake into layers and fill it with a layer of sweetened whipped cream or chocolate ganache before stacking it back together. Trifle: Cube the cake and layer it in a trifle dish with layers of whipped cream, berries, and chocolate sauce for a beautiful and decadent dessert. Cake Pops: Crumble the cake, mix it with frosting, and form into balls. Dip the balls in melted chocolate and decorate with sprinkles or nuts for gluten-free cake pops. Mini Cakes: Cut the cake into mini rounds using a round cookie cutter. Stack the rounds with layers of frosting in between for individual mini cakes. Ice Cream Sandwiches: Cut the cake into squares and use them as the “bread” for ice cream sandwiches, filling with your favorite ice cream flavor. Mug Cakes: Make individual mug cakes by mixing a small amount of cake batter with some milk or water in a mug and microwaving for a quick and easy treat.
Chocolate Mousse Cake with Mirror Glaze Flourless Chocolate Cake Recipe Heart Chocolate Terrine Chocolate Mousse Cake with Mirror Glaze Heart Chocolate Mousse Recipe
Frequently asked questions
Did you LIKE this recipe? Save it for later. You can find my recipes on Pinterest. Follow me on Facebook, Twitter, and Instagram.Subscribe, and I’ll send you new recipes right to your inbox. Thank you for sharing - Save for later