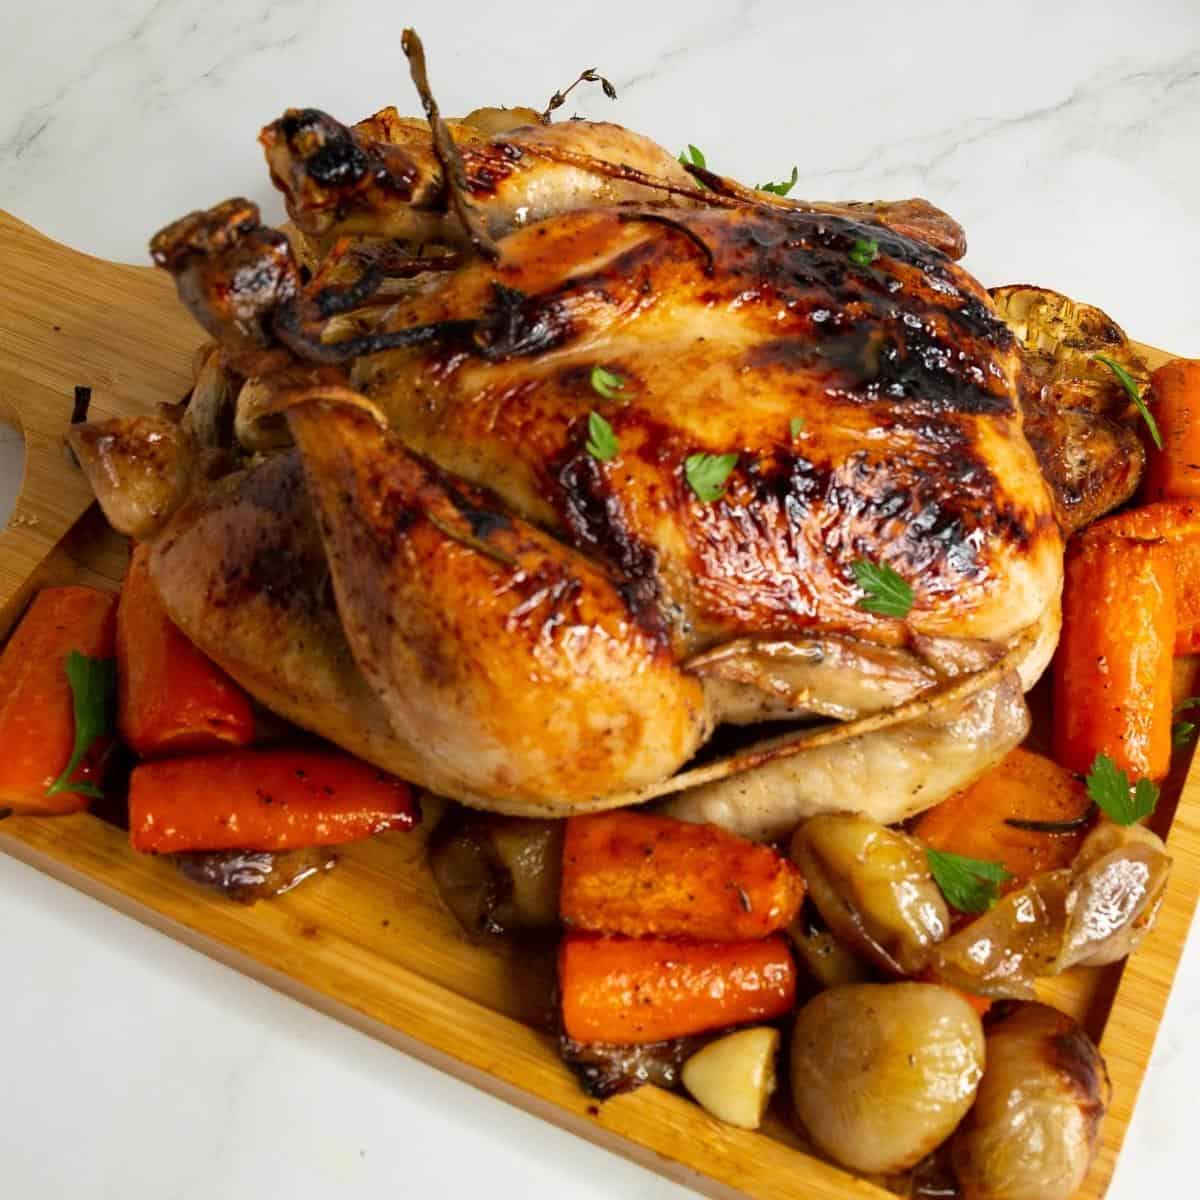
Roast chicken is a timeless classic, loved for its simplicity, versatility, and the comfort it brings to the table. It’s a dish that effortlessly turns any meal into a celebration, making it perfect for special occasions. The aroma of a roasting chicken fills the home with a sense of warmth and anticipation, setting the stage for memorable gatherings with family and friends. Its juicy, tender meat and crispy, golden skin appeal to both the eyes and the palate, creating a dish that’s both elegant and satisfying. Whether served with traditional sides or creative accompaniments, roast chicken is a reliable favorite that never fails to impress, making every occasion feel festive and special. Roasting chicken in a Dutch oven takes this beloved dish to a new level of flavor and tenderness. The heavy lid and cast iron material of the Dutch oven trap moisture, creating a steamy environment that keeps the chicken moist and succulent. This method allows the chicken to cook evenly, while the surrounding vegetables soak up the flavorful juices, becoming deliciously tender. The Dutch oven also allows for the addition of aromatics like garlic, onions, and lemons, which infuse the chicken with rich, aromatic flavors. Removing the lid towards the end of cooking helps achieve a beautifully crisp, golden-brown skin, making the dish both visually appealing and irresistibly tasty. Roasting chicken in a Dutch oven combines the best of both worlds—moist, tender meat and crispy, flavorful skin—making it an ideal choice for any special occasion.
Step-by-step: Dutch oven roast chicken
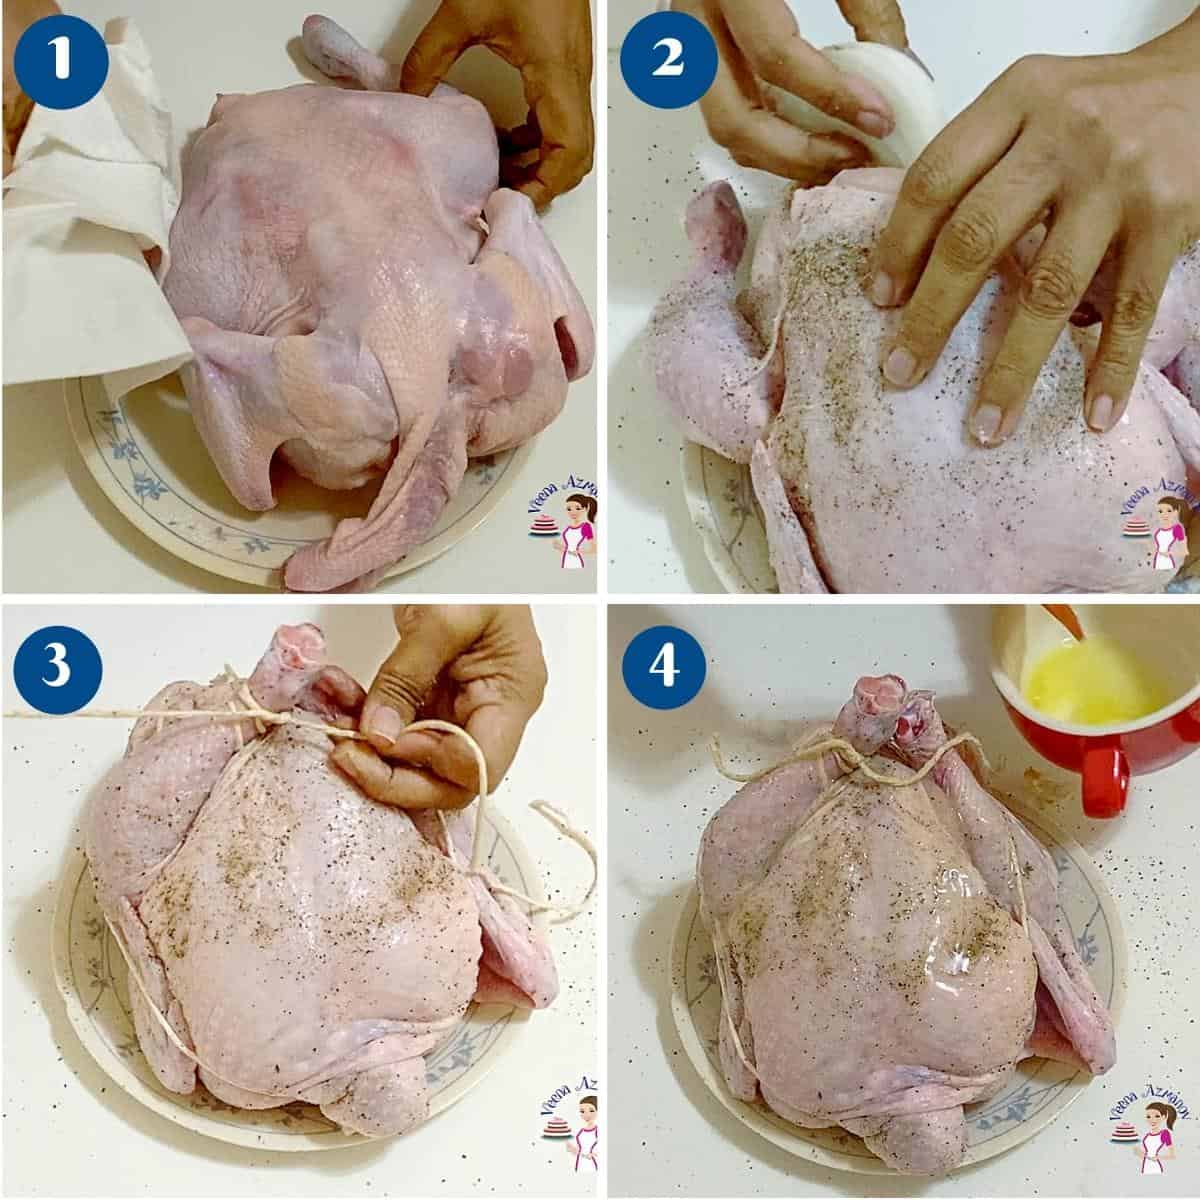
Preheat the Oven: Preheat your oven to 375°F (190°C) Gas mark 5 Prepare the Chicken: Rinse the chicken under cold water and pat it dry with paper towels. Make sure the chicken is completely dry for the best results. Season the chicken generously with salt, black pepper, and thyme inside and out. Brush the entire chicken with melted butter, ensuring it is well-coated.
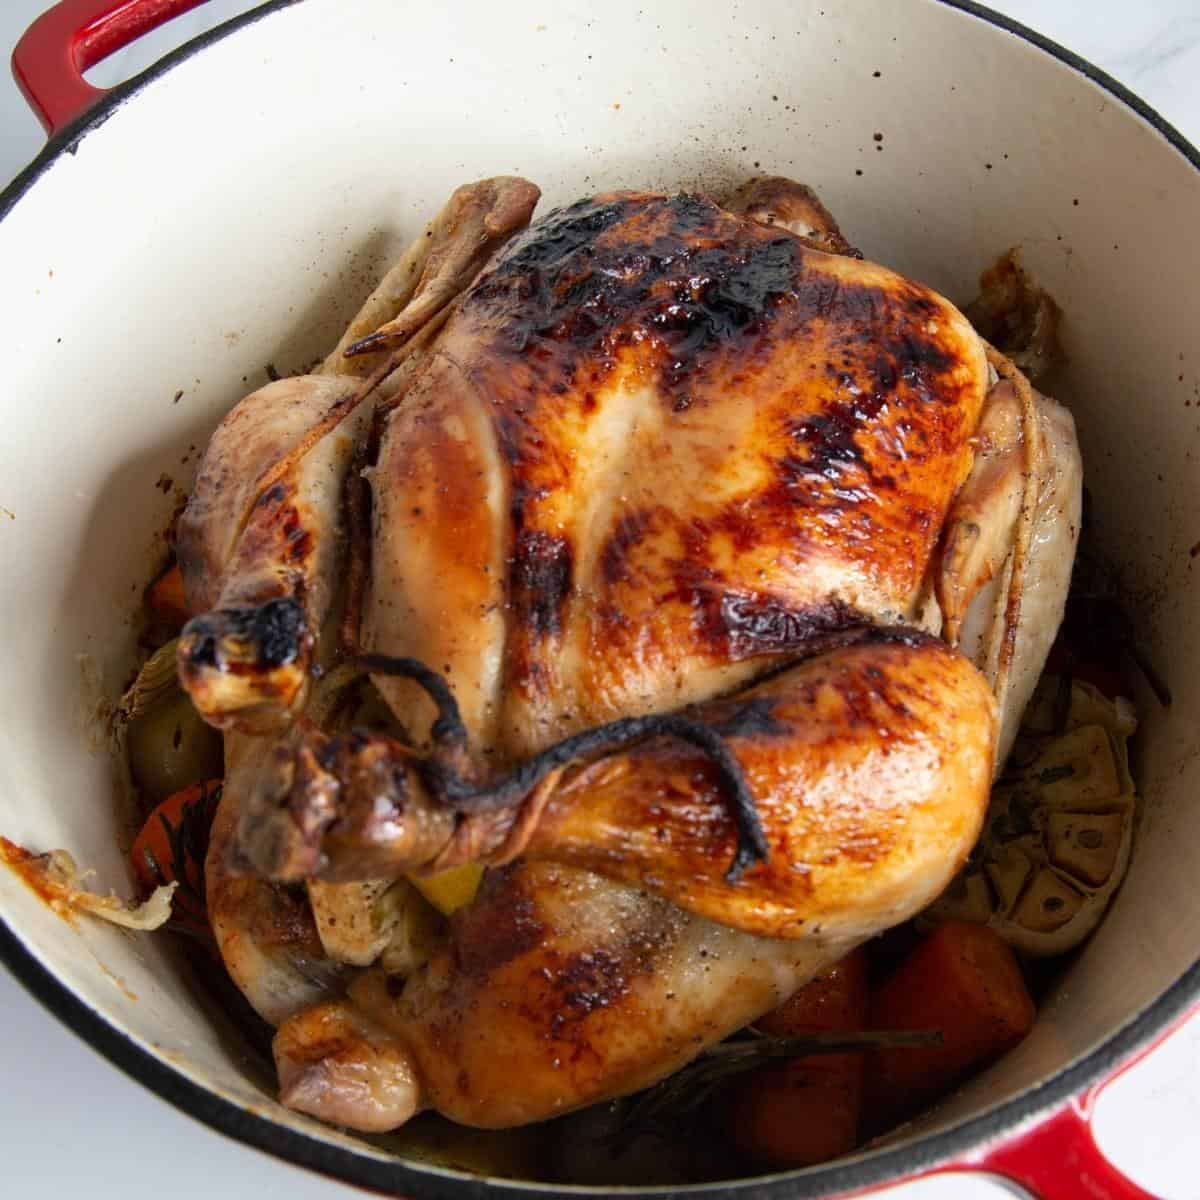
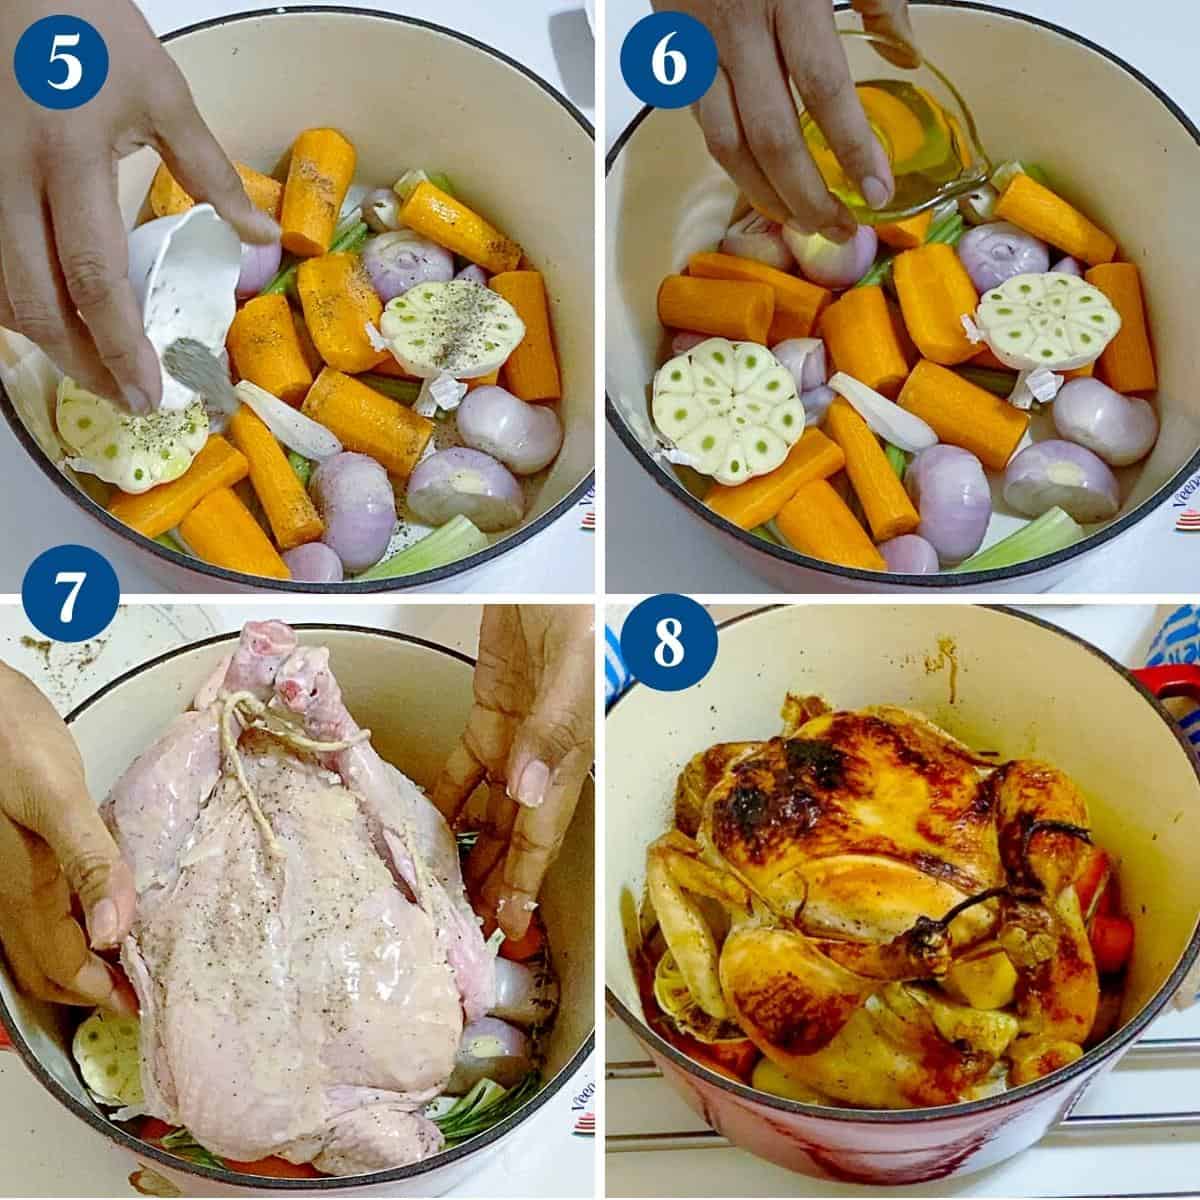
Stuff the Cavity:Stuff the cavity of the chicken with the quartered onion, halved garlic bulb, and lemon halves. This aromatic stuffing will infuse the chicken with flavor as it cooks. Prepare the Vegetables: In a Dutch oven, arrange the carrots, shallots, and celery stalks at the bottom. This will serve as a bed for the chicken and add flavor to the drippings. Roast the Chicken: Place the prepared chicken on top of the vegetables in the Dutch oven. Cover the Dutch oven with its lid and place it in the preheated oven. Roast for about 1.5 to 2 hours, or until the internal temperature of the chicken reaches 165°F (74°C) in the thickest part of the thigh. Baste the Chicken: About halfway through the cooking time, remove the lid and brush the chicken with more melted butter. This step helps keep the chicken moist and enhances the flavor.
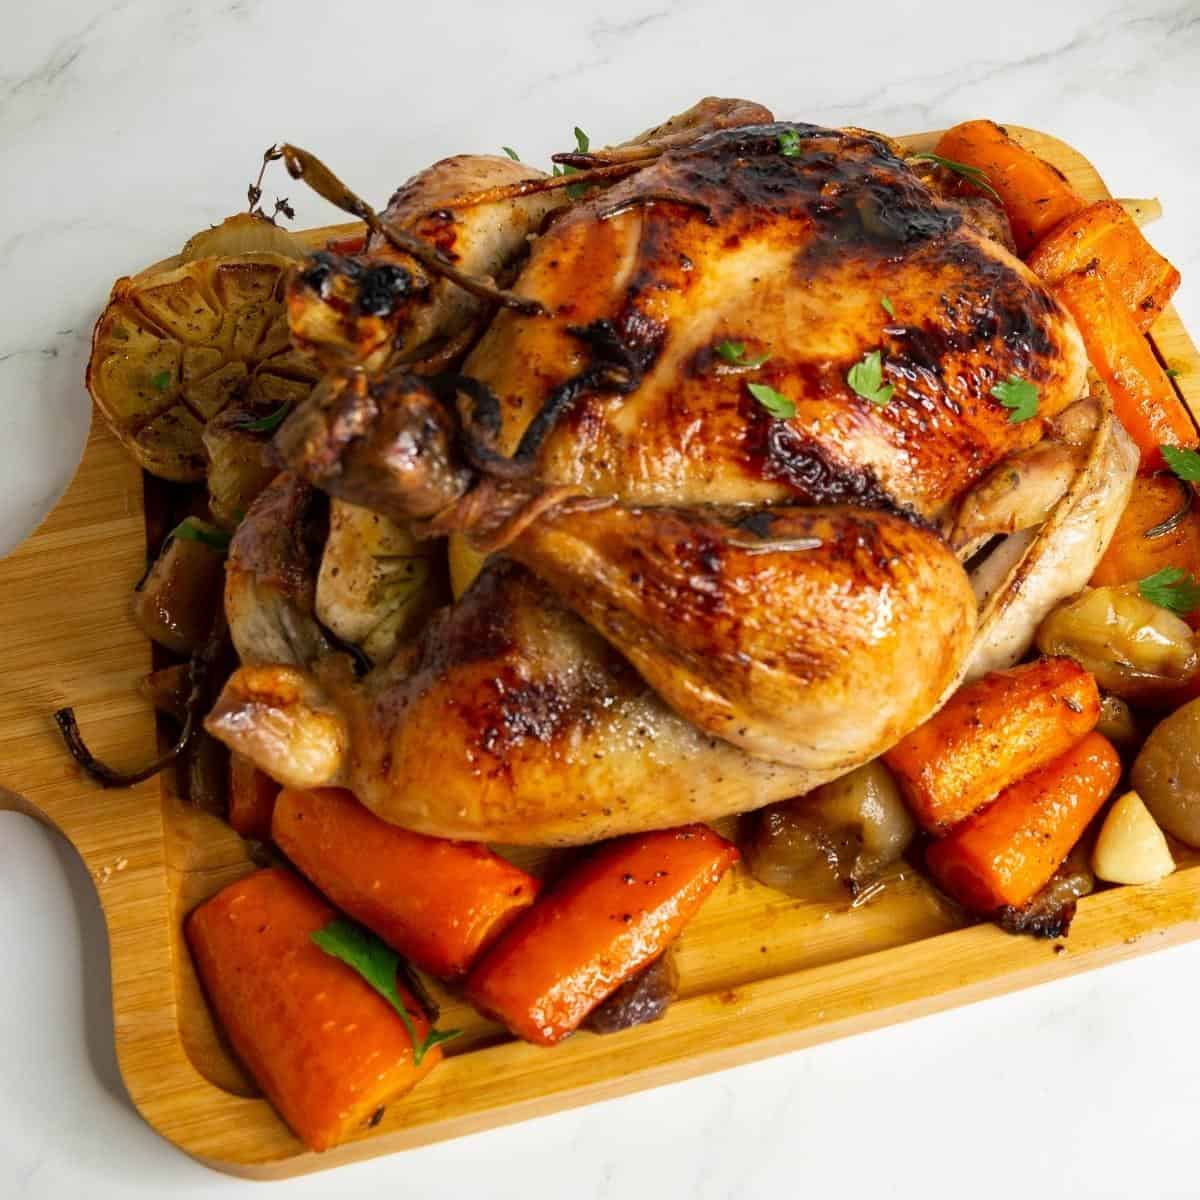
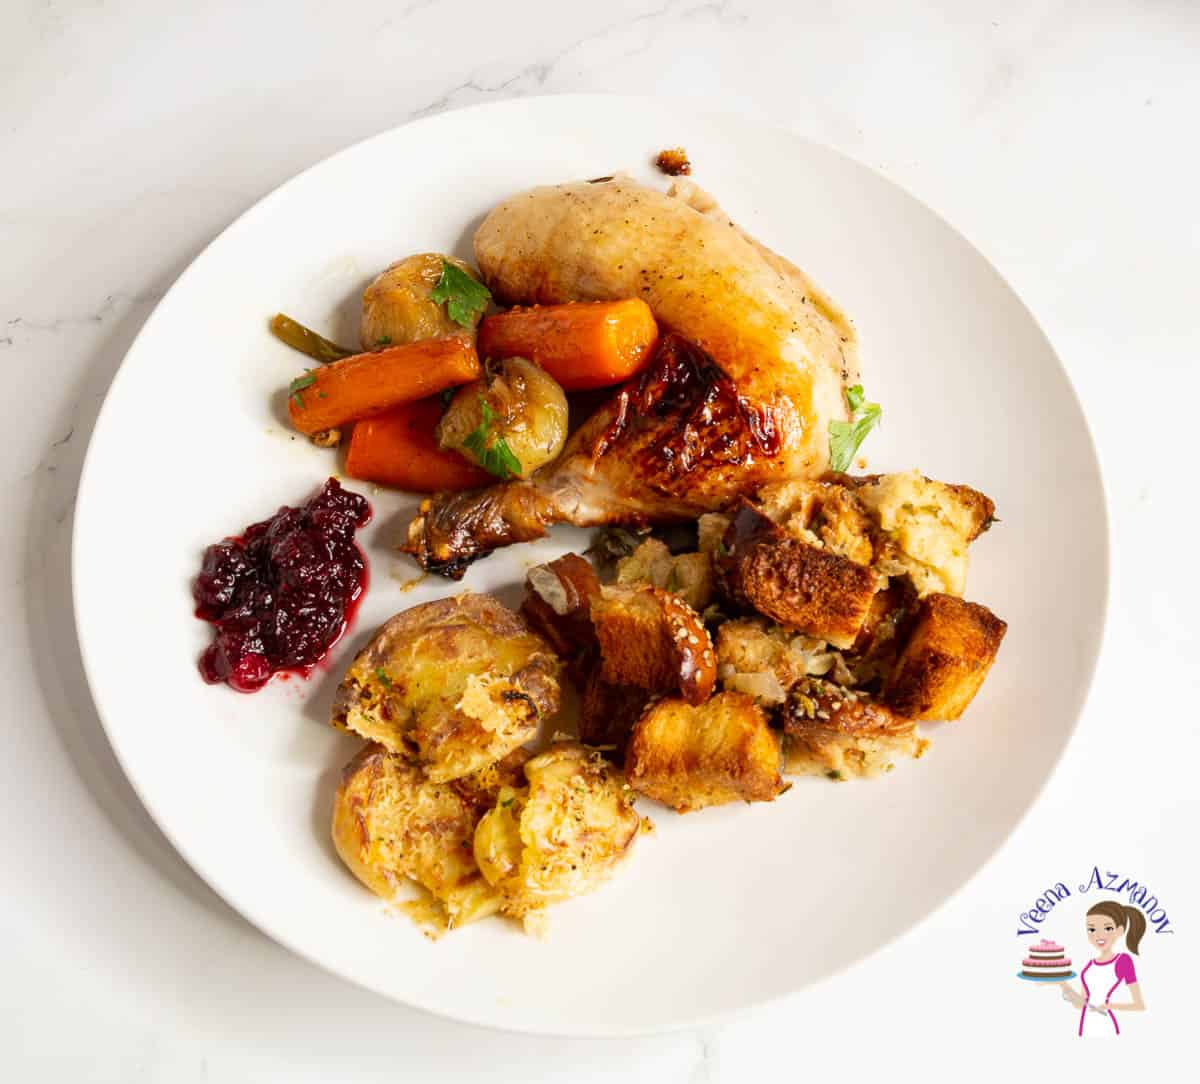
Finish Roasting: Remove the lid for the last 30 minutes of cooking to allow the skin to become golden brown and crispy. Continue basting if desired. Rest the Chicken: Once cooked, remove it from the oven and let it rest in the Dutch oven for 10-15 minutes before carving. This redistributes the juices, ensuring the meat remains tender and juicy. Serve: Carve the chicken and serve it with the roasted vegetables from the Dutch oven. Drizzle with the pan juices for extra flavor.
Tips for Success
Start with a Dry Chicken: Pat the chicken dry with paper towels before seasoning and brushing with butter. A dry chicken helps the skin become crispy during roasting, enhancing both texture and flavor. Generously Season the Chicken: Ensure the chicken is well-seasoned both inside and out with salt, pepper, and herbs. Generous seasoning enhances the chicken’s natural flavors and ensures a well-flavored dish. Properly Stuff the Cavity: Loosely stuff the chicken cavity with the quartered onion, halved garlic bulb, and lemon halves. This allows the aromatic flavors to infuse the chicken without preventing even cooking. Overstuffing can impede airflow and affect cooking time. Arrange Vegetables in a Single Layer: Place the carrots, shallots, and celery stalks in a single layer at the bottom of the Dutch oven. This allows the vegetables to roast evenly and absorb the chicken’s juices, becoming tender and flavorful. Baste the Chicken: Brush the chicken with melted butter at least once more during cooking. Basting helps keep the chicken moist, enhances the flavor, and promotes a golden, crispy skin. Monitor Internal Temperature: Use a meat thermometer to check the chicken’s internal temperature. Insert it into the thickest part of the thigh, avoiding the bone. The chicken is done when it reaches 165°F (74°C). This ensures the chicken is fully cooked and safe to eat. Roast with the Lid On and Off: Roast the chicken with the Dutch oven lid on for most of the cooking time to retain moisture. Remove the lid for the last 30 minutes to allow the skin to crisp up and develop a beautiful color. Let the Chicken Rest: Allow the chicken to rest for 10-15 minutes after roasting. Resting helps the juices redistribute throughout the meat, making it more tender and juicy when carved. Use the Pan Juices: After roasting, use the flavorful pan juices to make a gravy or drizzle them over the carved chicken and vegetables. These juices are infused with the rich flavors of the butter, garlic, lemon, and herbs, enhancing the dish. Serve Immediately:Serve the roast chicken while it’s still hot, accompanied by the roasted vegetables. Freshly roasted chicken has the best flavor and texture, making it a satisfying and comforting meal.
Frequently asked questions
Roasted Red Pepper Garlic Tapenade (3 ingredients) Goats Cheese Crostini or no-knead bread with roasted garlic Garlic Parmesan Asparagus or sesame green beans Easy Swiss Chard or spinach potato patties or Leek Potato Patties Roasted Lemon Dill Potatoes – or garlic roasted potatoes
Did you LIKE this recipe? Save it for later. You can find my recipes on Pinterest. Follow me on Facebook, Twitter, and Instagram.Subscribe, and I’ll send you new recipes right to your inbox. Thank you for sharing - Save for later