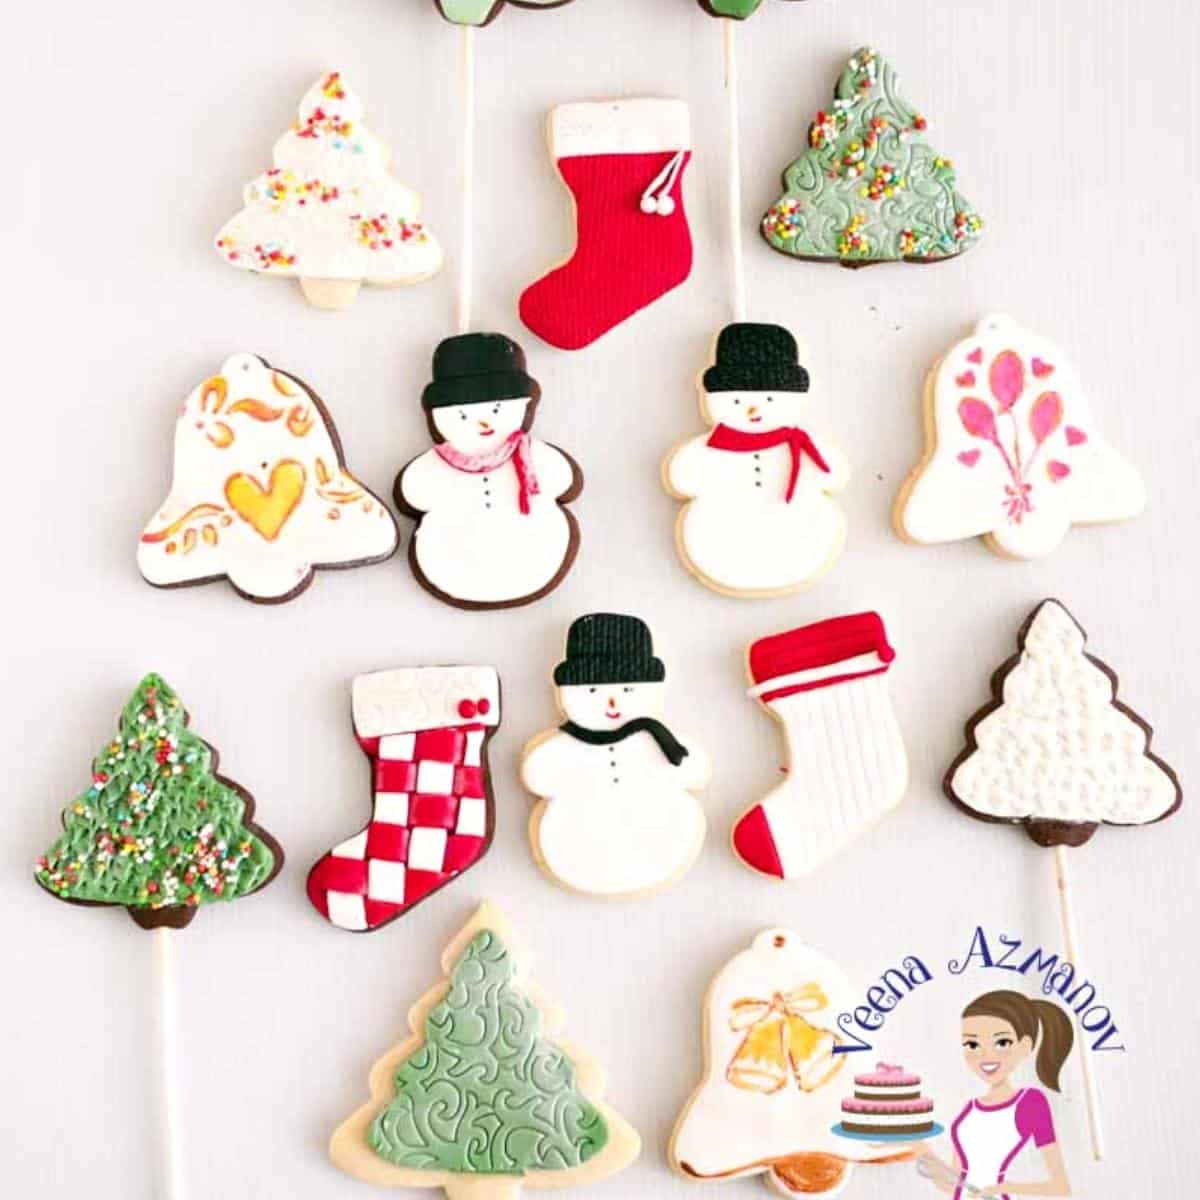
Christmas is a special time of the year. Everybody loves decorated Christmas cookies, no matter what age you are. Nestled inside snowy branches and quilted with snowflakes, fondant-decorated cookies are a wonderful addition to your holiday spread. The moment I start listening to Christmas music I start thinking of Christmas goodies. Of course, kids also get excited! So, I wanted to make a tutorial for you and I thought how about some Christmas cookie decorating, with fondant. Below, you can see the various cookies that I made. In fact, I tried to keep it simple and easy. And, I hope you enjoy this tutorial. Also, I put some on a cookie pop stick. Kids love those. And, they are easy to make and perfect to distribute to kids at the party.
Videos
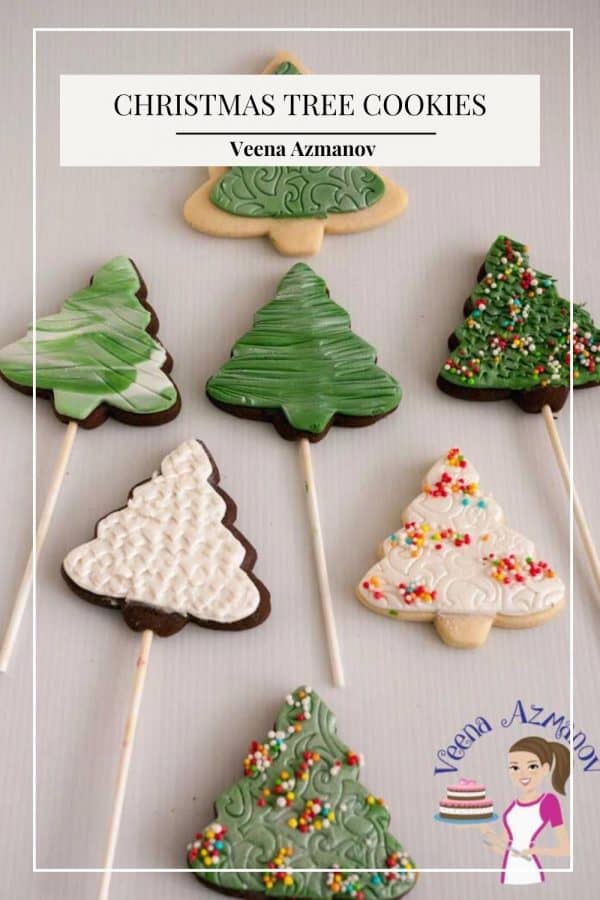
So here are my Christmas trees
I have shown you three different cookies here. The simple embossed mat, the marbled and the textured, as well as the 3D ones in white and green. And, you can see that they are simple and really easy to make. In fact, you don’t have to be a professional cake decorator to make simple cookies like this.
These are my Christmas bells
I have stenciled these – and I show you how I stencil each one and add more details. For example, two-tone shading, as well as bronze detail, defining.
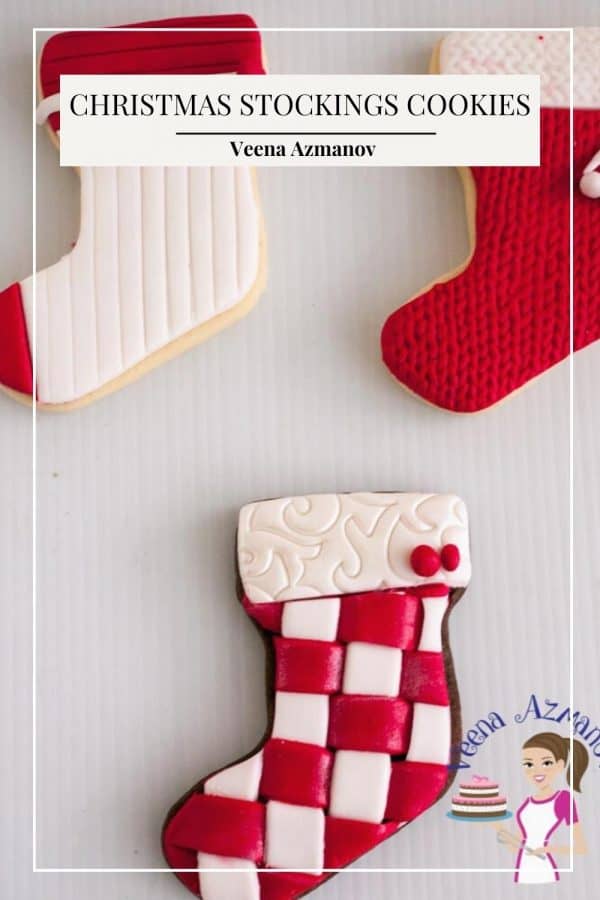
The Christmas stockings sugar cookies
For these, I have used the kit wear or sweater embossed mat, an embossed mat, and a fondant embossed mat. They do look impressive and may be difficult to make but honestly? Actually, the embossing does most of the work for you. And, if you see the video you will see they are SO SIMPLE and easy.
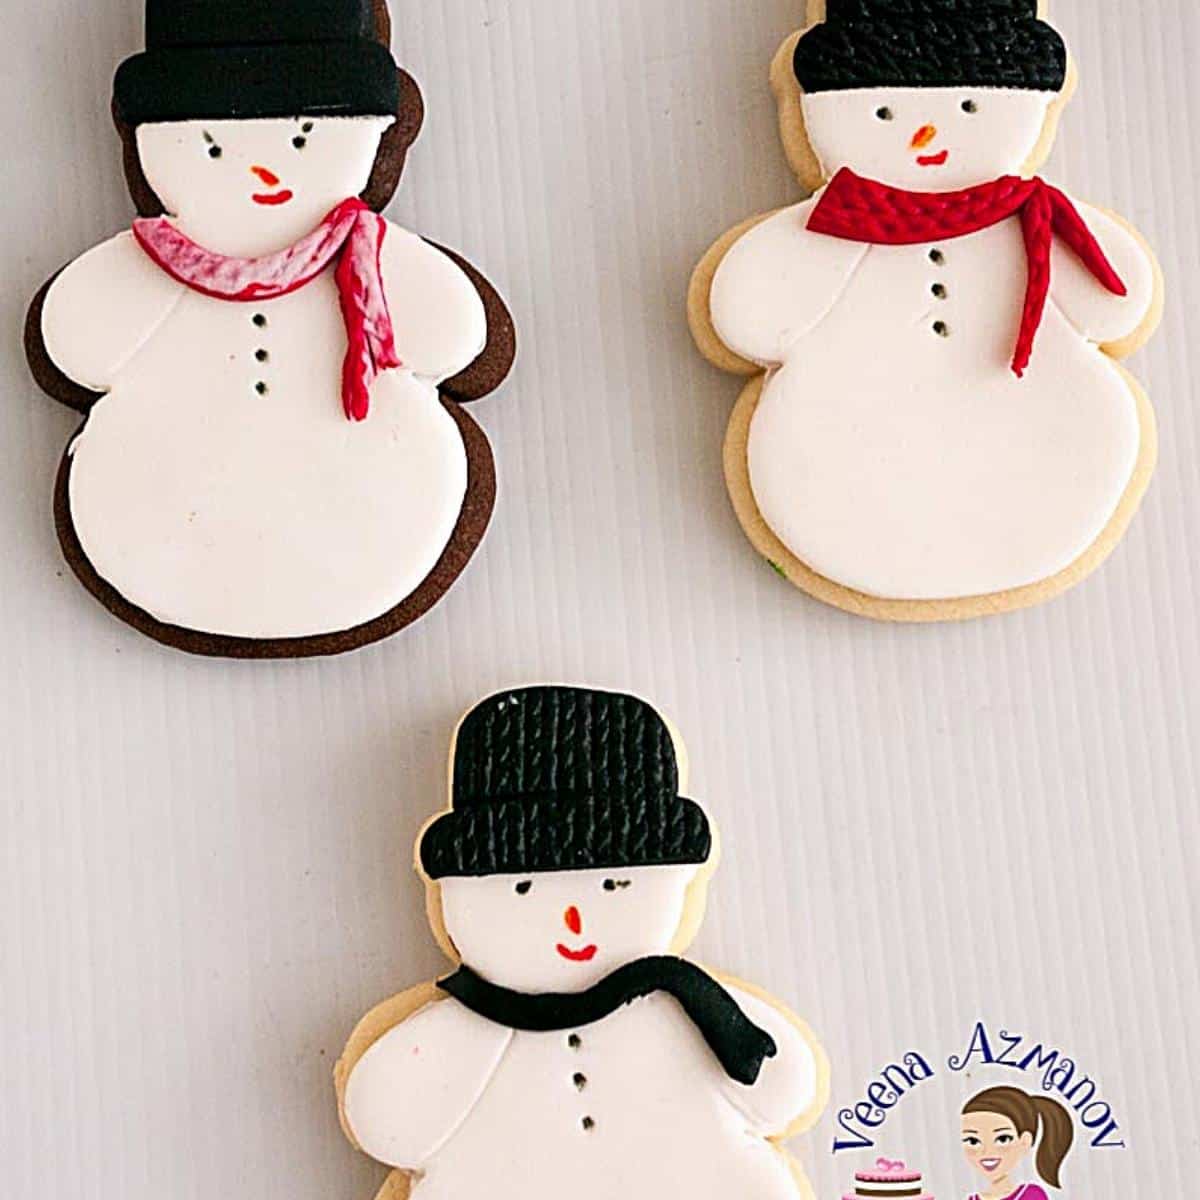
And finally, my Aadi’s favorite – The snowman sugar cookies
Again, I used the sweater silicon mold for the hat but kept them simple. And, these are probably the easiest cookies in the whole batch.
Cookie dough recipe
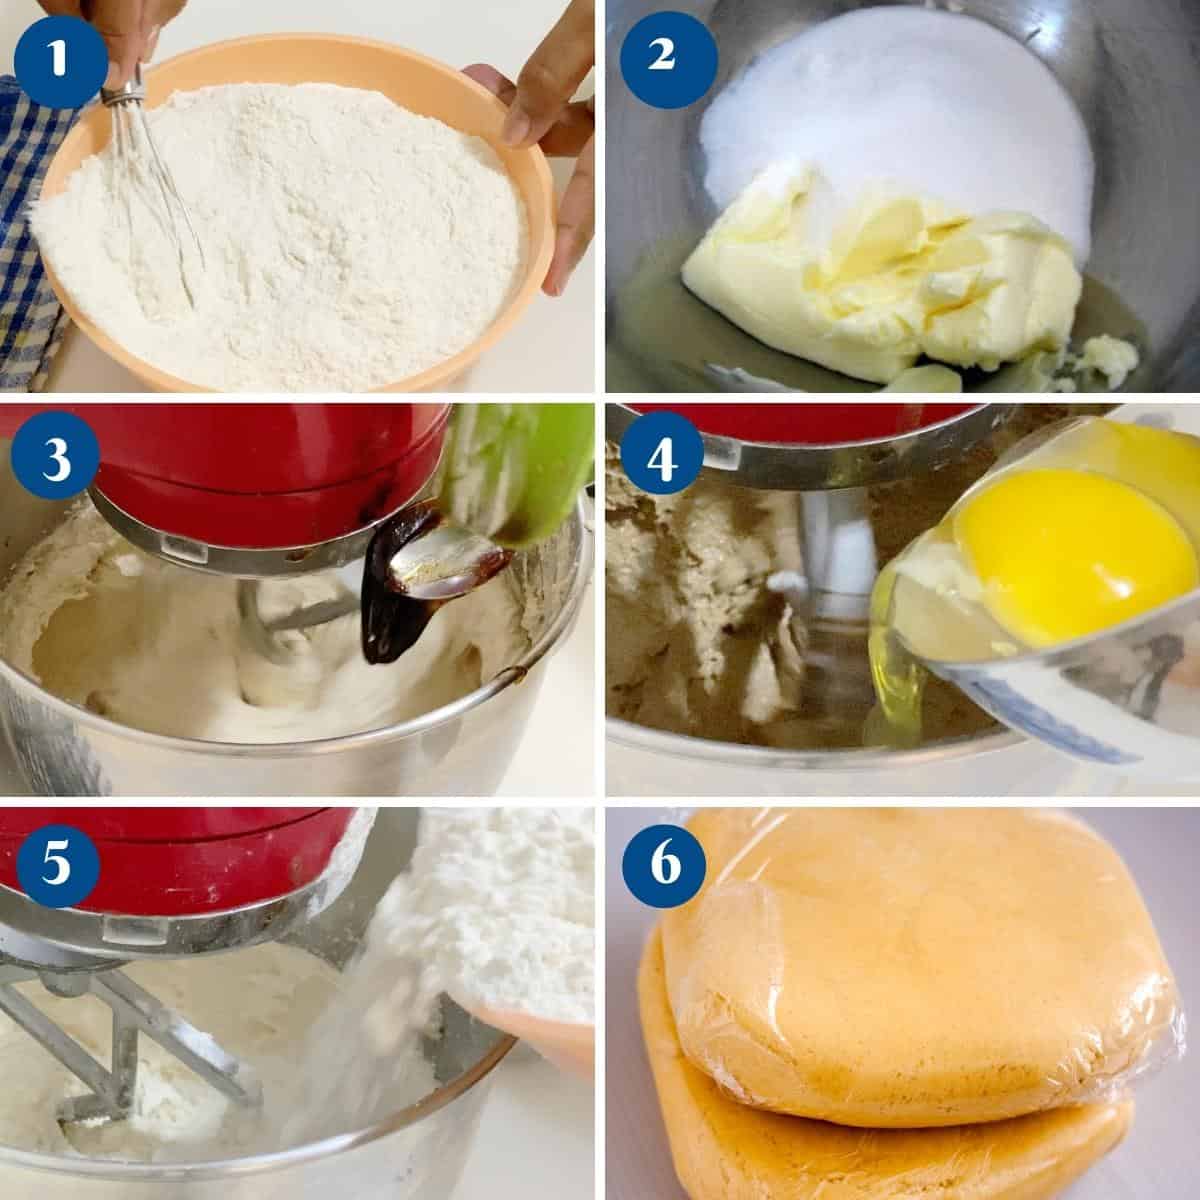
Dry ingredients – In a medium bowl, sift together the flour and salt. Set asideCreaming – In a large bowl of a stand mixer with the paddle attachment on medium speed cream the butter and sugar until light and fluffy.Pro tip – Do not skip this creaming step for the butter/sugar. Creaming works best when the butter is at firm room temperature, not soft room temperature.Wet ingredients – Add the vanilla extract followed by the eggs one at a time making sure each is well incorporated.Pro tip – I combined the vanilla extract with the eggs in the video. But, you don’t necessarily have to do that.Wet to dry – Next, add the flour mixture. Combine well but do not over-mix at this time.Pro tip – We do not want to activate the gluten in the dough so do avoid overmixing the flour.
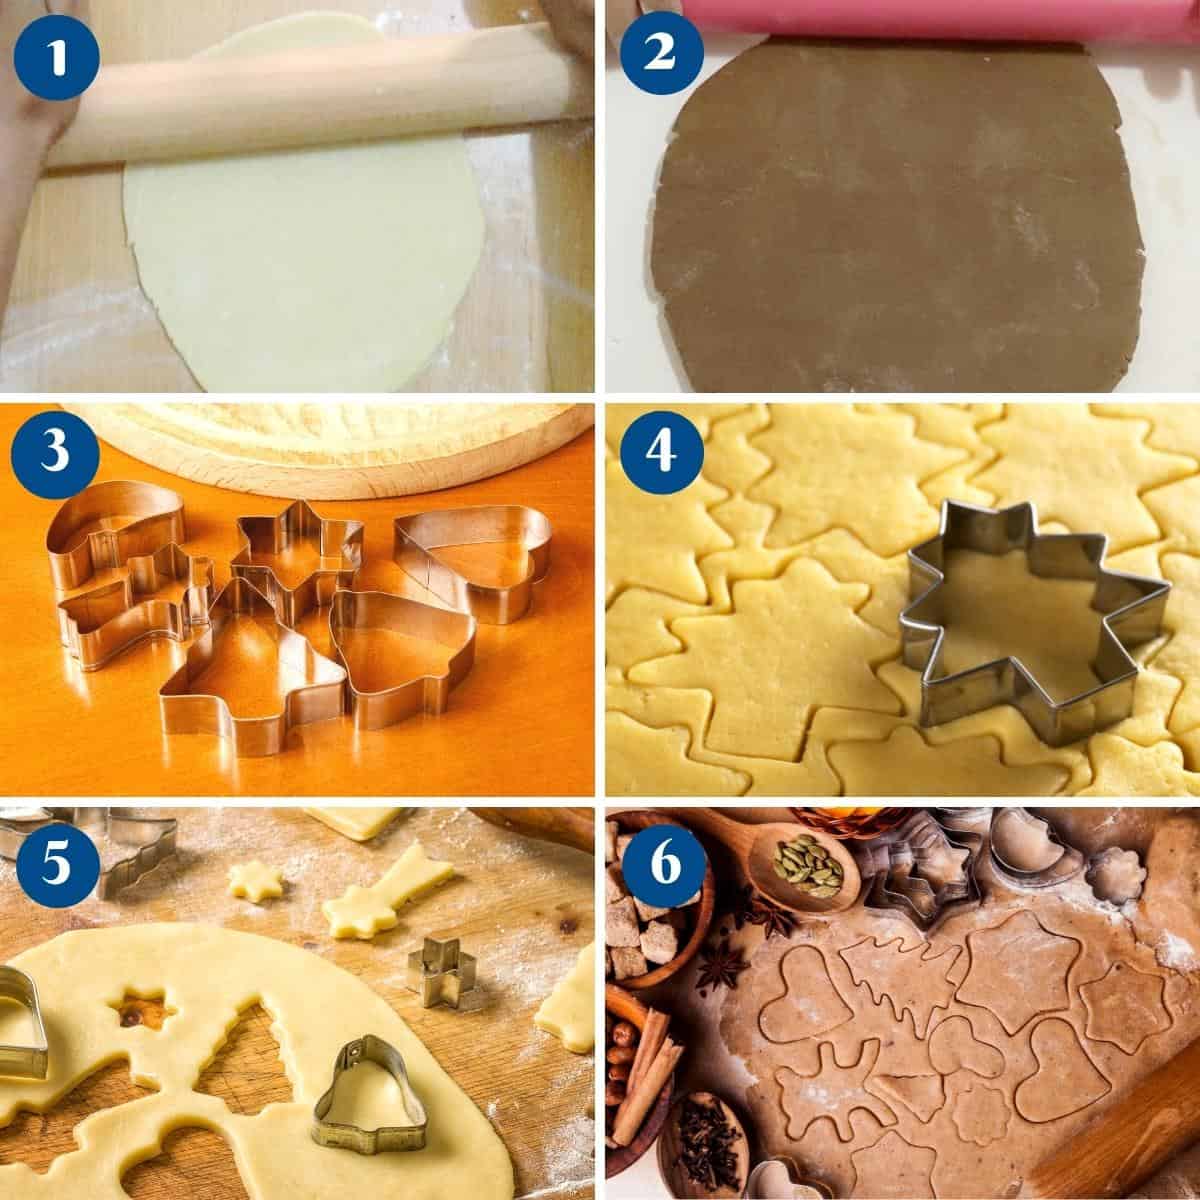
Chill – Transfer the dough onto a work surface and divide the dough into two discs. Wrap each in plastic wrap and chill in the fridge until firm enough to roll About 30 minutes to an hour at least.Pro tip – you can keep the dough chilled in the fridge for up to 4 days. You can even freeze the dough for up to a month.Roll – Once the dough is chilled; roll the dough on a lightly floured surface evenly.Pro tip – I roll my cookies to about 1/4-inch or 6 mm thickness using a rolling pin with spacers. Read – 10 Tips – how to roll and cut sugar cookiesCut – Using your Christmas cookie cutter cut out desired shaped cookies and place them on a cookie sheet one inch apart. I’ve used some 3-inch round and square cookie cutters for these cookies.
Oven – Preheat the oven to 350°F/ 177°C/ Gas Mark 4Pro tip – It is best to keep the cookies chilled in the refrigerator while the oven is preheating. Chilled cookies will prevent spreading.Bake – Transfer the chilled cookies to the oven and bake on the middle rack for about 8 to 10 minutes depending on the thickness of the cookies. Pro tip – The cookies must not be dark around the edges. As soon as they get a slight color on the bottom they are ready. They will continue to cook with the residue heat on the baking tray.Cool – When baked let cool on the baking sheet for 10 minutes then transfer to a cooling rack to cool further before you transfer to an airtight container.Pro tip – always frost cold cookies otherwise the icing will melt.Frost the cookies as shown in the video.
For those of you that cannot watch the one above. And, don’t forget to Subscribe to my channel to see what’s next week’s video. I have a new video every week. Sometimes two..!!
You may also like
Did you LIKE this recipe? Save it for later. You can find my recipes on Pinterest. Follow me on Facebook, Twitter, and Instagram.Subscribe, and I’ll send you new recipes right to your inbox. Thank you for sharing - Save for later