Indulge in the sweet delights of Easter with our irresistible sugar cookie recipe, perfect for crafting adorable frosted treats like bunnies and chicks! Baking enthusiasts of all ages will find joy in creating these charming Easter-themed cookies, making them an ideal activity for festive celebrations. Our recipe boasts a buttery, melt-in-your-mouth texture that serves as the canvas for your artistic endeavors. With a simple yet delicious combination of pantry staples, including butter, sugar, and flour, these cookies are a breeze to whip up. The addition of vanilla extract adds a delightful aroma and depth of flavor, elevating these treats to new heights of deliciousness. What sets our recipe apart is its versatility. Whether you’re shaping these cookies into playful bunnies with fluffy tails or adorable chicks with vibrant yellow feathers, the dough holds its shape beautifully during baking, allowing your creative visions to come to life. Once cooled, the cookies eagerly await your artistic touch with colorful frosting and charming details. Celebrate the season with a batch of these delightful sugar cookies, destined to become the centerpiece of your Easter festivities. Whether enjoyed as a delightful snack, a festive dessert, or a heartfelt gift, these frosted Easter cookies are sure to spread joy and cheer to all who indulge. Embrace the spirit of the season and create cherished memories with our beloved sugar cookie recipe, the perfect choice for crafting Easter delights that are as delicious as they are delightful!
Step-by-step: Easter bunny cookies
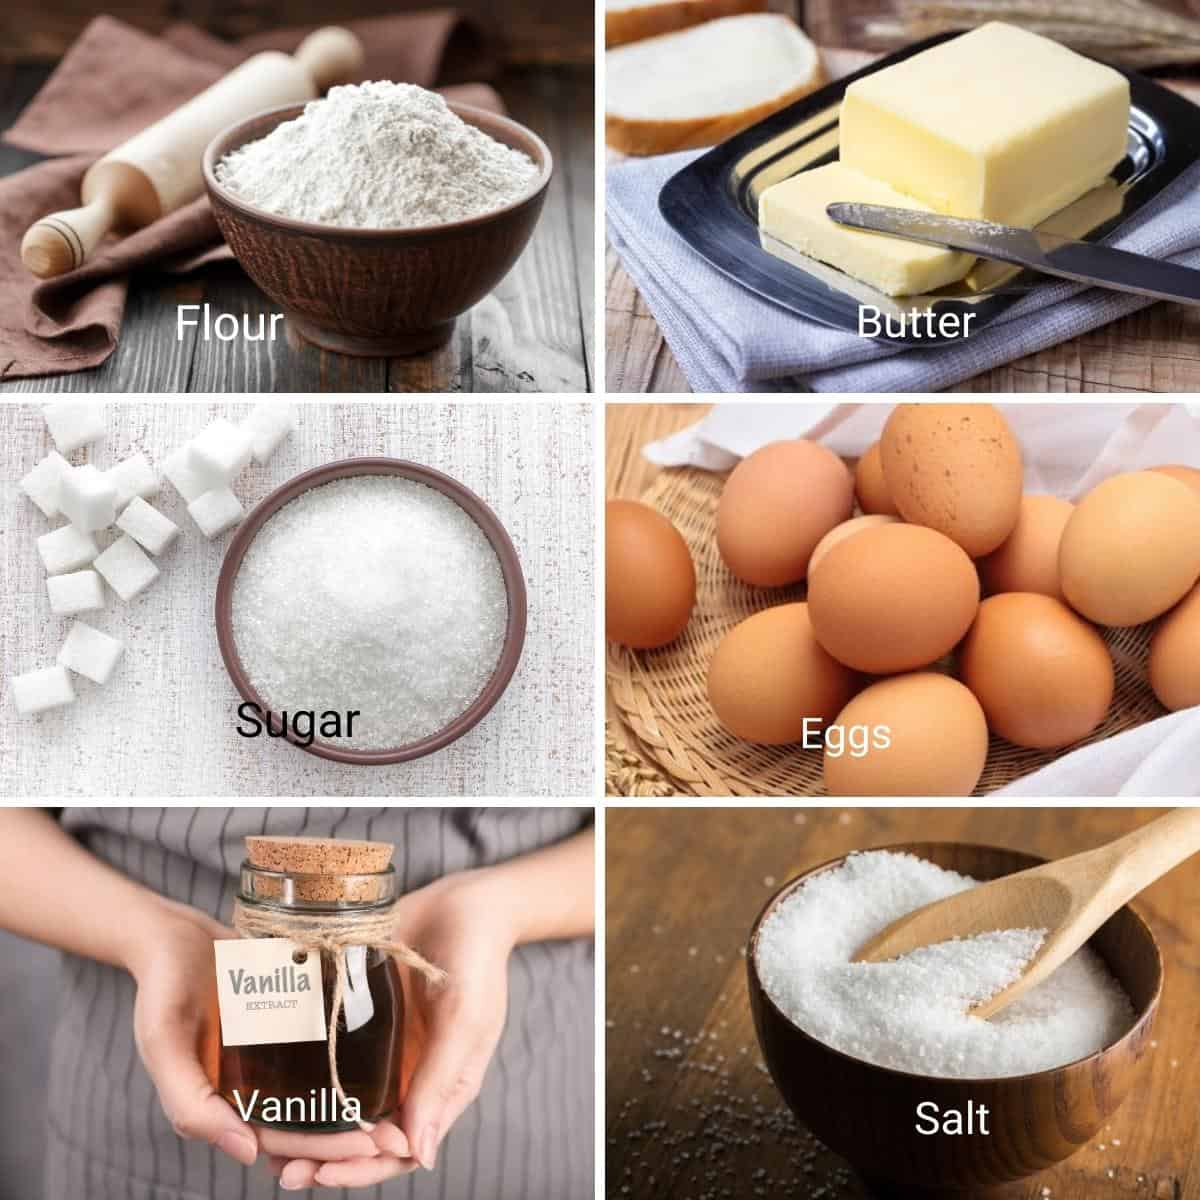
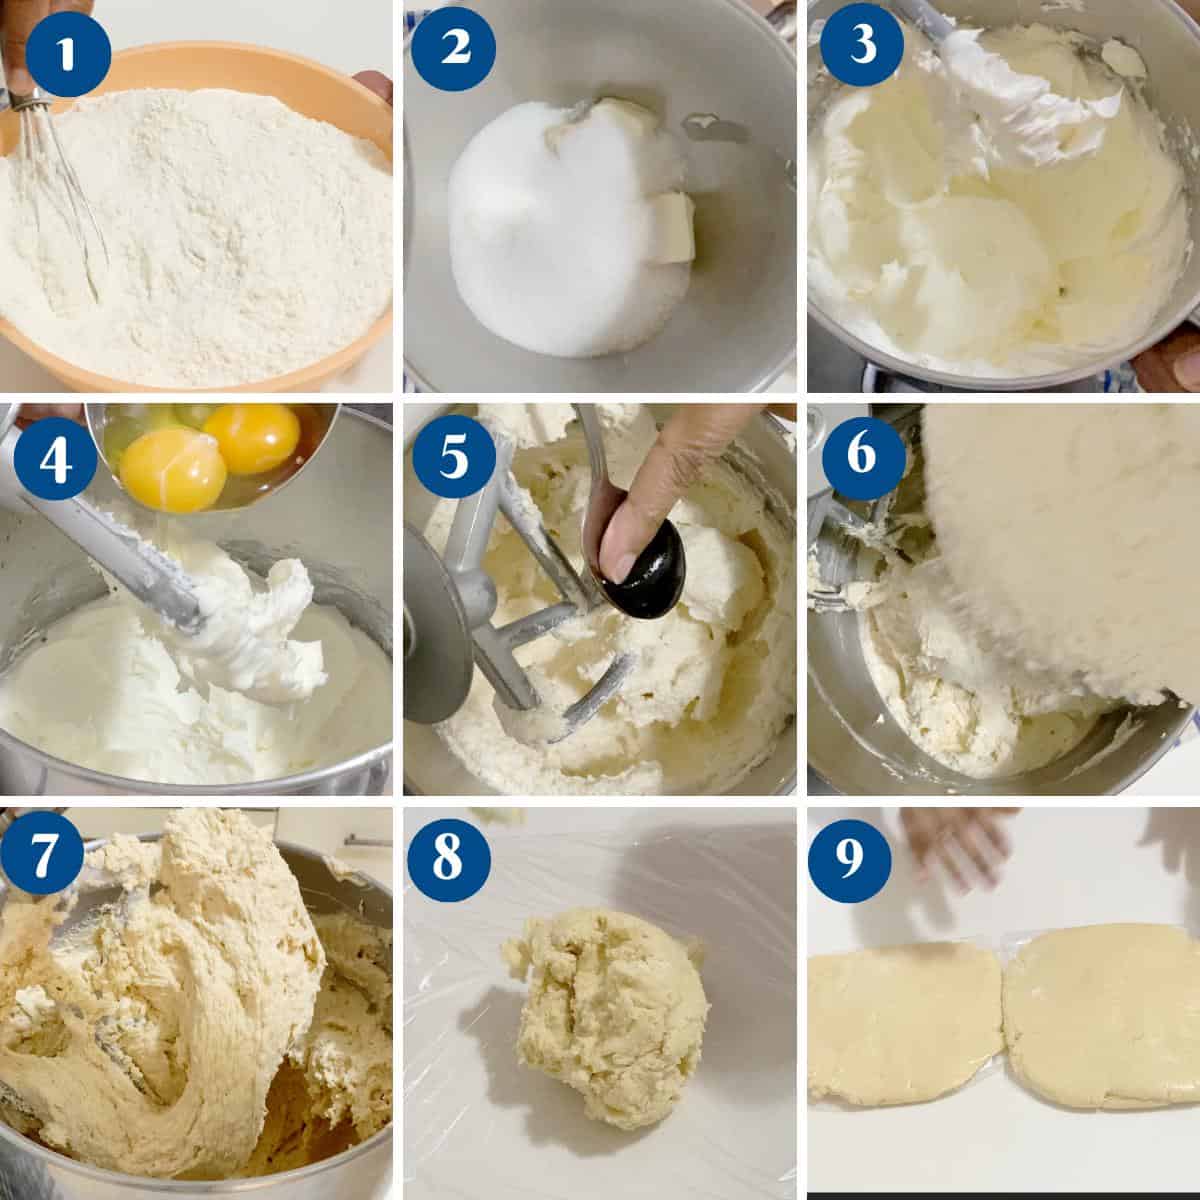
Dry ingredients – In a medium bowl, sift together the flour and salt. And set aside. Creaming – In a large bowl of a stand mixer with the paddle attachment, on medium speed, cream the butter and sugar until light and fluffy.Pro tip – Do not skip this creaming step for the butter/sugar. Creaming works best when the butter is at firm room temperature, not soft room temperature. Wet ingredients – Add the vanilla extract followed by the eggs, one at a time, making sure each is well incorporated.Pro tip – I combined the vanilla extract with the eggs in the video. But, you don’t necessarily have to do that. Wet to dry – Next, add the flour mixture. Combine well but do not over-mix at this time.Pro tip – We do not want to activate the gluten in the dough so do avoid overmixing the flour.
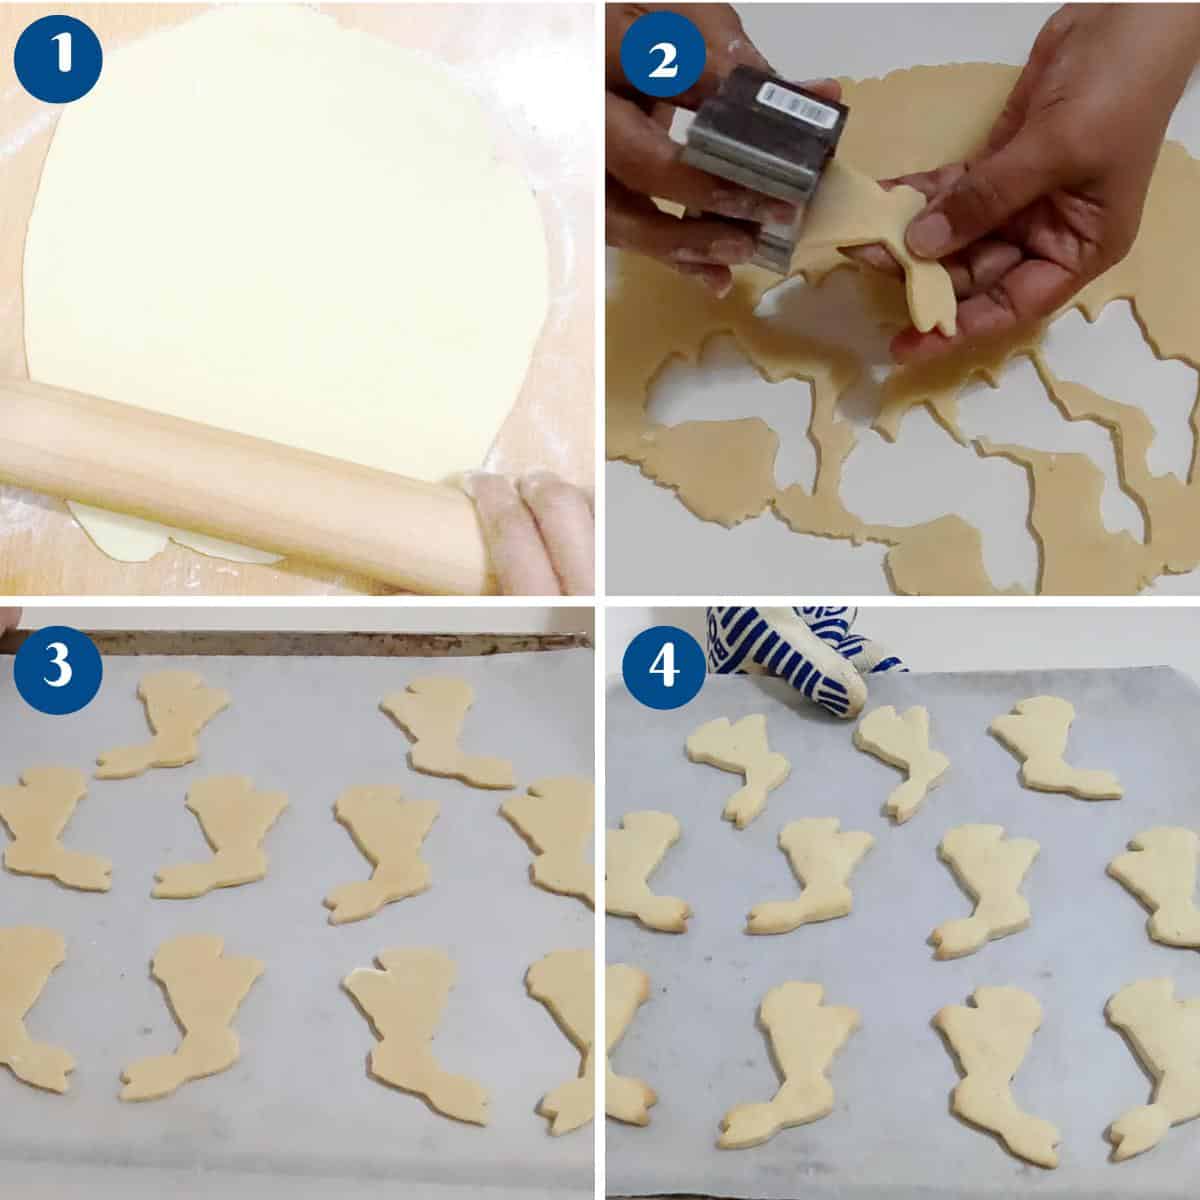
Chill – Transfer the dough onto a work surface and divide the dough into two discs. Wrap each in plastic wrap and chill in the fridge until firm enough to roll. About 30 minutes to an hour at least.Pro tip – You can keep the dough chilled in the fridge for up to 4 days. You can even freeze the dough for up to a month. Roll – Once the dough is chilled, roll the dough on a lightly floured surface evenly. Place on a cookie tray and leave to chill for 15 minutes.Pro tip – I roll my cookies to about 1/8-inch or 6 mm thickness using a rolling pin with spacers. Read – 10 Tips – how to roll and cut sugar cookies. Oven – Preheat the oven to 350°F/ 177°C/ Gas Mark 4Pro tip – It is best to keep the cookies chilled in the refrigerator while the oven is preheating. Chilled cookies will prevent spreading.
Cut the cookies – Using a bunny cookie cutter, cut the cookies and place them on a parchment-lined baking tray. Bake – Transfer the chilled cookies to the oven and bake on the middle rack for about 8 to 10 minutes, depending on the thickness of the cookies. Pro tip – The cookies must not be dark around the edges. As soon as they get a slight color on the bottom they are ready. They will continue to cook with the residue heat on the baking tray. Cool – When baked, let cool on the baking sheet for 10 minutes. Then, transfer to a cooling rack to cool further before you transfer to an airtight container.Pro tip – Always frost cold cookies otherwise the icing will melt.
Frost the cookies
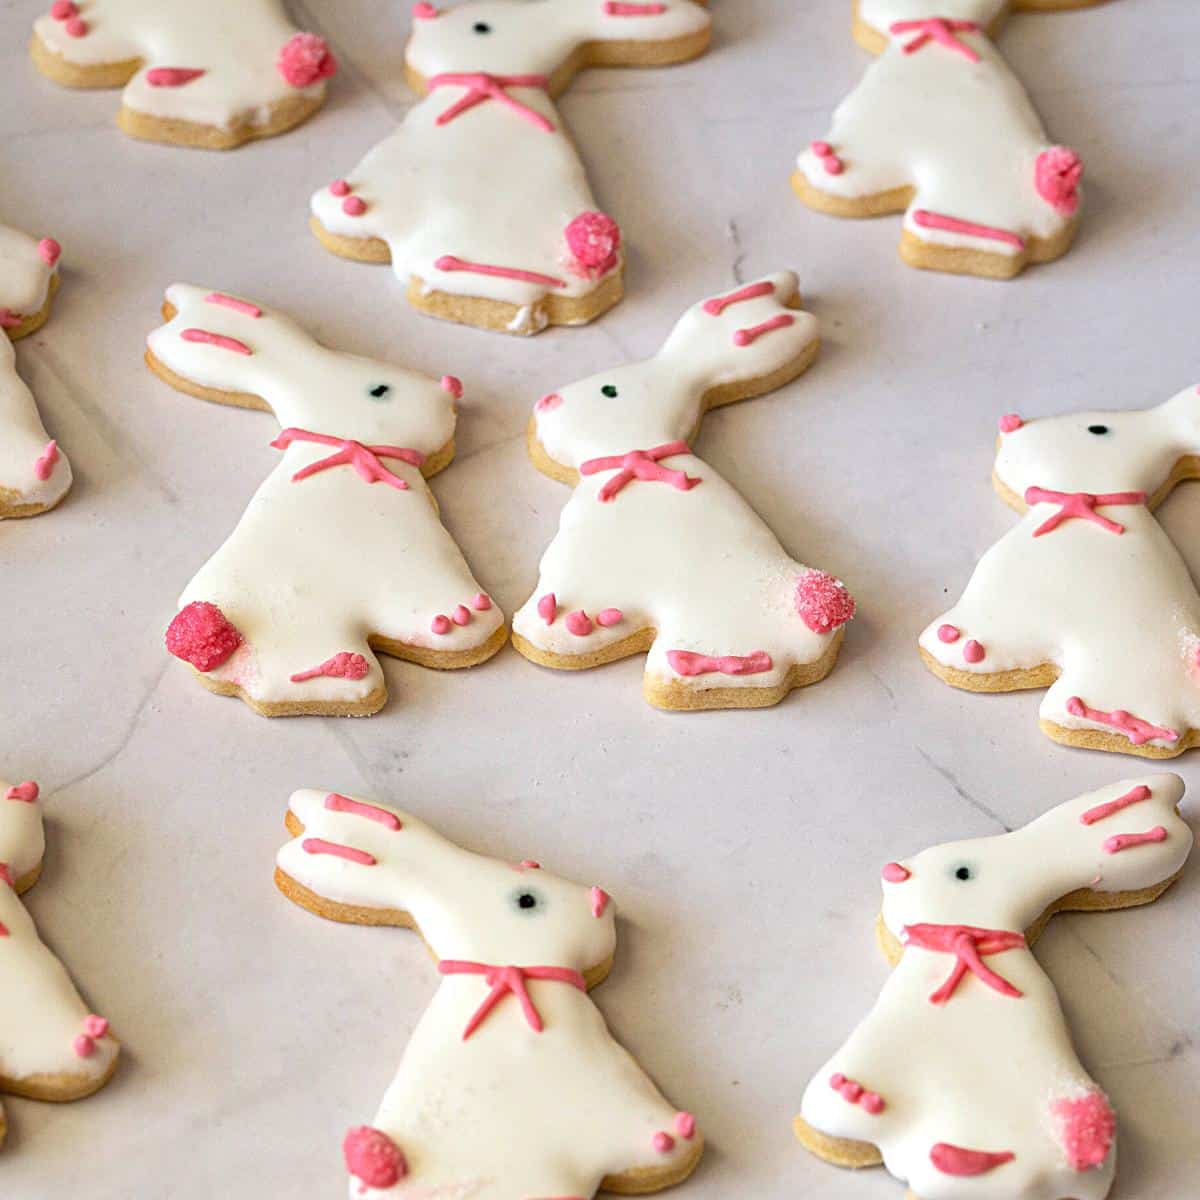
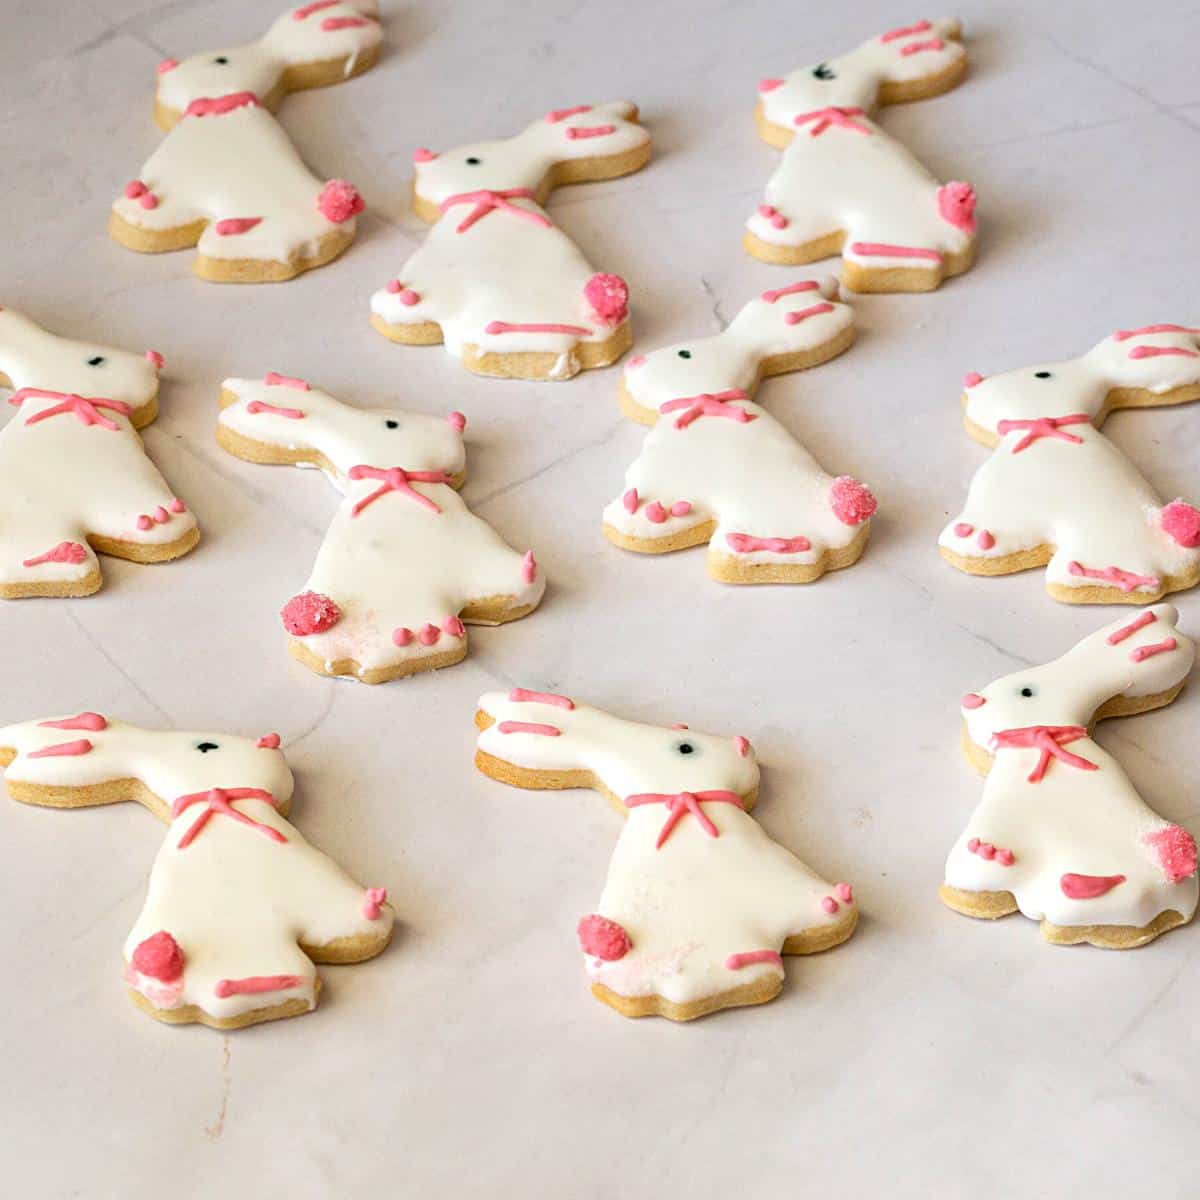
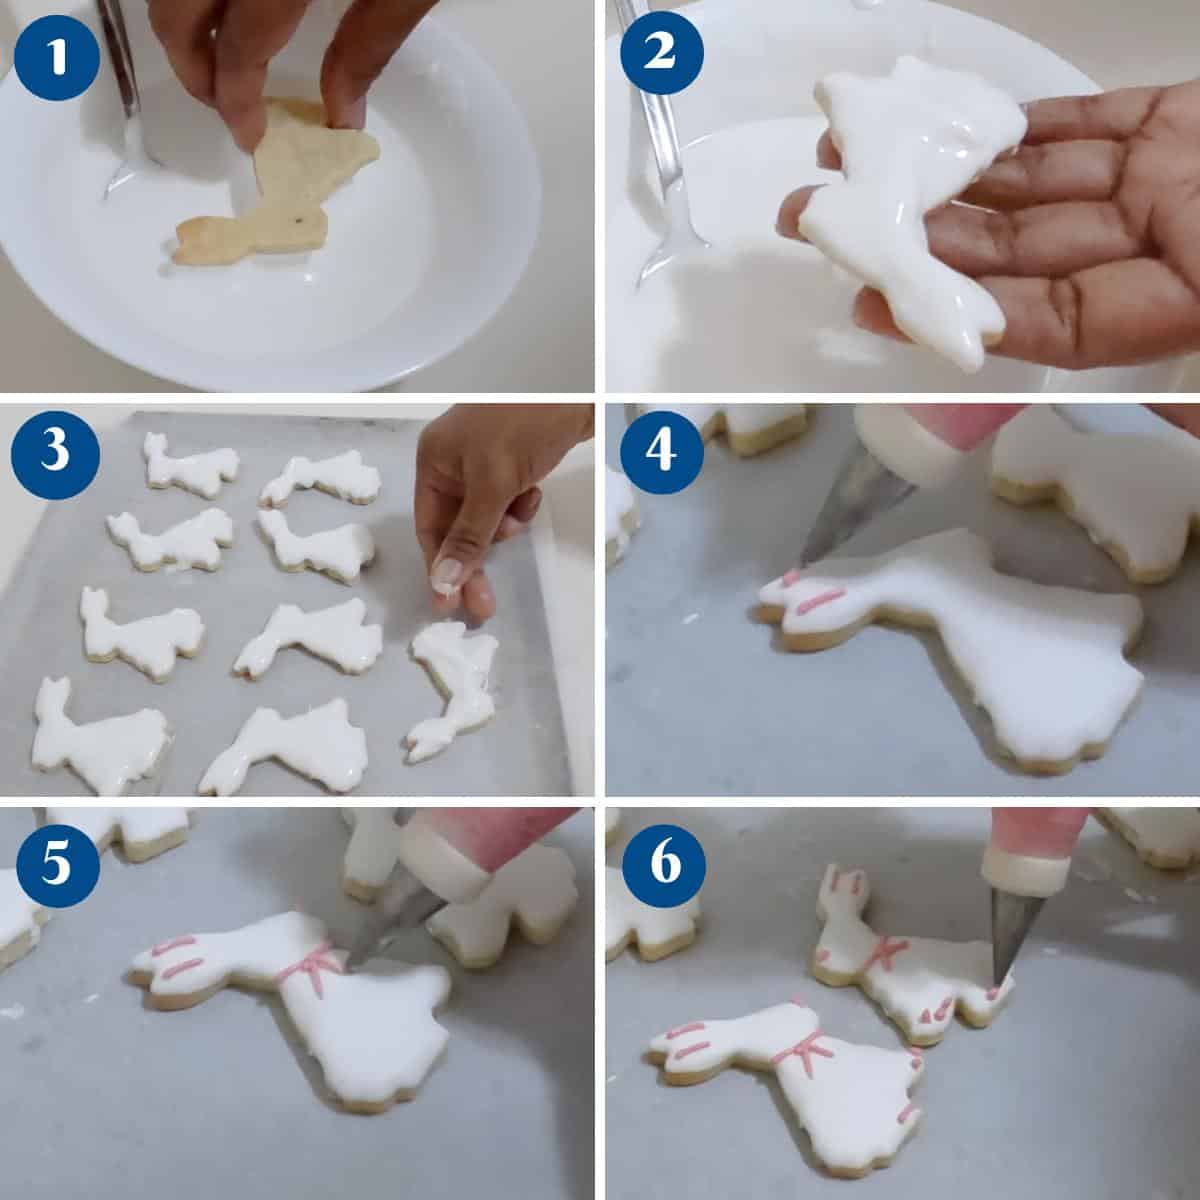
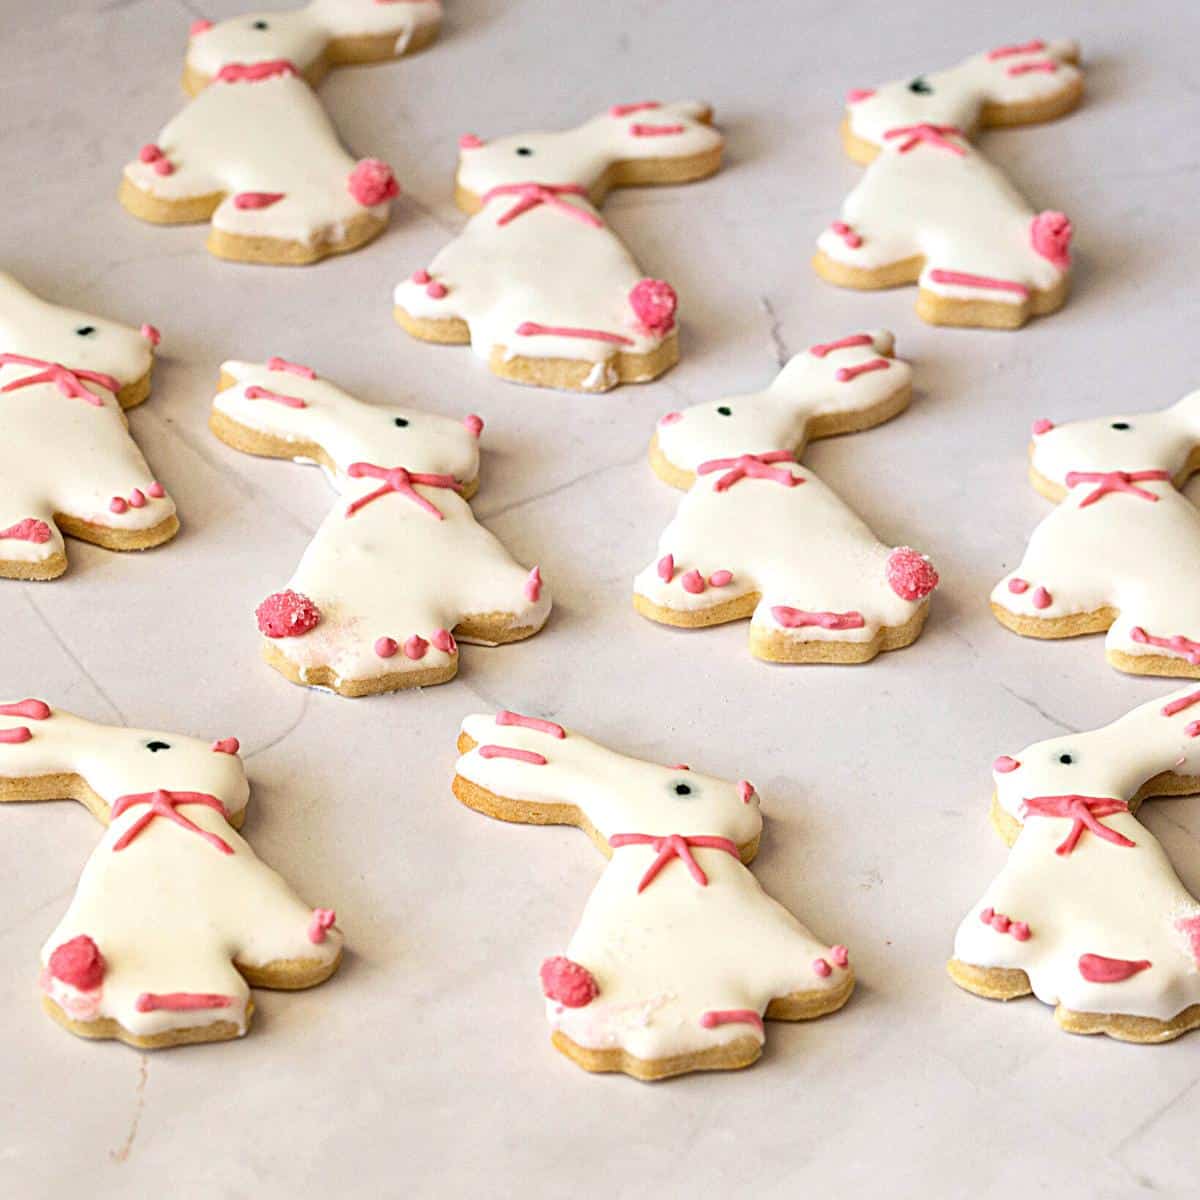
Royal icing – In the bowl of a stand mixer with the paddle whisk attachment, whip the egg whites with salt and lemon juice until foamy. Then, add the powdered sugar gradually and continue to whip until stiff peaks form.Pro tip – Keep the royal icing covered well with plastic wrap to prevent crusting. This crust can sometimes cause blockage in the piping tips. Consistency – Next, transfer some of the icing to a bowl and add one to two tablespoons of water until you have a thick pouring consistency.Pro tip – Consistency is key! Too thick and the surface won’t be smooth and too liquid will cause the icing to overflow. Frost – You can frost the cookies using one of the two methods below. Dip – Dip each cookie in the royal icing and let the excess drip down. Then, transfer to a parchment-lined baking tray and leave to dry. Flood – Alternatively, you can put the icing in a piping bag with a number 2 round piping tip. First, make an outline then fill the center with icing so it covers the whole surface. Pipe – Taint some royal icing with pink food color and put in a piping bag with a number 2 piping tip. Frost the ears, mouth, tail, and paws. Then, use a toothpick to make black dots for the eyes. Dry – Allow the cookies to dry completely before you stack them and store them in a cookie jar.Pro tip – The surface of the cookie will crust immediately but it is important to leave the cookies to dry completely before you stack or you can ruin the frosting.
Easter Egg Sandwich Cookies Hand Painted Butterfly Cookies Tutorial Stained Glass Cookies Hazelnut Cookies Recipe Cardamom Coffee Cookies
Frequently asked questions
Thank you for sharing - Save for later