I am so surprised that I have had so many requests to make a tutorial on frozen buttercream transfer. Especially, because I notice there are already a few tutorials available. Before I started doing cakes professionally, I did quite a few of these for the kids cakes in the family. Honestly, I’m more a fondant person. So, I’m not a huge fan of buttercream transfers. If given a choice, I’d rather cut a shape out of sugar paste. Like you can see on this tutorial for Fondant Picture Transfer. Of course, if you do not have sugar paste on hand, this is a great way to make an edible image for your cake.
Buttercream recipe for buttercream frozen transfer
It is important that you use buttercream made with butter (at least half butter) – Veg shortening does not harden when chilled, so it will be difficult to handle. I make this one just for the buttercream transfer.
Method
Use just a bowl and a spatula no mixers.Avoid over mixing so we can avoid any air pockets in the buttercream.Sift the sugar so there will be no blockage in the piping bag.Use soft room temperature butter.Cream butter lightly.Add the powder sugar and mix together.Lastl,y add the vanilla and water.Add more water if needed but only after you have colored the icing.Gel colors will influence the consistency of icing.Use as required.
The frozen buttercream transfer tutorial
Choose an image and get ready
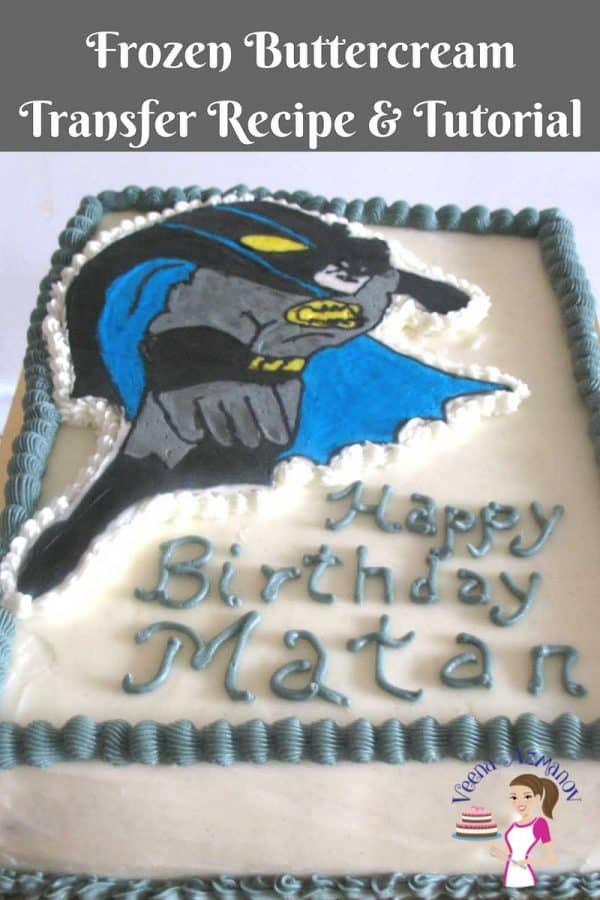
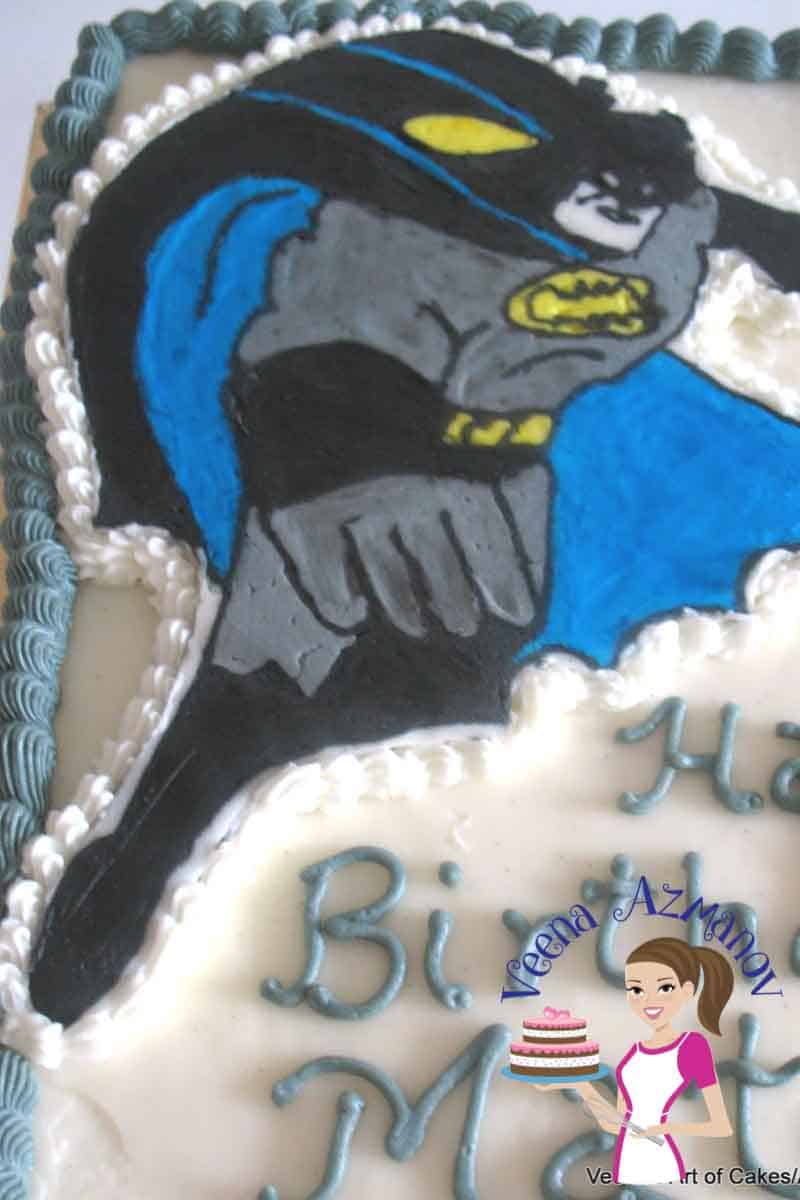
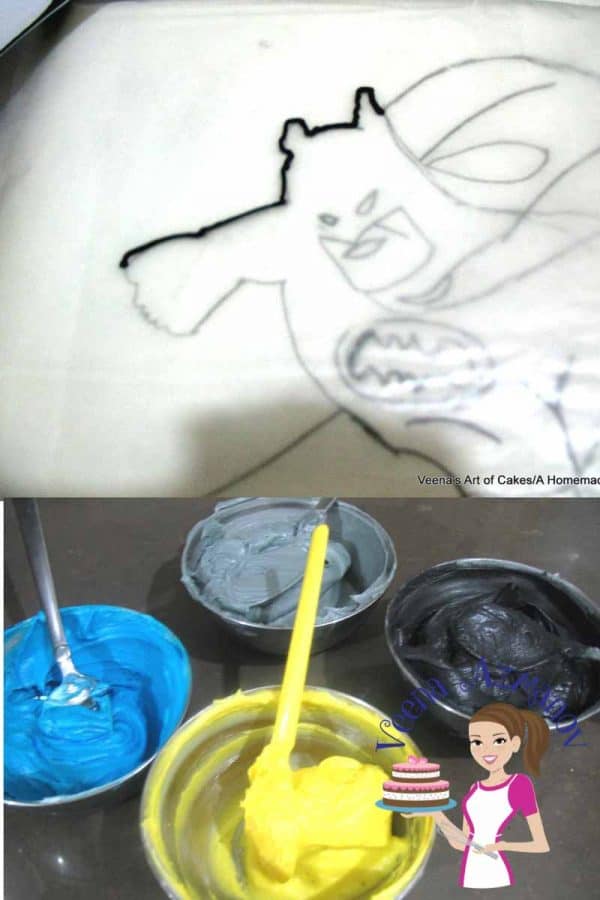
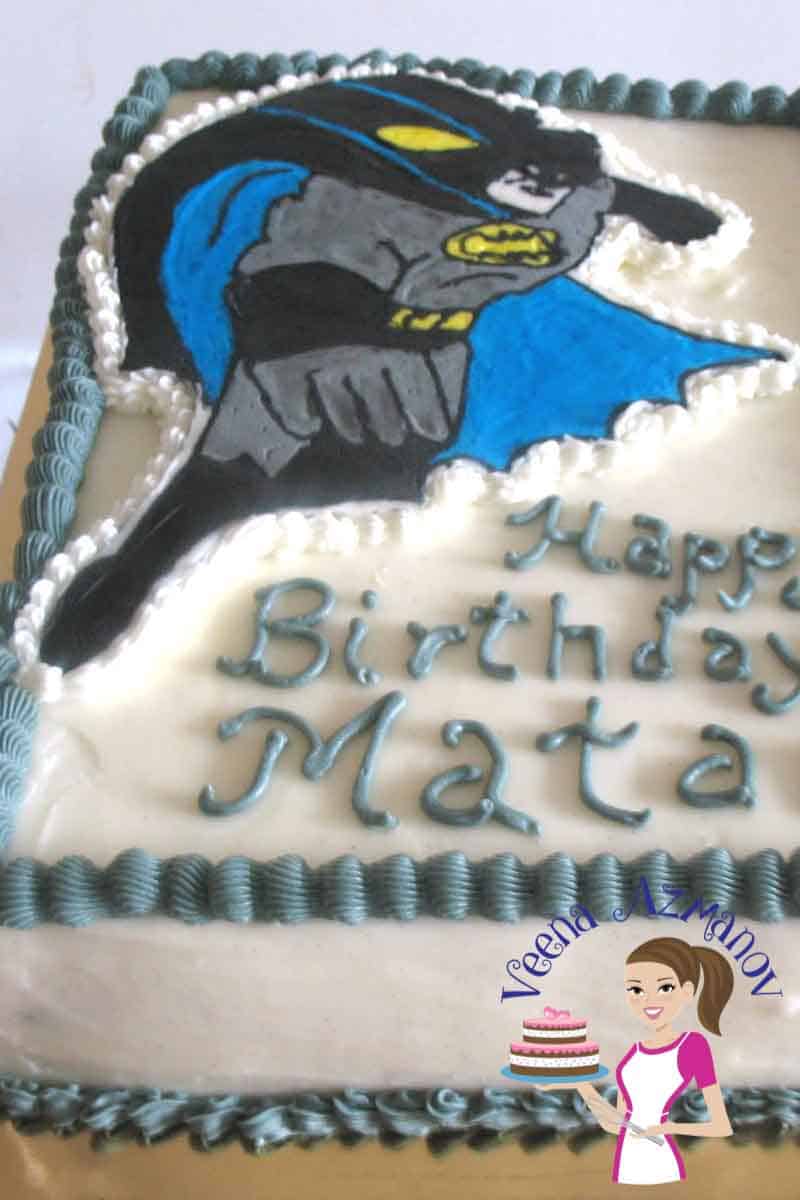
First, get yourself a picture of the image in the size you want for your cake.In my case here it’s a Batman image and my cake is 13 x 9 rectangular cake.Print a mirror image on a paper. So that when you place the image it will be the right side up.Next, trace the image’s outline on a parchment paper which can be used to follow as a guide when piping.It would be great if you have a glass panel so you can see what is happening on the other side of the design. In my case, I do not have a glass panel so I just used the back of a tray.Tape the image on the tray or glass.Cut a piece of parchment paper approximately the same size of the image and tape that too. Parchment side up.The purpose of taping it is to ensure the image does not move while you are filling in the colors.
Next prepare the icing colors
Buttercream – It is important that you use buttercream made with butter (at least half butter) – Veg shortening does not harden when chilled so it will be difficult to handle.Consistency – You want to make sure your buttercream is of soft peaks -Why?You want the icing to be smooth on the reverse. If you icing is stiff it will hold the shape of the nozzle and not smooth out. So when you reverse the pattern you will see your design is made of small snails pattern. (I wish I could show you what I mean)Temperature – Try to work in an air conditioned room so your icing won’t go soft and melt while you are working on it. Working with soft icing can bleed colors too.If necessary place the project in the fridge for a few minutes at intervals before you continue.
Piping
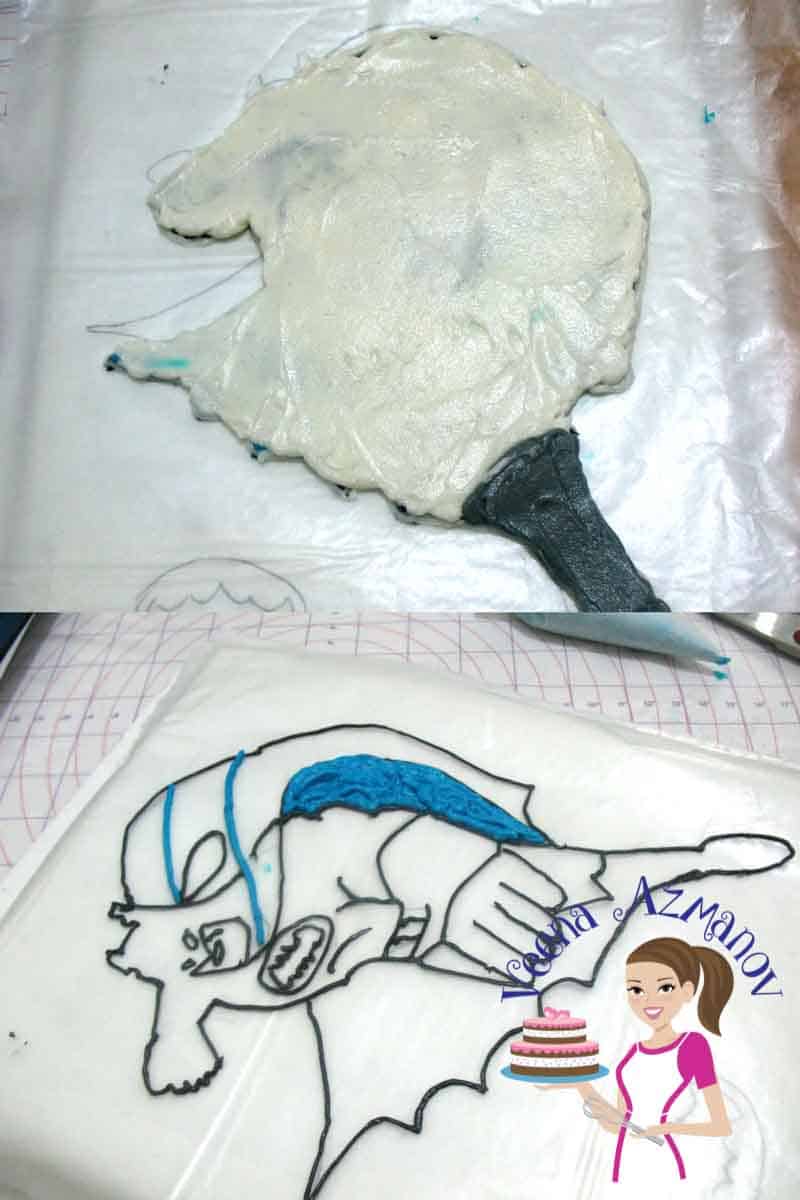
To begin, start with an outline.I use homemade black buttercream. I pipe the whole outline and then place it in the fridge before I continue to fill. This helps and does not make the colors bleed.Next, fill in the colors. Work in layers. What has to be visible on the other side has to be piped first. Can you see the blue lines that are on the cloak, they will be visible on the other side so they get piped first before I fill in the black cloak.
The second layer can overlap the first. So, in this case, I can cover the blue lines with the black cloak and it will not affect the design.Here you can see all my colors are filled in. Tap the tray on the table a few times so the icing will settle giving you a smooth effect on the other side. Remember the design is on the reverse.Next – pipe a layer of icing the same color as the cake.This will help the design blend with the cake in the background though the image is slightly higher than the cake.My cake is white/ivory so that’s what I am piping here. (I ran out of white so I piped a little grey for the boots)With a spatula or the back of your knife – ever so gently smooth the white.
Freeze your design/pattern
You need a minimum of 60 minutes time in the freezer so the design will be easy to handle.You could make this a few days, weeks ahead of time and leave it in the freezer too.Just place the piece of parchment with the design in a sealed box and use when you are ready.
Placing the buttercream transfer on the cake
Remove transfer from the tray and work quickly.Make sure you decide where you want to place it on the cake because once you place iton the cake, it is difficult to remove and change places as it will.Pick the transfer from the cake.Place the design parchment side up/ icing side down.Place your hand on the parchment and press down slightly on the cake so it will sit fixed onto the cake.Next, slowly peel the parchment paper from the top.
You may also like
Did you LIKE this recipe? Save it for later. You can find my recipes on Pinterest. Follow me on Facebook, Twitter, and Instagram.Subscribe, and I’ll send you new recipes right to your inbox. Thank you for sharing - Save for later