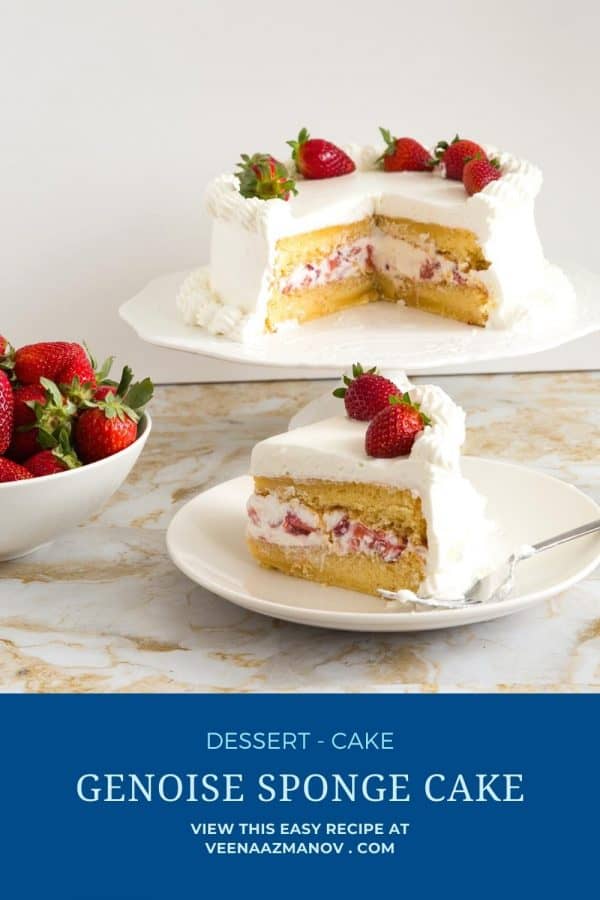
Genoise sponge cake is a classic Italian cake known for its light and airy texture. Unlike traditional sponge cakes, genoise is made without any chemical leavening agents, relying instead on the air incorporated into the eggs during whipping to rise. This makes it perfect for layered cakes and desserts where a light texture is desired. Genoise sponge cake originated in Genoa, Italy, and is believed to have been created in the 18th century. Its creation is attributed to the Italian chef Giovan Battista Cabona, who served it to the King of Poland, Stanisław Leszczyński, in the 18th century. The cake quickly gained popularity in France and other European countries, where it became a staple in patisseries. What sets genoise sponge cake apart is its versatility and ability to absorb flavors and moisture. It is often used as a base for layered cakes, such as the classic Italian dessert tiramisu, or soaked in syrup and layered with cream and fruit for a classic French fraisier cake. Its delicate texture and rich flavor make it a favorite among bakers and dessert enthusiasts alike, showcasing the artistry and skill that goes into creating a truly exceptional cake.
Why make this genoise?
What I like best about this cake is that it is light both in texture and flavor. That is why it is often used in combination with fruit and whipped cream. Now, this is not a difficult cake to make, but if you do not use the right technique, you might not get the desired result which is light and airy!! Fool proof method – the traditional method for making genoise is by separating the egg yolk and egg white and then folding in the whipped whites in the batter. This can often be intimidating and if not done right it can cause the batter to deflate resulting in a flat cake. But, with this method we whip the whole eggs (yolks and egg whites) and fold them into the batter. This is a safer method and make a wonderfully lifght and full cake. You could serve this genoise on its own with a fruit sauce for a light dessert too. The leavening agent in this cake is the eggs as there is no baking powder. The flour and butter used are much less than in a regular sponge cake. Chocolate genoise – replace some of the flour with cocoa powder to make a delicious chocolate genoise sponge
Ingredients and substitutes
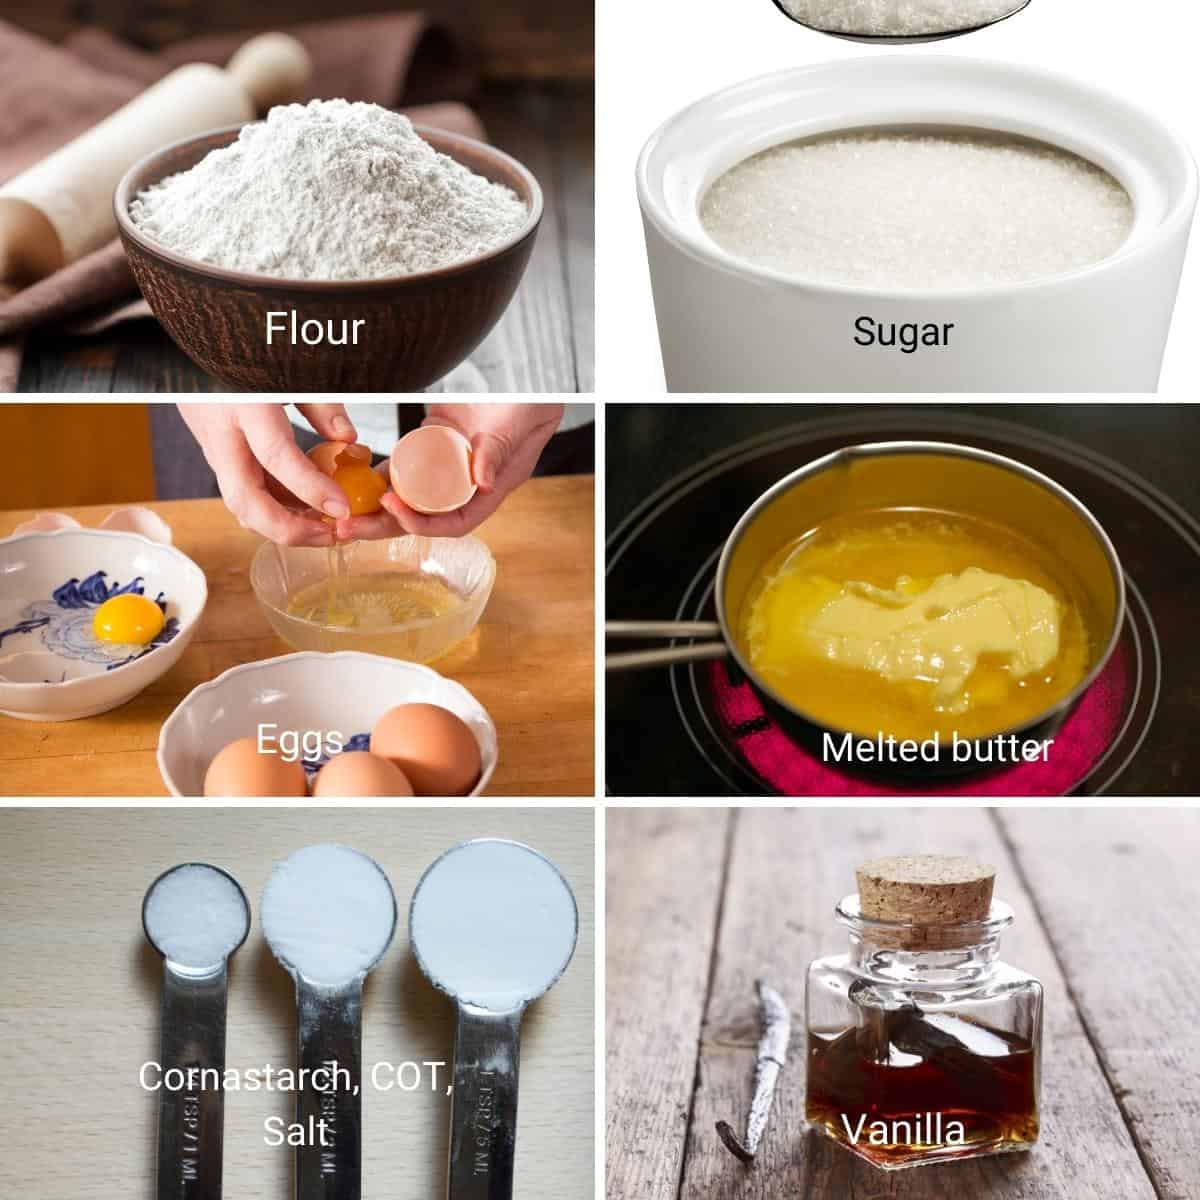
Eggs: Eggs provide structure and stability to the cake. They also help trap air during whipping, which contributes to the cake’s light texture. For a vegan alternative, you can try using aquafaba (the liquid from canned chickpeas) or commercial egg replacers. Sugar: Sugar sweetens the cake and also tenderizes it by weakening the gluten structure. You can use granulated sugar, brown sugar, or alternative sweeteners like honey or maple syrup. Keep in mind that using liquid sweeteners may affect the texture of the cake. Flour: Cake flour is typically used in genoise because it has a lower protein content, resulting in a softer cake. If you don’t have cake flour, you can make a substitute by replacing 2 tablespoons of flour with cornstarch for every cup of all-purpose flour. Butter: Butter adds moisture and flavor to the cake. You can substitute it with vegetable oil for a dairy-free option. However, keep in mind that butter contributes to the flavor and texture of the cake, so the substitution may alter the final result slightly. Vanilla Extract: Vanilla extract adds flavor to the cake. You can substitute it with other flavorings like almond extract or citrus zest for a different flavor profile. Cream of tartar – Gives a much creamier egg white and it’s less likely to separate the protein and the water. It’s also flavorless so it does not affect the flavor of your baked goods. The best substitute for cream of tartar is a pinch of salt. While lemon juice and vinegar are also often used. Liqueur or Flavoring Syrup (Optional): Some recipes call for adding a liqueur or flavoring syrup to the cake for additional flavor and moisture. You can omit this or use a non-alcoholic alternative like fruit juice or flavored extracts.
How to make Genoise Sponge
Cake
Oven – Preheat oven at 350F/ 177C/ Gas Mark 4 Pans – Grease and flour 2 x 8-inch round cake pans with a parchment paper circle for the bottom as well as the sides of the pan. (Or you can also use wax paper and a deep 9-inch round cake pan)
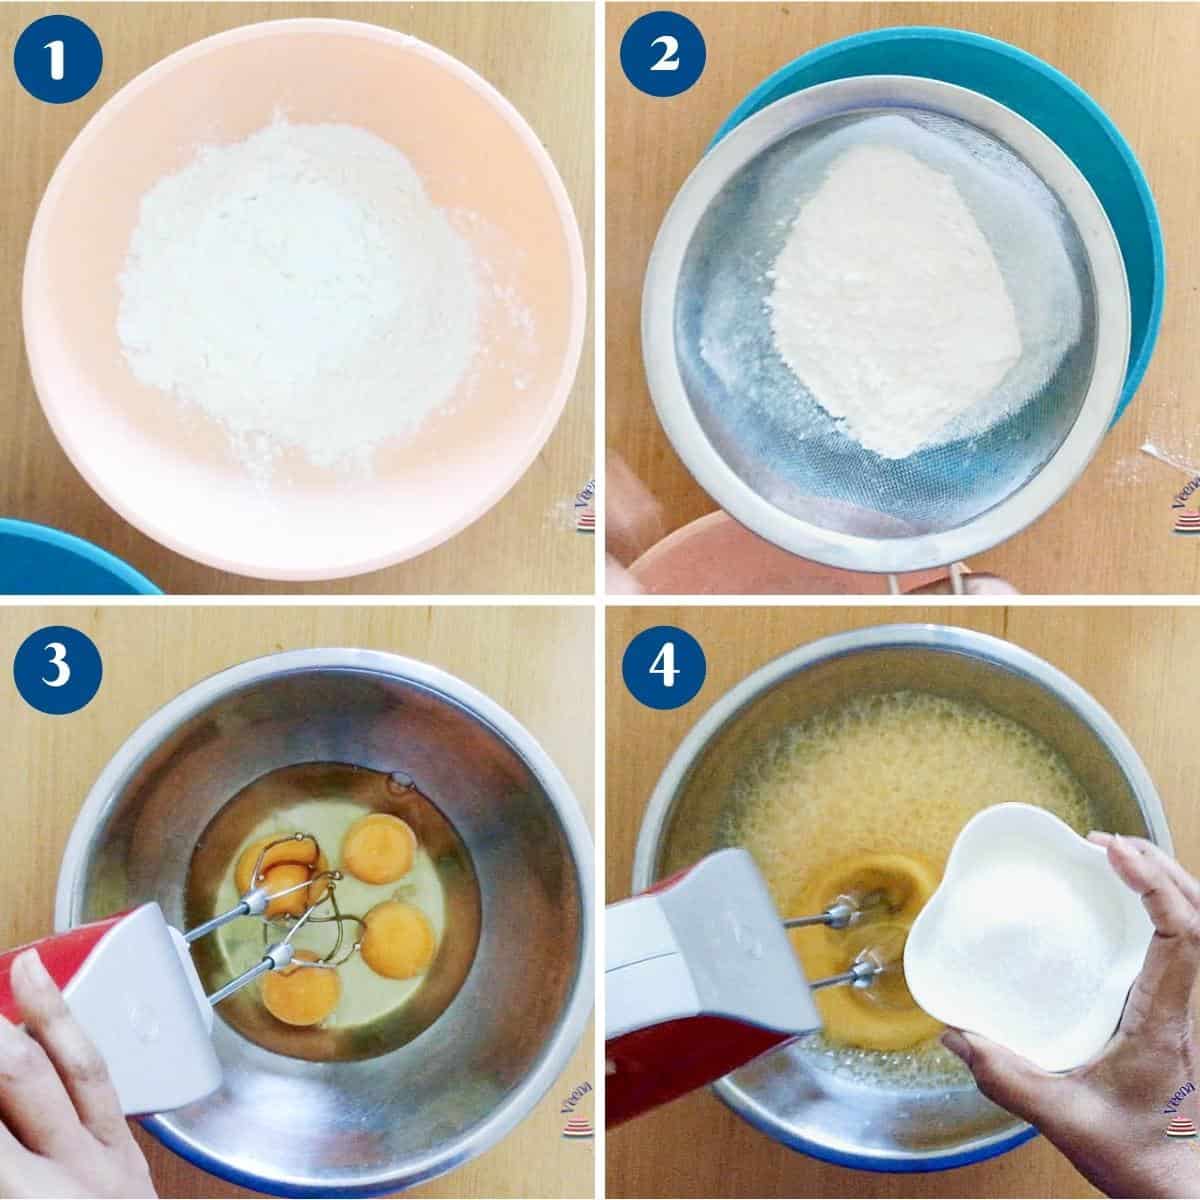
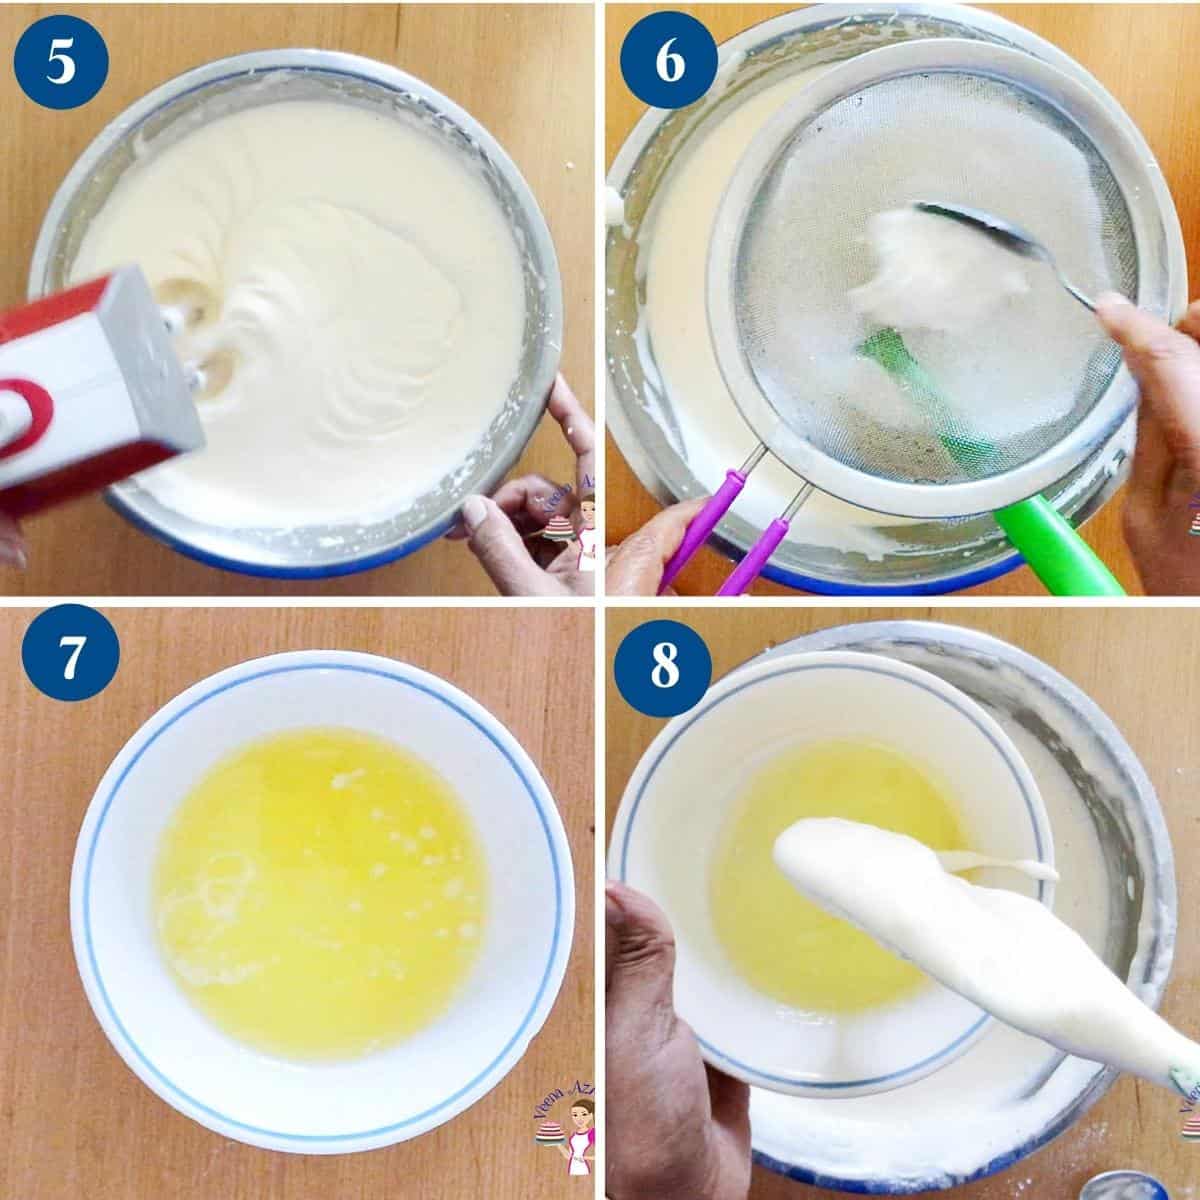
Dry ingredients – Sift the flour and salt two times to make it light and airy Whip eggs – In the bowl of a stand mixer with the whisk attachment whip whole eggs and cream of tartar for a minute. Then, gradually add the sugar one tablespoon at a time or in a steady stream. Once all the sugar is in whip on medium-high speed until stiff peaks. Add vanilla extract.Pro tip – do not overwhip the eggs, you want them stiff peaks but still have a glossy shine. Add flour – Swift the flour for the third time directly into the eggs. Do this in three batches folding carefully so the whipped eggs don’t deflate.The folding method – place your rubber spatula into the batter… go under away from you…..and come up in front of you. You are also rotating the bowl with the other hand simultaneously. Sounds complicated but it is not.
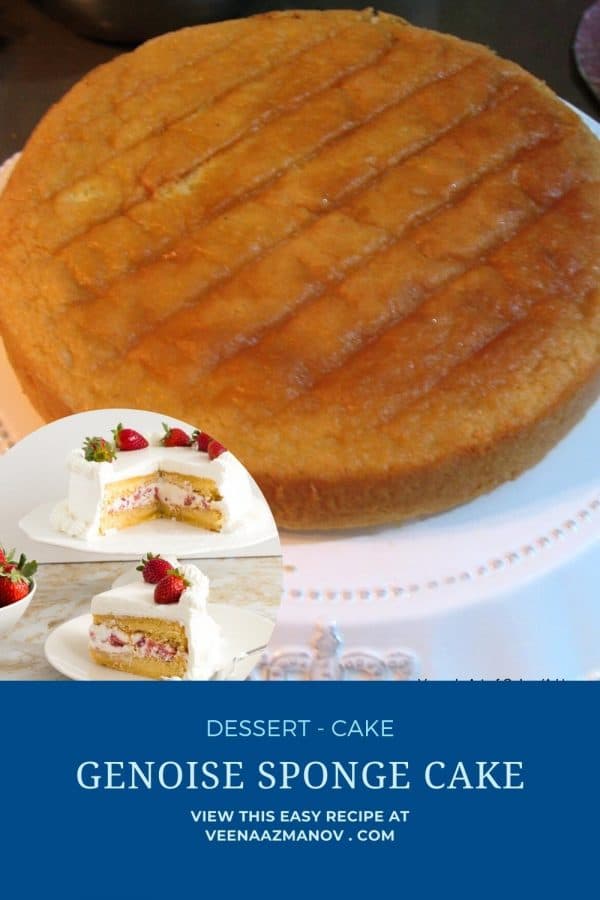
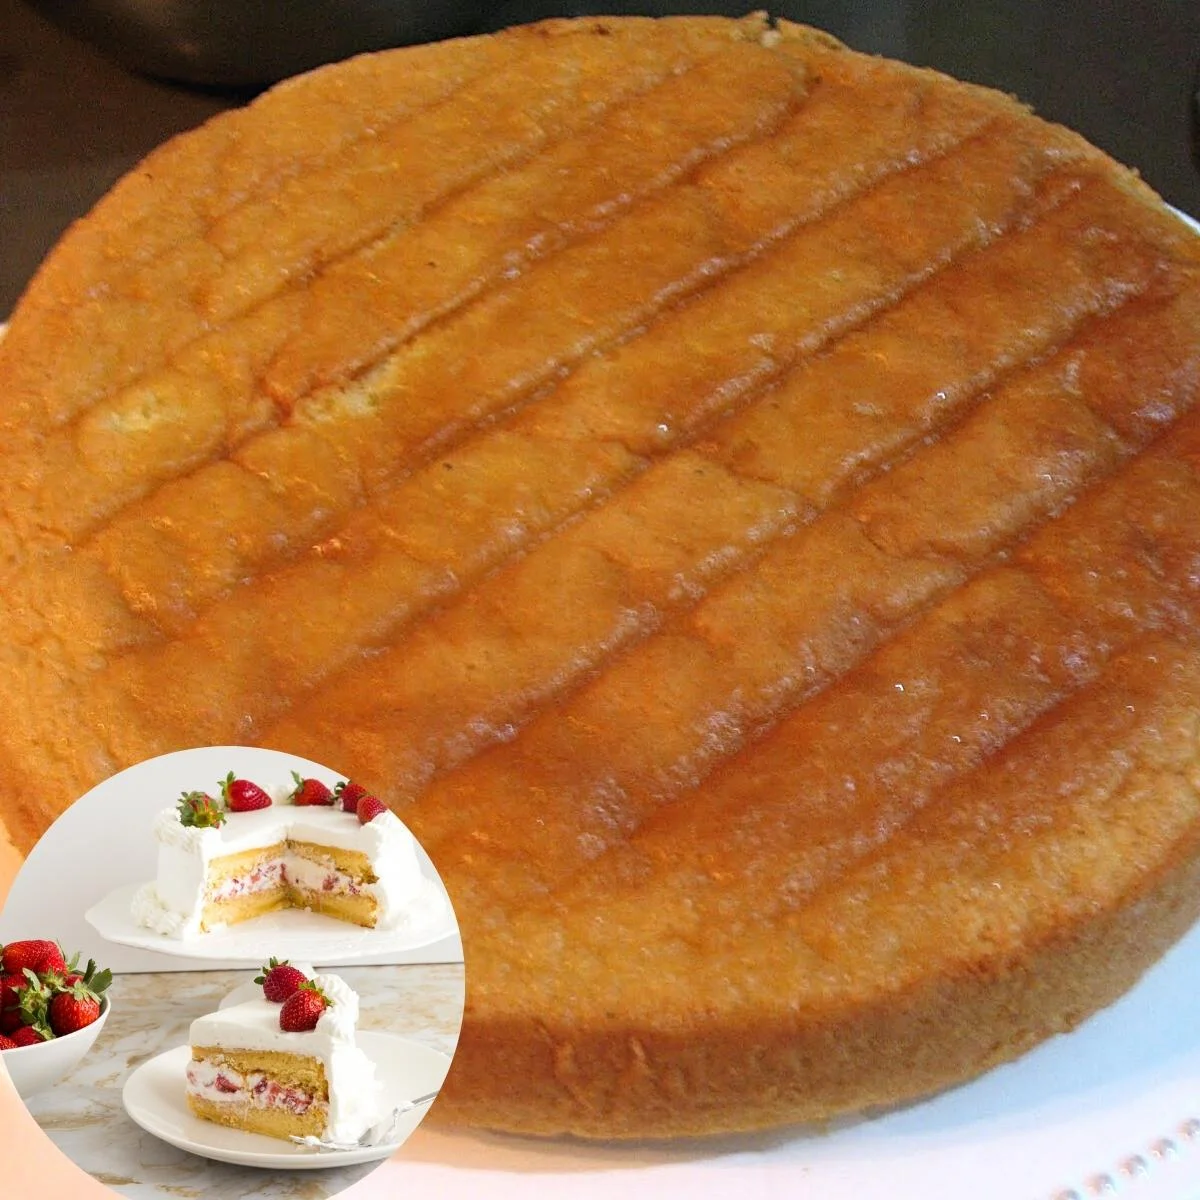
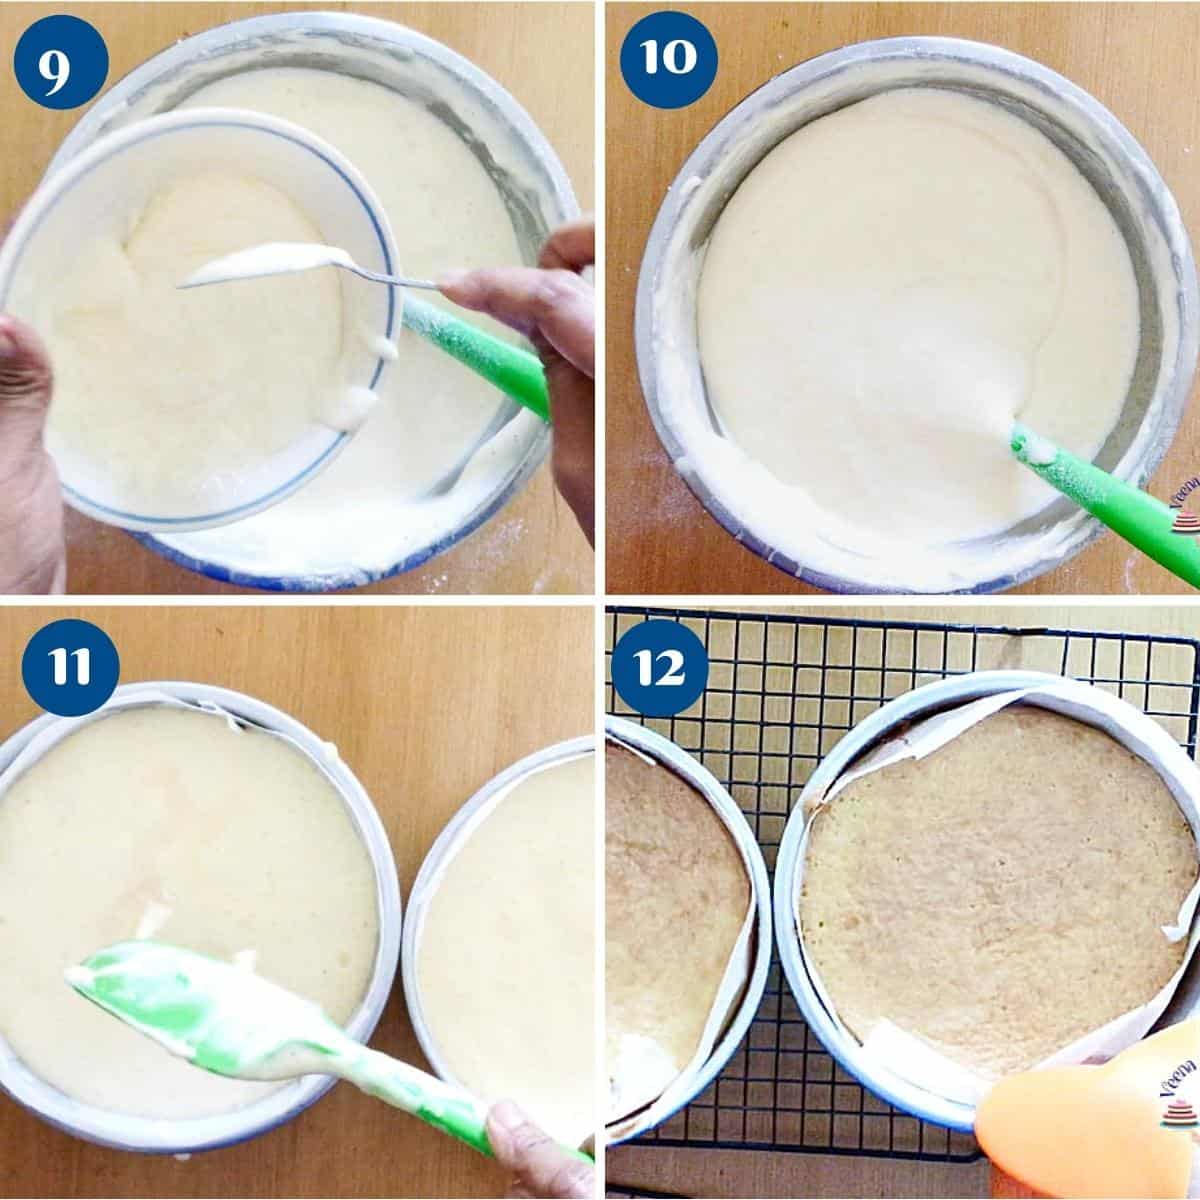
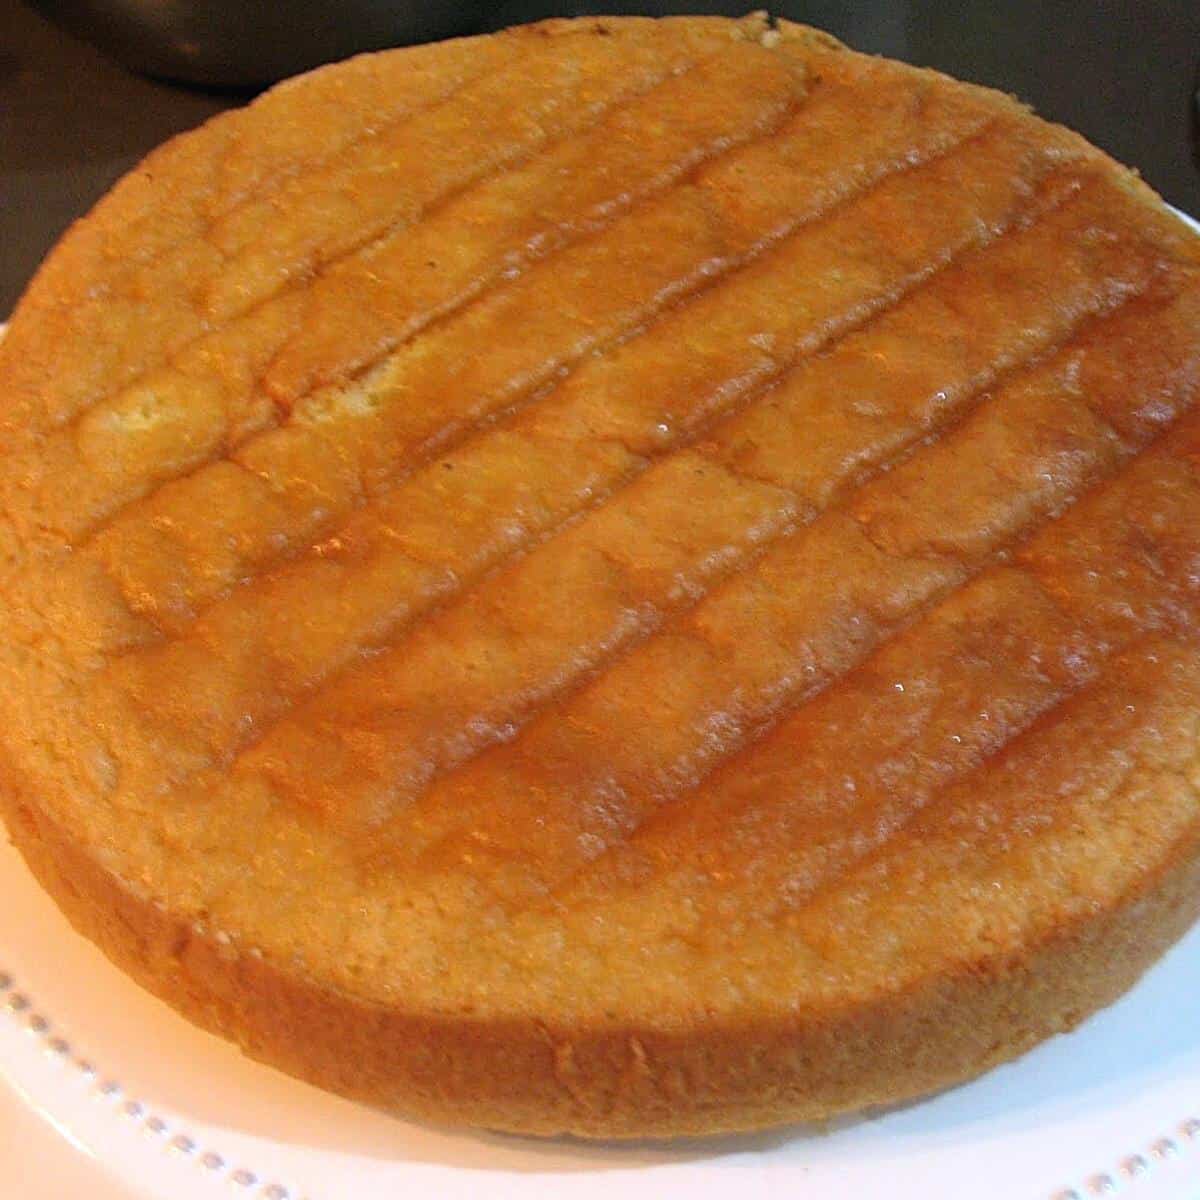
Butter – add two dollops of the cake batter into the melted cooled butter then add the mixture to the batter and fold in gently.Pro tip – Make sure you have all the flour incorporated into the batter before you add the butter to avoid flour pockets into the finished cake. Bake – Pour the batter into 2 x 8-inch cake pans and bake for about 25 to 30 minutes.Pro tip -the cakes are done when the top is springy, the sides are loosened from the cake pan or a toothpick inserted into the center comes out clean. Cool – Unlike other cakes – it is best to take these cakes out of the pan as soon as they are out of the oven to avoid sinking. First, invert them onto a baking rack and then invert them over again using a second baking rack, so the tops of the cakes are facing up again.Pro tip – Make sure to use gloves and do this carefully. Always cool cakes completely before frosting.
Filling and frosting
Whipped cream – In the bowl of a stand mixer with the whisk attachment add the heavy cream. Start whipping at medium speed, gradually add the sugar. Then turn to high speed and whip to stiff peaks.Pro tip – chilled heavy cream in a chilled bowl will whip faster. I like to keep my mixer bowl in the fridge for a few minutes before I start whipping. For the sugar syrup – in a small saucepan on high heat, boil water and sugar for 2 minutes. Set aside to cool. Strawberries – save 8 to 10 pretty strawberries for decoration. Chop the rest into small pieces for the filling (about 1 cup).
Assemble
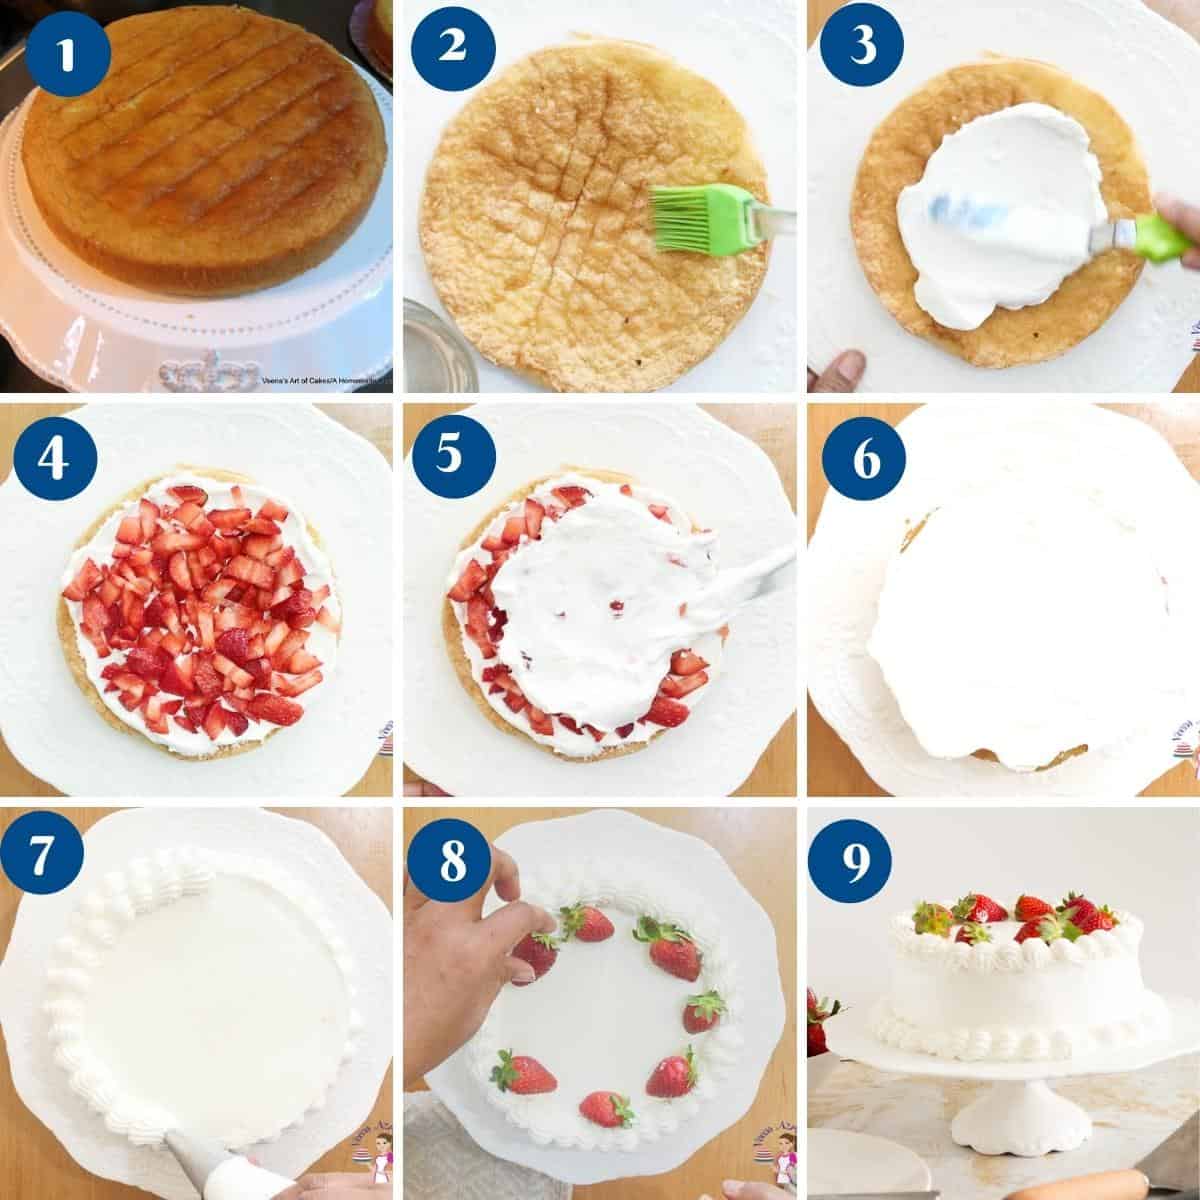
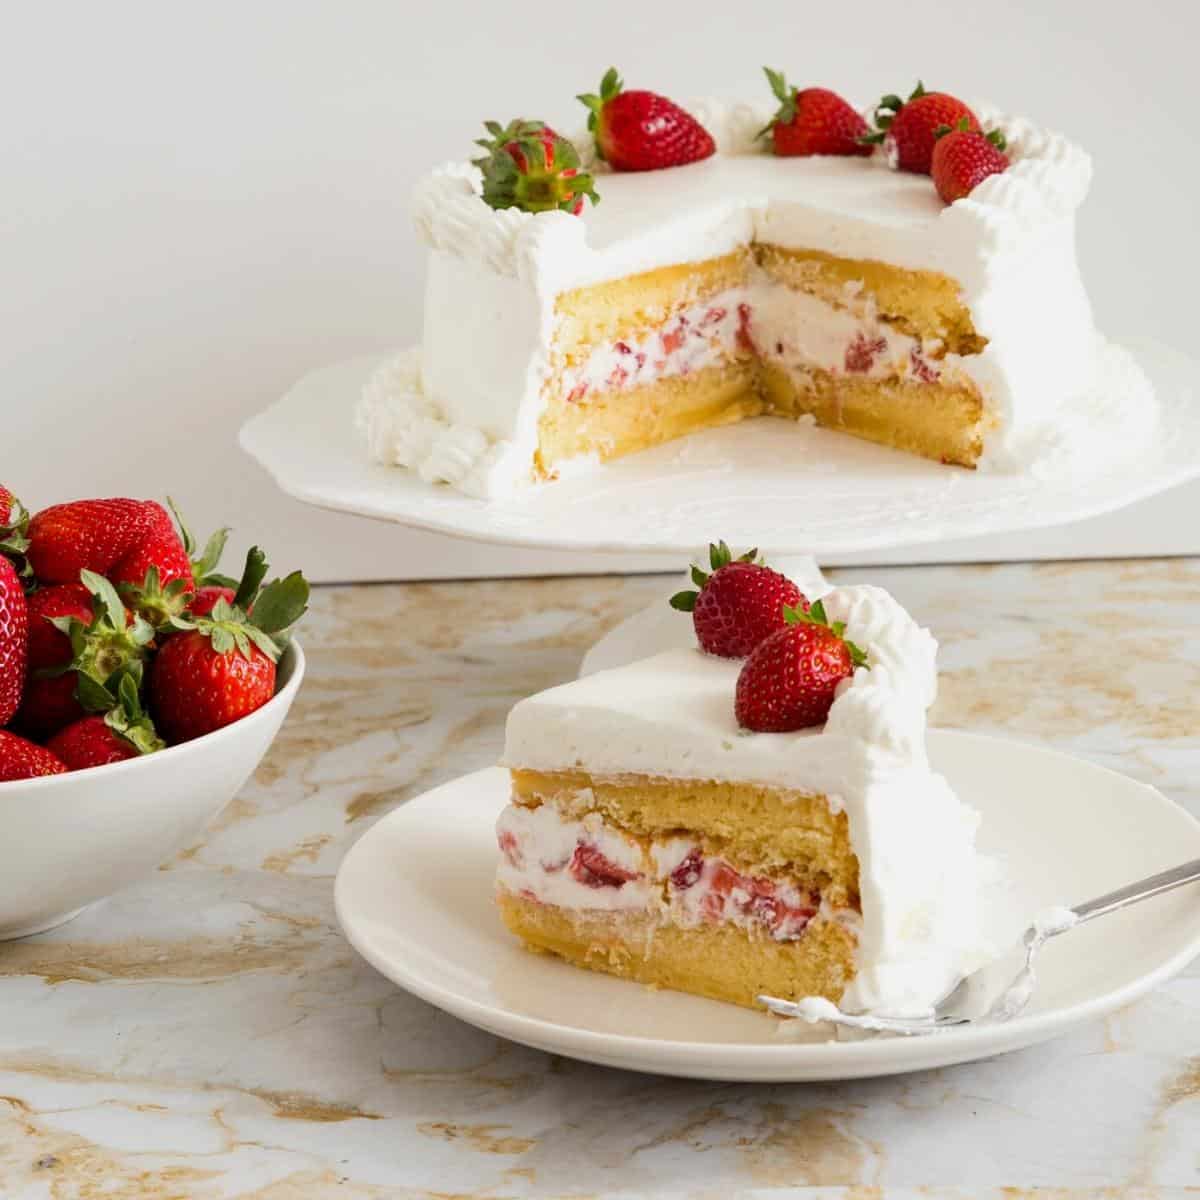
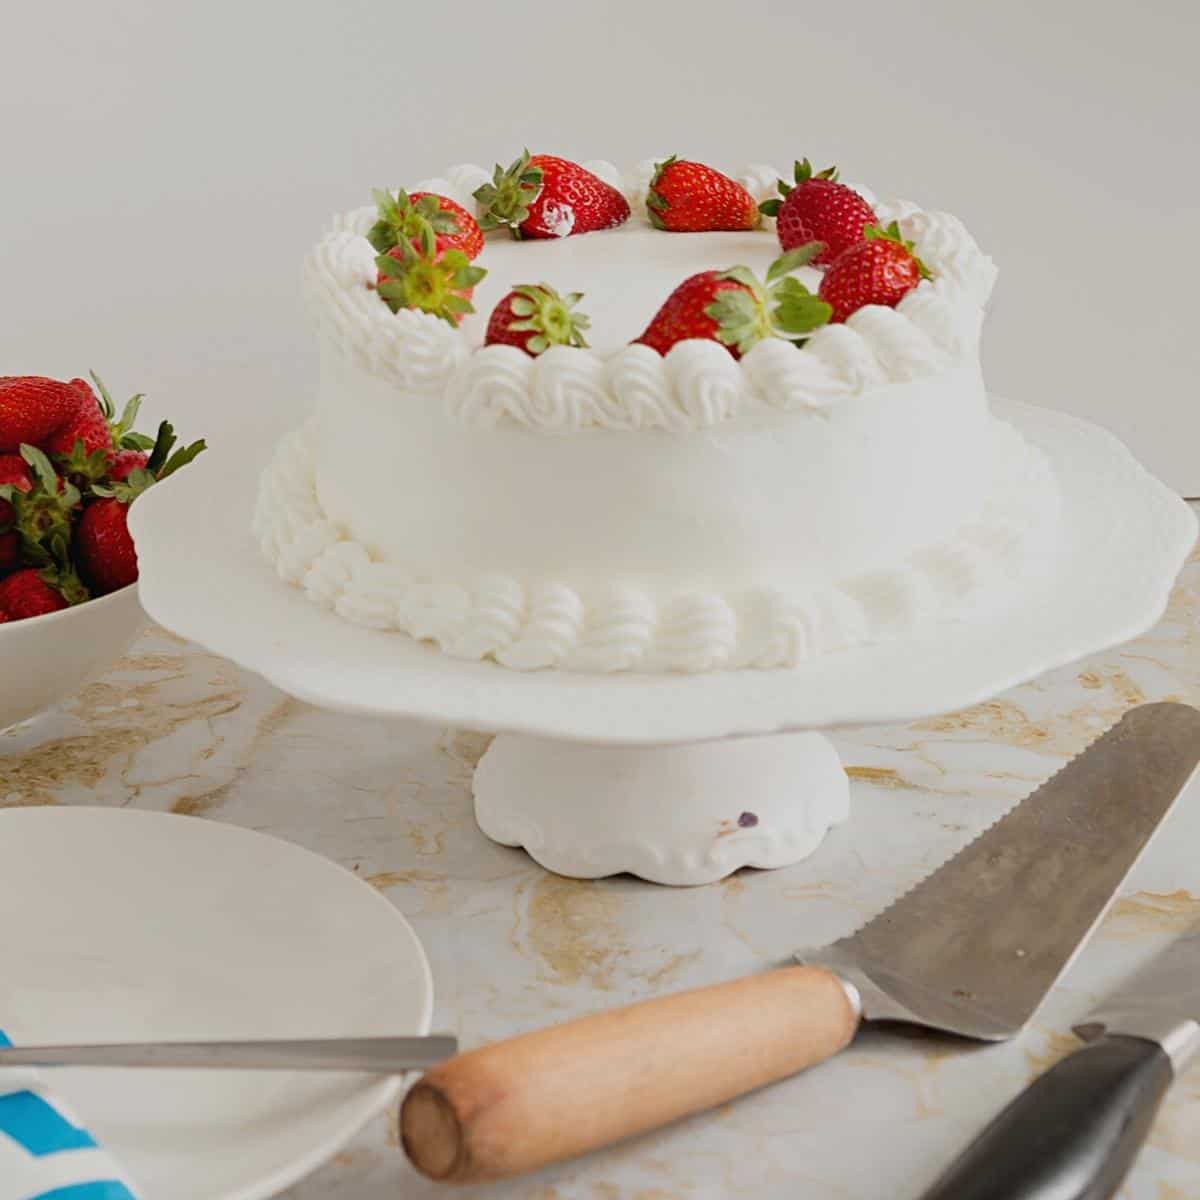
Place one layer of the cake on a cake stand. Generously brush the cake with simple syrup. Spread a dollop of whipped cream, spread evenly with a straight-edge spatula, then, generously sprinkle some chopped strawberries and top with another dollop of whipped cream. Spread evenly with a spatula.Pro tip – a second dollop of whipped strawberries will help prevent them from moving around. This gives a more stable cake. Place the second cake layer on top of the filling, brush with simple syrup. Spread more whipped cream on the top and sides of the cake. Spread evenly with an offset spatula. Dip the spatula in warm water to create a smooth finish.Pro tip – do not use hot water, dip the spatula in warm water as hot water will melt the cream Place leftover whipped cream in a piping bag with a star tip. Pipe a border on the bottom and top edge of the cake. To finish place eight to ten strawberries on top equally spaced.
Tips for success
Room Temperature Ingredients: Ensure that your eggs are at room temperature. This helps them incorporate more air when beaten, resulting in a lighter cake. Proper Mixing: When whisking the eggs and sugar over the heat, make sure to whisk continuously to prevent the eggs from scrambling. Also, when folding in the flour, do so gently to avoid deflating the batter. Sifting the Flour: Sift the cake flour before adding it to the batter. This helps to aerate the flour and prevents lumps in the batter. Melted Butter Technique: Mixing a portion of the batter with melted butter before folding it back into the main batter helps to ensure the butter is evenly distributed without deflating the batter. Correct Baking Time: Bake the genoise until it is golden brown and springs back when lightly touched. Overbaking can result in a dry cake. Cooling Properly: Allow the cake to cool in the pan for a few minutes before transferring it to a wire rack to cool completely. This helps prevent the cake from collapsing. Storage: Store the genoise in an airtight container at room temperature for up to 2 days, or freeze it for longer storage.
Troubleshooting
Dense or Heavy Cake: This could be due to overmixing the batter or not incorporating enough air. Make sure to fold the flour in gently and avoid deflating the batter. Sinking in the Middle: This could happen if the cake is underbaked or if the oven temperature is too high, causing the cake to rise too quickly and then collapse. Check the cake for doneness with a toothpick, and ensure your oven is calibrated correctly. Dry or Tough Texture: This could be due to overbaking or using too much flour. Be sure to bake the cake just until it’s done and measure your flour carefully. Sticky or Gummy Texture: This could be due to underbaking or using too much sugar. Make sure to bake the cake until a toothpick inserted into the center comes out clean, and measure your ingredients accurately. Uneven Rising: This could happen if the oven temperature is not consistent or if the cake is not evenly mixed. Make sure to preheat your oven properly and mix the batter thoroughly but gently. Flat Cake: This could be due to old leavening agents or not beating the eggs enough. Make sure your baking powder or baking soda is fresh, and beat the eggs until they are thick and pale. Cracked Top: This could be due to overmixing the batter or a too-hot oven. Mix the batter gently and make sure your oven is set to the correct temperature.
Creative variations
Lemon Genoise: Add lemon zest to the batter for a refreshing citrus flavor. You can also brush the cooled cake with a lemon syrup for extra moisture and flavor. Chocolate Genoise: Replace 1/4 cup of the cake flour with cocoa powder for a chocolate version. You can also add chocolate chips or chunks to the batter for a more intense chocolate flavor. Almond Genoise: Add almond extract or finely ground almonds to the batter for a nutty flavor. You can also sprinkle sliced almonds on top of the cake before baking for added texture. Coffee Genoise: Add instant coffee granules dissolved in a little hot water to the batter for a subtle coffee flavor. You can also brush the cooled cake with a coffee syrup for extra richness. Spiced Genoise: Add ground cinnamon, nutmeg, and cloves to the batter for a warm, spiced flavor. You can also add chopped nuts or dried fruit for added texture. Berry Genoise: Fold fresh or frozen berries into the batter before baking for a burst of fruity flavor. You can also layer the cake with whipped cream and more berries for a berry-filled treat. Rum Genoise: Brush the cooled cake with a rum syrup for a boozy kick. You can also add rum extract to the batter for a more intense flavor.
Creative ways to serve genoise sponge cake
Layered Cake: Use the genoise as layers in a layered cake. Fill the layers with whipped cream, pastry cream, fruit preserves, or fresh fruit. You can also soak the layers with flavored syrups or liqueurs for added moisture and flavor. Trifle: Cube the genoise and layer it in a trifle dish with whipped cream, fruit, and custard or pudding. Repeat the layers until the dish is full, and top with whipped cream and fruit. Tiramisu: Use sliced genoise instead of ladyfingers in a classic tiramisu recipe. Layer the genoise with coffee-flavored mascarpone cheese and dust with cocoa powder. Charlotte: Use slices of genoise to line a mold, then fill it with a mousse, Bavarian cream, or fruit filling. Chill the charlotte until set, then unmold and serve. Roulade: Roll the genoise with a filling like whipped cream, jam, or chocolate ganache to make a roulade or jelly roll cake. Dust the outside with powdered sugar or cocoa powder before serving. Individual Cakes: Use a cookie cutter to cut the genoise into individual rounds or shapes. Layer the rounds with filling and stack them for individual cakes. Ice Cream Cake: Use slices of genoise as layers in an ice cream cake. Alternate layers of genoise with softened ice cream, then freeze the cake until firm. Decorate the cake with whipped cream, chocolate sauce, or fruit before serving.
Best Strawberry Mousse Strawberry Cake with Swiss Meringue Buttercream Strawberry Cheesecake – Baked and Strawberry Cake Recipe Strawberry Bundt Cake Strawberry Jelly or Strawberry Jam – No Pectin See all strawberry cake
Frequently asked questions
Did you LIKE this recipe? Save it for later. You can find my recipes on Pinterest. Follow me on Facebook, Twitter, and Instagram.Subscribe, and I’ll send you new recipes right to your inbox. Thank you for sharing - Save for later