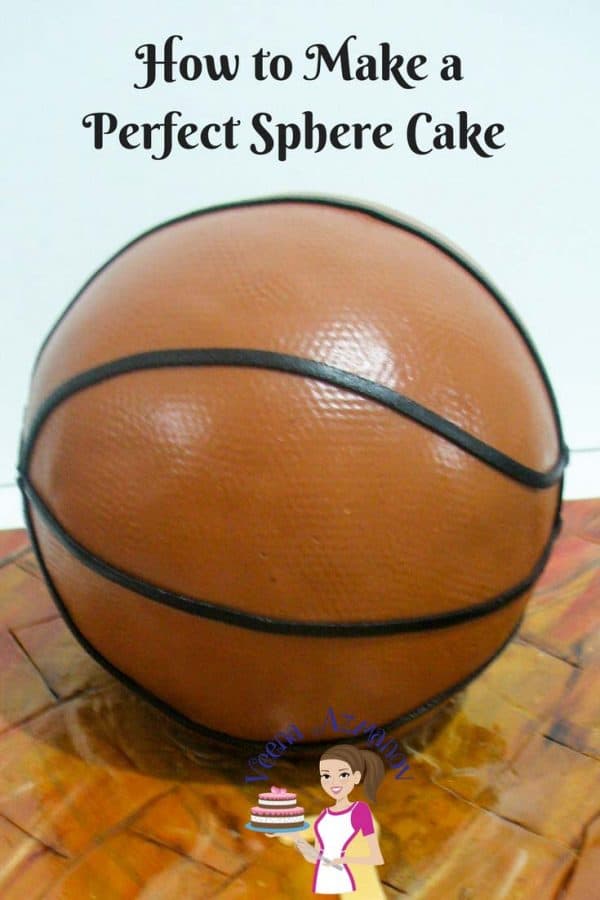
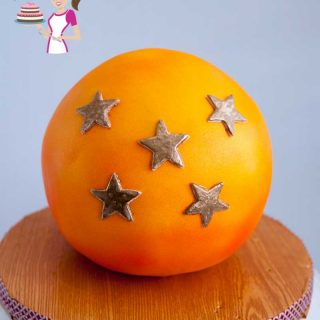
Who hates making sphere cakes? I use to! When I just started off I wondered how everybody else managed to get a perfect sphere except me..! No matter what I did … eventually, it would end up … not so perfect! Well, for one practice helps but the right technique for the right cake will help even more. What do I mean by that? I’ll explain as we go along this post. Now, this is going to be a long post. If you know me I will tell you everything I know until I have exhausted myself and you. I know!! Not everyone appreciates the long post but most do..so feel free to scroll past what’s not for you.
A few important tips to make a perfect sphere cake
Recipe – yes, you want to make sure you have a recipe that is not too soft. Preferably a butter-based cake that will firm up when you chill, making it easy for you to work. I have given you my vanilla as well as chocolate sphere cake recipes. Whether – if you live in a place with warm weather no matter how dense your cake, the possibility of the bottom cake and frosting getting soft is higher. What happens if the bottom cake becomes soft? It will not hold the weight of the top half. I think you know the rest. Dowel – one way to support your cake when weight is a concern would be to dowel the cake. While doweling is a great option – the base of the cake is pretty small so you usually end up making a three-quarter ball just so you can dowel it. Right? Cake Base – Another way to make your sphere cake more sturdy is, of course, to use a different base instead of cake. So the bottom one-third of your cake could be rice Krispy treats or foam. yes, form. Especially if you have a large cake foam makes a perfect bottom.
Support options to make a perfect sphere cake
No DowelIf I’m making a cake for my kids, this would usually be my go-to method. Quick, easy, less hassle. As long as the cake will not have to stay out for long.BUT, if I’m making a cake for a customer, it usually needs to be stable for more time. I usually finish my cake a few hours before the customer comes to pick it up. In addition, the customer usually picks up the cake a few hours before the event itself. As a business person, you have to take these things into account to prevent any last-minute accident, and risk your good reputation. Hence, in such cases, I definitely use one of these options below. With DowelsLike I said above, the base is small so you have to cut a bit of the bottom cake and place a small cake board. This is a great way to make a quick ball cake. It works well in good weather but, it’s not a whole ball. More like a three-quarter ball. Also, it works well if you want to make a teapot or a carriage, etc. Rice Krispy TreatsThis is a great option to use if you want a whole ball effect. Since the rice Krispy treats are firm the base tends to hold the weight of the cake much better. You may remember this Cinderella Carriage Cake Tutorial. I used a sphere cake to make the carriage. The bottom base for the sphere is Rice Krispy treats.
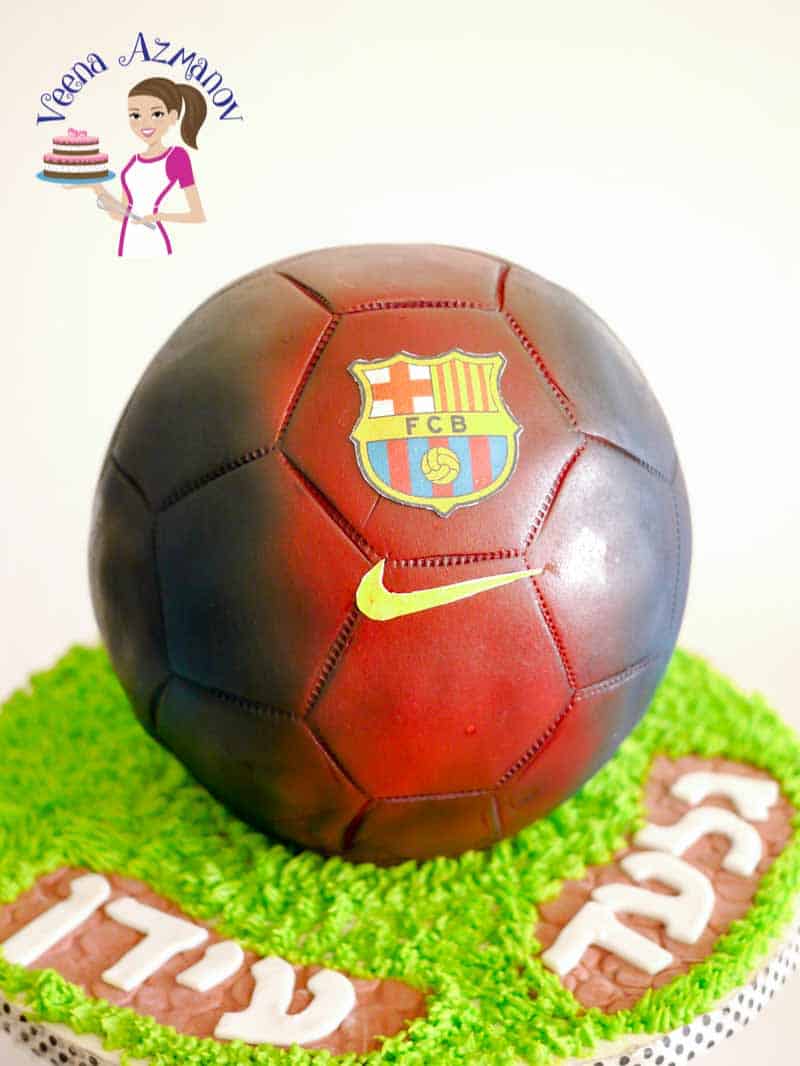
Foam / StyrofoamThis is the best option if you have a big ball cake. which of course won’t work with dowels or with Rice Krispy treats. This Barcelona ball has foam at the bottom 1/3. Because it’s an 8″ cake and it was made in the middle of summer. There is no way I would be able to do it any other way in our climate.
Do I need a ball pan?
Yes and NO!! A ball pan is not necessarily a bad idea. They aren’t expensive and you can make not just a ball but many other cakes that a spherical in shape. Alternatively, I’m sure you have stainless steel bowls or Pyrex bowls that are the same shape as a half-sphere. Bake two of those and use them just as I have in this post.
A perfect sphere cake with just a cake board and some dowels
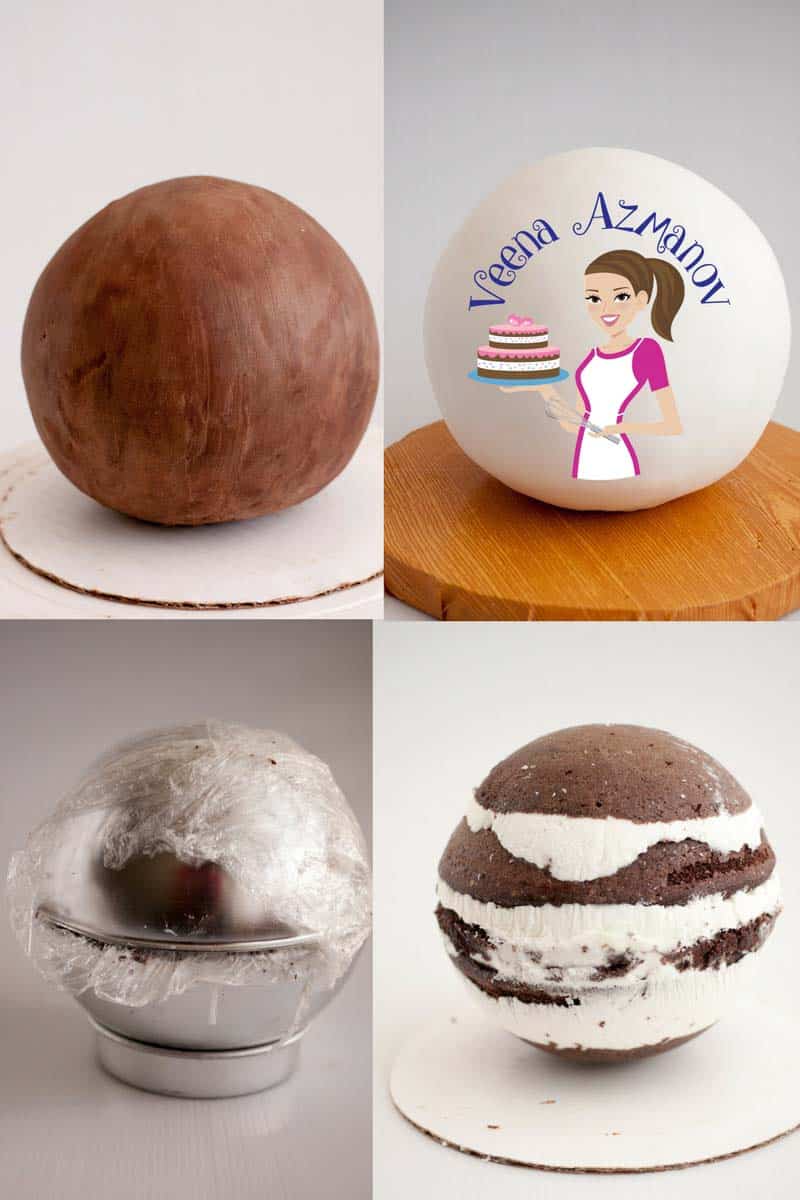
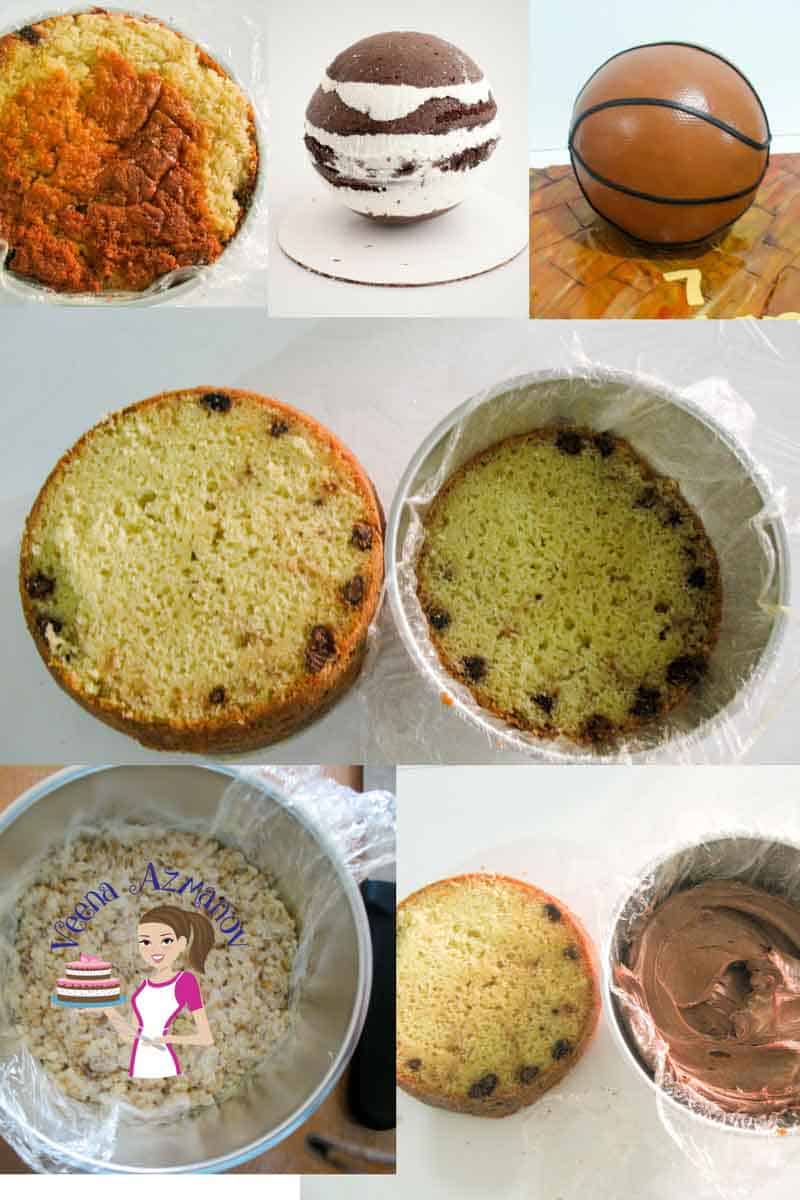
Bake your cake in two half ball pans. Cool cakes completely – then cut the domes off and torte the halves if you want. Prepare two small cake circles/boards using form core or similar. One about 2 inches for the bottom of the cake, and the other an inch smaller than the widest circumference of the ball. This will be in the middle for support. Here my ball pan is a 6″ circle. So my form core circle is 5 inches. Using the same ball pan you used to bake the cake – line the pan with a plastic or cling wrap so the frosting won’t freeze to the pan. Place the small circular board 2 inches from the bottom of the base. Now layer the cake in the ball pan alternating with cake and frosting. You should have two half spheres like below.
Chill for 10 mins then continue
Using bubble tea straws, or similar, dowel to the bottom sphere. The one that has the small 2-inch base. The dowels have to be close to each other so they are within the 2-inch base. Next, add a little frosting over the dowels, and Place the second cake circle (the 5-inch one). As you can see in the image above – I have two half spheres – bottom one with dowels and centerboard and top sphere with only cake and frosting. Now fill frosting in any gaps of the two spheres and place the top sphere on the bottom sphere. The frosting should be the same height as the pan.. so no gap between the two spheres… remove any excess.
The ball pan should have no gap between the top half and bottom half, making a perfect sphere. Any gap in between will result in an oval, instead of a sphere. Chill the cake in the pan for a couple of hours so it’s all nice and firm. Once chilled, slowly pick up the pans and remove the plastic wrap. You should now have a perfect sphere cake – ready to be frosted with either buttercream or ganache, and then fondant.
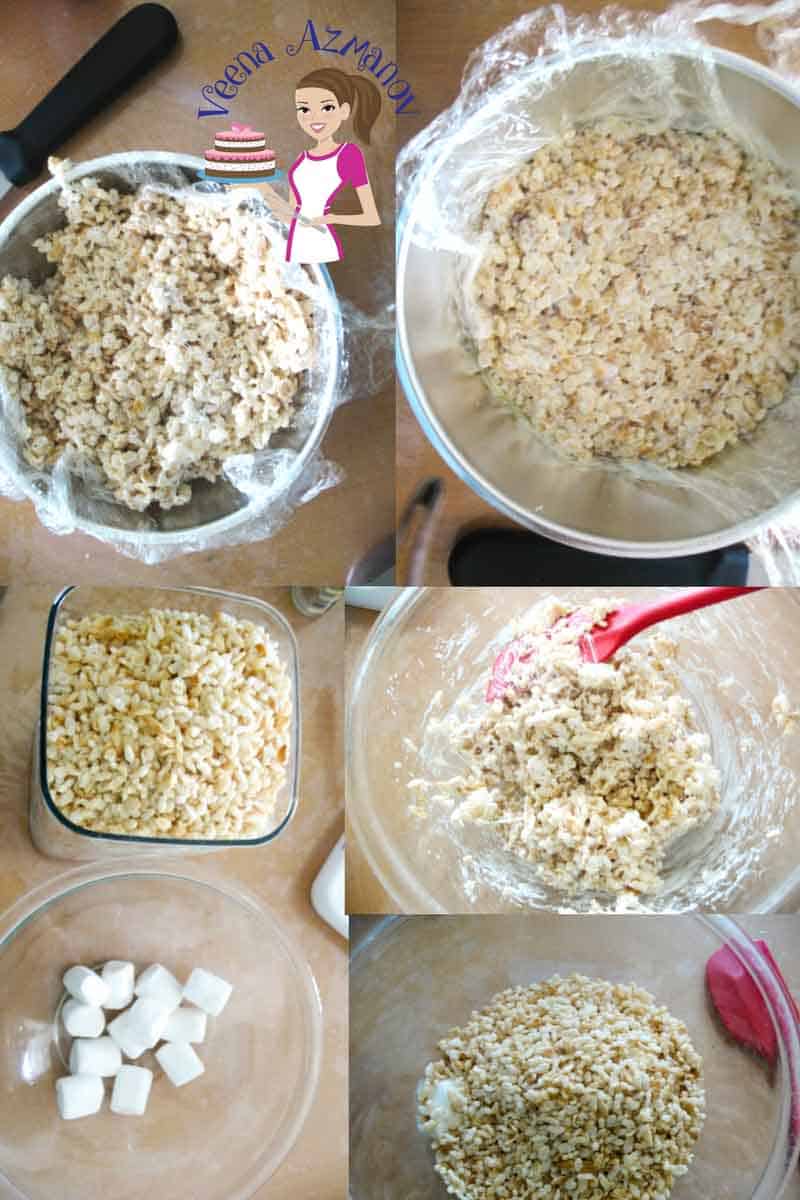
A perfect sphere cake using Rice Krispy treats as a base
As you can see Rice Krispy treats are easy to make with just melted marshmallows and Rice Krispy treats. I’ve given you the recipes and lots more info in my post – Rice Krispy treats in cake decorating So I’ll skip the basics here.
Melt marshmallows in a microwave-safe bowl. Add Rice Krispy treats and mix to combine. Mold the treats into the bottom of a ball pan so you have the shape of the ball pan. If you plan on adding a center dowel to your cake, make a hole in the center now – (making a hole later may cause cracks). Place the pan with the Rice Krispy treats in the fridge so it becomes firm and hard.
When the Rice Krispy treats are firm, follow the same process as I shared above. Layer both the pans with cake and frosting until you have two halves. Then place the top sphere on the bottom sphere and chill as before. Remove when cold, unwrap and continue frosting the cake.
A perfect sphere cake using a foam base
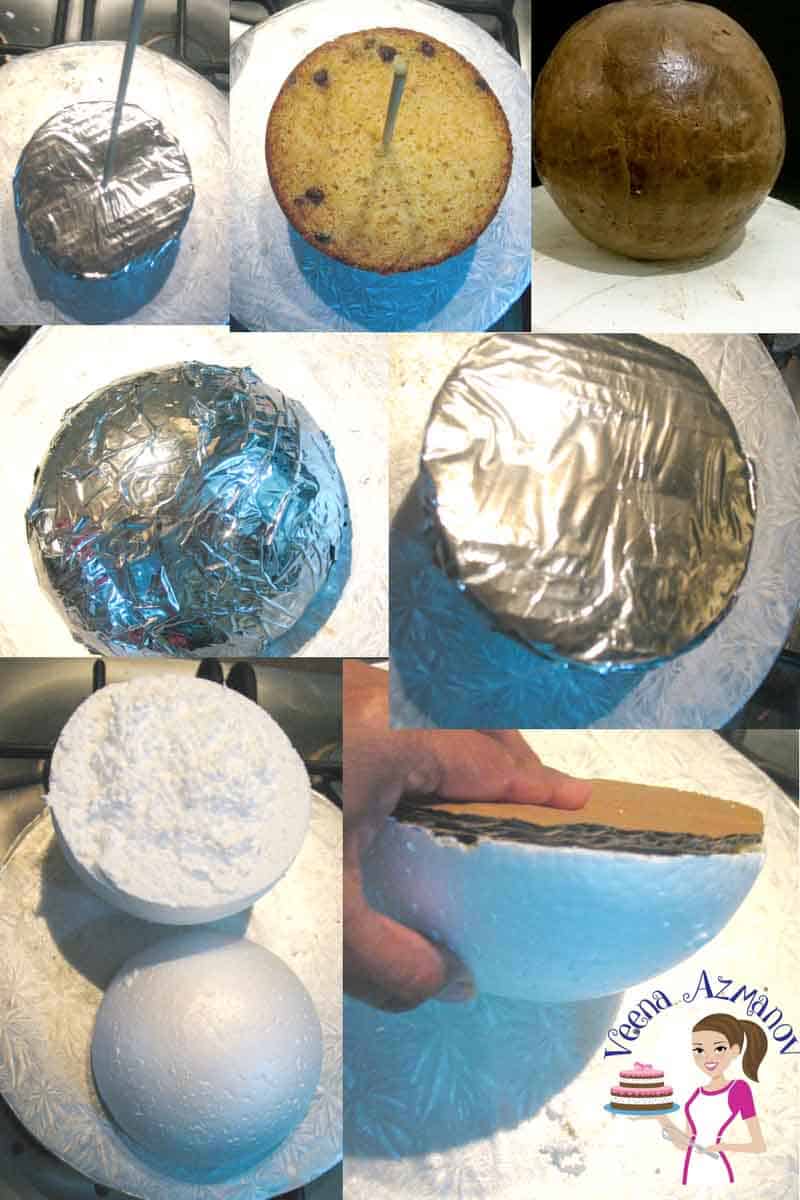
To use foam as your base use a foam ball that is the same size as your cake. You can find these at any arts & craft shop near your home. These are not food safe but we will cover the base with foil before we use it.
Cut the bottom part of the ball. Depending on how big your cake is I’d say use between 1/3 to 1/2 of the ball. I used 1/3 of the ball for an 8″ ball – I’d use 1/2 if the cake was larger. Once you cut the foam base – make a cake circle the same size as your base. Glue the two together with hot glue. (see image above) Then wrap the whole thing in foil to make it food safe. A large ball cake needs a center dowel not just for stability but it also makes it easier to work. Place a center dowel thru the foam and Stack cake/frosting on the cake board (no pans for large ball cakes).
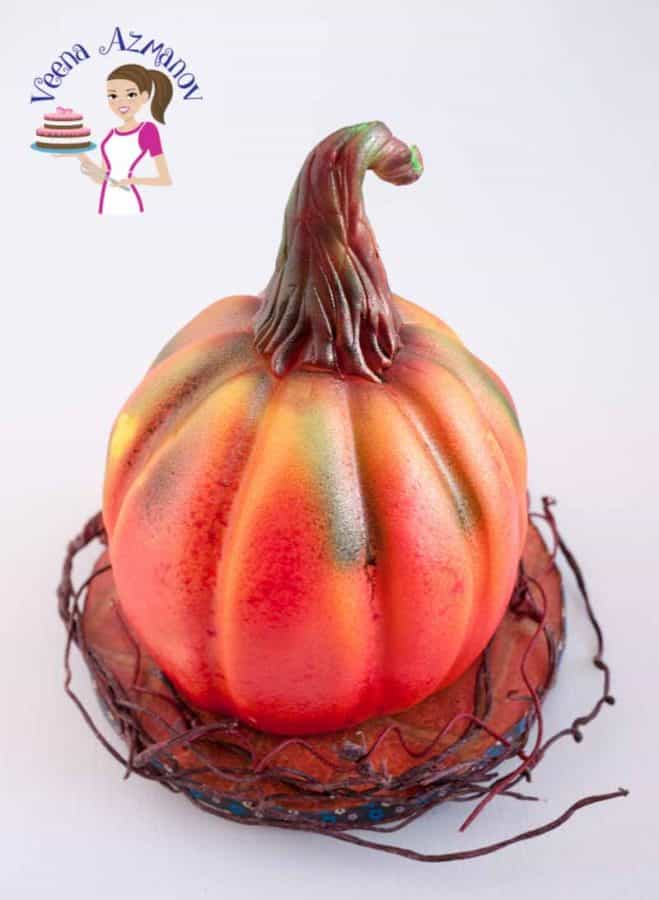
You remember the pumpkin cake?
In this pumpkin cake – I used a sphere cake too! But I made it simple with no dowel and no support. Because I made it in winter. You can see some of the process in this video on how to make the pumpkin cake video tutorial. I must admit I have learned a lot the hard way. Since everybody shows you a perfect sphere but no one tells you the little details that are required to make that perfect sphere cake. Small things that you learn only by doing it yourself. I have in my short career as a cake artist learned so much about these cakes. I hope that this post will help you with your next sphere cake. Feel free to ask me any questions via the comments below and I will be happy to answer them for you. Did you LIKE this recipe? Save it for later. You can find my recipes on Pinterest. Follow me on Facebook, Twitter, and Instagram.Subscribe, and I’ll send you new recipes right to your inbox. Thank you for sharing - Save for later