Every little girl dreams of a magical princess birthday cake that looks stunning and tastes as divine as it looks. However, creating the perfect princess cake can be daunting, especially if you’re not a professional baker. But don’t worry, I’ve got you covered! In this article, we’ll provide you with five amazing tips to help you create a cake that will have everyone lining up for seconds. From picking the perfect princess theme to choosing the right colors and maximizing decorations and embellishments, we’ll guide you through the process step by step. So get your apron on and prepare to create a cake fit for royalty
For starters, it’s a chance to showcase your creativity and impress your guests with a delicious, beautiful, and fun dessert. Plus, the excitement and joy on your little princess’s face as she blows out the candles on her special cake will be worth all the effort and time spent. So, let’s dive in and make that magical princess cake a reality! The first step is picking the perfect princess theme.
1. Pick the Perfect Princess Theme
Selecting the perfect princess theme is one of the most crucial steps in creating a stunning princess cake for your little one’s birthday.
This is the foundation upon which the cake will be built, and the theme will dictate the colors, decorations, and overall look of the cake. You can choose a classic Disney princess like Cinderella or Belle or a modern princess like Elsa or Moana. Alternatively, you could create a cake inspired by a specific location, like a fairytale castle or a magical forest. The possibilities are endless, but it’s important to consider your child’s preferences when making your decision. Once you’ve selected the perfect princess theme, it’s time to gather all the materials you will need to bring your vision to life.
2. Choose the Right Colors
Choosing the right colors is essential to bringing your princess theme to life on your birthday cake.
First, consider the overall color scheme of your party, including the decorations and tableware. You don’t want to clash with your existing décor or create a cake that blends in too much, either. Pink and purple are classic princess colors, but adding gold or silver accents can make the cake feel more regal. For a more adventurous color scheme, consider incorporating blues or greens for a mermaid or fairy princess theme. Just ensure that your colors complement each other and your theme. Use food coloring sparingly and carefully mix colors together to create your desired shade. And don’t forget that the color of your frosting can impact the colors of your decorations. So be mindful of how your colors will interact with each other. With the right color palette in mind, you’ll be ready to move on to the next step: maximizing the use of decorations and embellishments.
3. Maximize the Use of Decorations and Embellishments
With the right color scheme in place, it’s time to think about bringing your cake to life with decorations and embellishments.
To create a truly stunning princess cake, you need to think beyond basic frosting and sprinkles. Consider adding edible glitter, edible pearls, or even edible gold leaf to give your cake a regal feel. You can also use fondant to create intricate details like flowers, bows, and crowns. Don’t be afraid to layer different textures and shapes to make your cake stand out. Once you’ve mastered the art of decorating, it’s time to experiment with different cake shapes and designs to take your princess cake to the next level.
4. Experiment with Different Cake Shapes and Designs
Experimenting with different cake shapes and designs is important to truly capture the essence of a princess cake.
With just a little creativity, a simple square or round cake can be transformed into a castle, a carriage, or even a multi-level gown. Use various shapes and sizes of cake pans to mix and match layers and create a unique look. Consider using a bundt pan to create a tiered effect or carving a dome-shaped cake to resemble a princess’s hat. The possibilities are endless! Once you’ve settled on a shape, think about adding details with frosting, fondant, and decorations. With some practice, you’ll be able to create a stunning centerpiece fit for any royal celebration. And if you’re feeling adventurous, try combining multiple cake shapes to create a truly unique creation.
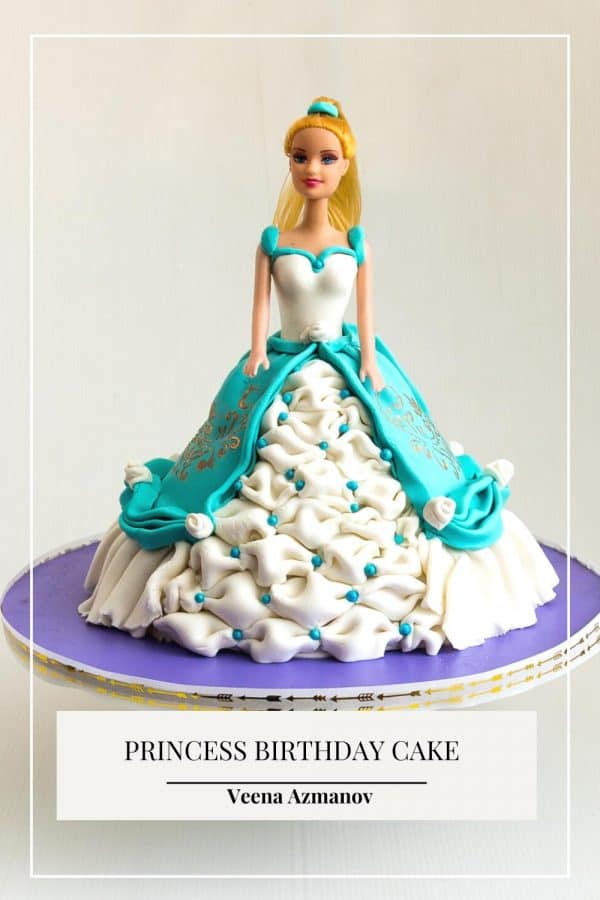
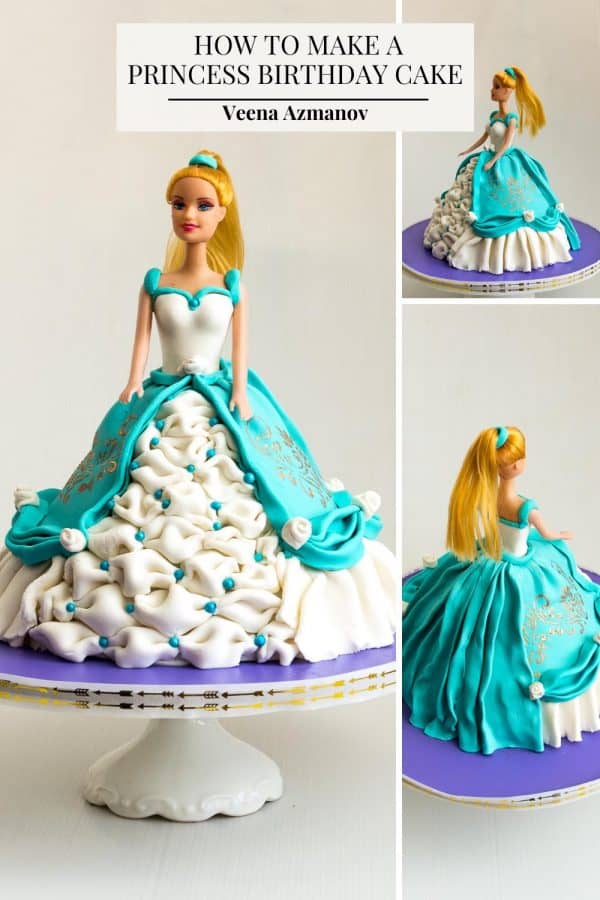
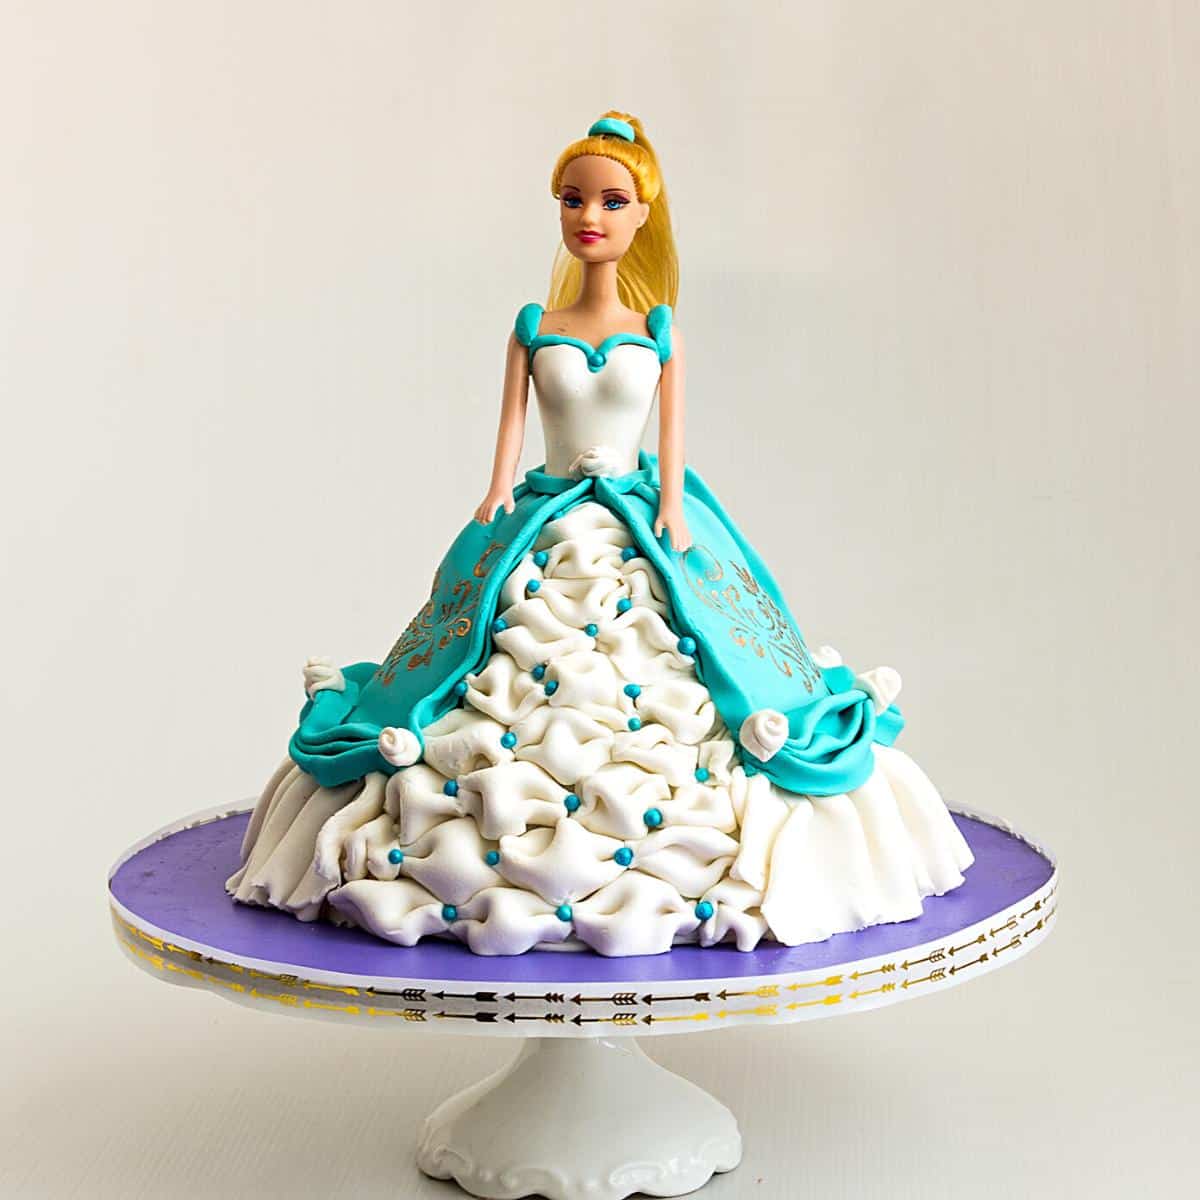
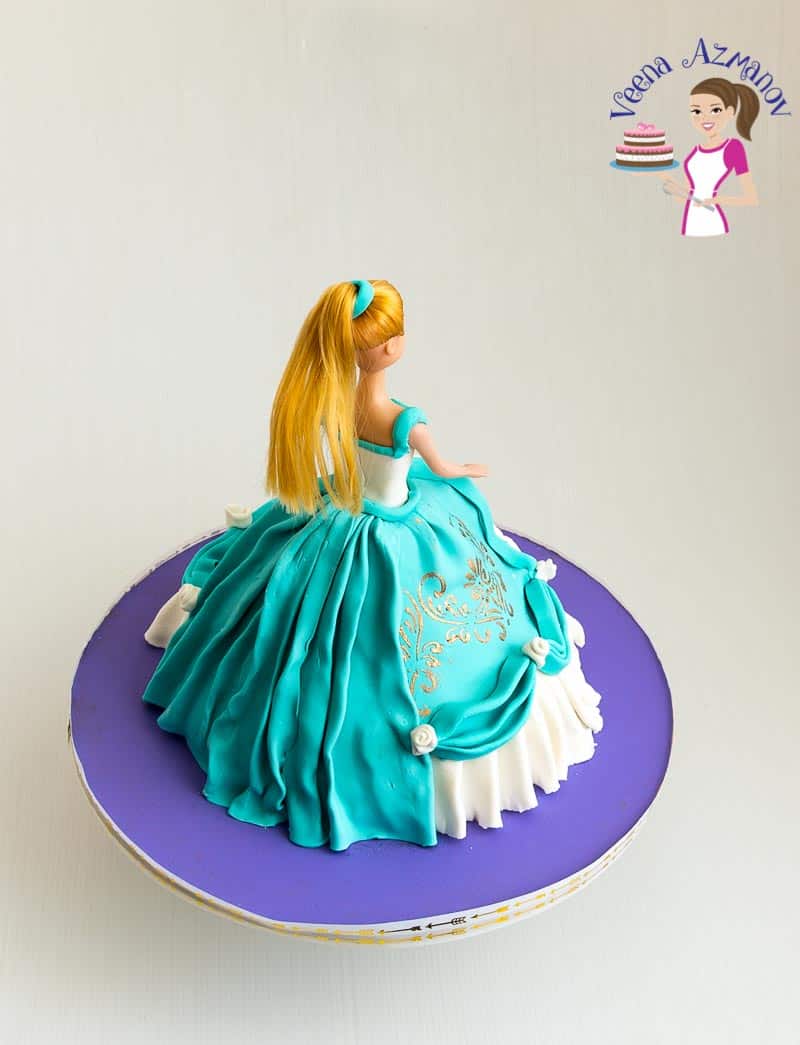
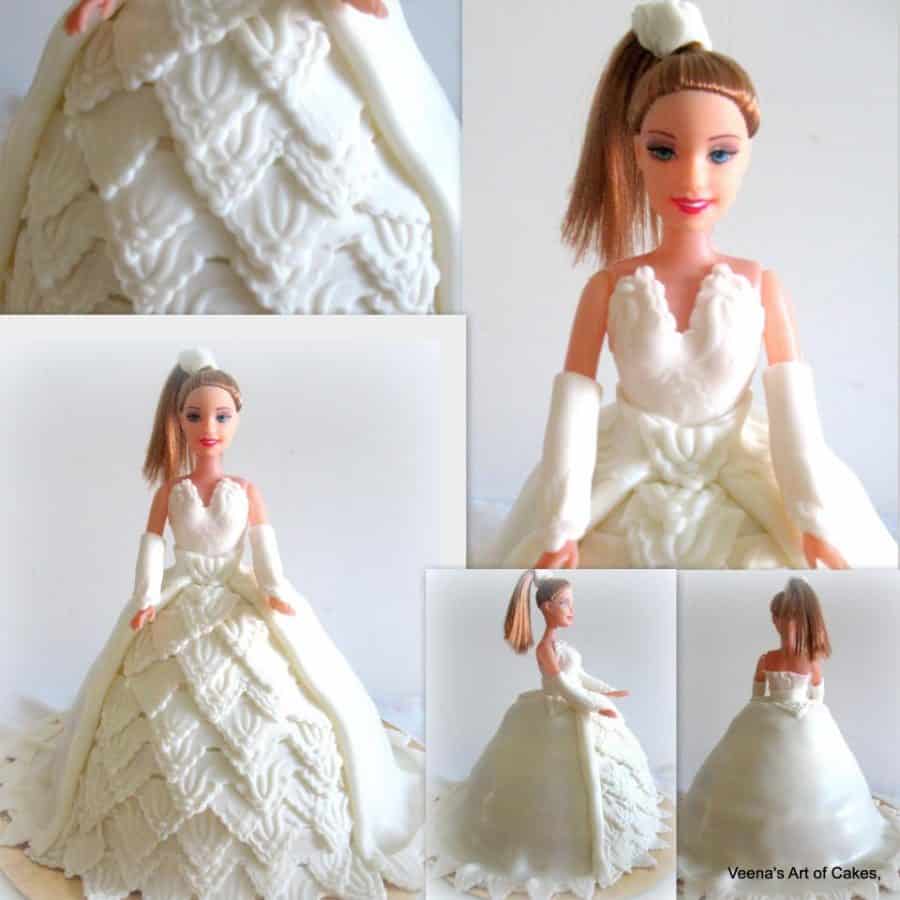
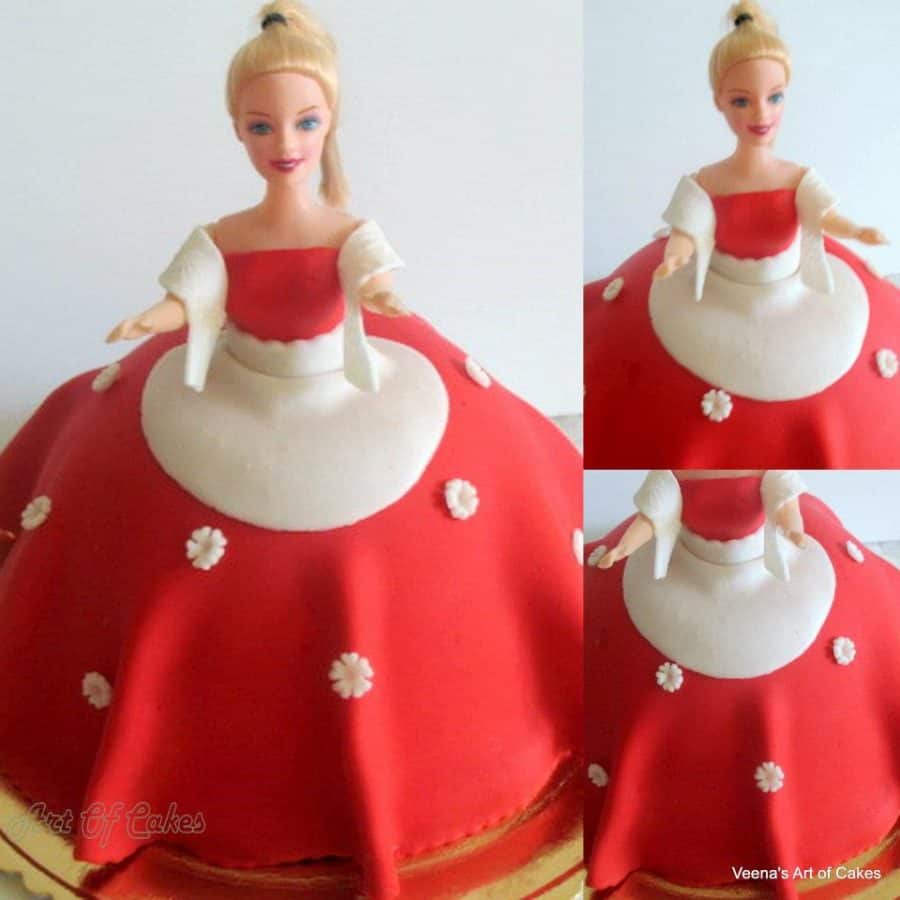
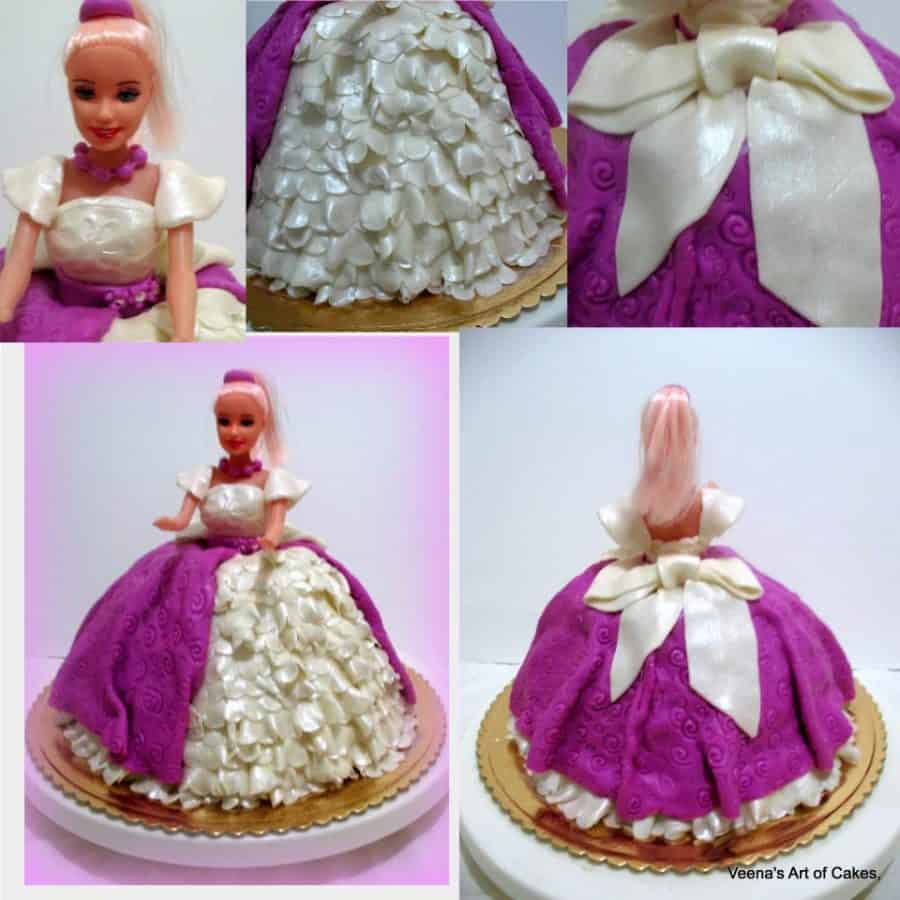
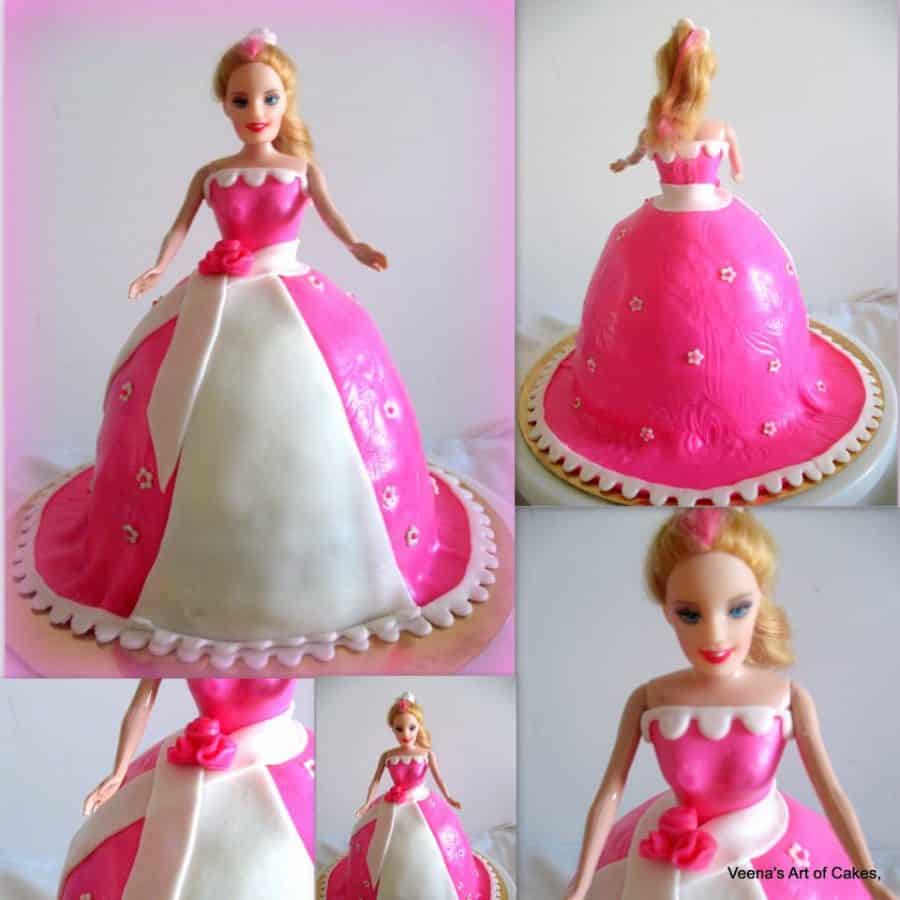
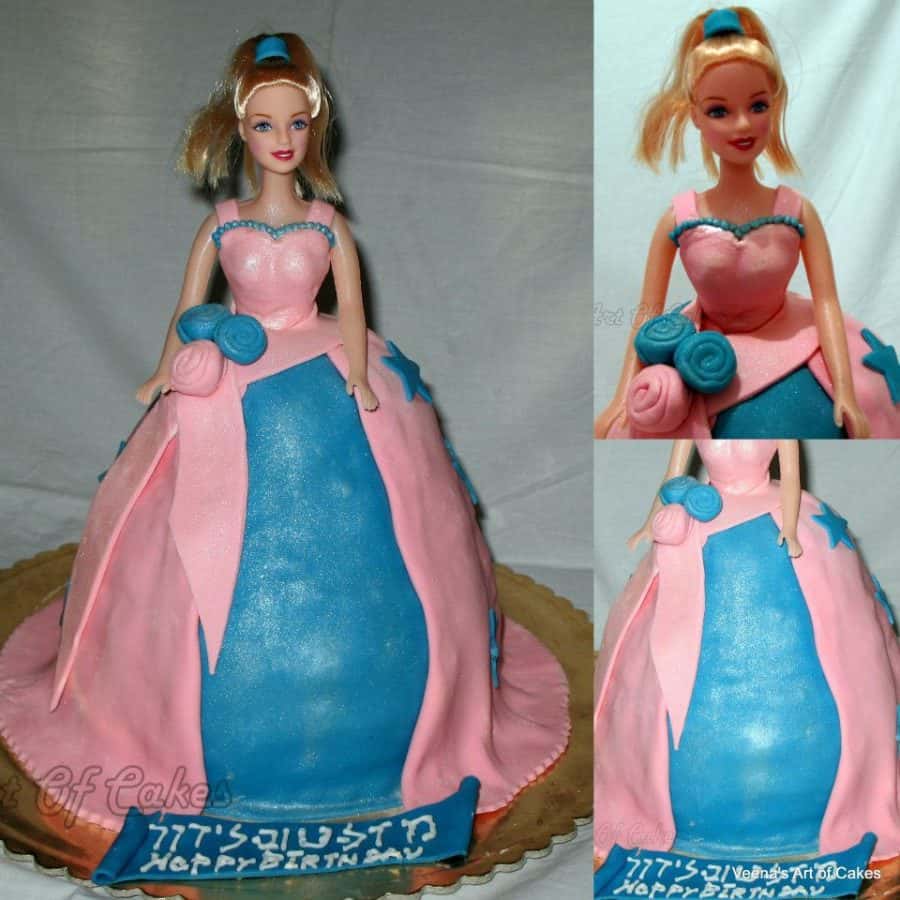
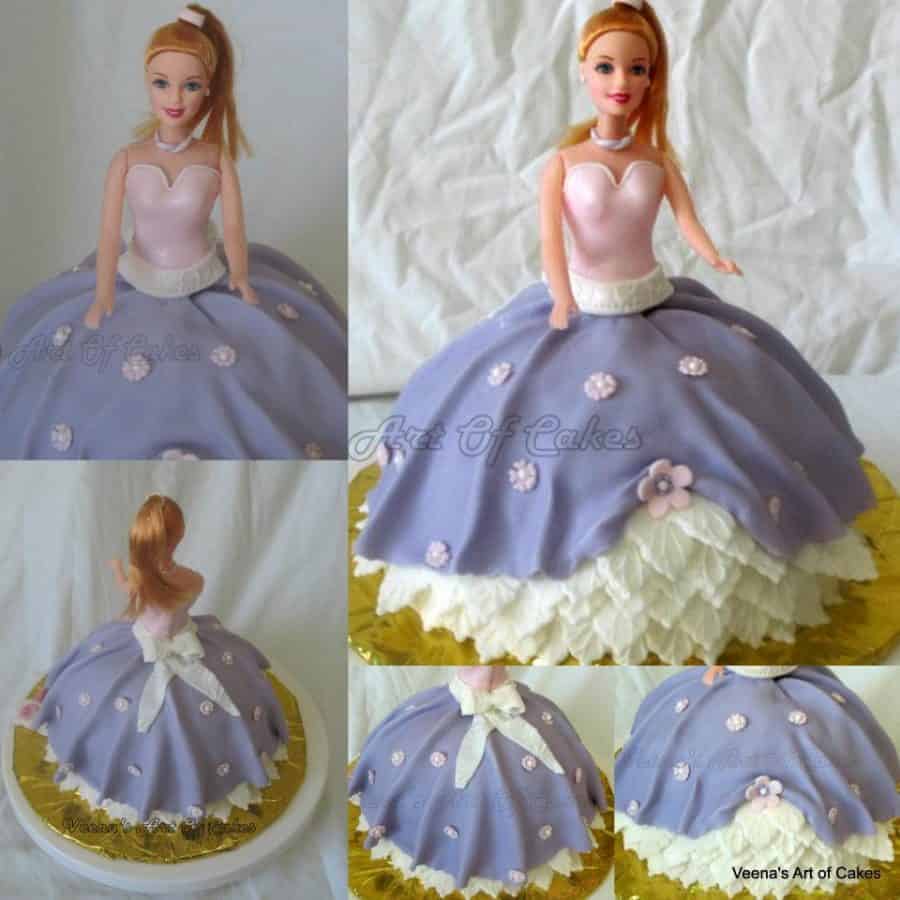
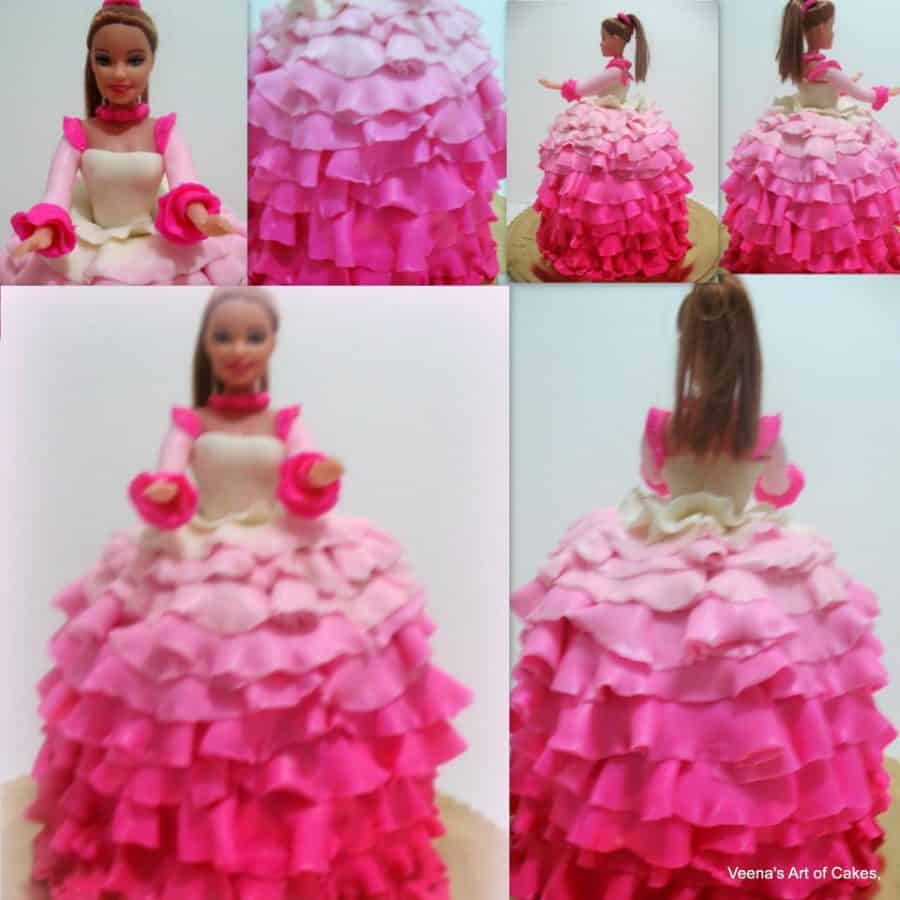
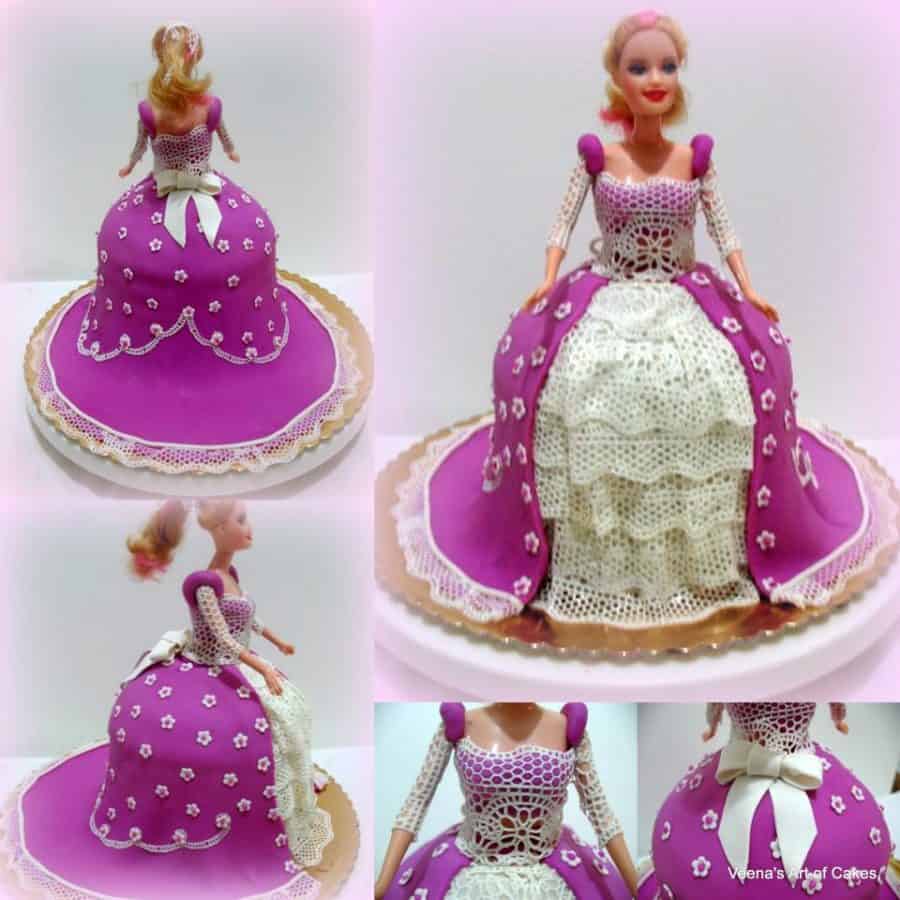
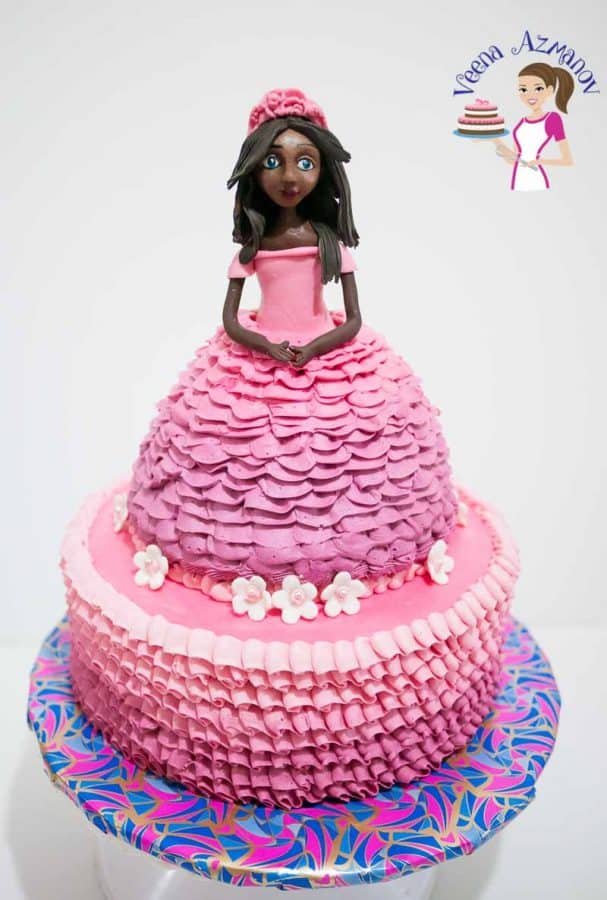
5. Use a Doll Base for a Show stopping Centerpiece
Consider using a doll base to truly elevate your princess cake and create a showstopping centerpiece.
This technique involves placing a plastic doll into the center of the cake, with the cake as the skirt of a princess gown. You can choose a doll that resembles your child’s favorite princess or simply select one with a similar dress style. To prepare the doll, wrap the bottom half in plastic wrap to protect it from the cake. Then, bake your cake layers and stack them around the doll, carving out a small hole in the center if necessary. Once the cake is assembled, simply frost and decorate it as desired to complete the princess gown effect.
With these materials on hand, you’ll be ready to start creating your stunning princess birthday cake. But before you start decorating, it’s important to choose the right colors to bring your theme to life.
Buttercream is a classic frosting typically made with butter and powdered sugar. It’s easy to work with and can be flavored and colored to suit your preferences. Buttercream also has a creamy, soft texture that many people prefer over the firmer consistency of fondant. However, buttercream can be prone to melting in warm weather and is not as durable as fondant. If you’re creating a cake with intricate details or decorations, fondant may be a better choice. Fondant is a sugar paste that can be rolled out like dough and draped over the cake for a smooth, clean finish. It’s ideal for creating realistic-looking details and can be molded into various shapes and figures. Fondant also holds up well in heat and humidity, making it a good option for outdoor events. On the downside, fondant can be more challenging to work with, as it requires kneading and rolling to achieve the right consistency. Some people also find its texture to be less appealing than buttercream. Ultimately, the choice between buttercream and fondant comes down to personal preference and the specific needs of your cake design. If you’re new to cake decorating or want a softer texture, buttercream may be the better option. But fondant may be the way to go if you’re looking for a professional-looking finish or need a cake that can withstand outdoor elements.
How to make this cake
Ingredients you will need
Cake—This is my chocolate mud cake recipe. You can also use my one-bowl chocolate cake or simple moist chocolate cake. Frosting: We’ve used my velvet American buttercream between the layers and cake decorators chocolate ganache on the outside. Fondant—The white fondant I used to cover the ganache cake is my homemade fondant recipe, and the blue is marshmallow fondant. I just used up what I had left from my previous cake orders. Gold luster dust—We spoke more about luster dust in this post, so all I’m going to say is please read the label and make sure you use one that is edible. If not, it must be removed before serving.
Decorate
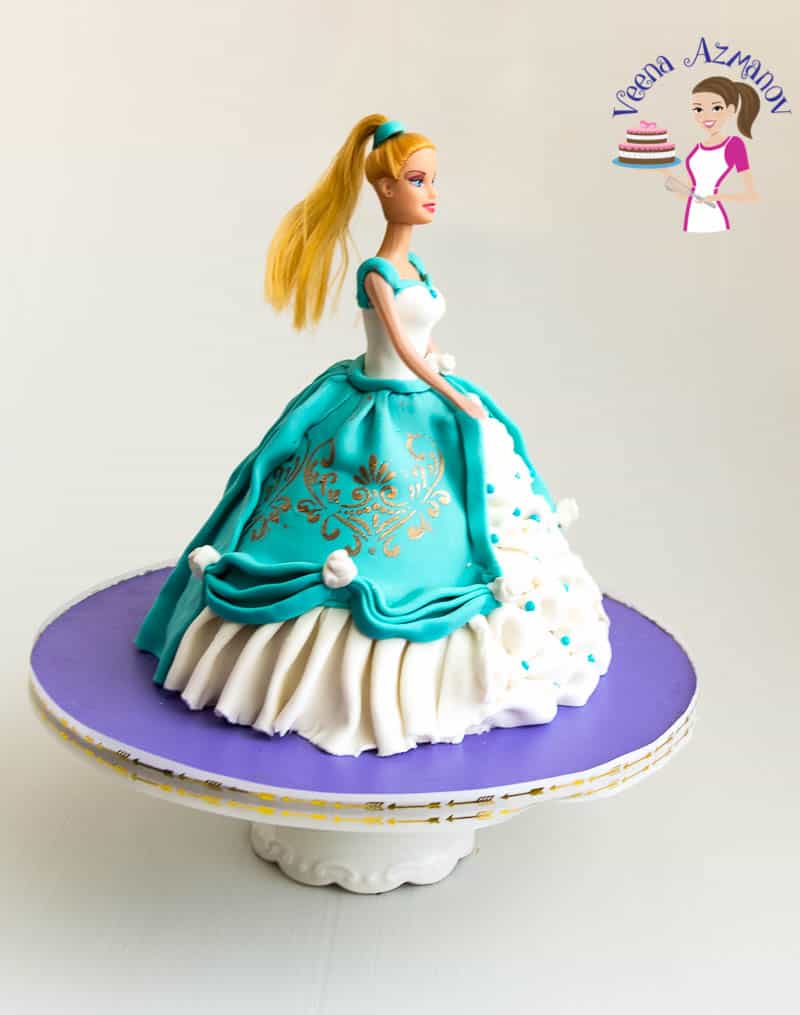
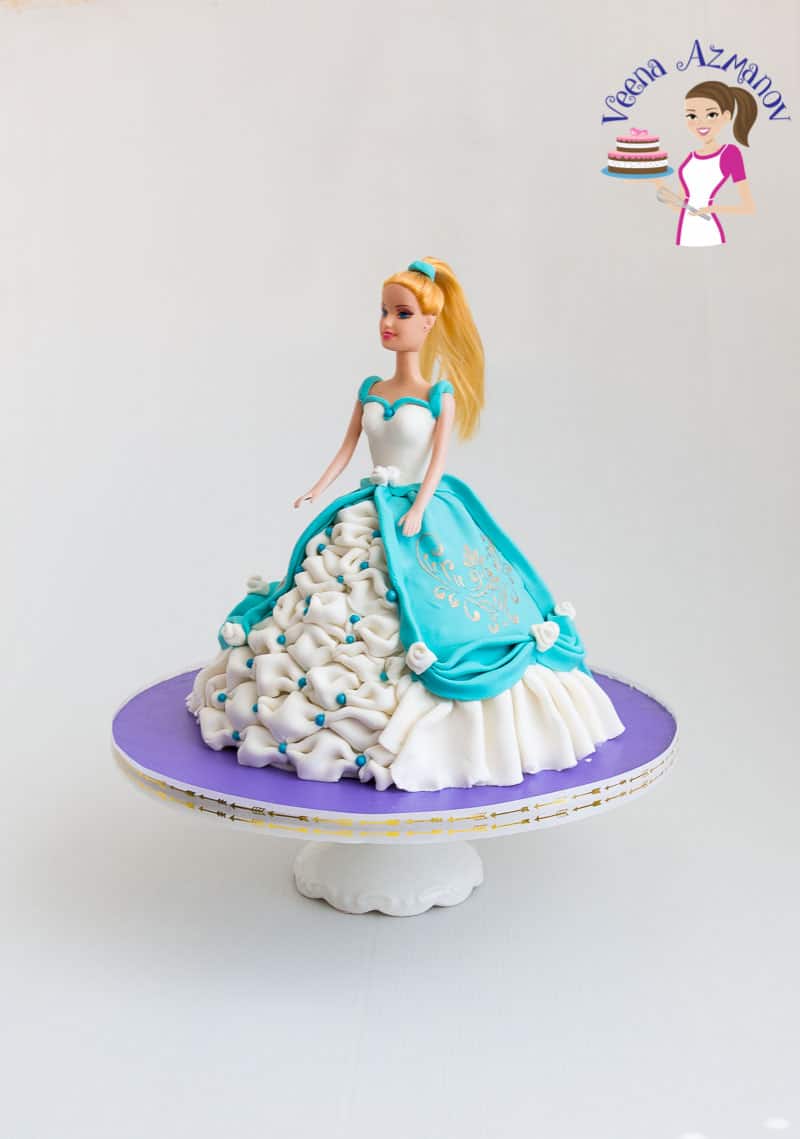
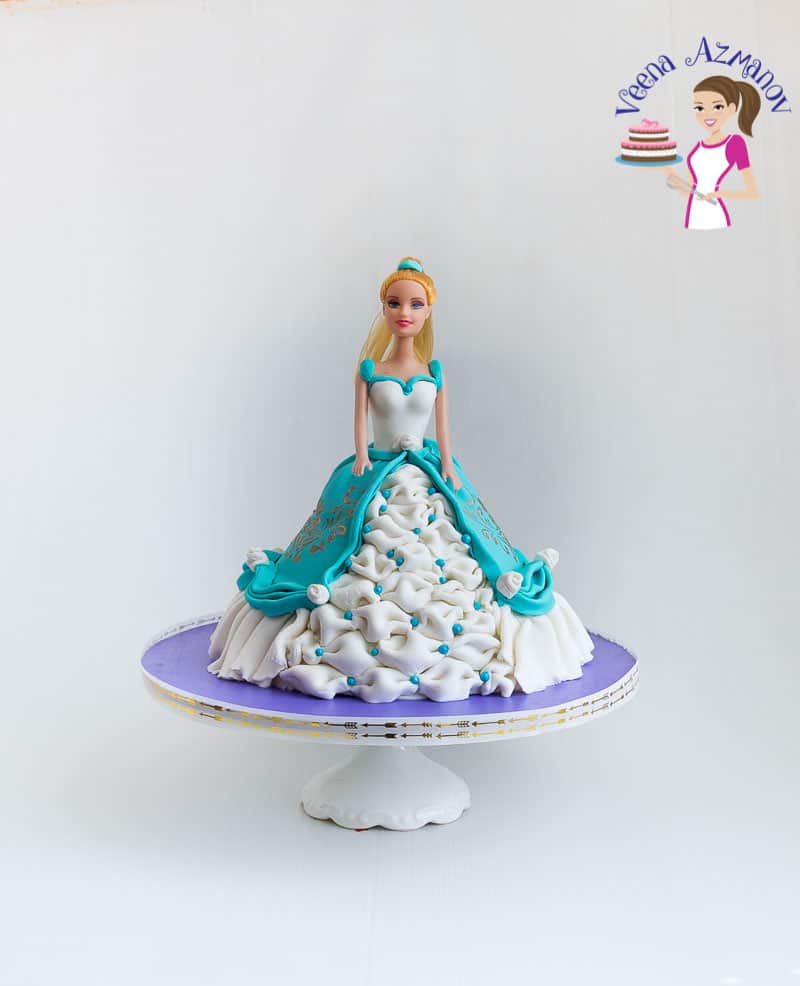
Torte the skirt-shaped cake into three layers and brush each layer with simple syrupPro tip – If you plan to use a doll with legs – hollow out the top end of the skirt, making space for the doll legs (alternatively, you can just use the top half of the doll’s body as I have in the video) Stack the cake layers on the board, spreading a generous amount of frosting between each layer. Then, place in the fridge for 15 minutes so the layers do not move.Pro tip – Chilling the cake now will prevent the layer from moving during frosting. Frost – Then frost the cake with chocolate ganache or more buttercream – use a spatula to smooth the layers. Chill the cake in the fridge for an hour or more so the ganache sets firm Fondant – Brush the cake lightly with water and wipe off any excess. Roll white fondant and cover the cake smoothing all around and cut off the excessPro tip – covering the skirt now will prevent the fondant from getting messy with chocolate during decorating.
Skirt decorations
Billow ruffles – Roll thin white fondant and cut into 3 x 3-inch squares or 3 x 4-inch rectangular pieces. Pinch the two short sides like an accordion as shown in the video. Arrange each billow on the cake in front of the dress. Continue to make these until you have a tapered design from top to bottom. Add turquoise dragees between each billow ruffle to cover the seams. Bottom frill – Roll a strip of white fondant about 8 inches long and 4 inches wide. Create wide pleats starting from the center out towards both ends. Use a rolling pin to press the center so everything stays in place. Use a pizza cutter to cut the center lengthways and make two frills as shown in the video. Use a cone shape tool or a toothpick to soften/frill the edges. Place these around the cake on both sides of the billow ruffles. Stenciled frock – Roll a piece of fondant about 10 inches long and 4 inches wide. I used turquoise-colored fondant. Place a stencil on top and using a brush dust the stencil with gold luster dust. Remove the stencil. Measure the cake and cut the desired length for the skirt. Gently pick it up and place it on the sides of the dress cake securing it on the top.Pro tip – gently press the stencil on top of the fondant with a rolling pin to ensure the stencil does not move on the fondant. Use a soft clean art brush and a gentle tapping motion. Back ruffles – Roll and cut two long strips of turquoise fondant about 6 inches long and 5 inches wide. Fold to create pleats lengthways. Arrange on the back of the dress.Pro tip – create movement with the ruffles so they look natural. Secure the top but make sure to cut off the excess. Swag – Again, roll 3 strips of turquoise fondant about 8 inches long and 4 inches wide. Fold the pleats and cut the strip into three to make three swags. Pinch the edges so the pleats stay together. Then, place them on the skirt above the white frills.Pro tip – I placed small white fondant roses to cover the edges as seen in the pictures. You can also add degrees of mini fondant flowers.
Princess body
Bodice – Place a small white fondant strip (about 2 inches wide and 4 inches long) over the body. Press into place and cut off the excess at the back. Shape under the arms cutting off excess. Shape the neckline into a U or V shape. Turquoise fondant can be used to create accents like bodice lines and sleeves. Place the body on the skirt making sure to cut off excess.Pro tip – make sure to cut off any excess fondant from the center before you add the body so as to prevent the doll from looking big at the waist. Belt – Using white fondant cover the seams at the waist with a thin strip of fondant. Add a bow at the back and you have a belt.Pro tip – I used a textured rolling pin over the fondant before making the belt.
More cake decorating tutorials
Frequently asked question
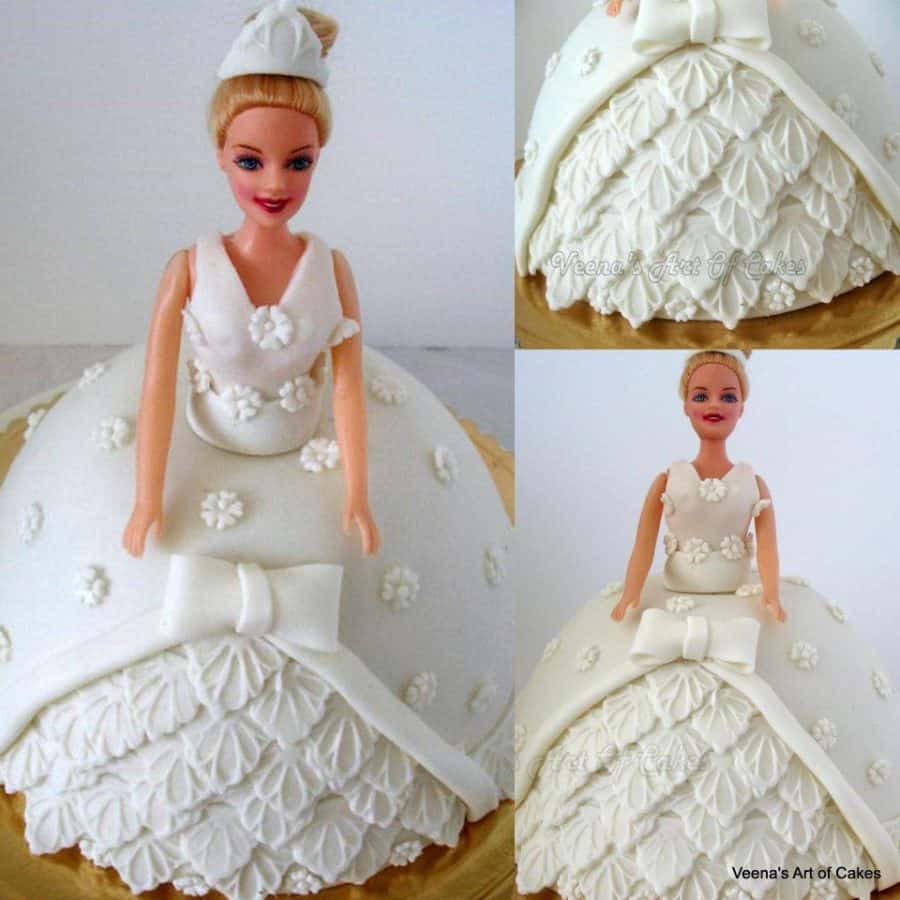
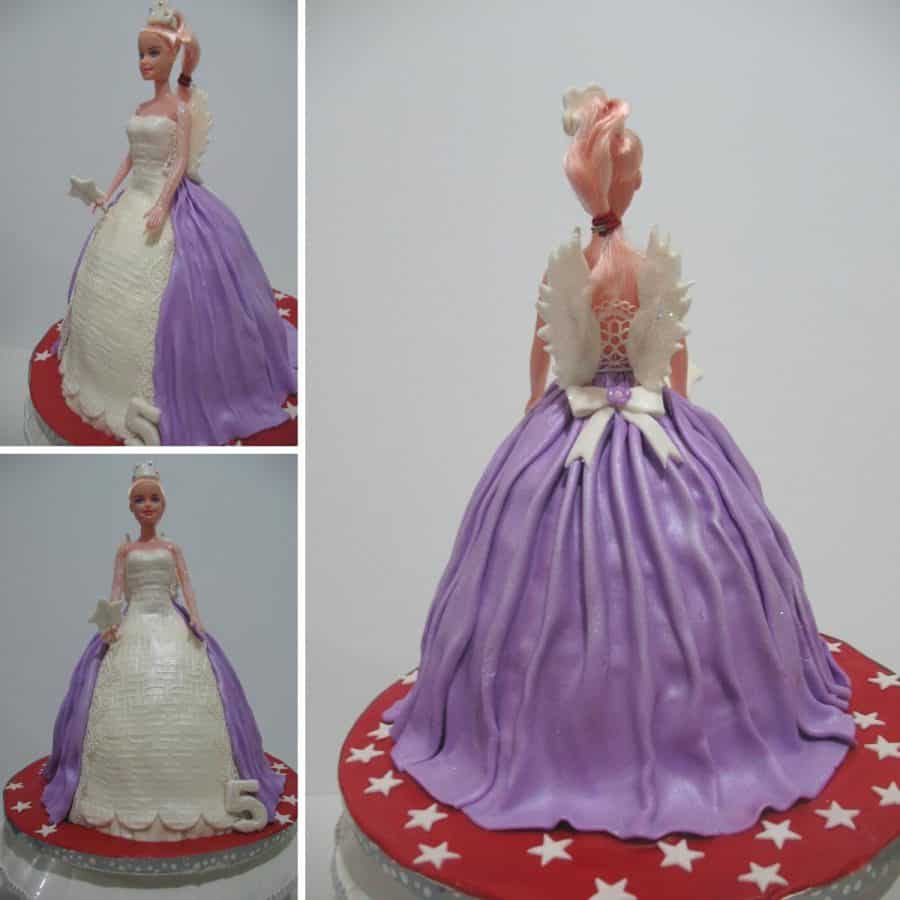
In conclusion, creating a stunning princess birthday cake is a task that requires a lot of effort, but it can be made easier with these helpful tips. Your choice of colors, embellishments, and cake shapes will all play a big part in making your cake look and taste great, so don’t be afraid to experiment with different options. Remember that every little girl deserves a cake fit for a queen, so let your creativity run wild! As you put these tips to use, keep in mind that the best part of baking is always seeing the joy on your loved one’s face when they get a taste of your hard work. So go ahead and get started, and don’t forget to enjoy the baking process along the way. Happy baking! When I was a professional cake artist I made many many princess birthday cakes. Here are some of them I made over the years.
How to make a Princess Doll Cake Buttercream Castle Cake with Princess Cupcakes Scrumptious Recipes and Original Chocolate Decorations Gum Paste Princess Crown and Cake Homemade Vanilla Birthday Cake Recipe
Thank you for sharing - Save for later