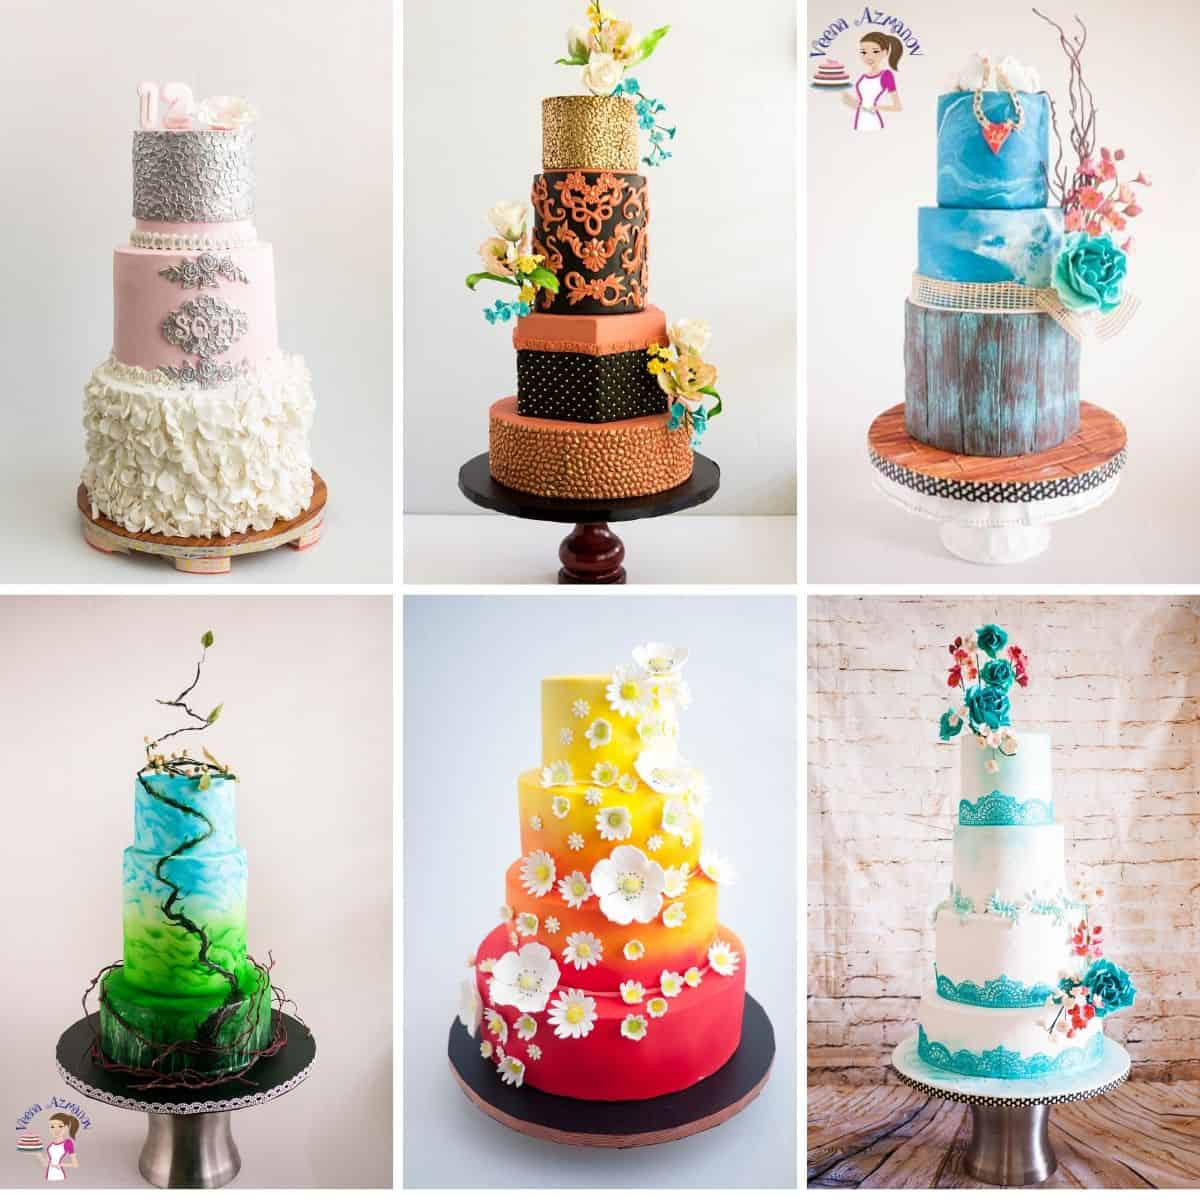
Stacking a cake refers to the process of placing multiple cake layers on top of each other to create a tiered cake. This is commonly done for cakes with two or more layers, such as wedding cakes or celebration cakes. Stacking typically involves placing a layer of frosting or filling between each cake layer to create a cohesive, layered cake. Dowels or other supports are often used to ensure the stability of the stacked layers, especially for taller or more elaborate cakes.
Step-by-step: Level, Torte, fill, and frost the cakes
Torting, filling, and frosting a cake is a process that involves layering multiple cake rounds with filling and then covering the entire cake with frosting. Here’s a step-by-step guide:
Torting and Filling
Level the Cakes: Use a long serrated knife to trim the domed tops of the cakes, making them level. Cut the Cakes: Carefully cut each cake horizontally into even layers. You can use a cake leveler or the serrated knife for this. Prepare the Filling: Make your desired filling, such as buttercream, ganache, fruit preserves, or pudding. Ensure the filling is spreadable but not too runny. Layer the Cake: Place one cake layer on a cake board or plate. Spread a thin layer of filling evenly over the cake. Add More Layers: Continue layering cake and filling, making sure each layer is level and evenly distributed. Stack the Cake: Place the final cake layer on top, cut side down, to create a flat top surface.
Frosting the Cake
Crumb Coat: Apply a thin layer of frosting, known as a crumb coat, to the entire cake. This helps seal in crumbs and provides a smooth base for the final coat of frosting. Chill the cake for about 30 minutes to set the crumb coat. Final Coat: Apply a thicker layer of frosting to the entire cake, starting with the top and then the sides. Use a spatula to spread the frosting evenly, working quickly to prevent crumbs from mixing into the frosting. Smooth the Frosting: Use a bench scraper or offset spatula to smooth the frosting, starting with the top and then the sides. Hold the scraper or spatula at a slight angle and rotate the turntable to create a smooth finish. Decorate (Optional): Once the cake is frosted, you can decorate it as desired with piping, fondant, sprinkles, or other decorations. Do the same for all cakes: If you have more cakes, follow the same process as above to fill, frost, and decorate the cakes. Chill the Cake: Refrigerate the cakes for at least an hour or overnight to allow the frosting to set before stacking.
What does doweling a cake mean?
Doweling a cake refers to the process of inserting dowels or other supports into the cake tiers to provide stability when stacking multiple layers. Dowels are usually inserted into the lower tiers to support the weight of the tiers above them. This is especially important for tiered cakes to prevent the layers from collapsing or shifting during transport or display. Doweling helps distribute the weight evenly and ensures that the cake remains stable and secure.
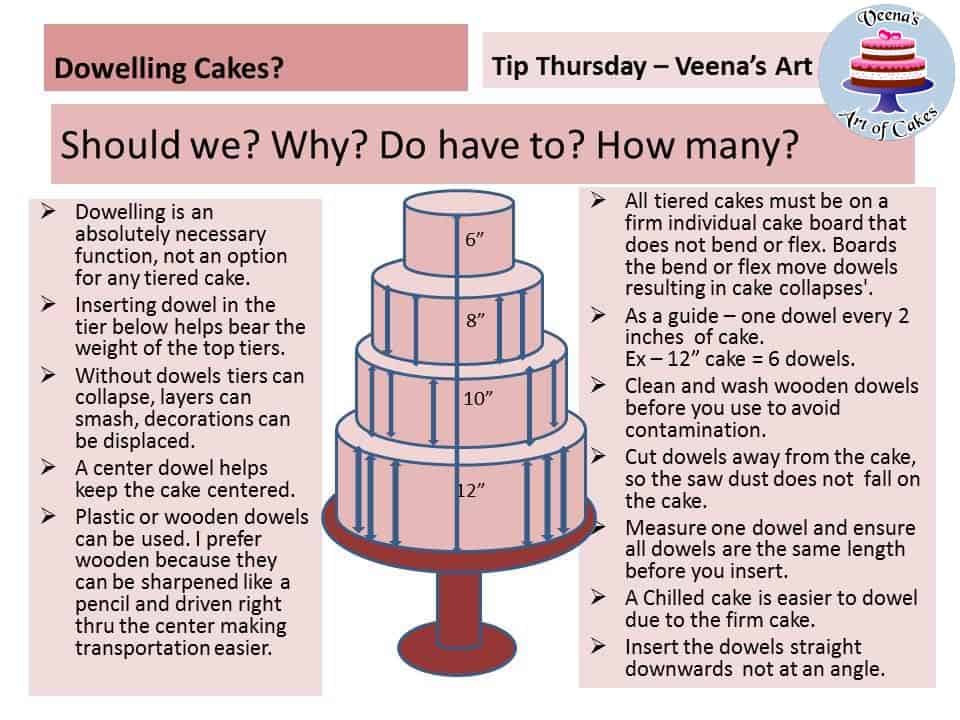
Doweling a cake before stacking is necessary for several reasons:
Support: Dowels provide support for the upper tiers of the cake, distributing the weight evenly and preventing them from collapsing into the lower tiers. Stability: Dowels help stabilize the cake layers, especially during transportation or if the cake is on display for an extended period. Prevent shifting: Dowels help prevent the cake layers from shifting or sliding, which can happen if the cake is not properly supported. Structural integrity: Doweling ensures that the cake maintains its shape and structure, especially for tall or multi-tiered cakes. Safety: Doweling reduces the risk of the cake collapsing, which could be dangerous, especially for large or heavy cakes.
Overall, doweling is essential for ensuring that stacked cakes are structurally sound, stable, and safe to serve.
How do I know if I must dowel a cake?
Deciding whether to dowel a cake depends on several factors, including the size, weight, and design of the cake. Here are some guidelines to help you decide: In general, it’s better to err on the side of caution and dowel a cake if you are unsure whether it needs it. It’s also a good idea to follow best practices for stacking and doweling cakes to ensure that they are stable and secure.
Types of dowels used to stack cakes
Wooden dowels – Make sure you buy the firm wooden dowels as some dowels sold at craft shops are too delicate and will not hold under multiple tiers. Plastic Dowel – These plastic cake dowels are the most popular in the UK and can be easily found in most cake shops. Bubble Straws – These bubble straws are thicker than the usual straws and are usually easier and cheaper to buy. Most often, it’s best to use a few extra of these just because they are more flexible than the firm wooden straws. PVC plastic straws – These are the thick water PVC pipes that are usually used in cakes that have more structure. These are considered acceptable because they are used for water. Metal dowels: Metal dowels are strong and can support heavy cakes. However, they are not as common as wooden or plastic dowels and can be harder to cut to size.
Step-by-step: How to stack a cake with dowels?
Stacking a three-tier cake with dowels requires precision and care to ensure the tiers are properly supported. Here’s a general guide on how to do it:
Prepare the cakes: Bake and cool your cakes. Level them if necessary to create a flat surface. Choose dowels: Select food-safe dowels (like wooden or plastic dowels) that are sturdy enough to support the weight of the tiers. You’ll need a central dowel that runs through all tiers, as well as additional dowels for support in each tier. Mark and cut the dowels: For each tier, measure the height of the cake and cut dowels slightly shorter to ensure they won’t poke through the top of the cake. You’ll need four to six dowels for each tier, spaced evenly in a circle near the center.
Stack the bottom two tiers: Place the largest tier on your serving plate or board. Push the central dowel through the center of the cake, stopping just above the top surface. Insert the shorter dowels in a circle within the area where the next tier will sit. Add the next tier: Carefully place the next tier on top, ensuring it’s centered. The dowels in the lower tier should support the weight of the upper tier. Repeat for the top tier: If you have a third tier, repeat the process with the central dowel and dowels in the second tier. Finish the cake: Add any decorations or frosting to the stacked tiers. Transport and store carefully: If you need to move the cake, use a cake box for support and handle it gently.
Always keep the size and weight of your cakes in mind when stacking tiers, and adjust the number and placement of dowels as needed.
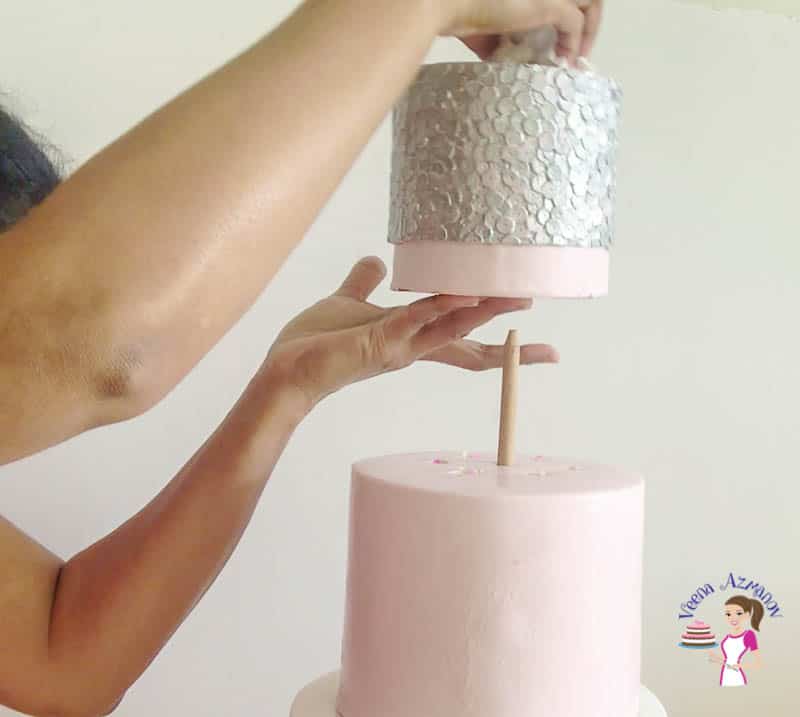
My easy method for stacking chilled cakes
I reside in the Middle East, where summers are hot and humid, making it challenging to handle cakes. To mitigate this, I only stack cakes when they are thoroughly chilled. However, this can present its own set of difficulties, particularly with chilled ganache cakes, which become heavy and firm. Inserting bubble straws into such cakes can be quite demanding. This tutorial demonstrates a clever technique for stacking chilled cakes using bubble straws. By first inserting a wooden dowel into the cake and then replacing it with a bubble straw, the process of supporting the tiers becomes much easier. This method is especially useful in hot and humid climates where cakes can be challenging to handle. Here’s the method I employ for stacking chilled cakes using bubble straws: For a visual demonstration of this technique, I recommend watching the accompanying video, which illustrates both the process and its effectiveness.
Do I have to use a center dowel in tiered cakes?
The central dowel in a tiered cake serves several important purposes:
Support: The central dowel provides vertical support for the entire cake structure, ensuring that the upper tiers do not collapse or shift during transport or display. Stability: By running through the center of all the cake tiers, the central dowel helps stabilize the entire cake, especially important for tall or multi-tiered cakes. Prevention of Leaning: The central dowel helps prevent the cake from leaning or tilting to one side, ensuring that the tiers remain stacked evenly. Structural Integrity: The central dowel contributes to the overall structural integrity of the cake, helping to keep it upright and intact. Ease of Serving: The central dowel makes it easier to transport and serve the cake as a single unit, rather than individual tiers.
In summary, the central dowel is a crucial element in tiered cakes, providing essential support, stability, and structural integrity to the entire cake structure.
How many dowels do I need to stack my cake?
The number of dowels you need in your cake depends on the size and weight of the tiers, as well as the design of the cake. Here are some general guidelines for doweling cakes:
Central dowel: For tiered cakes, you typically need a central dowel that runs through all the tiers to provide stability and support. This dowel should be long enough to go through the entire cake and into the baseboard or cake drum. Support dowels: For each tier, you’ll need support dowels to distribute the weight of the tiers above evenly. The number of support dowels depends on the size and weight of the tier. As a general rule, you can use 4 to 6 dowels for each tier, spaced evenly in a circle near the center of the tier. Spacing: The spacing of the dowels is crucial for even support. Space them evenly in a circle near the center of the tier, ensuring that they are not too close to the edge to prevent them from poking through the top of the cake. Size: Dowels should be cut to the height of the tier minus the height of the cake board or cake drum it sits on. This ensures that the dowels provide support without poking through the top of the cake. Type: Use food-safe dowels such as wooden or plastic dowels. Bubble tea straws can also be used as dowels and are popular for their sturdiness and ease of use.
Tips for Success
Frosting a cake Prepare the Cake: Make sure your cake layers are completely cooled before filling and frosting to prevent the frosting from melting or becoming too soft. Level the Cake: Use a serrated knife or cake leveler to trim the tops of the cake layers to create an even surface for stacking and frosting. Use a Turntable: A turntable makes it easier to frost the cake evenly. Rotate the turntable as you frost to ensure smooth and even coverage. Apply a Crumb Coat: Before adding the final layer of frosting, apply a thin layer called a crumb coat. This helps seal in any crumbs and provides a smooth base for the final layer of frosting. Chill the Cake: After applying the crumb coat, chill the cake in the refrigerator for about 30 minutes to set the frosting before adding the final layer. Use an Offset Spatula: An offset spatula is a great tool for spreading frosting evenly and smoothly on the cake. Apply the Final Layer of Frosting: Once the crumb coat is set, apply the final layer of frosting using smooth, even strokes. Start with the top of the cake and work your way down the sides. Smooth the Frosting: Use a bench scraper or the edge of an offset spatula to smooth the frosting on the sides and top of the cake. Decorate as Desired: Once the cake is frosted, you can decorate it with piping, sprinkles, or other decorations to suit the occasion. Chill the Cake: After decorating, chill the cake again for about 30 minutes to set the frosting before serving. Dowel & Stack a cake Use sturdy dowels: Choose sturdy, food-safe dowels such as wooden or plastic dowels that can support the weight of your cake tiers. Measure accurately: Measure the height of your cake tiers and cut the dowels slightly shorter to ensure they don’t poke through the top of the cake. Space dowels evenly: Place the dowels in a circle near the center of each tier, spaced evenly apart, to distribute the weight of the tiers above evenly. Use a central dowel: For stacked cakes, use a central dowel that runs through all the tiers to provide additional support and stability. Chill your cakes: Stack your cakes when they are thoroughly chilled to make them easier to handle and less likely to shift during stacking. Practice patience: Take your time when stacking and doweling cakes to ensure each step is done carefully and accurately. Watch tutorials: Watch video tutorials or seek guidance from experienced bakers to learn new techniques and tips for successful cake stacking. Practice makes perfect: Like any skill, practice is key. Don’t be discouraged if your first attempts aren’t perfect – with practice, you’ll improve your technique and achieve beautiful, stable cake stacks.
Troubleshooting
Level, Fill, & Frost a cake Uneven Layers: If your cake layers are uneven after cutting, use a cake leveler or a long, serrated knife to carefully trim them to create an even surface. Filling Leaking Out: If your filling is leaking out between the layers, you may have used too much filling or applied too much pressure when stacking the layers. Use a thin layer of filling and spread it evenly to prevent leakage. Cracks in the Cake: Cracks can occur if the cake is overbaked or if it is handled too roughly. To prevent cracks, ensure your cake is baked just until done and handle it gently when leveling and stacking. Bulging Layers: If you notice bulging between the layers after filling, it could be due to too much filling or uneven stacking. Use a thin layer of filling and ensure the layers are stacked evenly. Difficulty Spreading Frosting: If your frosting is too stiff and difficult to spread, try warming it slightly in the microwave or adding a small amount of milk or cream to loosen it up. Crumbly Frosting: If your frosting is too crumbly and not spreading smoothly, it may be too dry. Add a small amount of liquid (such as milk or cream) and mix until smooth. Frosting Too Thin: If your frosting is too thin and not holding its shape, it may need to be chilled for a short time to firm up before spreading. Air Bubbles in Frosting: To remove air bubbles from frosting, gently tap the cake stand or plate on a flat surface after applying the frosting. You can also use a toothpick to carefully pop any large bubbles. Dowel & Stack a cake Cake tiers are uneven: Ensure that each cake layer is level before stacking. If the tiers are uneven, carefully trim them with a serrated knife to create a flat surface. Cake is leaning or unstable: This could be due to uneven doweling or an unstable base. Double-check that your dowels are evenly spaced and that your base is sturdy and level. Dowels are visible or poking through the cake: Cut the dowels to the correct height, ensuring they are slightly shorter than the tier they are supporting. You can also cover the exposed dowels with frosting or decorations. Cake layers are sliding: If your cake layers are sliding, ensure that each layer is properly adhered with frosting or ganache. You can also use a thin layer of frosting between each layer to help them stick together. Cake is cracking or breaking: This could be due to a dry cake or rough handling. Ensure your cake is moist by using simple syrup or a moistening agent. Handle the cake with care during stacking to prevent cracking. Stacked cake is leaning to one side: This could be due to an uneven base or doweling. Double-check that your base is level and that your dowels are evenly spaced and cut to the correct height. Gaps between cake layers: If you notice gaps between your cake layers, you may not have used enough frosting or filling. Add more filling between the layers and gently press the layers together to close the gaps. Cake tiers are slipping: If your cake tiers are slipping during stacking, use a small amount of frosting or ganache between each tier to help them stick together. You can also use a central dowel for added stability.
Parmesan Crispy Potato StacksHow to Level Torte Fill a cakeHow to Carve a Pumpkin CakeHow to make Tall Cakes or Extended Height CakesPina Colada
Frequently asked questions
Did you enjoy this article/tutorial? Please ⭐️⭐️⭐️⭐️⭐️ itDon’t forget to Save it for latter. You can also find a collection of my tutorials and recipes on Pinterest. Follow me on Facebook, Twitter, and Instagram for more. Of course, make sure to Subscribe to my blog to receive my tutorials, and recipes by email. Thank you for sharing - Save for later