Ok, guys, this post is going to be a very long one with tons of troubleshooting tips and tricks. So it’s my humble request to you to not skip it and read it thoroughly. So are you guys ready? Sit back with some popcorn and beverage and enjoy the post. 🙂 Before getting into the post, let me explain to you all –
What is Idli and Dosa?
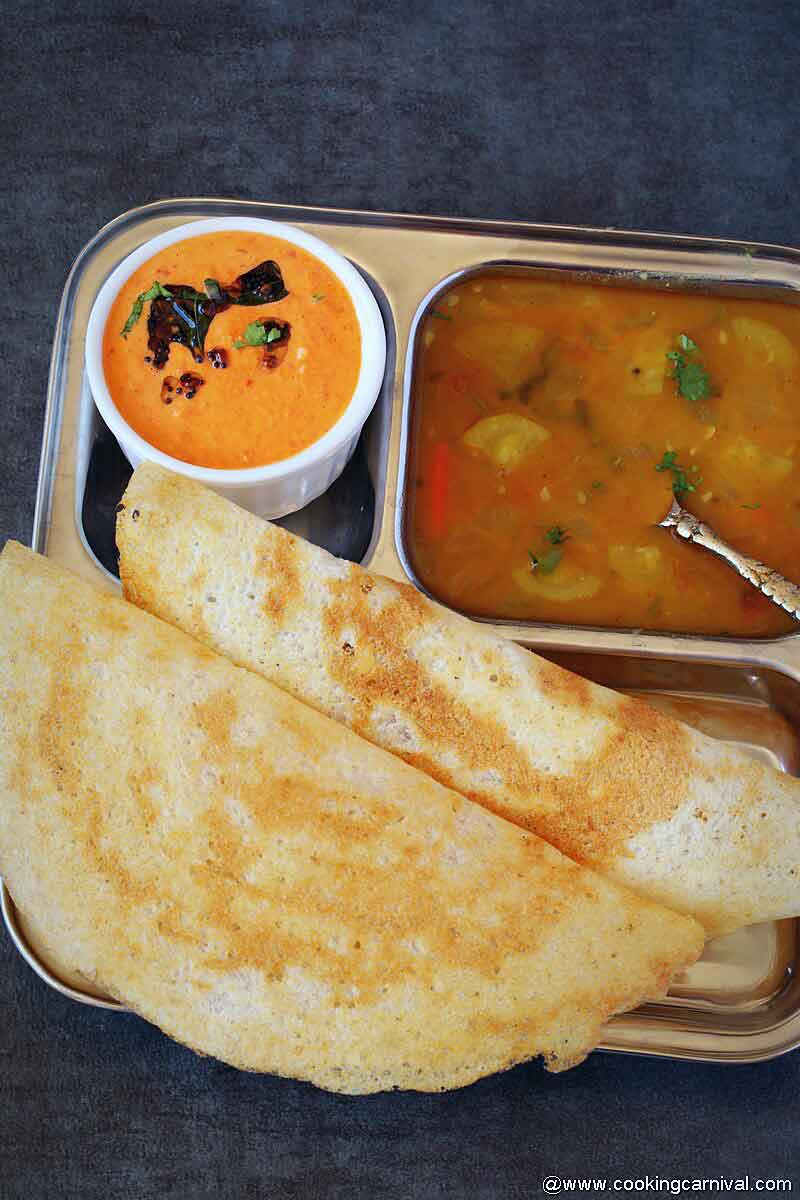
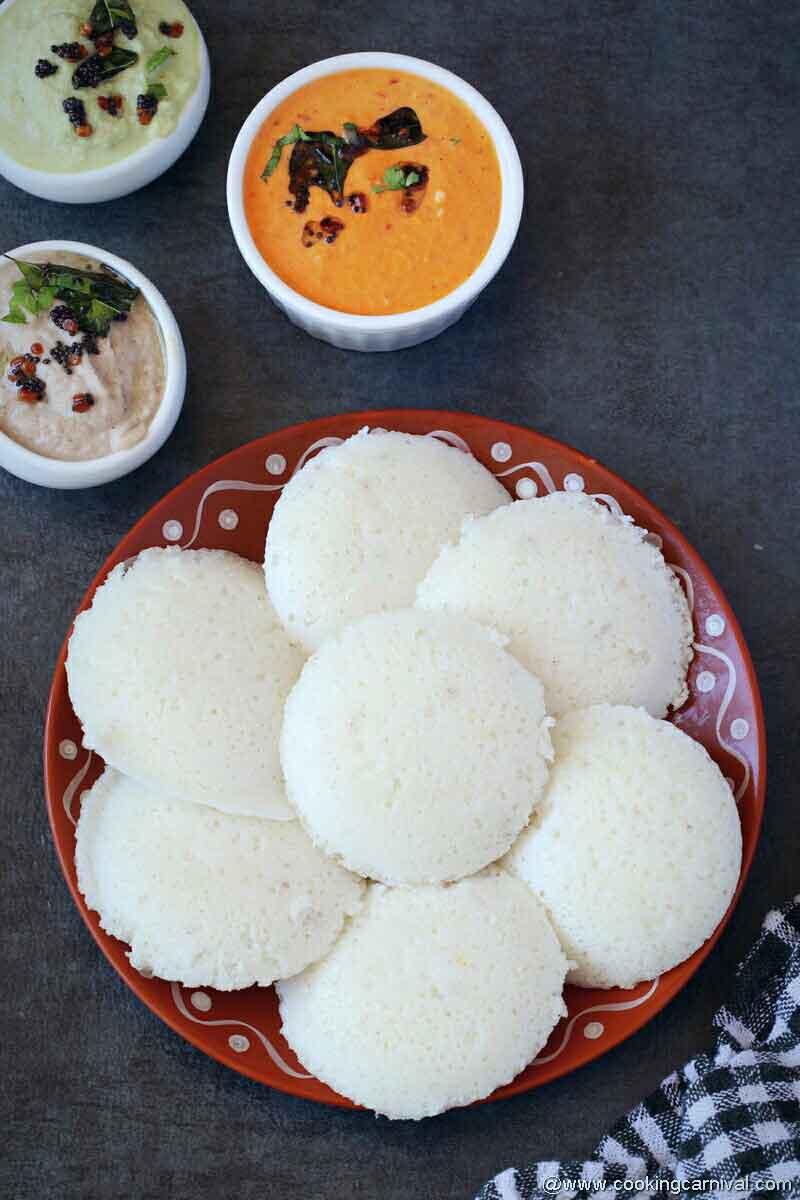
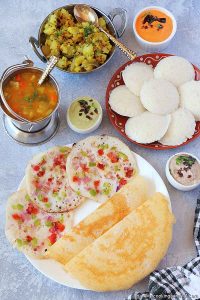
Idli and Dosa are traditional South Indian dishes that are also popular all over the world. You will find many different varieties of dosa and idli on the menu in any Indian restaurant. Basically, Idli is a steamed savory cake made with the fermented batter. Dosa also called Dosai is a savory crepe prepared with the fermented batter. Both the batters are made of rice and lentils. Idlis and dosas are some of the most delicious and healthiest foods that most of us like to eat. They are vegan and simple enough to make and eat every day. The perfect idli is soft and fluffy whereas the perfect dosa is paper-thin and crisp. It might be hard to imagine that such distinctly different recipes use the same batter, right? The only way to get the best soft idli and perfect crispy dosa is to have a perfectly fermented batter. (Below pic includes, Idli, Dosa, Uttapam, Masala for dosa, Sambar, Coconut chutney, Onion chutney, and Peanut chutney). When it comes to the perfectly fermented batter, it is all about the ingredients, their proportion, the consistency of the batter, and the weather. But with this foolproof idli and dosa batter recipe, you can fearlessly make and enjoy perfect idlis and dosas any time at home. Each state and family in India have a different recipe or proportion they prefer for the batter. Today, I am sharing the recipe for Idli Dosa Batter that works for me. Typically the dosa and idli batter is prepared separately however this all in one batter will serve the purpose for both. Let’s learn how to make a perfect idli-dosa batter with this ultimate Guide (Idli-dosa batter 101), which covers everything from the ingredients and proportions of rice and lentils to grinding them in a wet grinder Or in a blender, to the perfect consistency of batter and fermentation tips.
What ingredients required to make this batter?
You will need
Idli RiceWhole Urad dalFenugreek seeds (methi dana)Rock Salt
This is an overview of the ingredients in the recipe (very handy to use as a visual grocery list at the store). Quantities are mentioned in the recipe card.
A million-dollar question, What type of rice we should use?
Ok, I highly recommend using Idli Rice here. You can find it at any Indian grocery store. It is a kind of fat, short-grained, parboiled rice.
Can we use any other type of rice?
If you can’t find idli rice, you can use raw rice like sona masoori too. But here the ratio will be different. I go with 2:1. For 2 cups of raw rice, we need to use 1 cup of urad dal. I wouldn’t recommend using long grain basmati rice for this recipe.
Which urad dal to use?
There is a lot of variety of urad dal available that people use for idli batter. The urad dal in the batter plays a major role in creating the culture for fermentation and leavening. I would recommend using the whole skinless urad dal, also known as urad gota. You can also use split urad dal. But for 100% result, use whole urad dal.
What should be the Ratio of Dal to Rice?
I have done 1:2, 1:3, and 1:4 (dal to rice). And all the ratios worked for me. But the one that works the best for me is 1:3! So, for every 1 cup of dal, I use 3 cups of rice. This ratio works for both idli and dosa. With this ratio, idli comes out soft and white.
Why do we add Fenugreek seeds (methi dana) in the batter?
Fenugreek seeds help in fermentation, to get more volume and also helps in giving the dosa a nice brown color and crisp texture. I always add some fenugreek seeds (methi dana) to the batter.
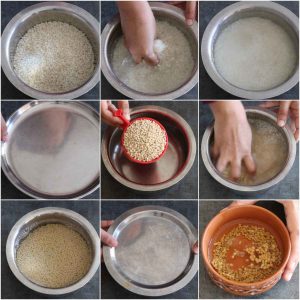
Is Washing the rice and dal required?
I can’t stress enough about this step. It is one of the most important steps. Wash your rice and dal for 3 to 4 times or until the water becomes clear. You should be able to see the rice and dal through the water at the end.
Can we soak dal, rice and methi seeds together?
The answer is no if you are planning to use this batter only to make idli. I would not recommend soaking them together. To get perfect soft idli, the dal needs to have a fluffy texture. And you can’t achieve that softness if you soak and grind the dal and rice together as both have a different texture. For this reason, it needs to be soaked and grind separately. However, if you are going to make only dosa with the batter, then yes, you may soak and grind them together.
How long to soak the rice and dal?
I always soak overnight, which is about 8 to 10 hours. Somewhere between 6 to 12 hours should be sufficient.
Do you need other ingredients?
Yes, you will need salt. Other than salt, some add a handful of cooked rice, flattened rice flakes (aval or poha) or sago pearls. It aids in fermentation and also helps in soft idlis. But I don’t add any of them. I used to add chana dal. But Nowadays, I only add it when I am making a batter exclusively for crisp dosa. I do not add chana dal in my this all in one batter.
What kind of salt to add?
I learned from one of the South Indian friends that the Rock Salt does better than regular salt making batter. I started using it and could get better results in fermentation. It’s not magic! There is a science behind it. Regular/Iodized salt interferes with the fermentation process which is not an issue using rock salt. Hence, I would highly recommend using rock salt (Non-iodized salt) for making this Idli Dosa batter.
When to add salt? After fermentation or before fermentation?
There is no thumb rule here. It is mostly matters of choice however consider below if you ever face challenges for the fermentation. Salt inhibits fermentation and interferes with good bacteria to some extent. Typically desired level of fermentation is easy to achieve in Summer (hot and humid) Vs Winter (cold) season. Hence, mostly you are good at adding salt before in summer but do it after in winter to be sure of no interference in fermentation.
How much water should we add while making the batter?
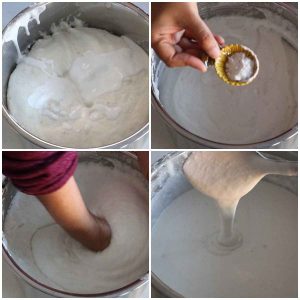
This is really important. Frankly speaking, I have never measured water while making this batter. I just eyeball and add water. I think once you understand the batter consistency, it becomes a breeze. But this time, to give you a perfect idea, I note down the water quantity. For this 3:1 ratio, you will need 3.25 to 3.5 cups of water while grinding in a wet grinder. Remember a few things,
Water quantity all depends on the quality of rice and urad dal.The batter should have a nice flowing consistency (it should not be runny though).The batter should not be thick. the thick batter won’t ferment properlyBy any chance, if you added more water and your batter becomes runny, don’t worry. You won’t be able to make idli, but you can very well make dosa. Don’t throw the batter just because the batter is runny.
How long should I grind the dal and rice?
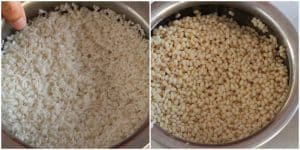
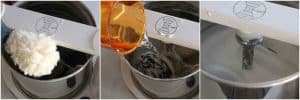
In wet grinder If you are like me who makes Idli and dosa frequently, I would highly recommend investing in tabletop wet grinder. A stone wet grinder incorporates a lot of air in the batter and makes the batter lighter and fluffier. Whereas the blenders and food processors get heated up faster and in turn heats up the batter. This interferes with the fermentation process. I usually grind urad dal for 20 minutes and add 1.25 cups water gradually (¼ cup in every 5 minutes interval). Basically you need to grind urad dal until it is smooth and fluffy. The batter should increase in volume, Few things to remember –
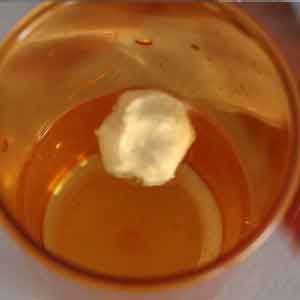
while grinding urad dal, do not add all water at once. The tip in grinding urad dal is to add the water slowly. If you add all of the water at once, it won’t fluff up well.The dal should fluff up and fill the grinder. It should have increased about 8-10 times of its original volume.To check the consistency – take a small amount of the ground dal and drop it into a glass of water. It should float, and it should not spread out or sink. That’s when you know the urad dal consistency is perfect.
For rice, I usually grind for 30 to 35 minutes. The grinding time depends on the quality of the rice you use. Sometime it may take longer to get a perfect consistency. Add 2 cups of water while grinding. (Add water in batches). One thing to note, Rice shouldn’t be as smooth as dal. It should be slightly coarse. In mixer grinder If you don’t have table top stone wet grinder, use good quality powerful mixer grinder. Some of the blenders I would recommend are Blendtec, Vitamix, Preethi, and Nutri bullet. A powerful blender (or mixie, as it is called in India) can do the job very well. Grind urad dal adding chilled cold water little at a time, with few seconds gap in between until you get the right consistency. Do not operate the mixie/blender continuously. Grind it in intervals. Now let the blender rest for 10 minutes as it would have been heated by now. Grind rice in 2 batches According to the size and quantity of the jar and rice). Again use chilled cold water for grinding and do not operate the blender continuously. Grind the rice until you get a little bit coarse batter. Use the wet grinding blade in the jar for grinding both urad dal and rice. Always use cold water for grinding the batter.
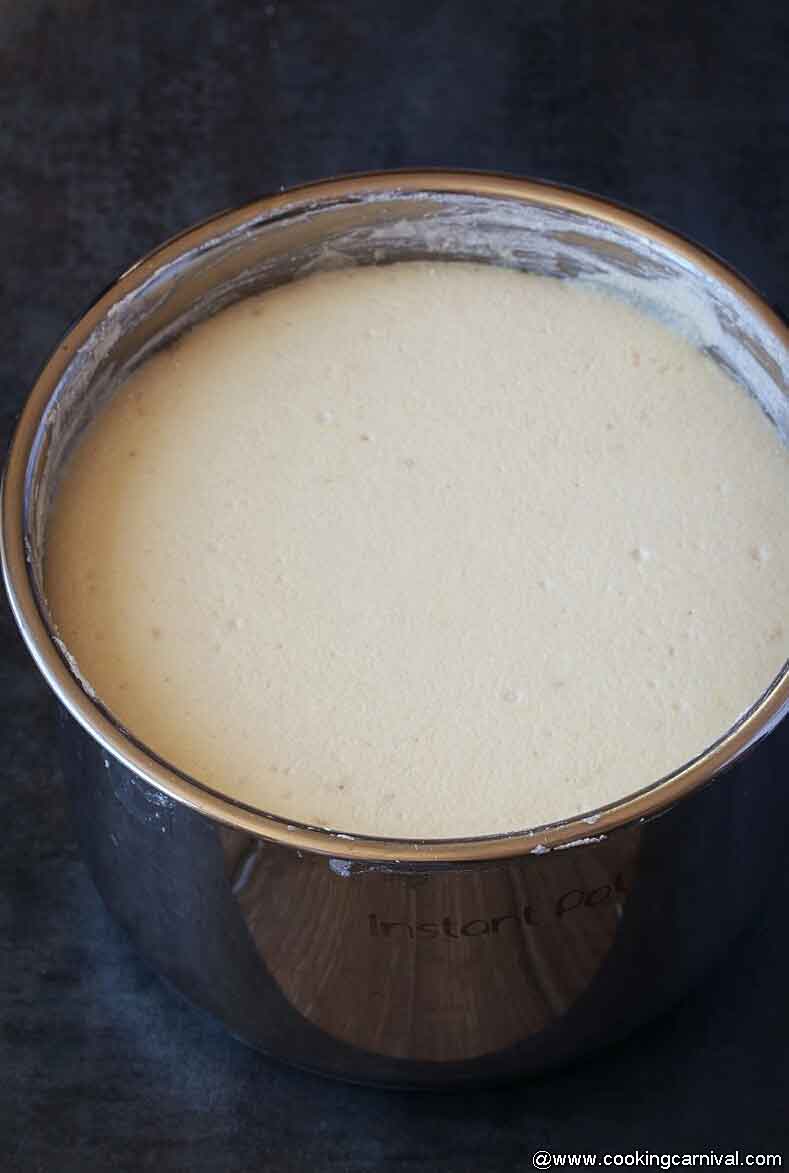
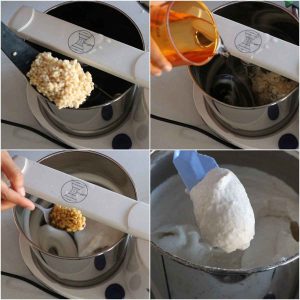
Which container should we use to ferment the batter?
I have tried fermenting in a stainless steel container, plastic containers, glass bowls, and non-stick vassal. For me, Not-stick vassal never worked. All the other 3 worked just fine. Once you have a smooth, thick and flowing batter, pour it into a container or steel bowl with enough room to allow it to rise. Before setting it in a warm place, make sure to mix it thoroughly by hand. Yes, with hands! Trust me, it makes a huge difference!
How to ferment the batter?
The batter needs a warm and dry place in order to ferment. If you live in a warm place, you can leave the batter on the counter and it will ferment. However, if you live in a cold place, you either need to place the batter in the oven with the oven lights on or use your Instant Pot! Fermentation without oven – If the temperature is warm enough, just keep the batter on the countertop, covered, and it will ferment in 10 hours. Sometimes less than 10 hours. Fermentation in the oven – Place the batter in the oven with the lights on. The batter ferments in 10 to 12 hours. Remember DONT turn on the oven. Just turn on the oven lights. Turn the oven light on for the first 6 hours and turn it off. The warmth is enough for the batter to ferment. Fermentation in the instant pot – Fermenting batter is difficult in colder places like the US, especially during the winter months. But guess what…the instant pot can come to the rescue here. Ever since I have got my Instant Pot, I always use it to ferment my batter. It gives consistent results. So, I just place the batter in the pot, cover with a glass lid and press the yogurt button and set it for 12 to 14 hours, according to the weather. Usually, by 12 hours, it should have fermented. If it doesn’t, increase the time by 2 hours. The 6-quart and 8-quart will be perfect for this much quantity.
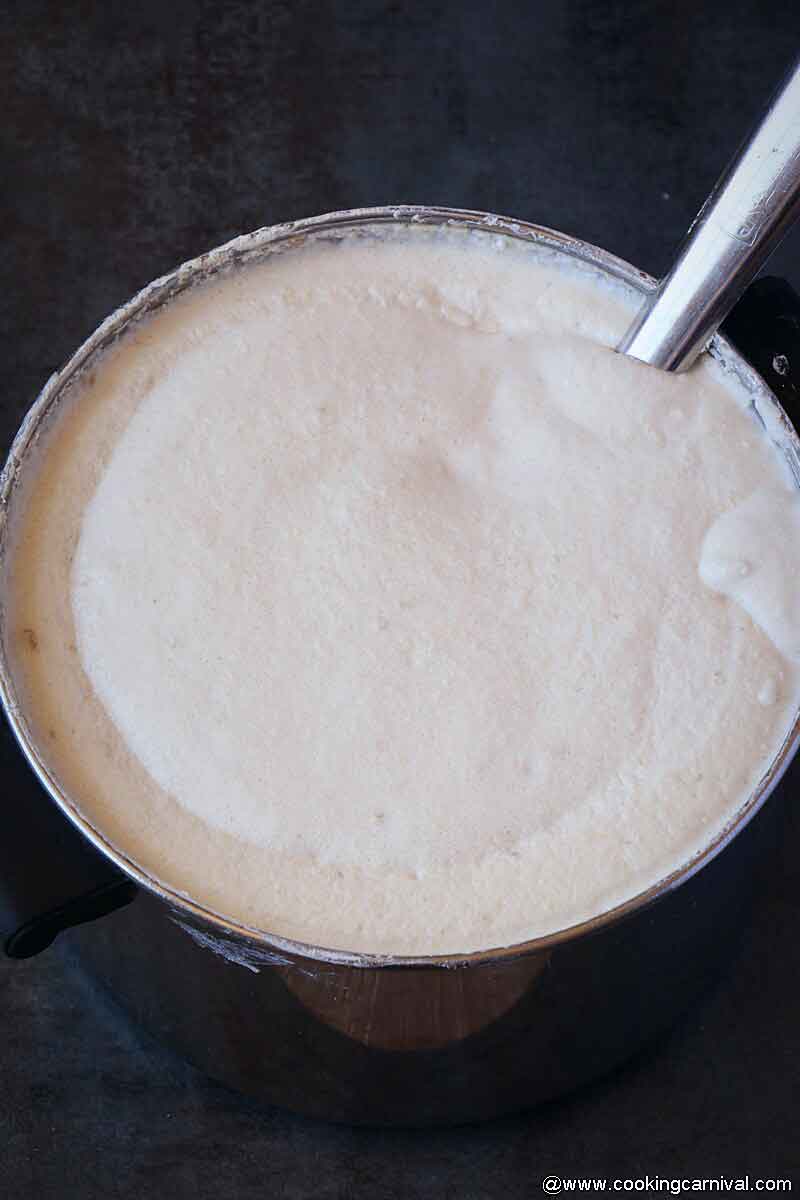
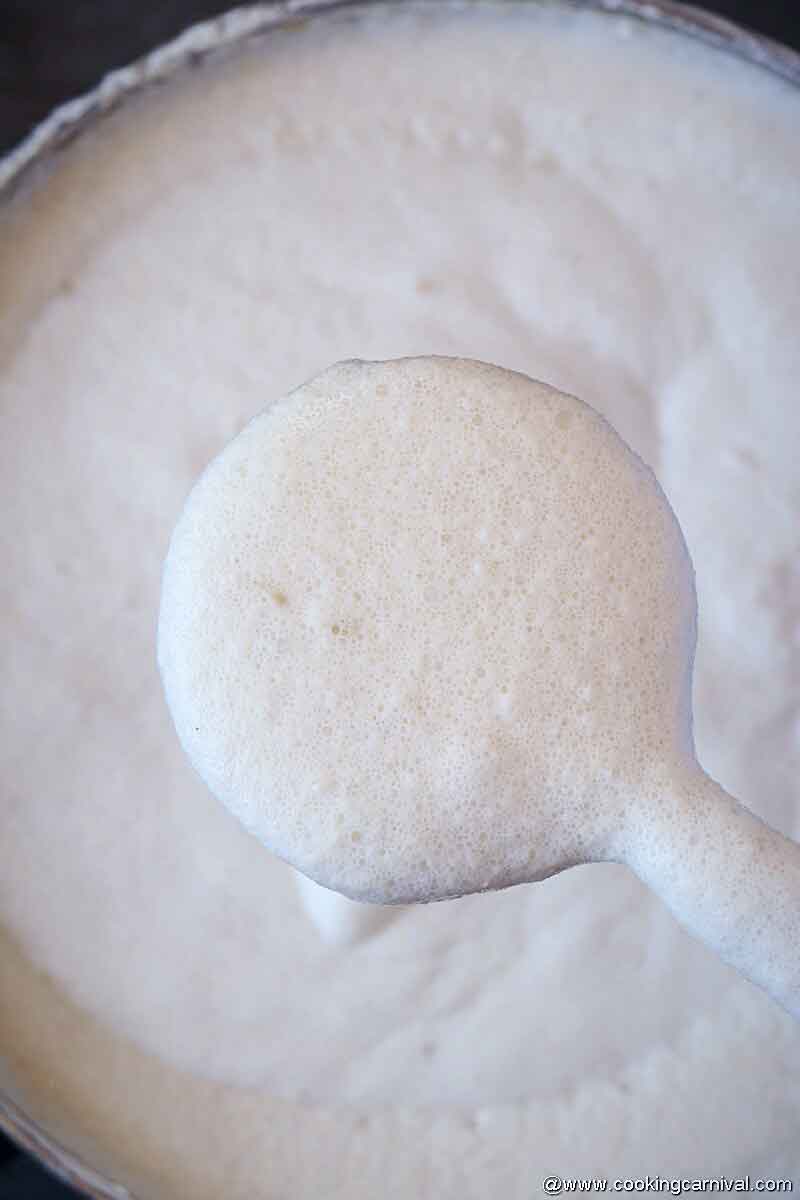
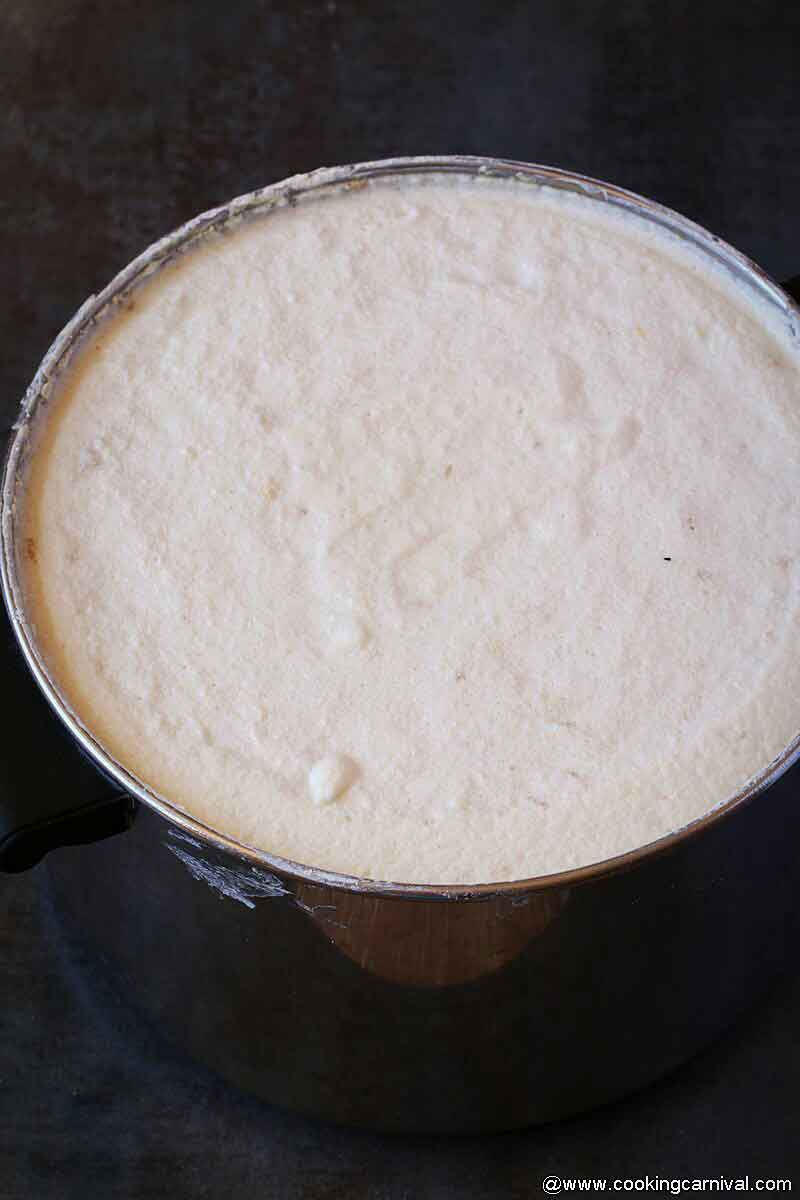
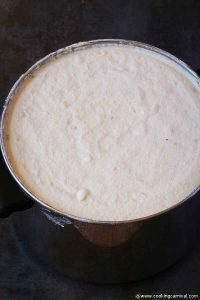
How to know if the batter has fermented?
After fermentation time, if you have done everything right, you will wake up to volcano types fermented goodness. The batter will at least double in volume. It will be all frothy and bubbly. One more great way to check is, take water in a bowl and then drop some batter into it. The batter should float. Give the batter a good stir, add salt if you haven’t added it already, and you are now all set to make soft idlis, crispy dosas, and delicious uttapam, Sandwich dhokla and paniyaram.
My batter is not fermenting – Some troubleshooting tips –
Some people also add poha to the batter. You may add next time if your batter is not fermented well. Add around 3 tablespoons poha and grind it along with the rice.Instead of 3:1, try 2:1 ratio.Never use heavily processed salt or iodized salt.The batter should be thick but free-flowing.Sometimes your batter might need a longer time to ferment. So leave it for a few more hours.Don’t forget to wash rice and dal thoroughly.
How to store this batter?
You can store the batter in your fridge for about a week or in the freezer for about a month. Thaw the frozen batter 6 to 7 hours before you make idli or dosa.
How to make Idli?
Take the fermented batter in a bowl and see the consistency of it. Add some water if the batter is too thick.Add about 2 cups of water to the idli cooker or steamer and let it come to a boil.Meanwhile, grease the idli plates with oil and pour the idli batter.Steam it for 10 minutes over medium heat and turn off the heat.Take out the idli plate. Let it sit for 1 to 2 minutes before you spoon out.Take a knife or a spoon. Grease it with some oil or water.Take the idlis out.Serve hot with sambar, chutney.
Some important tips to make soft idli –
Make sure you grind the dal nice and smooth with enough water.Idli batter should be at room temperature while making idlis.Do not steam the idli for a long time for more than 10 minutes.Wait for a couple of minutes and then spoon the idli out.If the batter is not thick and flowing, and is runny, the idlis won’t rise. It will be flat.
Ok friends, I don’t want to make this post too lengthy and long. So I will do a separate post on Dosa, uttapam, and paniyaram later. I have tried to cover everything I could think of and I hope it was helpful. If you have any other queries, please leave them in the comments section below and I will try to get back to you as soon as possible.
Some more South Indian recipes –
Adai Pongal Mango dal Medu vada Rawa Dosa Pesarattu Have you tried this recipe? We’ll love your feedback, Please click on the stars in the recipe card below to rate and leave your feedback in the comment box below. Subscribe to our YouTube Channel for tasty and easy video recipes. Warm regards, Dhwani.