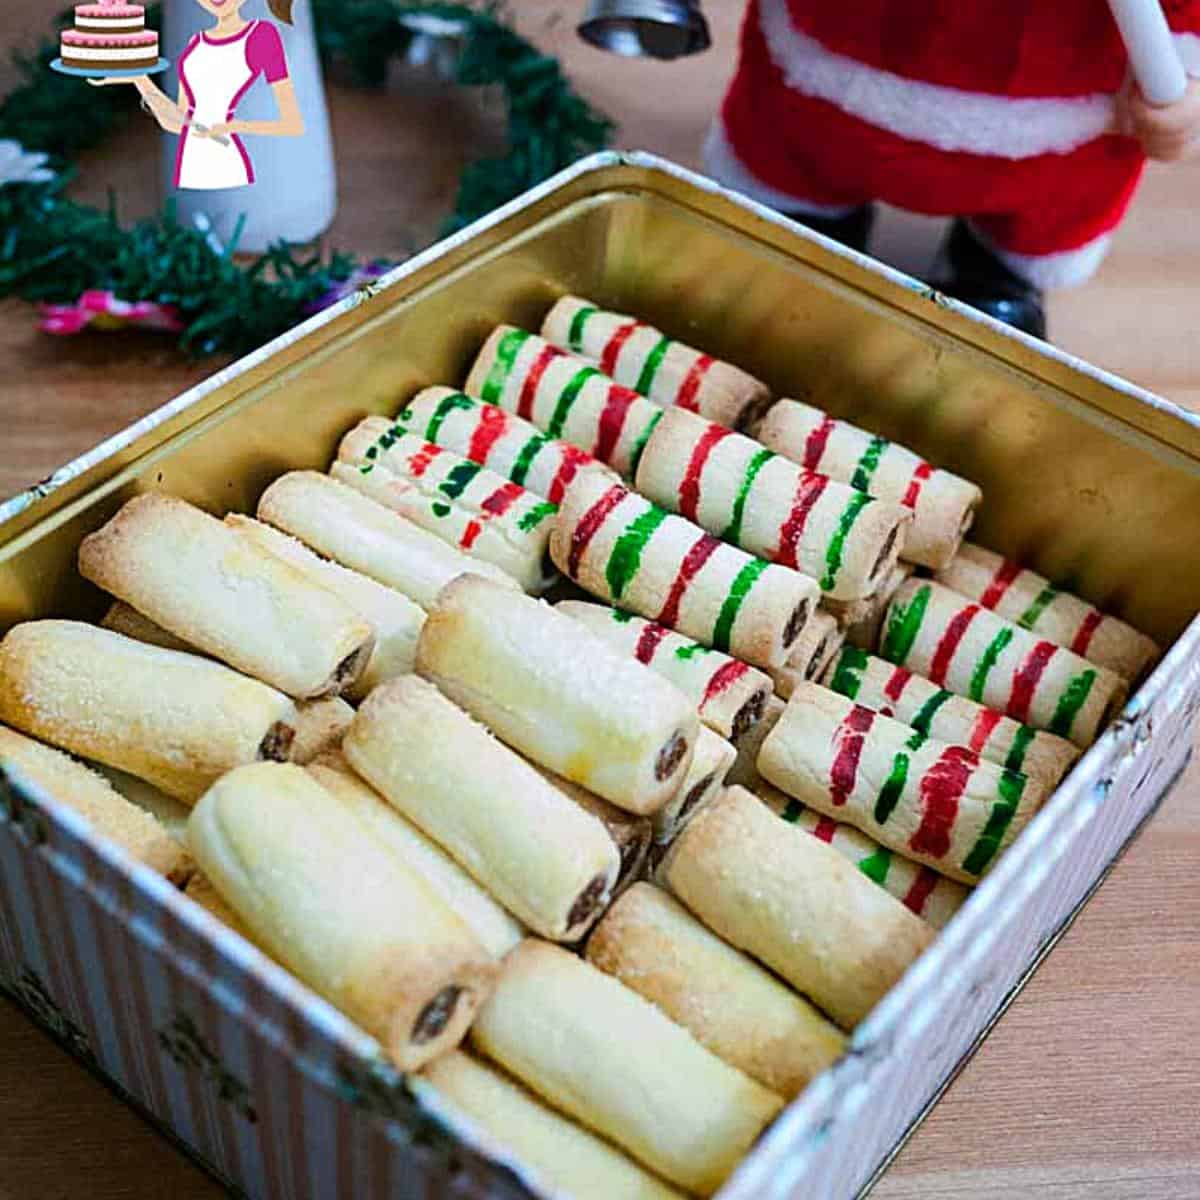
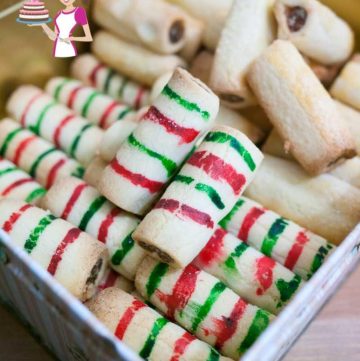
What is the one thing you remember most about Christmas from your childhood? Is it the gifts? Santa? The decorations? Christmas dinner? For me, it’s baking with my mom. These are date rolls and while the nut often changes, the dates remain the same. I’m sure they’d taste amazing with figs or apricots as well. And yet, I’ve always used dates and that’s because mom always used dates.
Step-by-step: Date roll cookies
Dough
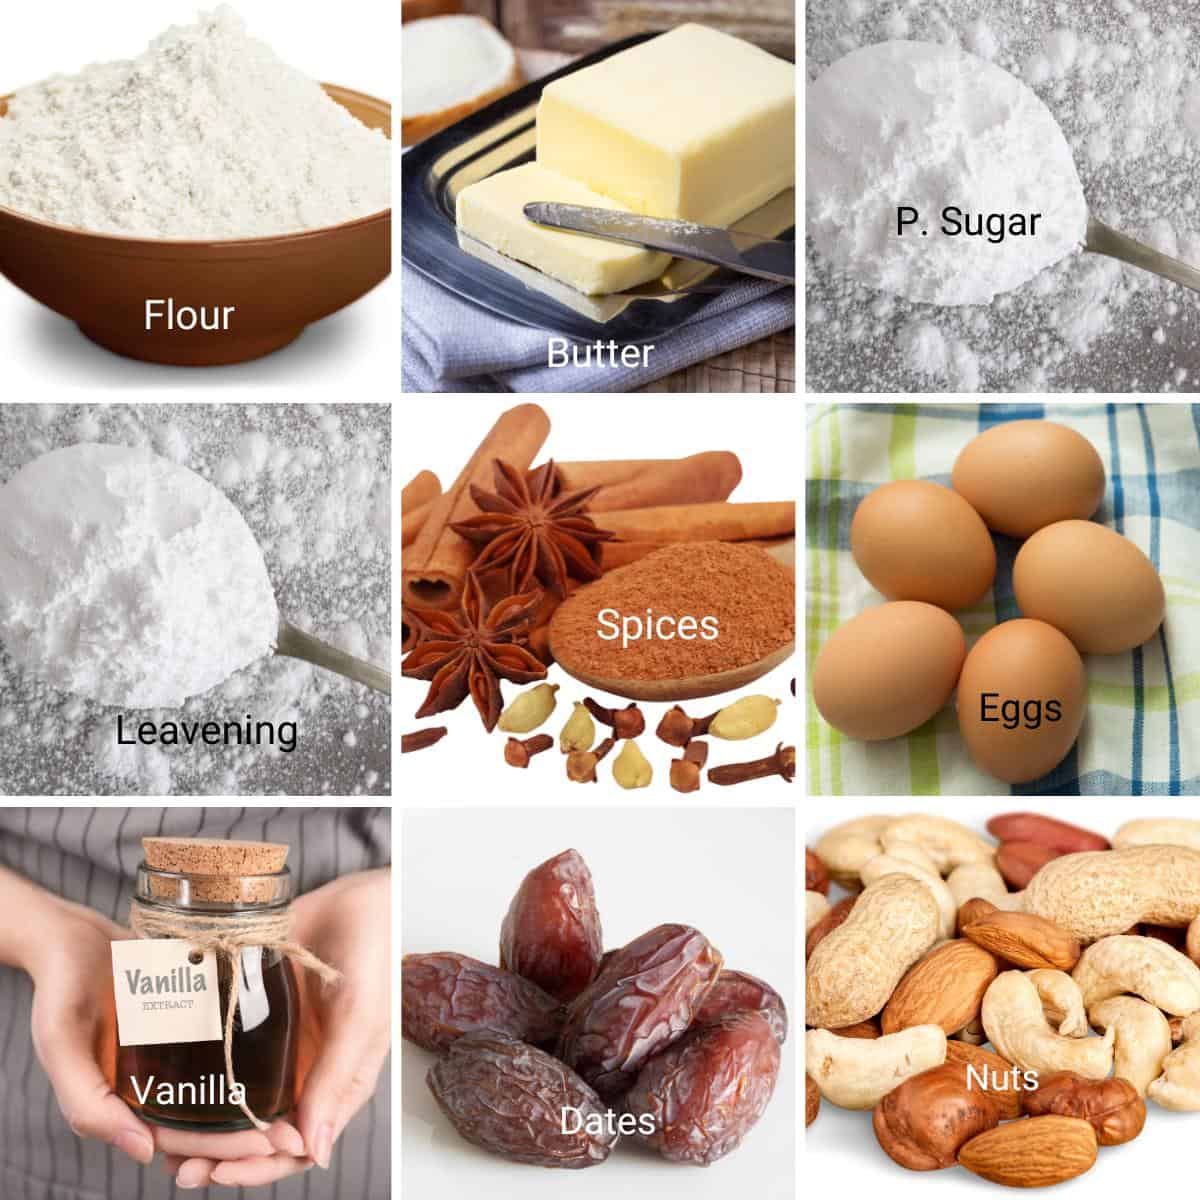
Dry ingredients – In a bowl, combine flour, baking powder, cornstarch, spices, and salt. Set aside. Dough – In the bowl of a stand mixer, cream butter, and powdered sugar until creamy. Add egg and vanilla extract. Followed by the flour mixture. Combine well. Chill – Divide the dough into three and shape each into a disc. Wrap in plastic wrap and chill for an hour or two until firm enough to roll.
Filling
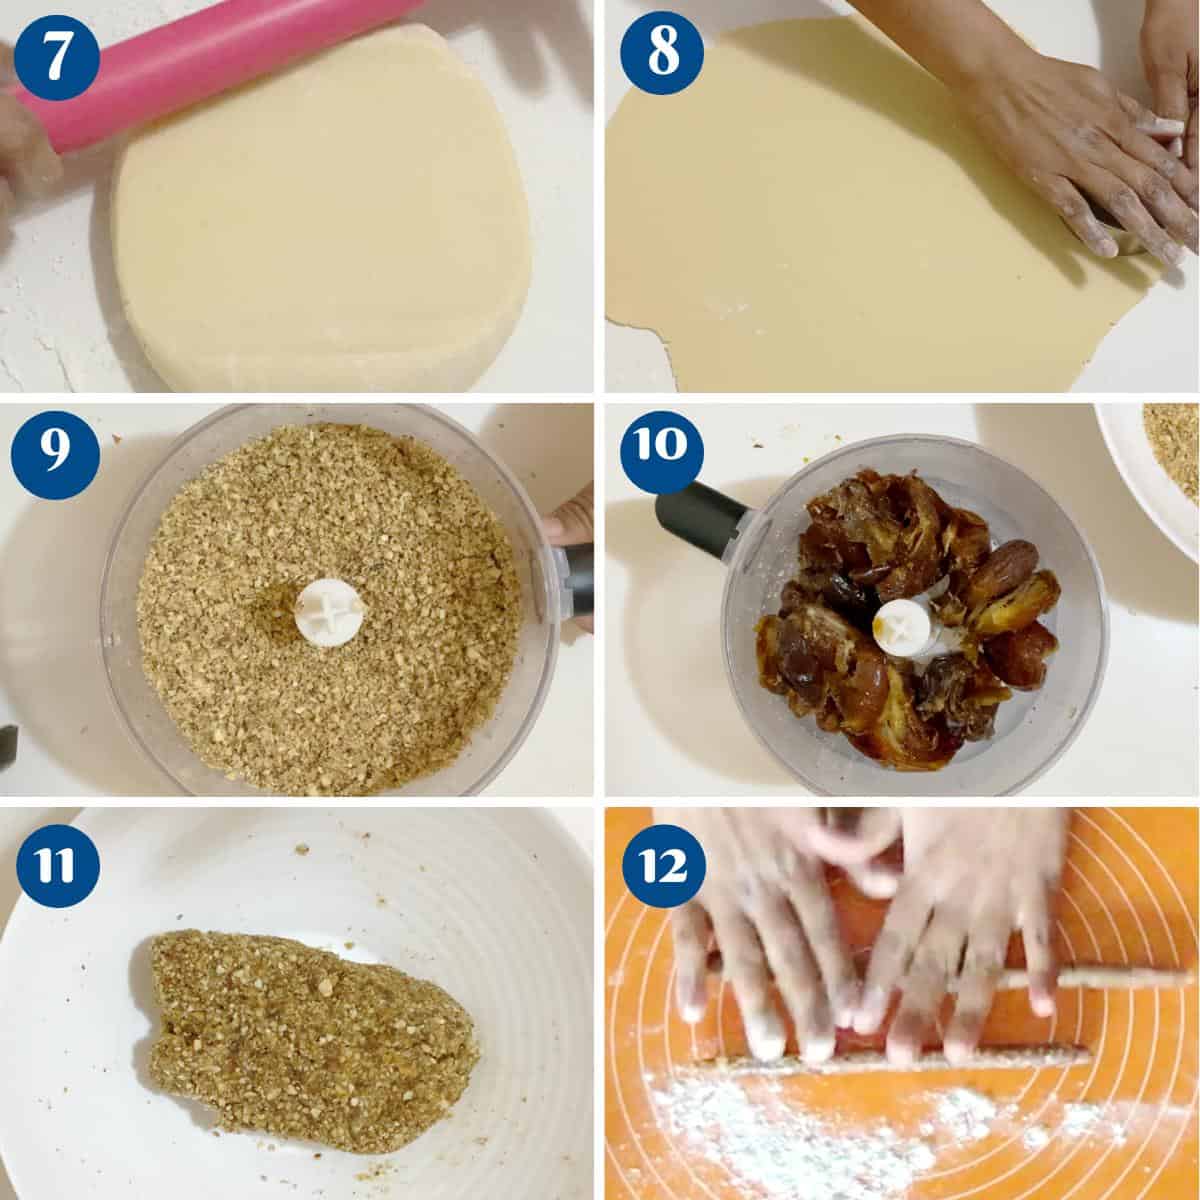
Nuts – In a food processor, pulse the nuts and spices to a coarse breadcrumb consistency. Set aside Dates – Deseed from the dates and add them to the food processor. Pulse until broken into tiny pieces.Pro tip – Use moist dates so the moisture will hold the nuts together and you have a nice moist filling. Alternatively, add one to two tablespoons of water if necessary. Combine – Return the nuts back into the food processor with the dates. Pulse until it all comes together.Pro tip – Take a little mixture into your hand, you should be able to roll it into a ball. If not, pulse some more Shape – Take a little date mixture into your hand – shape it into a ball then roll it into a long rope (see video) – Set asidePro tip – You want a thin rope so the resulting cookies will be delicate and pretty. Do not make them very long – they are easier to handle in lengths of 10 to 15 inches.
Assemble
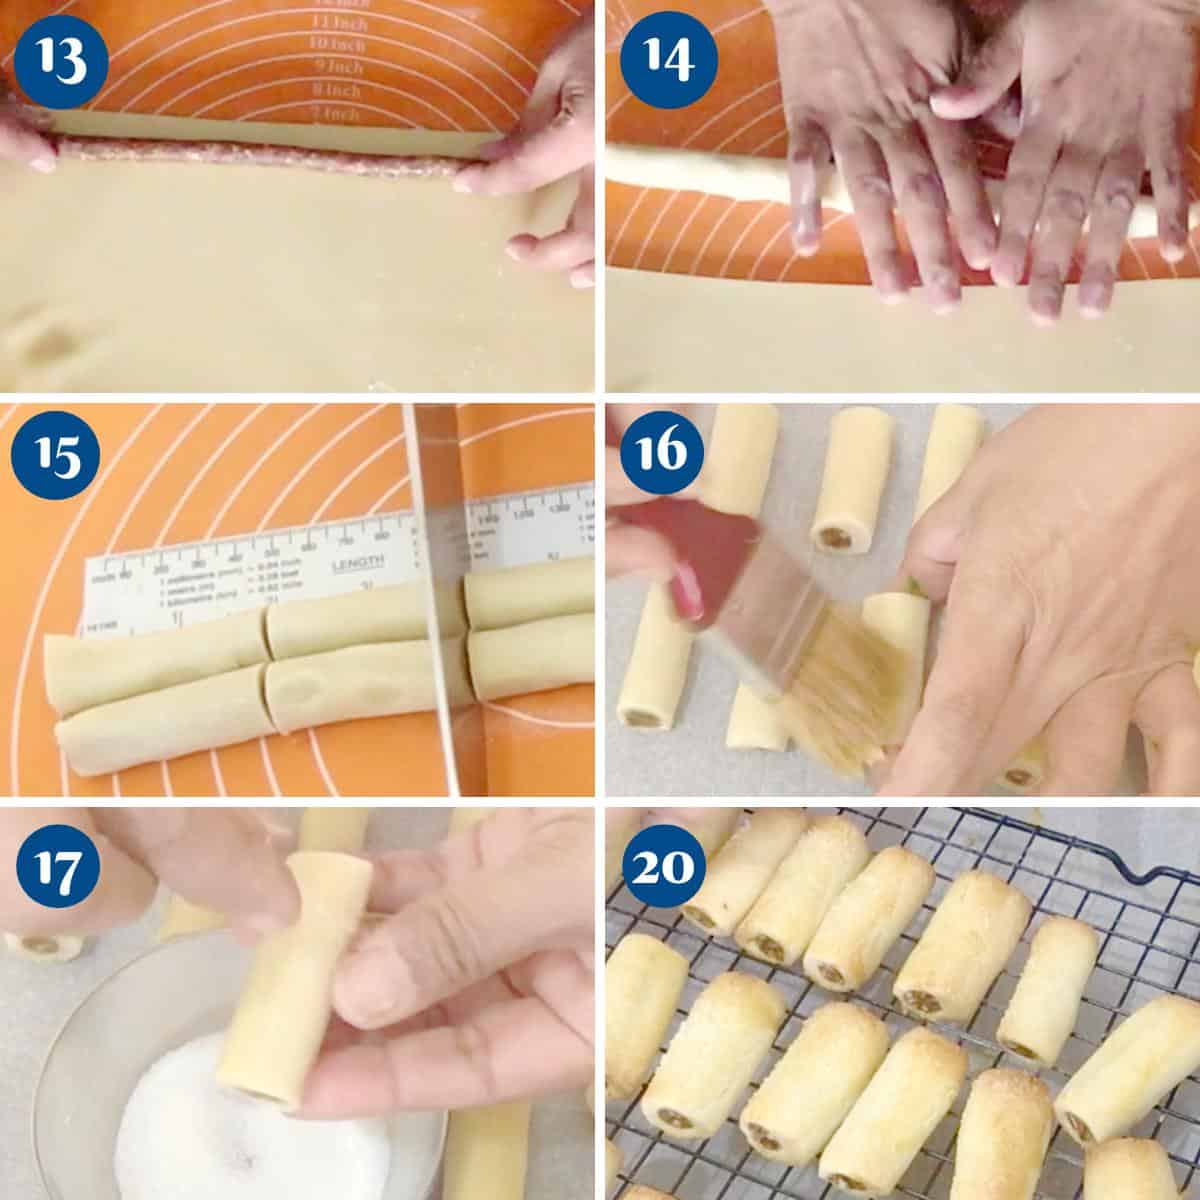
Roll. – On a lightly floured surface, roll the dough into a sheet about 1/8 inch thick. Place one prepared date and nut rope/sausage on the sheet at one end.Pro tip – if the dough is rolled too thick the finished cookie once filled will look bulky. So keep the filling and dough thin Shape – Use a tiny amount of water to help stick the dough together. Wrap the dough into a log. Cut it just where the seams meet and place the roll on a baking tray and into the fridge. Continue until you have used up all the dough or filling.Pro tip – Don’t cut the rolls into smaller pieces now. Wait until they are chilled so you get sharp edges. These can be kept covered in the fridge for up to 2 days.
Oven – Preheat oven to 375°F/ 190°C / Gas Mark 5 Cut – Once chilled, cut the rolls into two-inch pieces – I use a ruler so they are all same size. Brush each roll with egg wash and sprinkle with sanding sugar.Pro tip – Create red and green strips with food colors to give them a Christmas. Bake- Transfer the baking trays to the oven on the middle rack and in the for about 9 to 10 minutes.Pro tip – The cookies must not get any color. They will have a slight golden on the bottom but not on the top. Overbaking can make them hard.
Cool – Leave them on the baking tray for 10 minutes, then transfer them to a wire rack to cool completely. Store – Cool completely before you place them in an airtight cookie jar. These will keep for a week at room temperature. Or in the fridge for up to 2 weeks. You can even freeze them for a few months.
Frequently asked questions
Thank you for sharing - Save for later
Finally, here are the links to the rest of the cookies in the collage above
Holiday White Chocolate Mini Popcorn Balls – by Gloria Duggan of Homemade & Yummy Gingerbread Cookies – by Melissa Radcliffe of My Wife Can Cook No-Bake Cinnamon Peanut Butter Cranberry Cookies – By Arlene Braun Mobley of Flour on my Face Gluten-Free Spiced Cookie Brittle – by Sarah Jane Parker of The Fit Cookie No-Bake Chocolate Cranberry Cookie – by Kirsten Burrows of Treat yourself Sweeter.And of course – My Macadamia Date Roll Cookies