Mango Lassi is one of my favorite drinks, right along with this masala chaas (spiced buttermilk). Because I clearly have a thing for Indian yogurt drinks – both sweet like lassis and savory like chaas. Though I have to say that there are savory lassis too. But this one is a total sweet treat, and deliciously so! And in this post, I have not only shared my go to mango lassi recipe, but also how I balance the proportion of ingredients – to make the best mango lassi ever! And I understand that this can be a subjective thing, so I have also shared how you can tweak the quantity of ingredients to make this mango lassi to suit and delight your tastebuds. So enjoy! 🙂
What is Mango Lassi
Lassi is a rich and refreshing Indian yogurt drink that uses yogurt as the base, and comes in 2 varieties – sweet and salty. The salty lassi is made by adding salt & assorted spices to the yogurt. And in some cases, even a pinch of sugar, though not enough to sweeten the drink. The sweet lassi is usually sweetened with sugar and / or a ripe, sweet fruit. Or the pulp of a ripe sweet fruit, like mango for making mango lassi.
What is Mango Lassi made of
You don’t need a whole lot of ingredients to make mango lassi. In-fact strictly speaking, you only need yogurt and mangoes. But of-course, there are some delicious add ons, that make an already amazing drink, that much more irresistible.
Ingredients You Need
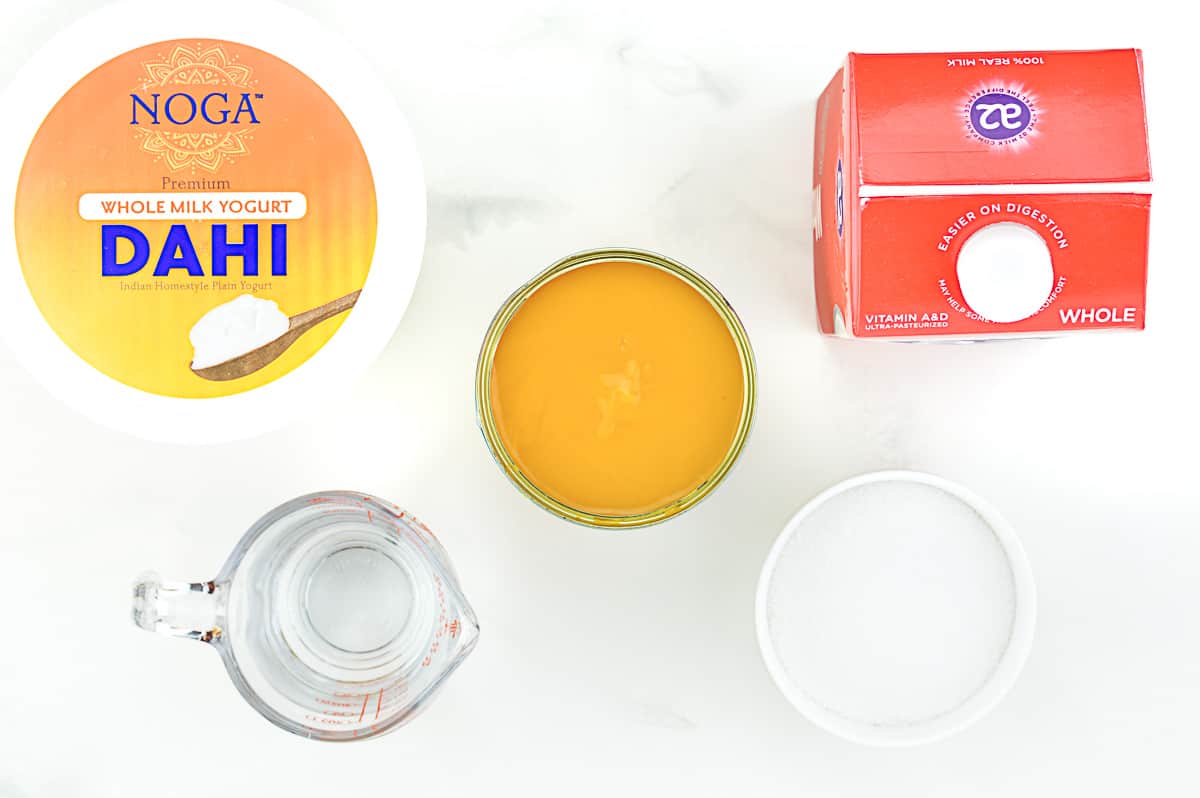
Mangoes / Mango Pulp – There is nothing quite like the pulp of fresh, sweet, and ripe mangoes for making mango lassi. But when mangoes are not easily available, you can use store-bought mango pulp. I prefer using either the Alphonso mango pulp or the Kesar mango pulp – both are really yummy. Yogurt – For making lassi, it’s best to use unsweetened full fat thick yogurt. Milk – Adding a little milk helps thin out the lassi, and cuts down the rich creaminess of yogurt, and makes it more of a drink vs just flavored yogurt. Here again, using full fat whole milk is best. But in a pinch you can use low fat milk and yogurt. Water – I further thin out the lassi using water to get the desired consistency of lassi I want. But this is mostly because I am using full fat whole milk. If you are using low fat milk, then you can thin out the lassi using only milk.Sugar – To sweeten the lassi. Or you can substitute sugar with jaggery powder or even honey.
For garnishing the lassi..
I’m not sure if garnish is exactly the right word here, but you can sprinkle the following things on, right before serving the lassi, for that extra burst of flavor and texture.
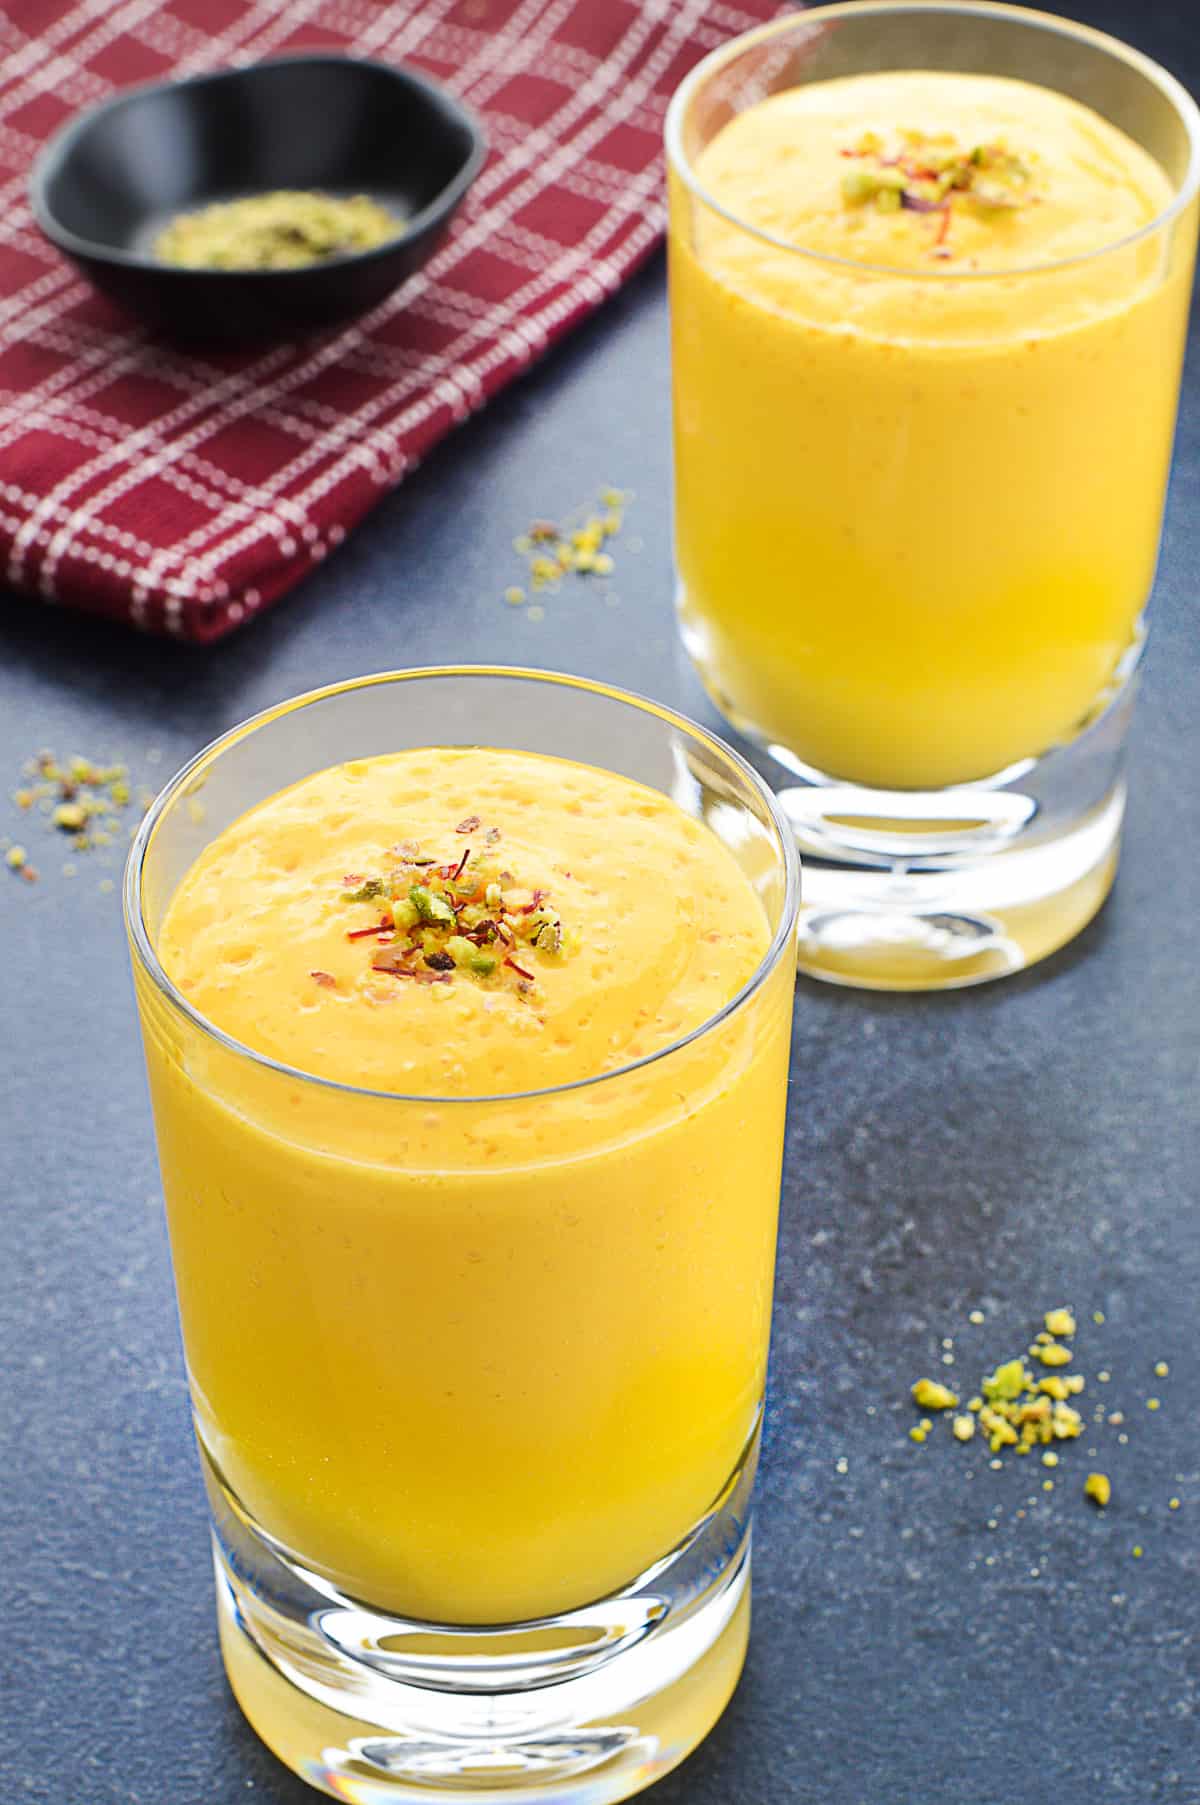
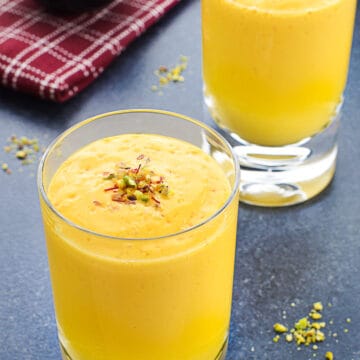
Cardamom powderCrushed pistachiosStrands of saffron
How to Make Mango Lassi
In a blender, blend together the mango pulp, yogurt, milk, water, and sugar.Once you’ve blended it well, pour it into a serving jar, and preferably chill the drink in the refrigerator for an hour or so.Right before serving, you can sprinkle a little cardamom powder on it, add some crushed pistachios, and maybe even garnish it with a few strands of saffron.Serve mango lassi chilled.
Recipe Notes / How to Tweak this Recipe
Vegan Mango Lassi Adjustments
I am not a vegan, so I have not tried all the different kinds of dairy substitutes for lassi. But coconut and almond milk/yogurt will work best for making vegan mango lassi because of the sweet and nutty flavor. As compared to soy milk that is more beany in flavor.
Serving Suggestion
A cool and refreshing drink like mango lassi is best paired with hot and spicy Indian dishes. Of-course lassi with classic punjabi dishes like chole bhatures or parathas are a match made in culinary heaven! That being said, in our household, we don’t need to pair mango lassi with anything. Our 9 year old for instance is happy to chug down the entire jug of lassi, and call it a full meal. 😀
Try these next..
⭐️ Masala Chaas | Indian Spiced Buttermilk⭐️ Restaurant Style Chicken Lollipop⭐️ Mumbai Style Prawns Koliwada⭐️ One Pot Palak Paneer (using Instant Pot)⭐️ Instant Pot Chicken Biryani Recipe⭐️ Nankhatai Cookies (under 30 minutes) As always, I hope you found this recipe useful. If you did, please let me know your rating ⭐️ and feedback 📲 in the comments below, or simply rate the recipe right on the recipe card. I’d really appreciate it. ❤️
📖 RECIPE
This recipe was first published in Apr 2020, and has been republished with updated instructions, notes & tips, step images as well as video in Apr 2021. If you’d like FREE recipes and meal prep ideas delivered directly to your email inbox every Friday in one short email, then subscribe to the Foodie Friday list HERE, and never run out of ideas on what to cook over the weekend or prep for the week ahead. 🙂