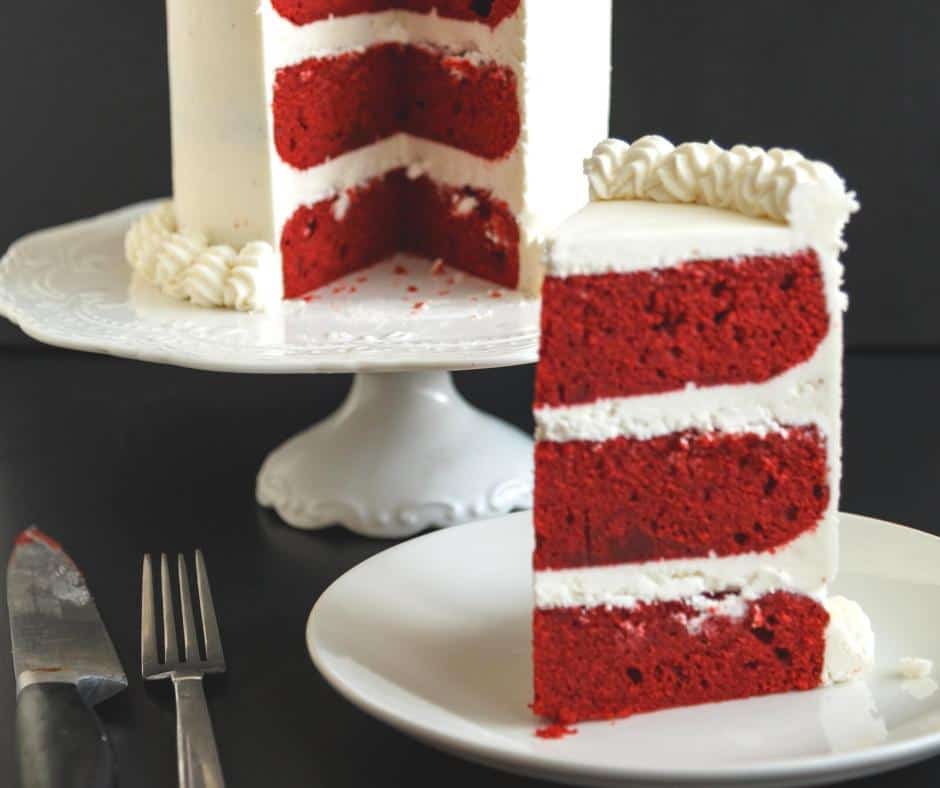
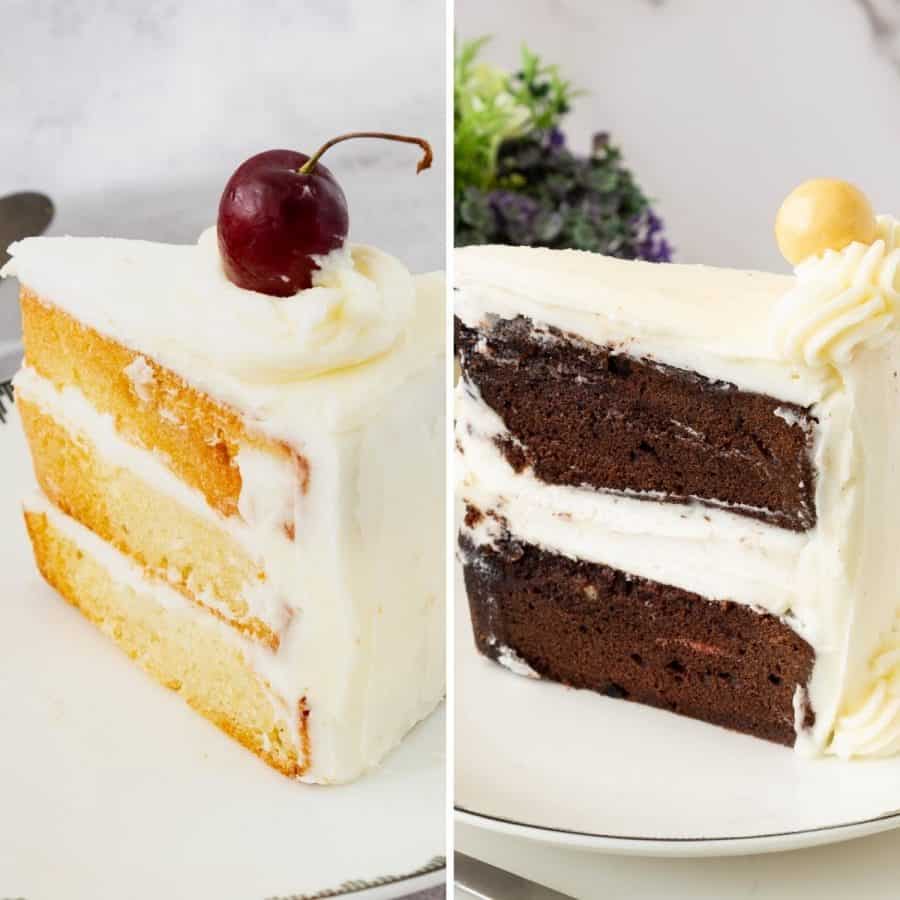
Are you in the mood for baking something special but not quite sure where to start? Look no further than this perfect red velvet cake recipe for beginners! Red velvet cake is a classic, with layers of moist cake, a hint of cocoa, and a rich cream cheese frosting.
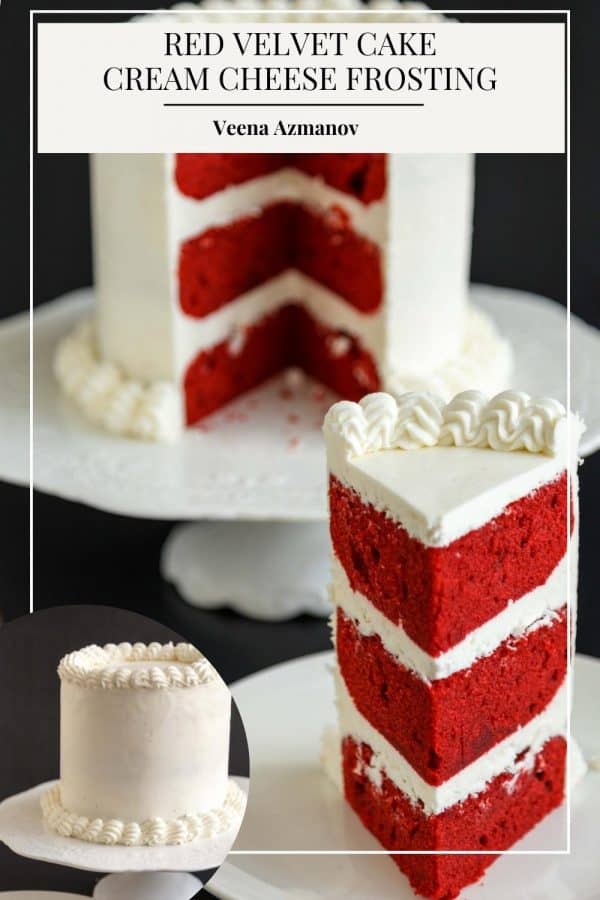
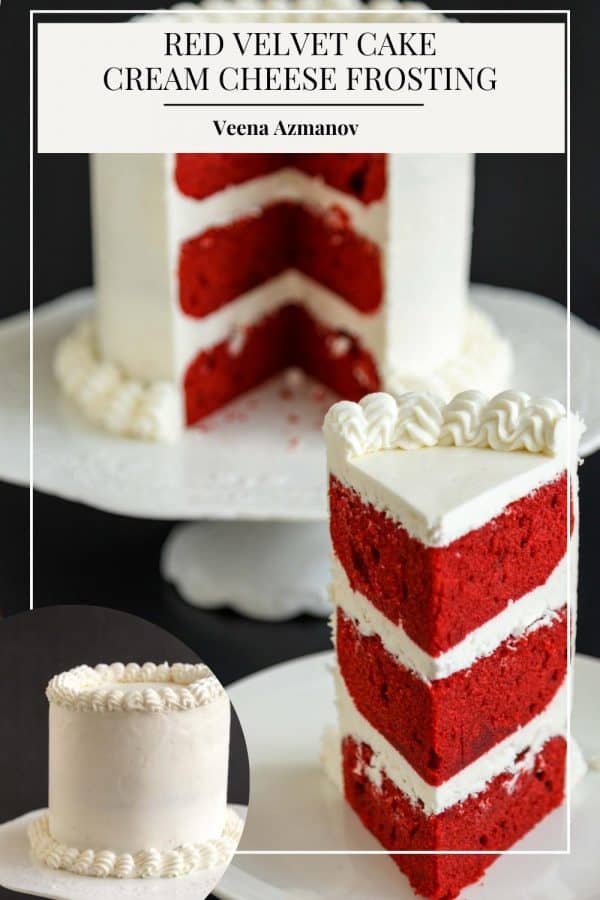
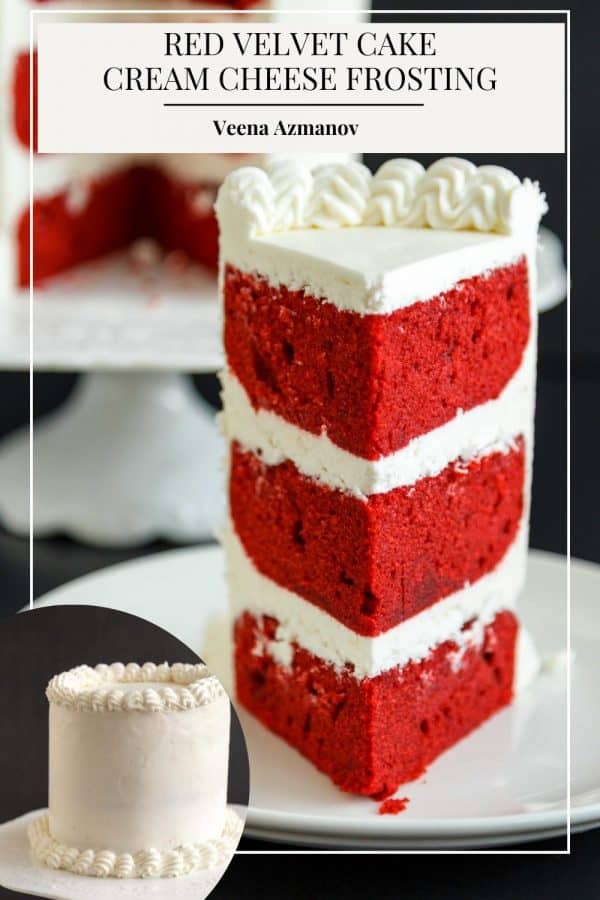
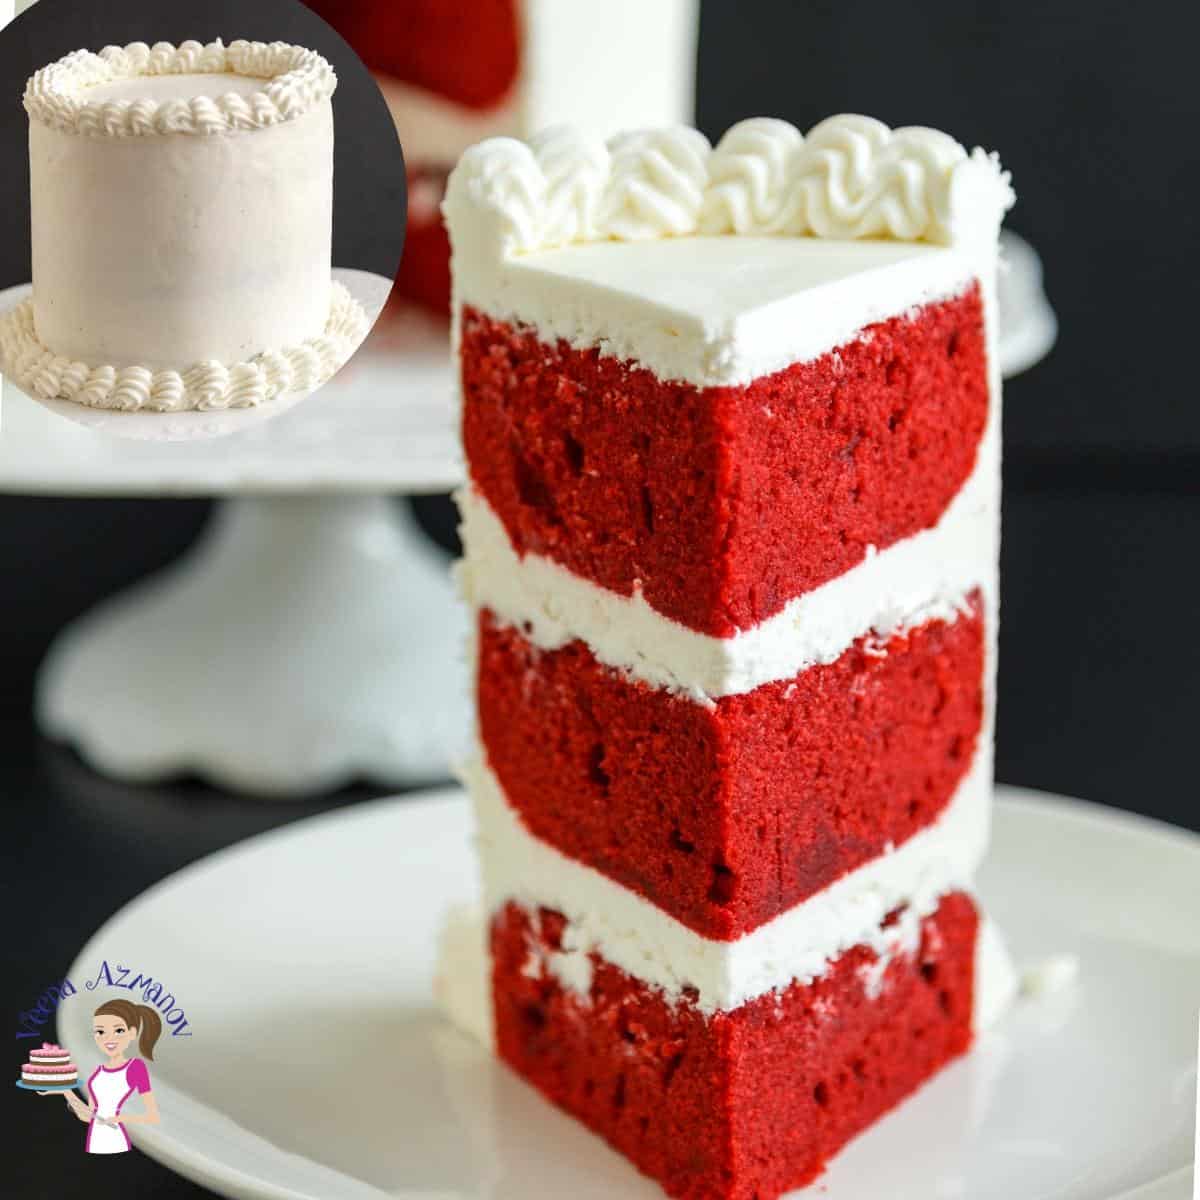
Best red velvet cake recipe
Cake
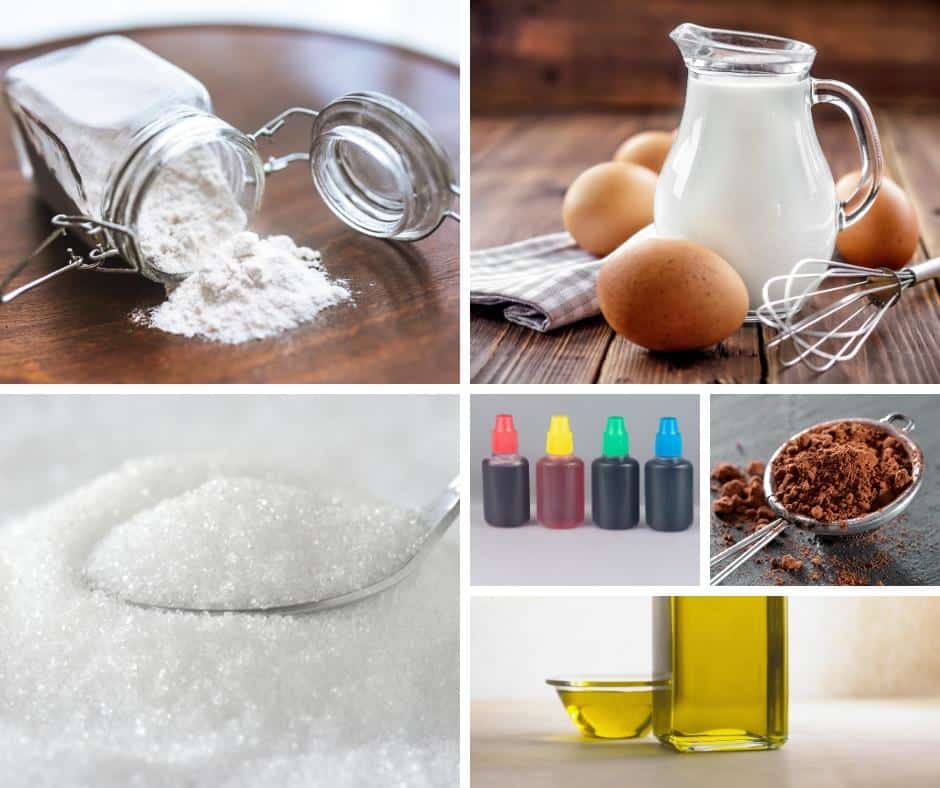
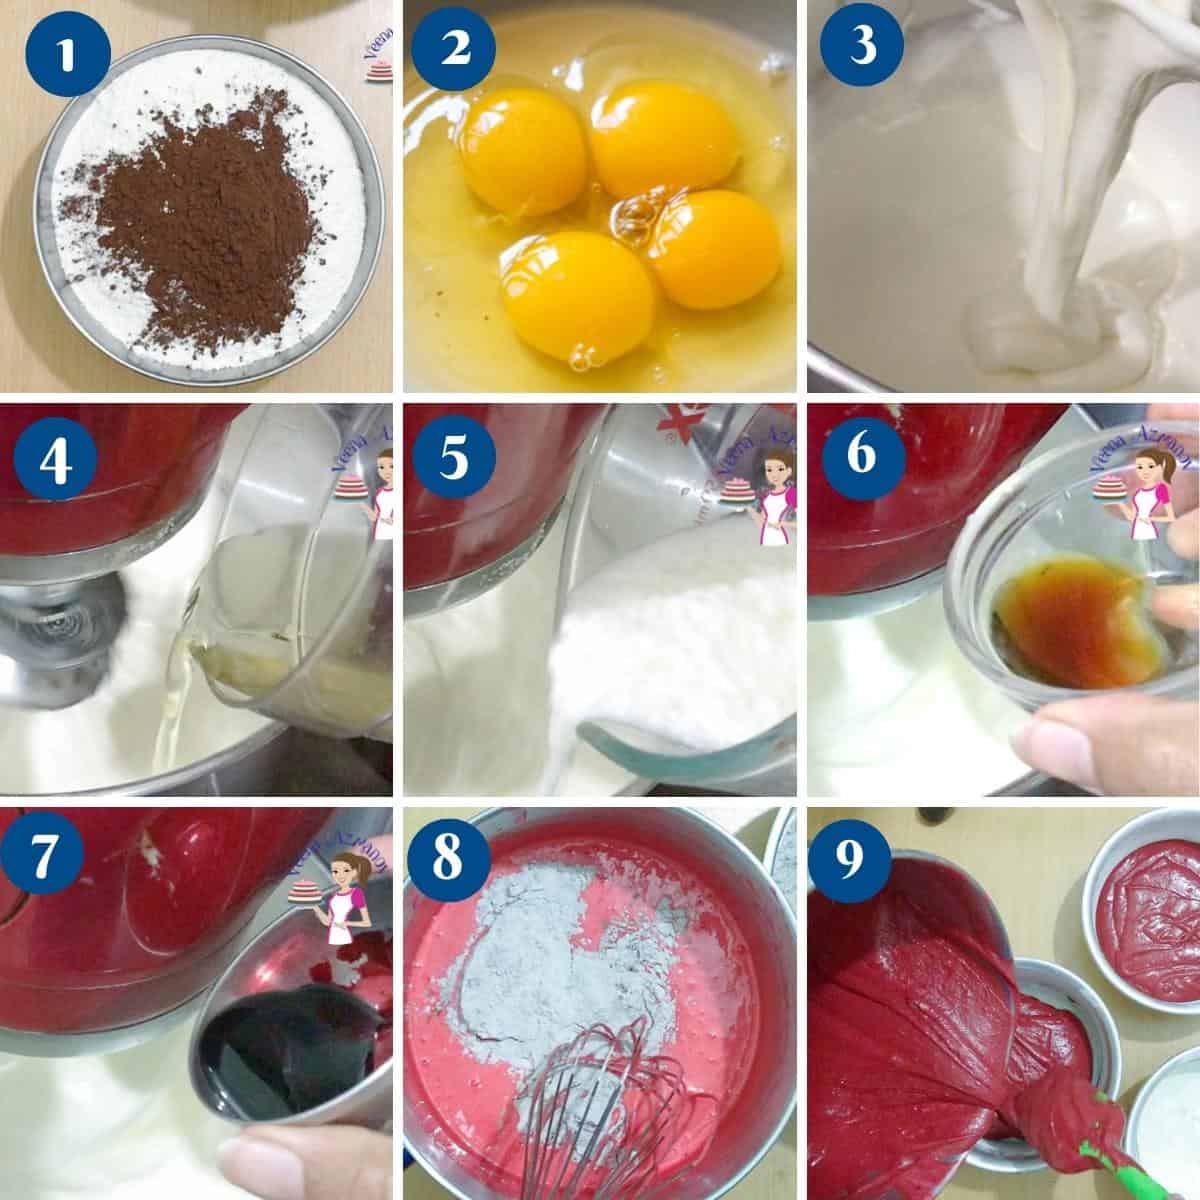
Oven and Pans – Preheat the oven to 325 F/ 165 C / Gas Mark 5. Grease and line with parchment paper 3 x 6-inch round cake pansPro tip – You can also use 2 x 7-inch round cake pans or one 9-inch round cake pan Dry ingredients – Sift together the flour, salt, baking soda, and cocoa powder – set asidePro tip – sifting the dry ingredients will add lightness to the cake. Eggs – In the large bowl of a stand mixer with the whisk attachment on medium-low speed, whip the whole eggs with a pinch of salt for two minutes. Then, gradually add the sugar one tbsp at a time. Once all the sugar is, in turn, the mixer to medium-high speed and whip until light and fluffy (ribbon stage)Pro tips – whole eggs will not whip to stiff peaks but they do become light and foamy Wet ingredients – Once eggs are whipped gradually add the buttermilk and vinegar, followed by the oil, vanilla extract, and gel food coloring.Pro tip – Make sure the oven is hot and the baking pans are ready because once you add the vinegar the mixture will start to bubble
Dry to wet – Continue to use the whisk attachment and add the flour mixture in three additions until you have a smooth batter. Scrape the sides of the bowl with a spatula. Pro tip – the whisk attachment will prevent lumps but make sure not to ovemix as we do not want to deflate all whipped eggs. Pans – Divide the batter between the prepared baking pans. Tap on the counter three times to remove large air pockets.Pro tip – using cake strips around the cake will prevent a dome. Bake in a preheated oven for about 25 to 30 minutes or until a toothpick or skewer inserted in the center of the cake comes out clean.Pro tip – The 3 x 6-inch cakes will take about 20 mins while the 7-inch will take about 25 to 30 mins Cool – once baked cool in the pan for 5 minutes then invert onto a wire rack completely before you decorate.Pro tip – always cool cakes completely before frosting otherwise the frosting will melt on warm cakes.
Cream cheese frosting
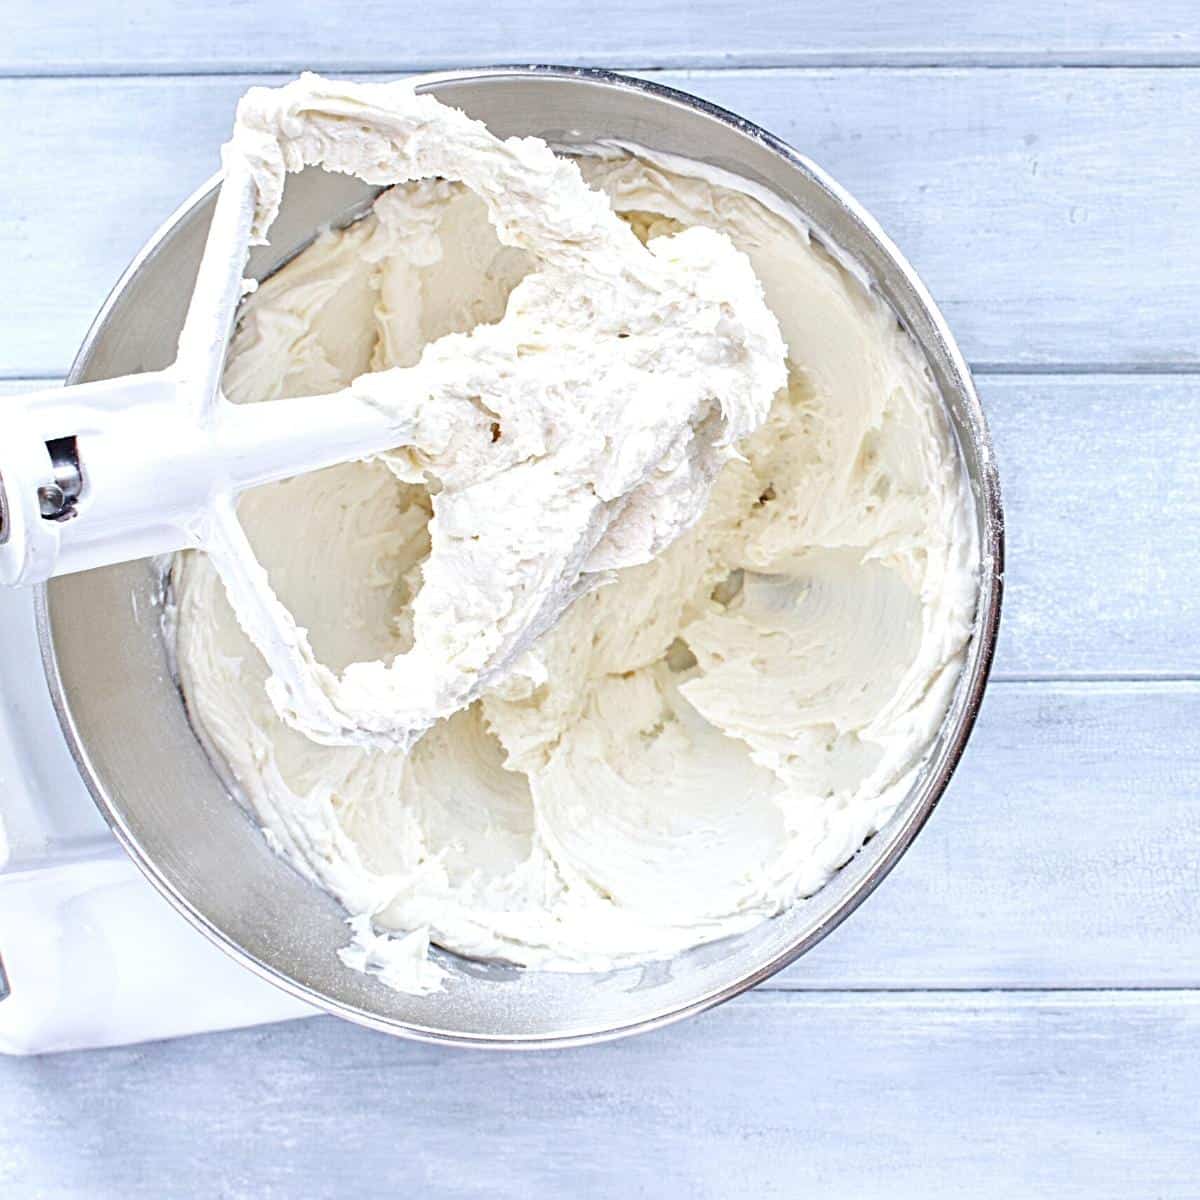
Cream – In the bowl of a stand mixer with the paddle attachment cream the cream cheese and butter to remove any lumps. Add 2 tbsp of heavy cream, salt, lemon juice, and vanilla extract– cream for another minutePro tip – do not overwhip cream cheese as it can separate or curdle. Sugar – Next, add powdered sugar one cup at a time. Once all the powdered sugar has been used whip for 2 to 3 minutes on medium-high speed until light and fluffy.Check consistency – if necessary add more powdered sugar to stiffen it, or more whipping cream to loosen it.
Assemble
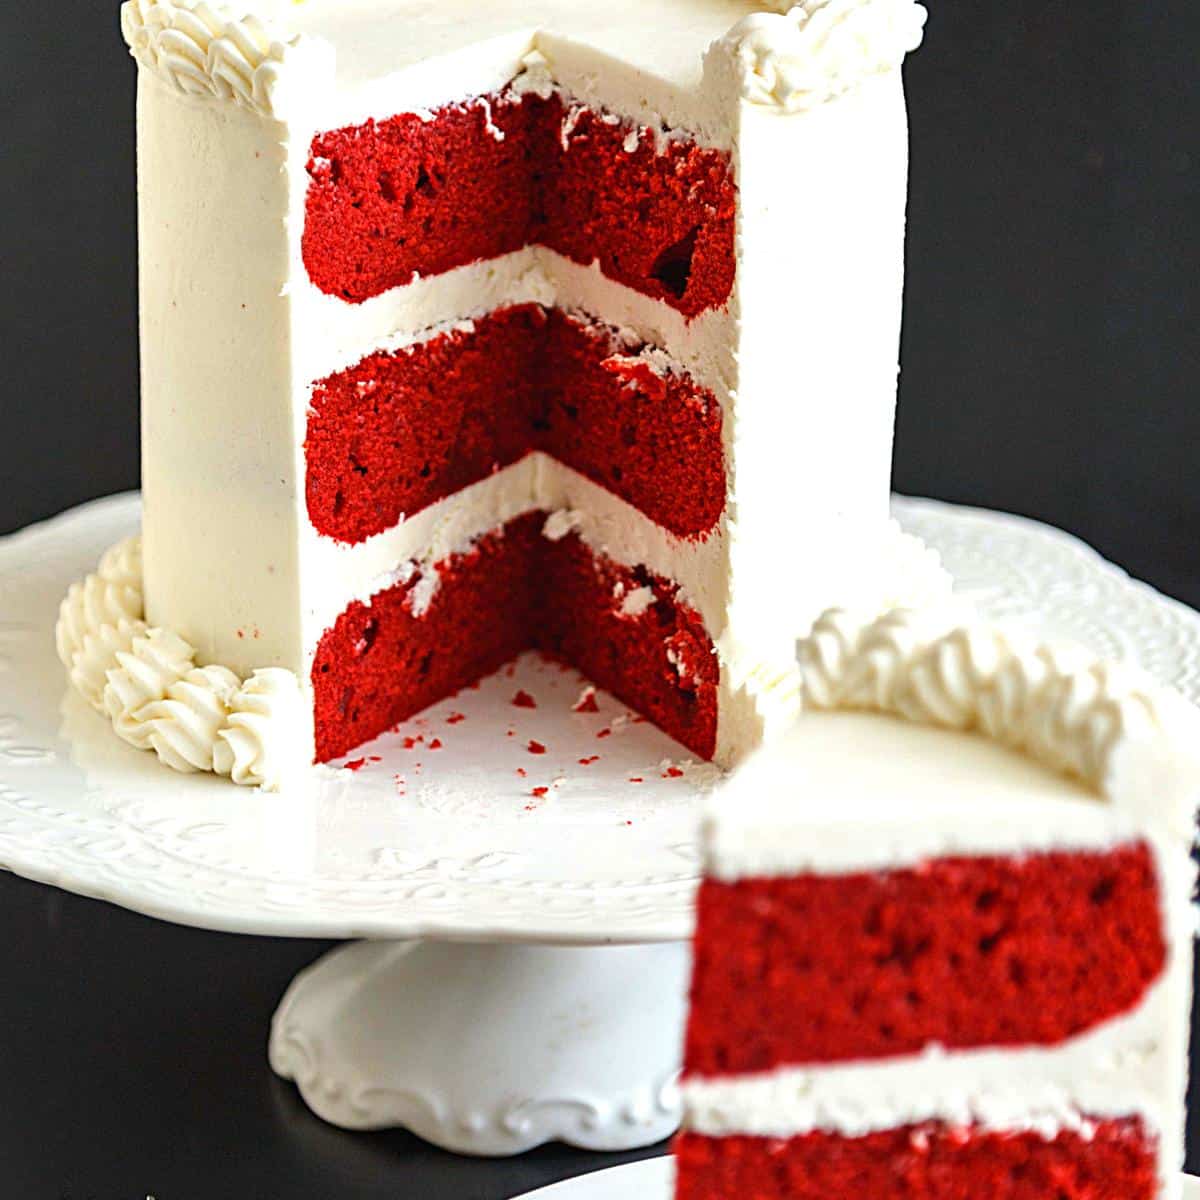
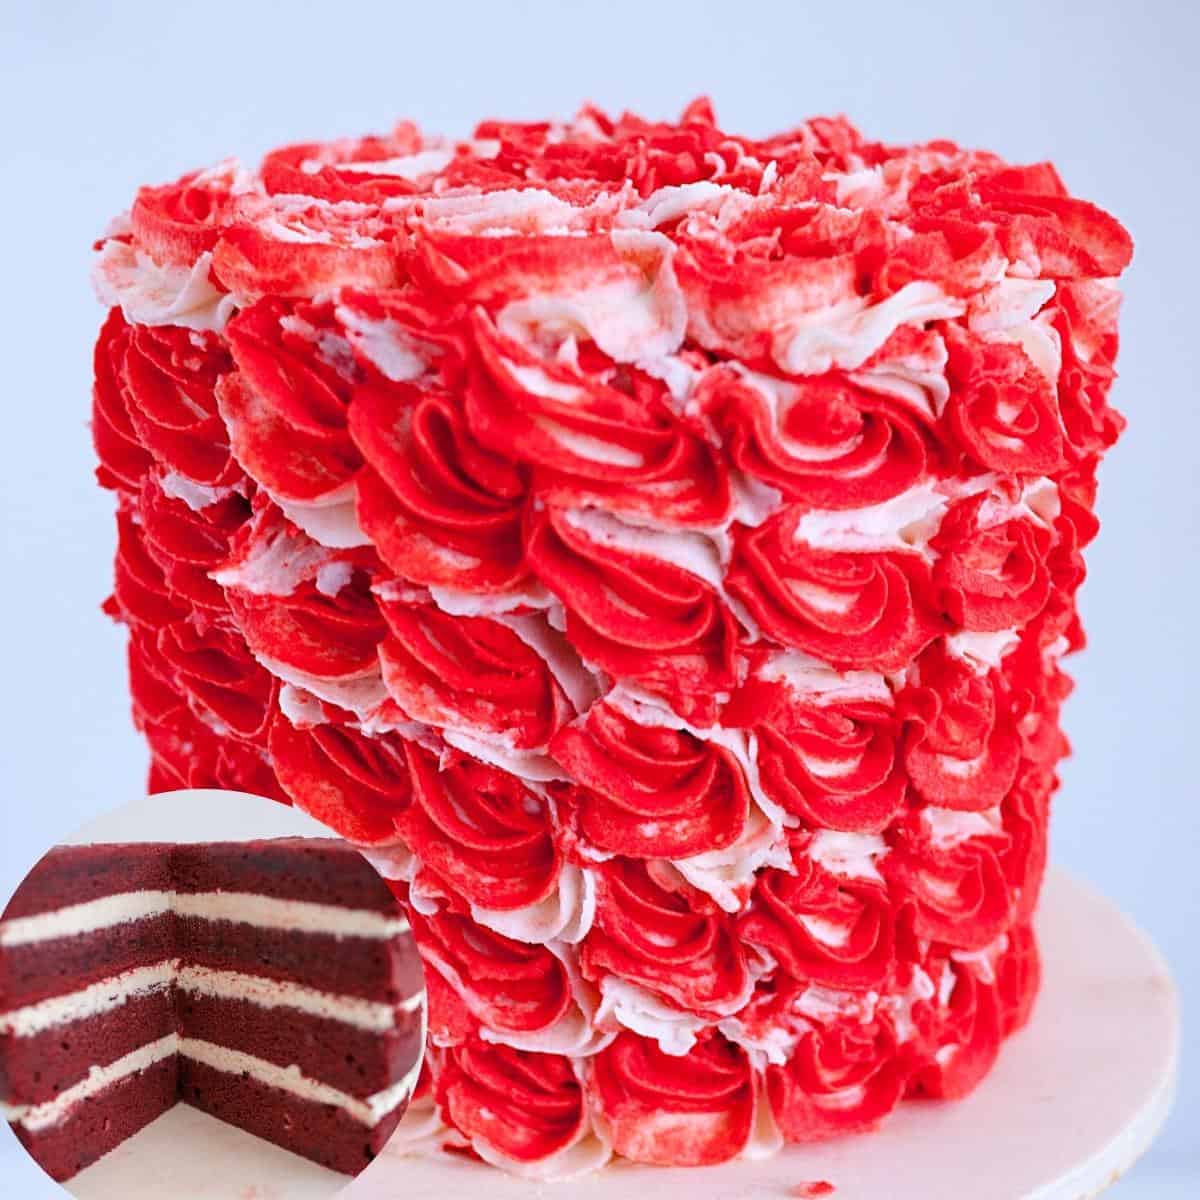
Prepare simple syrup – Boil the sugar, water and lemon juice on medium heat. Once all the sugar has dissolved boil for two minutes more. Then, cool completely before using.Pro tip– Simple syrup is optional but it is used to ensure the cake layers are moist. Level – Using a bread knife or cake leveler cut the domes off the cake layers. Torte the cakes horizontally in half. Then, brush each layer with the cooled simple syrup. Stack – place a cake layer on the cake board or cake stand. Top with a big dollop of buttercream – spread evenly using a straight-edge spatula. Then top the second cake layer on top followed by more buttercream and the last layer.Pro tip -if you plan to move the cake again, it is best to use a cake circle under the cake, so you can pick the cake with its base and without any accidents. Chill – Place the cake in the fridge to chill for 10 to 15 minutes.Pro tip – Chilling the cake at this point will ensure the layers don’t move when you frost the outside. Though, if you leave the cake uncovered in the fridge for too long it can dry out. So, 10 minutes is all you need. Frost – Spread the remaining buttercream on the top of the cake and sides of the cake.Pro tip – A straight-edge spatula for the top, an offset spatula and a bench scraper for the sides work better. Pipe – One smooth, place the remaining cream cheese frosting in a piping bag with a star or round and pipe borders on the top and bottom of the cake. Alternatively, you can crumble the cake domes (scrap cake) into crumbs and use that around the cake on the bottom.
Creative variations
Fruity Burst: Add a pop of flavor to your red velvet cake by incorporating fresh berries into the batter. Fold in a handful of ripe raspberries or juicy blueberries before pouring the batter into the cake pans. The burst of fruity goodness will add a refreshing twist to the traditional red velvet taste. Nutty Indulgence: For those with a penchant for nuts, consider sprinkling chopped pecans or walnuts on top of the cream cheese frosting. The crunch and earthy flavor of the nuts will complement the velvety smoothness of the cake, creating a delightful contrast of textures. Chocolate Lovers’ Dream: Take your red velvet cake to chocolatey heights by adding a layer of chocolate ganache between the cake layers. Spread a thin, glossy ganache coating on each layer before assembling the cake. Combining rich chocolate and velvet red will make every bite a heavenly experience. Citrus Zest: Add a zing of citrus flavor to your red velvet cake by incorporating zest from oranges or lemons into the batter. The bright, tangy notes will balance out the richness of the cake and add a refreshing twist. You can also add a touch of citrus juice to the cream cheese frosting to enhance the citrusy essence.
Creative ways to serve and use leftover cake:
Mini Red Velvet Cake Parfaits: Transform your red velvet cake into individual parfaits by layering bite-sized cubes of cake with creamy layers of frosting in elegant dessert glasses. Top it off with a sprinkle of chocolate shavings or a fresh strawberry for an added touch of sophistication. Red Velvet Cake Truffles: Turn your leftover red velvet cake into bite-sized indulgences by rolling pieces of cake into small balls and coating them with melted chocolate. These decadent truffles are perfect for parties and make for a delightful gift. Red Velvet Cake Push Pops: Add a playful twist to your red velvet cake by layering it in push pop containers. Alternate layers of cake and frosting for a visually appealing treat that is both fun to eat and Instagram-worthy. Red Velvet Cake Ice Cream Sandwiches: Take your red velvet cake to a new level by using cake slices as the “bread” for delightful ice cream sandwiches. Place a scoop of your favorite ice cream flavor between two slices of cake and roll the exposed ice cream edge in sprinkles or crushed nuts for an extra touch of indulgence. Red Velvet Cake Milkshake: Blend a slice of red velvet cake with a scoop of vanilla ice cream, milk, and a dash of cocoa powder for an incredibly rich and creamy red velvet cake milkshake. Top it off with a whipped cream dollop and a cake crumbs sprinkle for a truly decadent experience.
Frequently asked questions
Thank you for sharing - Save for later
For starters, this recipe is perfect for beginners. It’s simple to follow and doesn’t require any complicated techniques. Plus, all of the ingredients can be easily found at your local grocery store. But perhaps the best reason to make this red velvet cake recipe is the taste. The combination of cocoa powder, buttermilk, and vanilla extract gives this cake a complex and delicious flavor profile that is sure to satisfy your sweet tooth. And with the addition of cream cheese frosting, it’s the perfect balance of sweet and tangy. So if you’re looking for a crowd-pleasing dessert that is both easy to make and delicious, look no further than this red velvet cake recipe. Today, I am using the classic cream cheese frosting and the other is my NO Buttercream cheese frosting. But, the options for frosting are endless, see all my over 30 buttercream frosting recipes If you are looking to make a red velvet wedding cake then this would be great. This cake can be used to cover with fondant. Just make sure to chill the cake well. It is also a great cake to use for tiered cakes such as wedding cakes, birthdays, and anniversaries.
Line the cake pan with parchment paper. This will prevent the cake from sticking to the pan and make it easier to remove. It’s important to use room-temperature ingredients, especially oil and eggs, to ensure that they mix together properly. Room-temperature ingredients also blend together better, resulting in a smoother batter and a more evenly baked cake. Use fine-grain sugar – this ensures the sugar melts into the whipping eggs easily leaving no trace of sugar grains Don’t Over-mix the Batter: When mixing the batter, make sure you don’t overdo it. Overmixing the batter can cause the cake to become dense and dry. Mix the ingredients until just combined. Cake strips are highly recommended for this cake so you have a nice pale baked cake not dark. The top crust comes off easily. You can also make cake strips at home DIY Bake in the Middle of the Oven: For even baking, place the cake in the middle of the oven. This will ensure that the cake bakes evenly and doesn’t rise too much in the center. Keep cakes moist by brushing the layers with simple syrup – simple syrup is a mixture of sugar and water boiled until the sugar is dissolved.
Keep it simple: You don’t need to be a professional baker to create a stunning cake. Sometimes, less is more. A simple dusting of powdered sugar or a few fresh berries can be all you need to make your cake look beautiful. Use frosting sparingly: While frosting is a must-have for any red velvet cake, it’s important not to go overboard. Too much frosting can overpower the flavor of the cake and make it look messy. Stick to a thin layer, and add a few decorative swirls if you wish. Get creative with toppings: The best part of any cake is the toppings! Consider adding some crushed nuts, chocolate shavings, or even edible flowers to your red velvet cake for a pop of color and texture. Use piping bags: If you’re feeling extra ambitious, try using a piping bag to create fun and intricate designs on your cake. Practice on a piece of parchment paper first to perfect your technique.
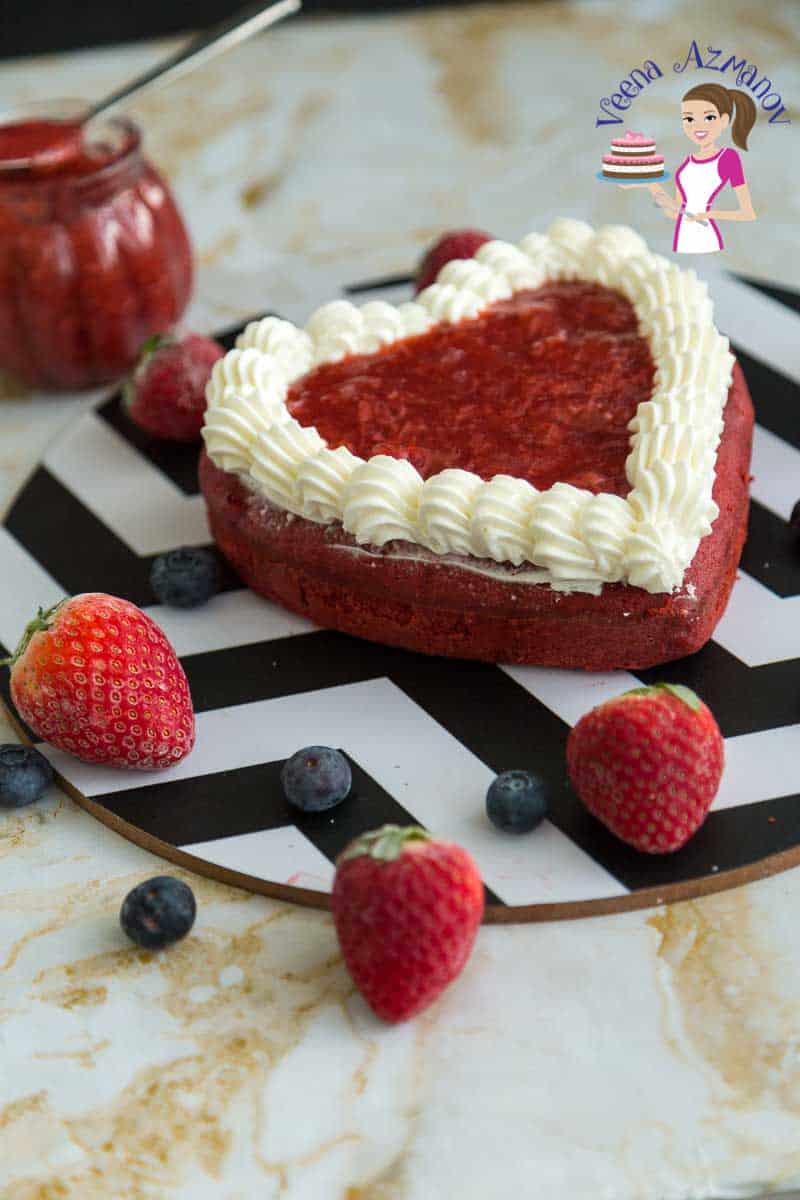
Add Some Fresh Fruits: Red velvet cake pairs well with fresh fruits like strawberries, raspberries, or cherries. Arrange sliced fruit on top or around the cake for a colorful and refreshing touch. Whip Up Some Cream Cheese Frosting: A classic pairing with red velvet cake is cream cheese frosting. You can serve it on the side or spread a generous layer on top of the cake. Dust with Powdered Sugar: For a simple but elegant touch, use a sifter or fine-mesh strainer to dust powdered sugar evenly over the cake. Add Some Edible Flowers: If you want to take your presentation to the next level, try adding some edible flowers to your cake. Choose flowers that are food-safe like roses, pansies, or violets to add a pop of color.