Here is an easy step-by-step recipe with a video to make an exotic Indian sweet with all the possible tips and tricks to get it right! Once you crack the steps to make soft Rasmalai at home, there is no looking back. Rasmalai is one of those desserts that never fails. Though it looks a bit difficult to make, it is actually very easy to prepare. It only needs a little effort, but it’s all worth it at the end when you have a delicious dessert on the table. Learn how to make this mouth-watering dessert recipe, that can be a part of your menu for festivals, get together, or any other special occasion.
What is Rasmalai?
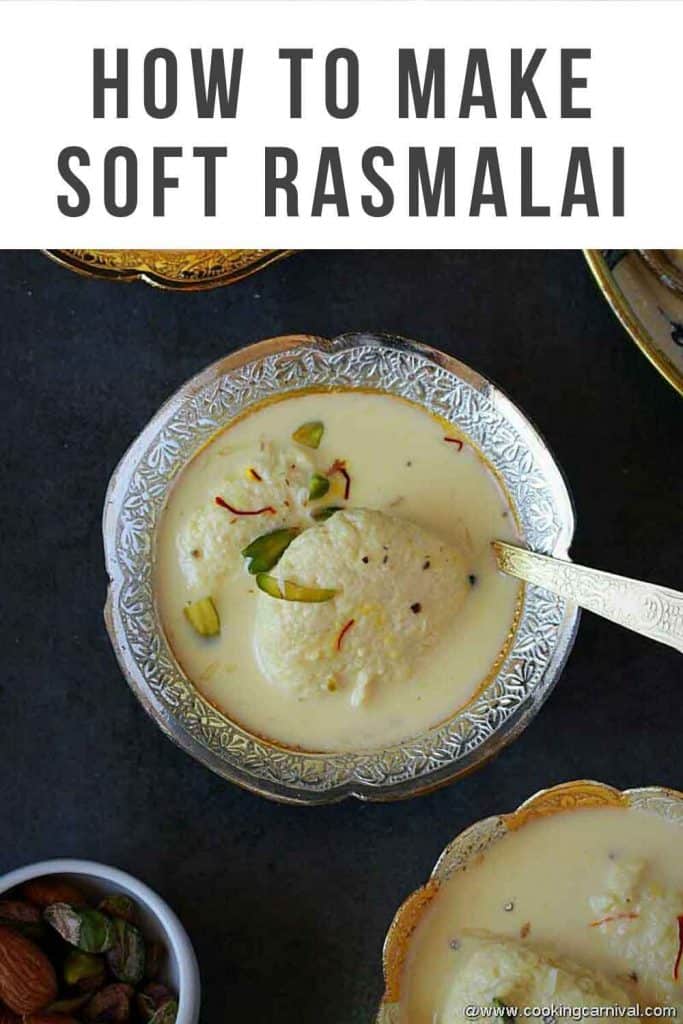
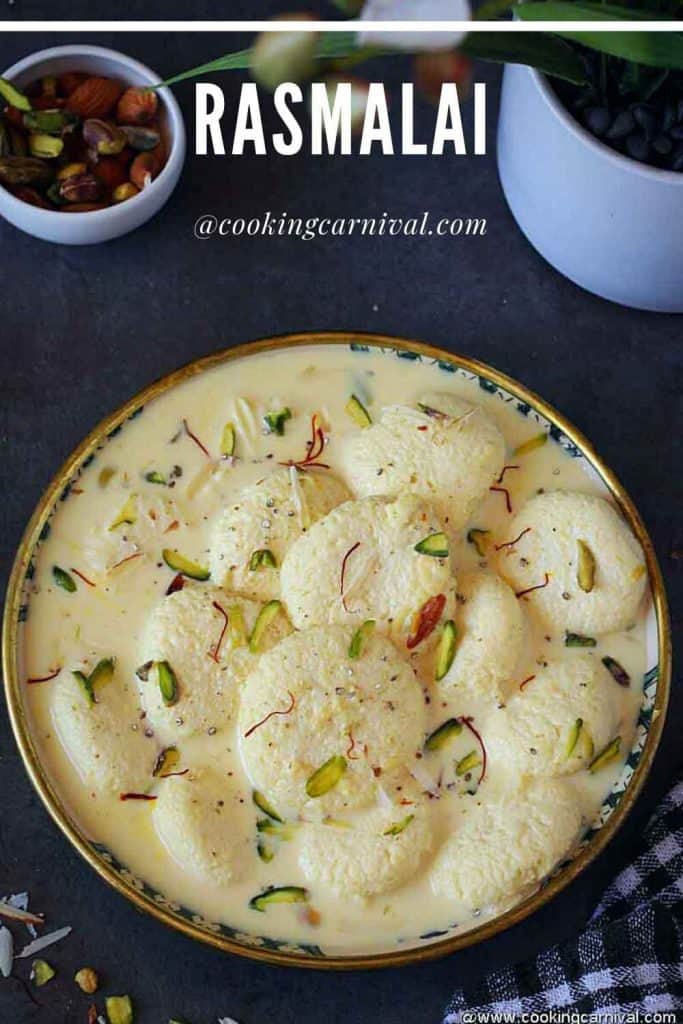
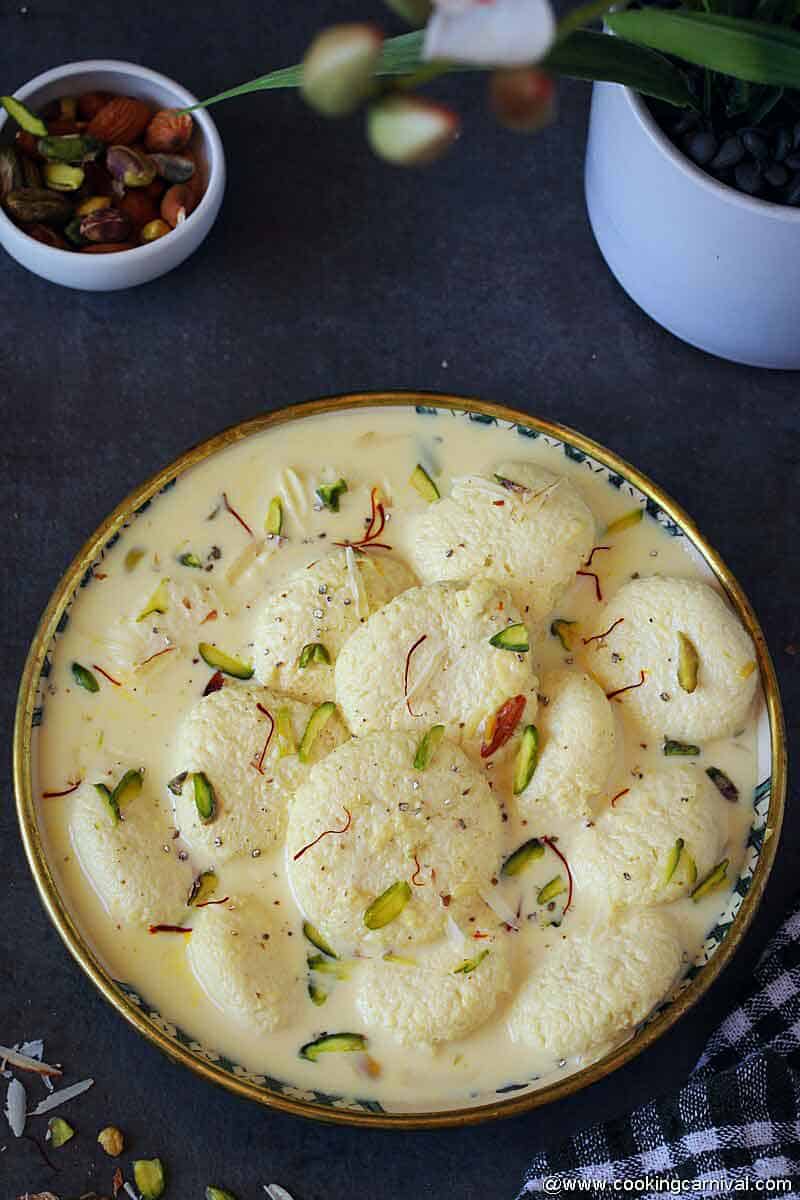
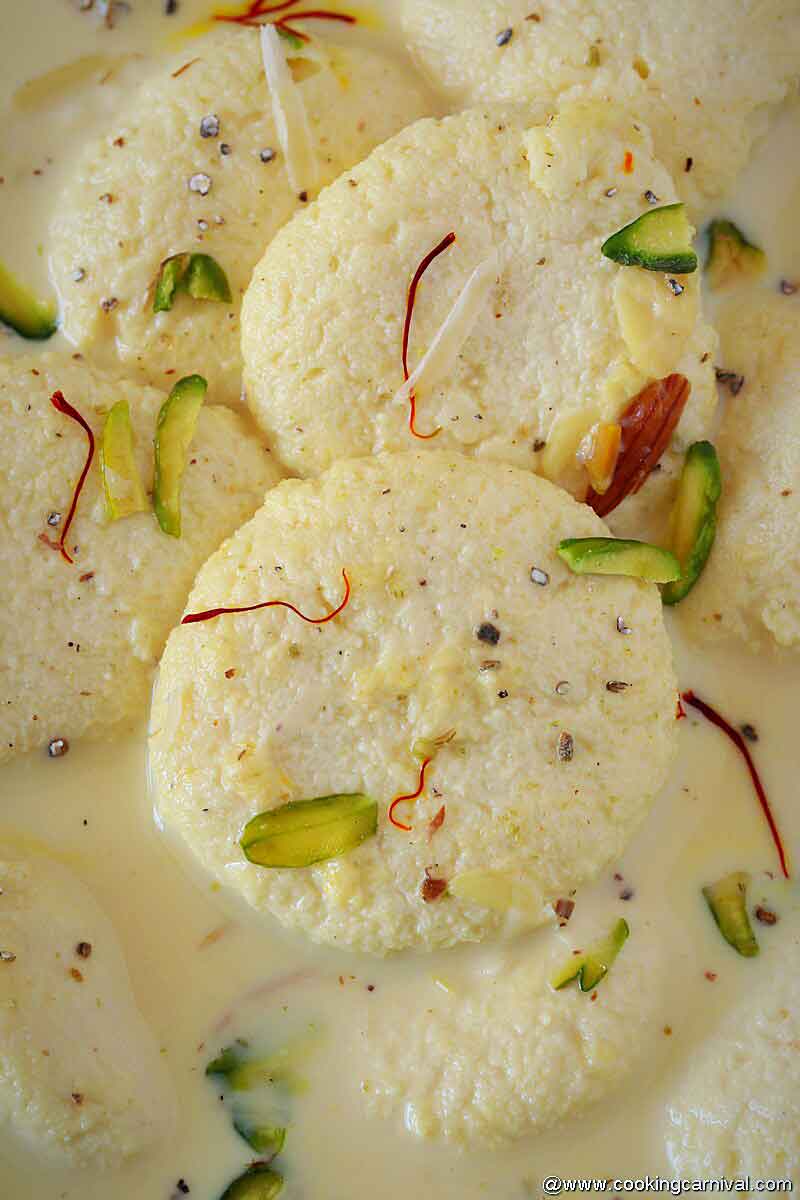
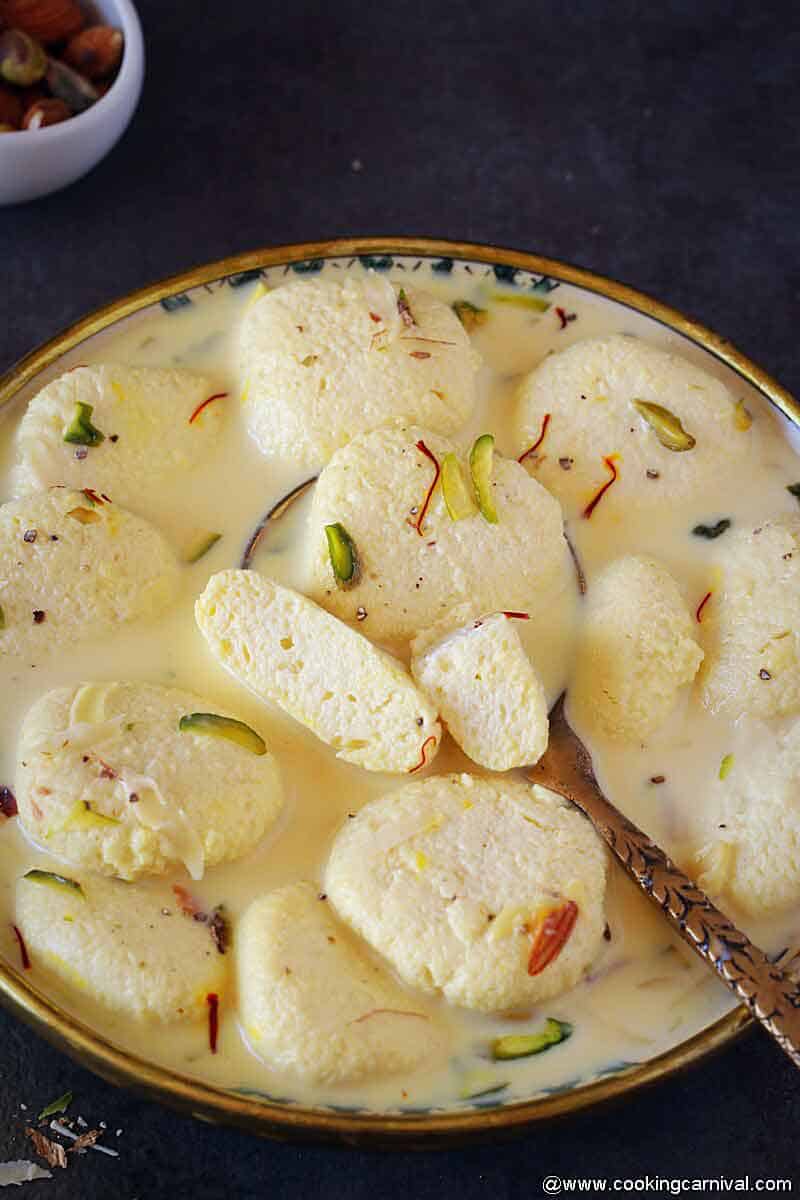
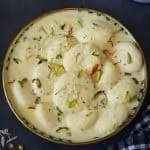
Rasmalai, or as it is traditionally called Rossomoloi, is a Bengali delicacy of spongy soft cheese dumplings that are cooked in sugar syrup and then soaked in creamy cardamom-saffron milk, absorbing all the lovely flavors. Rasmalai is a combination of two words “Ras” meaning juice and “Malai” meaning cream. Together, it creates a luscious treat with an incredible melt-in-your-mouth texture that will only leave you craving for more!! This dessert is also described as “a rich cheesecake without a crust”. The name itself is exotic and describes the richness of this delicate Indian sweet. It undoubtedly tops the list of all Indian milk-based desserts. And I am sure this rasmalai is one of the most favorite Indian desserts of everyone reading this! You can make Rasmalai Cake Jars too from this recipe. There are two parts of Rasmalai –
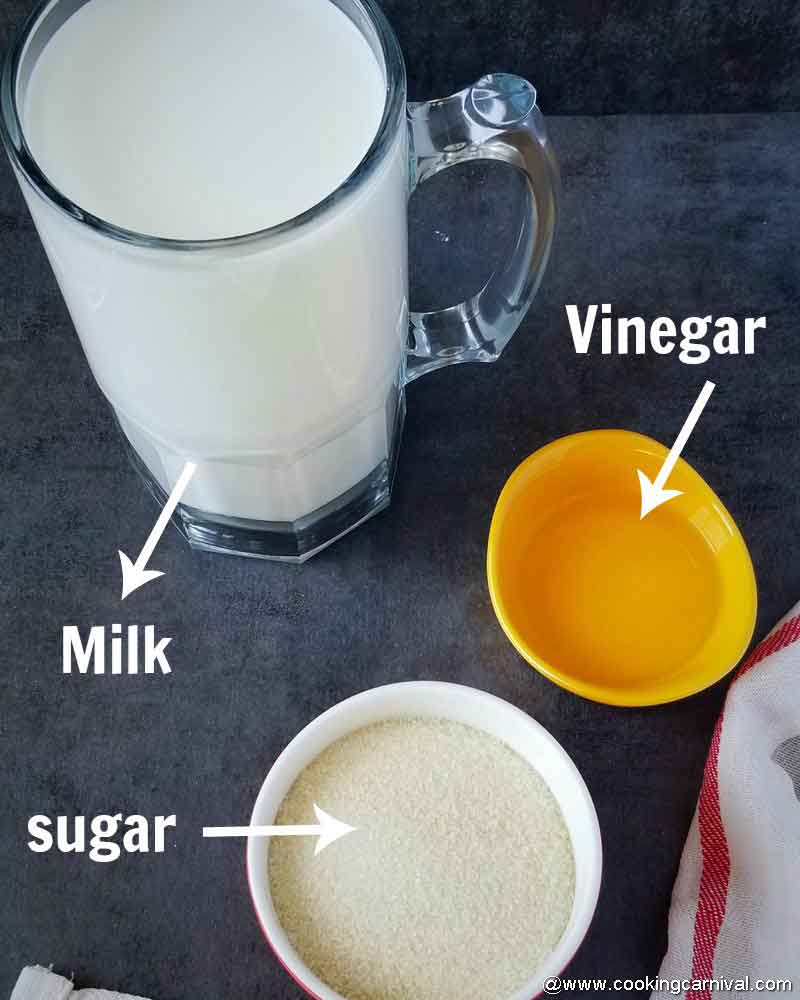
- The rasmalai balls – To make rasmalai balls the milk is first boiled and then curdled by adding lemon juice or vinegar. After draining the water from the curdled milk, the protein (the white part) that is left is called the “chenna” or “paneer”. The chenna is then kneaded with the heel of your palm till it becomes smooth. Small balls are then made from that chenna and dropped in boiling sugar syrup till cooked.
- The thickened milk or the ras: The milk is boiled with sugar, cardamom, and saffron until it is reduced by 50 to 60 percent. Then the ras malai balls are finally dipped in thickened milk and chilled before serving. Let’s learn this Rasmalai recipe in detail with step by step pics and tips to make it perfect. I have been making this recipe since I was 16! Making this recipe isn’t that difficult, but, there are few tips to keep in mind during its preparation. In this post for Soft Rasmalai Recipe, I have tried my best to explain whatever I have learned over the period of time.
Ingredients required, step by step process and Important tips –
This recipe is divided into 3 parts.
Step 1 – Ras (Flavored milk)
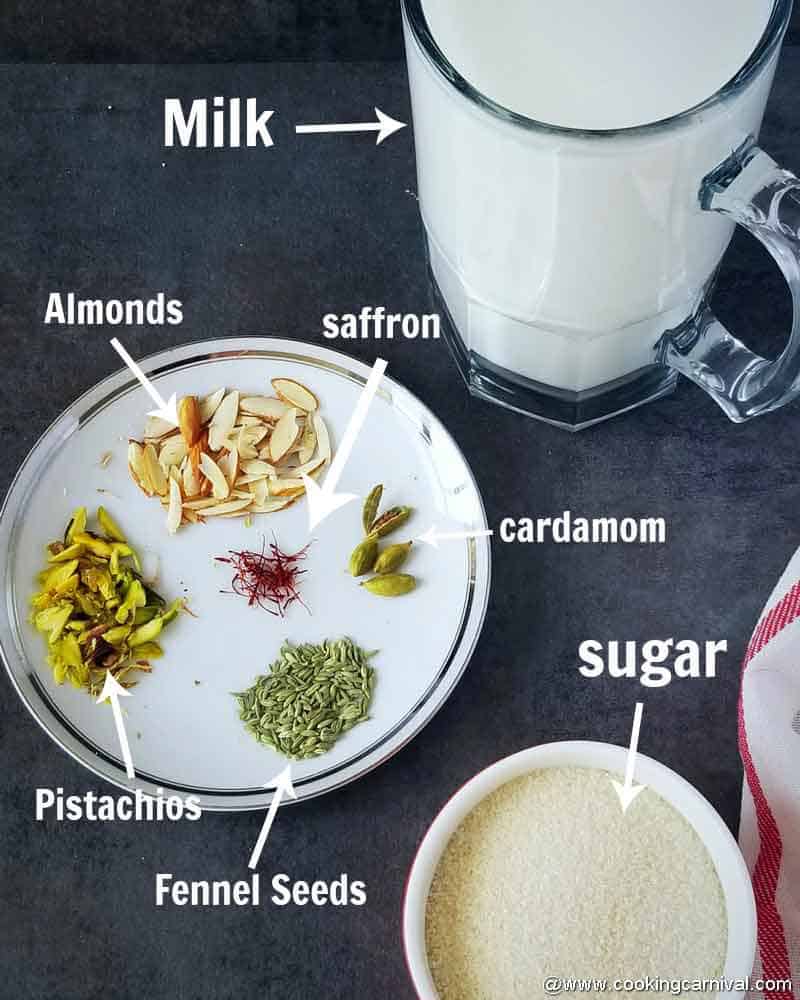
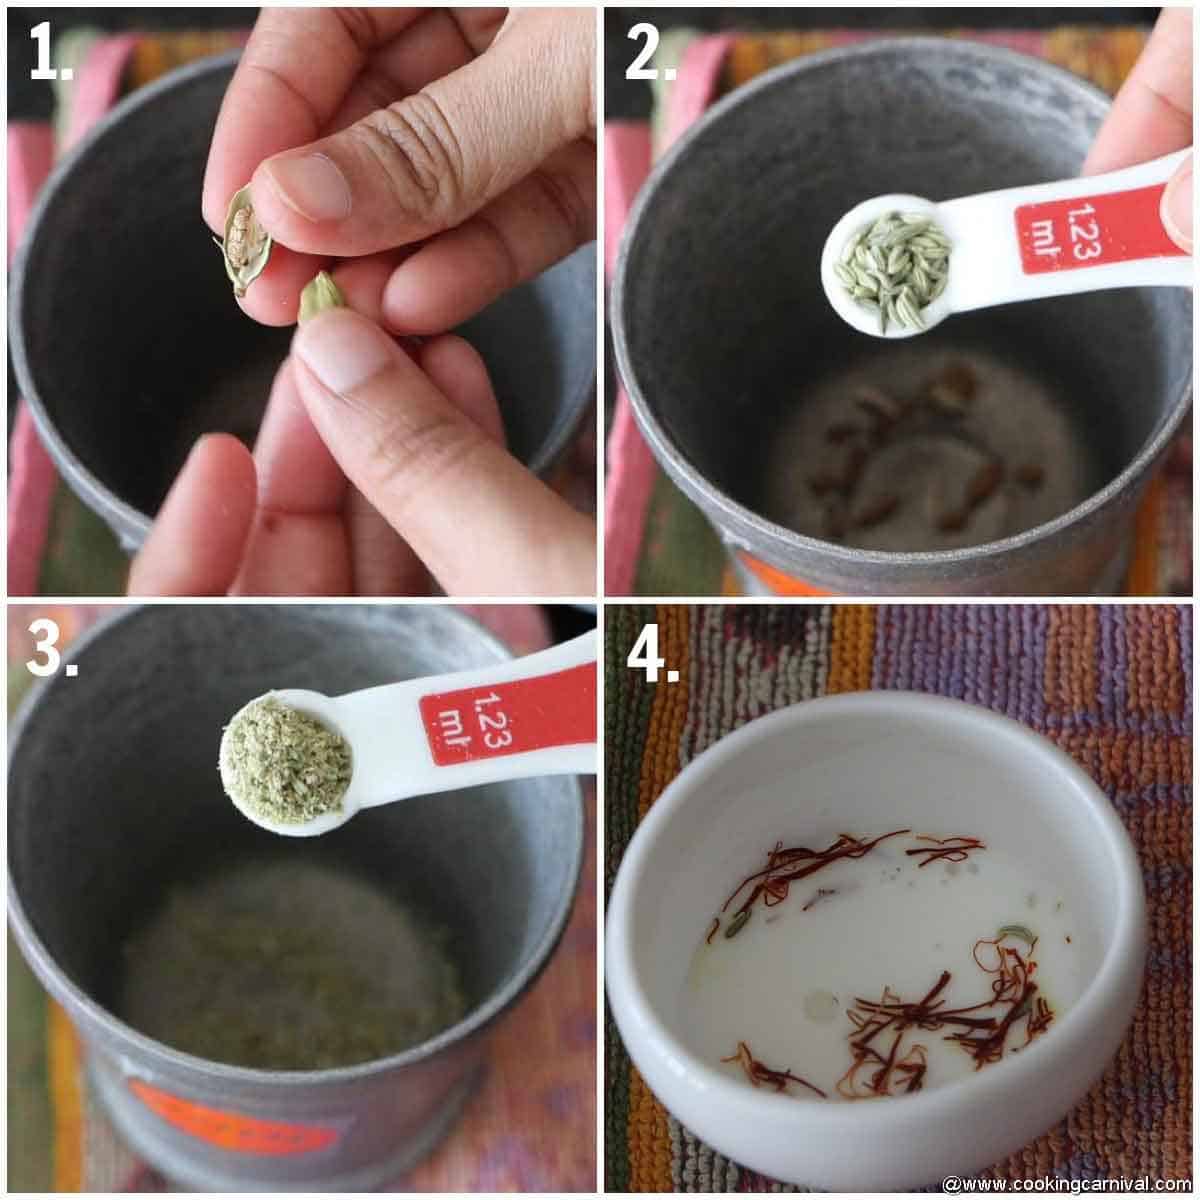
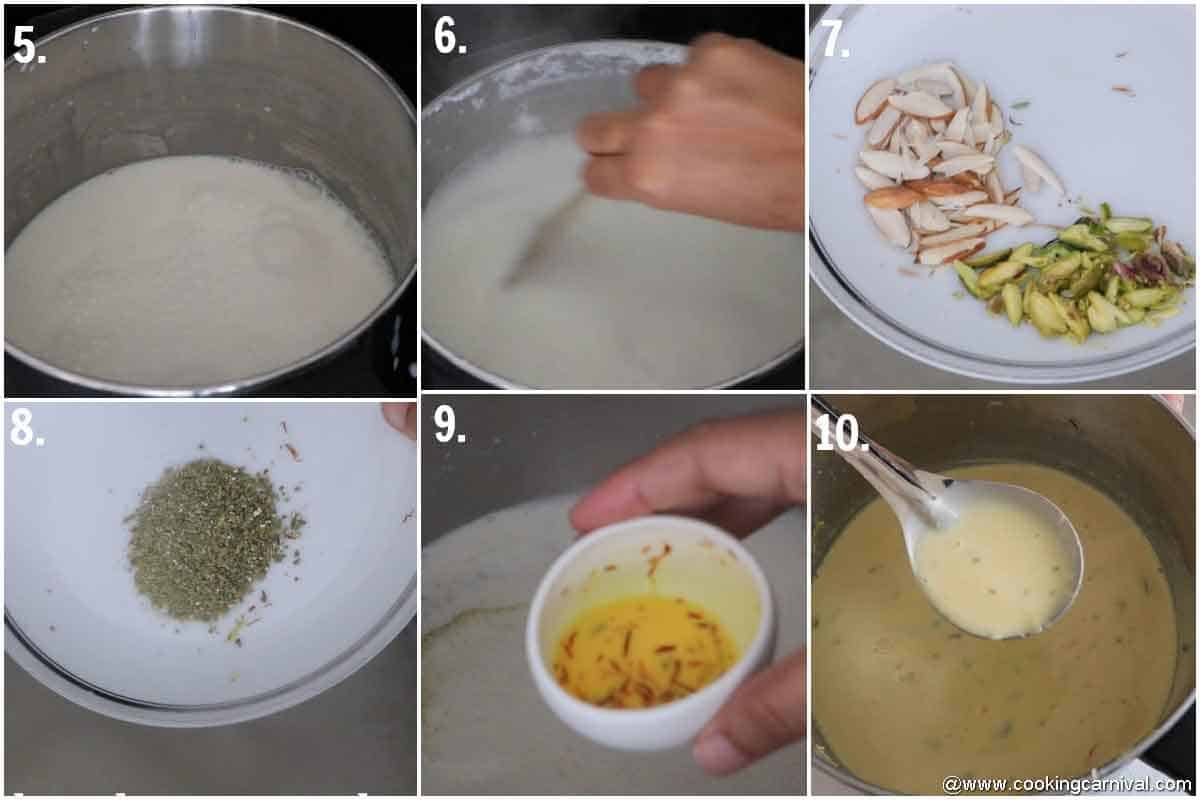
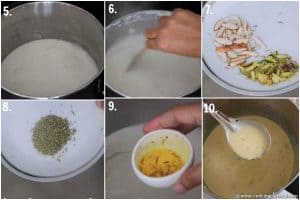
Ingredients required to make ras (Flavored milk) Here is an overview of the ingredients in the recipe (very handy to use as a visual grocery list at the store). Quantities are mentioned in the recipe card. Step by step process – Boil milk into the heavy bottom pan for about 1 hour and 10 minutes or until the milk reduces to 50% to 60%. Make sure to frequently stir the milk as the milk burns easily in the bottom of the pan. (Photo 5 and 6) While the milk is reducing, take fennel seeds and cardamom (Inner black part of cardamom) in a mortar and pestle and make a coarse powder. Also take saffron in a bowl add 1 tablespoon hot milk, mix and set it aside while the milk continues to cook. (Photo 1 to 4) Once the milk is reduced, add the sugar, cardamom-fennel seeds powder, almonds, pistachios, and saffron mix. (Photo 7 to 9) Mix them well and let it cook for another 5 minutes. Keep it aside. (Photo 10) Pro-tips
Use full-fat milk to make the ras.Never use thin pan while preparing ras, as there are high chances for milk to burn. Always use a heavy bottom pan.Make sure to frequently stir the milk as the milk burns easily at the bottom of the pan.Don’t use ready-made cardamom powder. Use freshly made cardamom powder.Use your choice of nuts.If you don’t like fennel seeds, you can skip it.You can use yellow food color to give a deep color.Adjust the sugar according to your liking
Step 2 – Paneer balls or call it malai
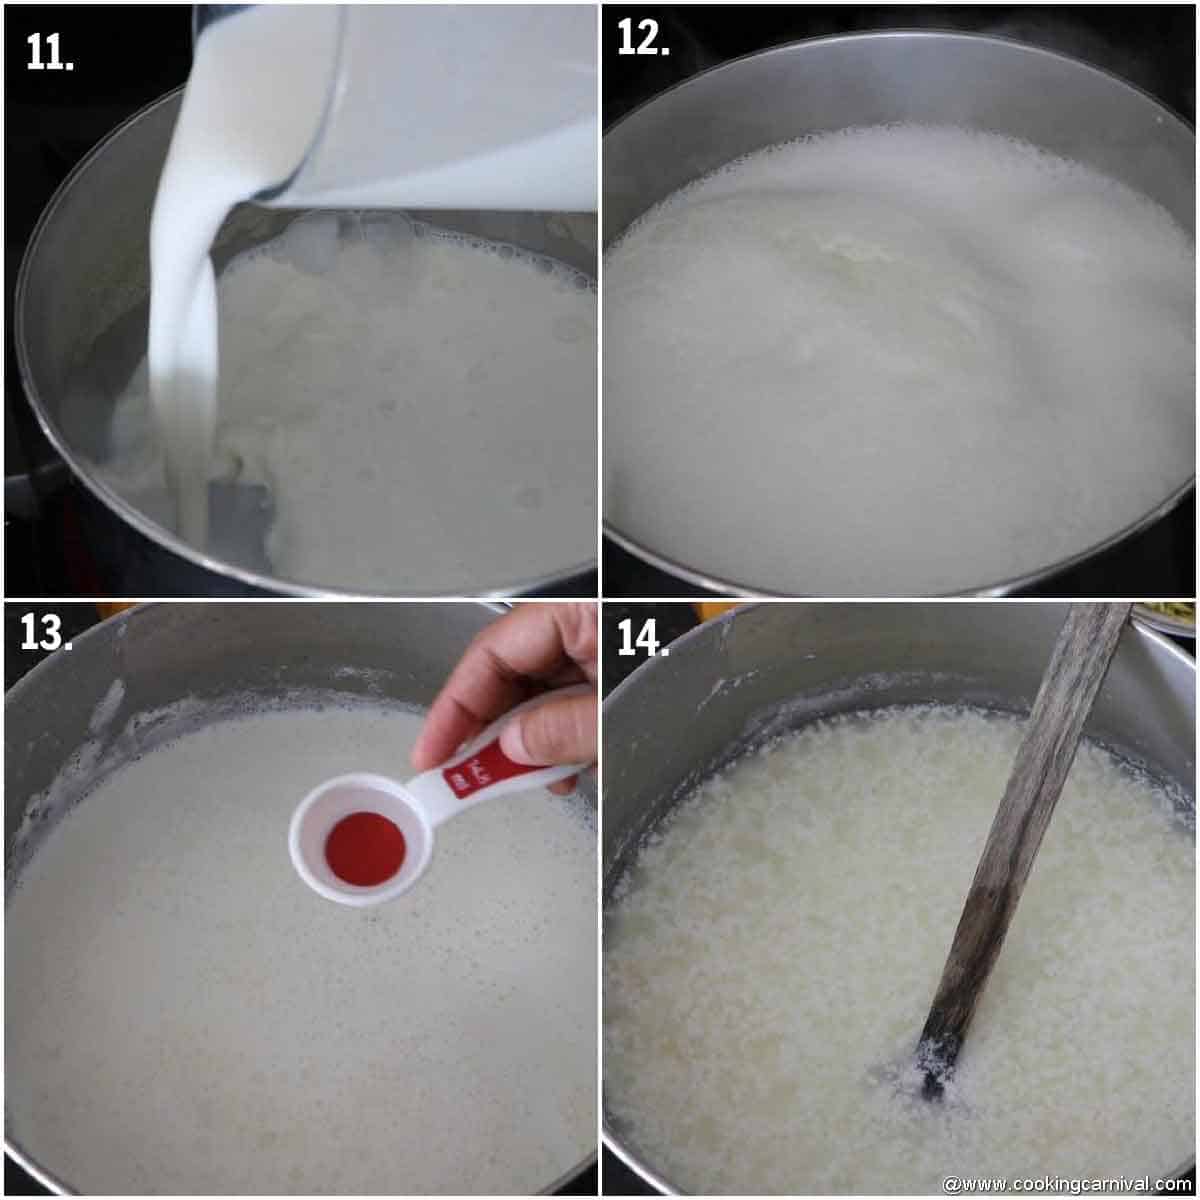
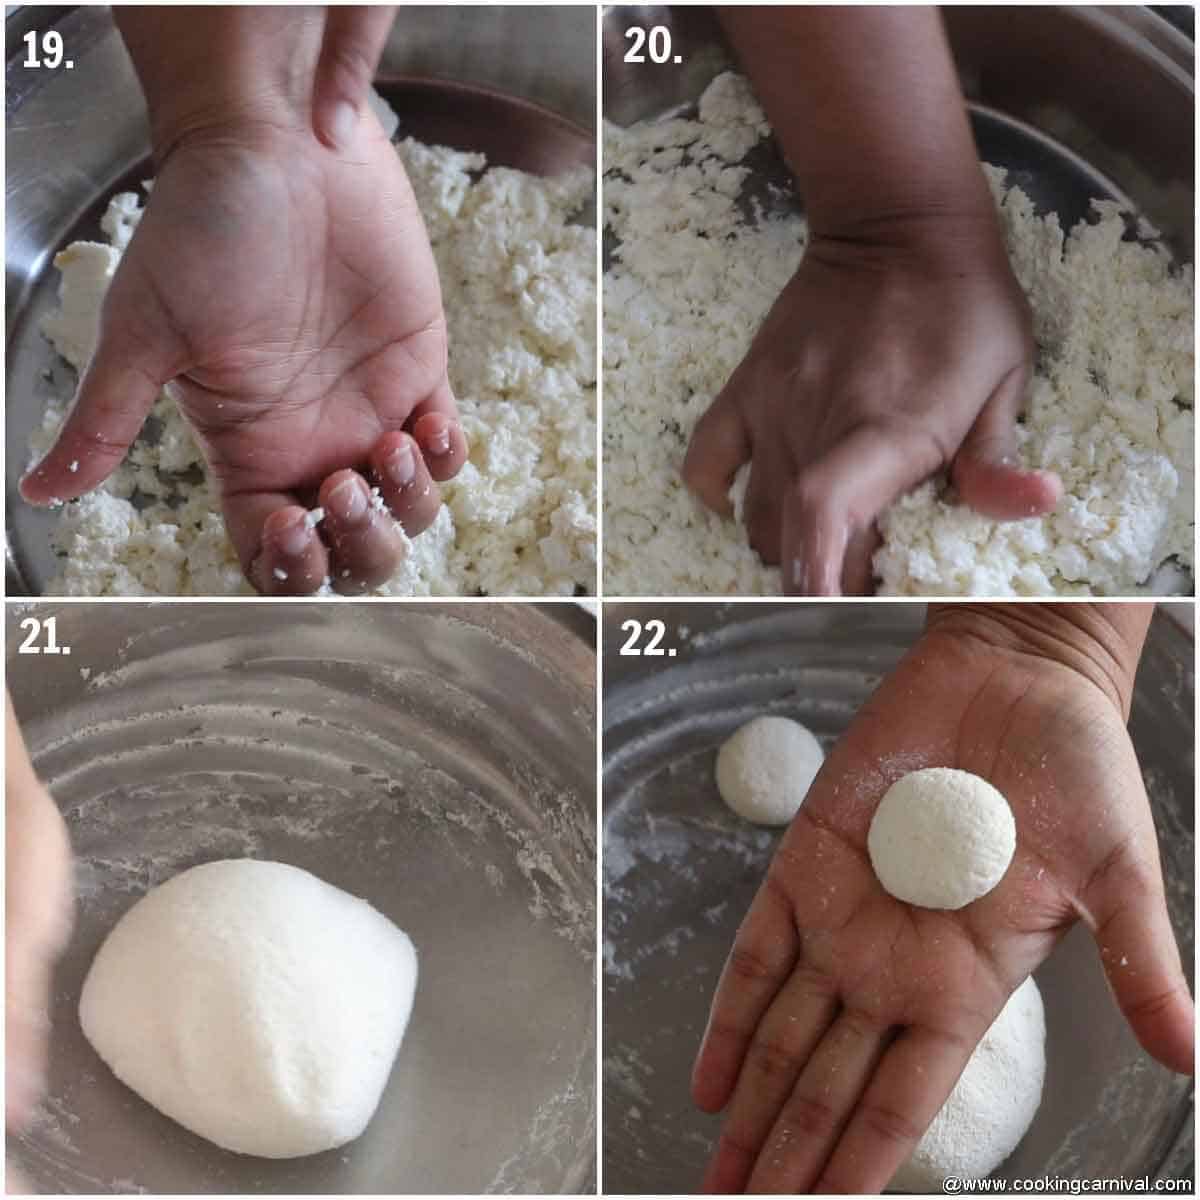
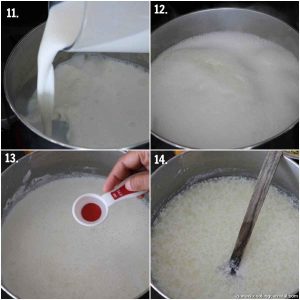
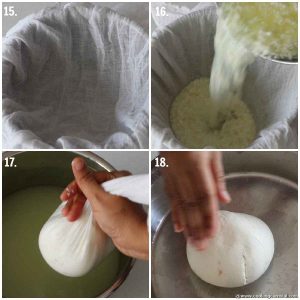
Ingredients Required Again this is an overview of the ingredients in the recipe (very handy to use as a visual grocery list at the store). Quantities are mentioned in the recipe card. Step by step preparation with tips and tricks Boiling the milk, adding the vinegar, straining and kneading the chena Take the milk in a heavy bottom pot, bring the milk to a boil. Switch off the flame, keep the pot aside for about 5 minutes. (photo 11 and 12) Now add vinegar or lemon juice a tablespoon at a time and stir continuously. (photo 13) Once you see the green color whey separated COMPLETELY, stop adding lemon juice or vinegar. (photo 14) Line a muslin cloth or cheesecloth over a big bowl, drain the curdled milk and collect the whey. (photo 15 and 16) Gather all the edges of the cloth, squeeze out the water as much as possible. (photo 17) Make a knot and hang it over the kitchen sink for about 15 to 20 minutes. DO NOT let the chenna dry completely. Make sure chenna is crumbly and slightly dry and yet a little moist. Transfer the chenna to a plate. Crumble it a bit. (photo 18) Now, using the heel of your palm, knead the dough for about 7 to 8 minutes or until you feel the chenna starting to ooze out some fat and it turns into a smooth, soft, and not sticky dough. (Photo 19 and 20) Now Divide the dough into 25 parts. Gently, roll out each part in a smooth crack-free ball between your palms. Then slightly flatten it. Prepare all the discs the same way. Cover it and keep it aside. (Photo 21 and 22) Pro-tip
Choose the GOOD quality of milk. I prefer full cream milk. If you are in the USA, use it whole milk. 2% and 1% will not give a good and creamy result. And if you are India, use Full fat cow milk.DONT add vinegar or lemon juice to boiling milk. Else it will result in chewier and hard rasgullas.DONT let the curdled milk sit in whey for a long time. Drain it as soon as possible.Use the whey for kneading the dough for Roti, to make soup, dal, or curries.Be careful while squeezing the water. The water will be very hot.Chenna shouldn’t be pasty. if it’s pasty, it needs to be drained for some more time. Please refer video for better texture ideas.Kneading the dough is THE MOST critical steps. You have to knead it until you get a soft, smooth, non-sticky dough.Sign of perfectly kneaded dough – “You will notice some fat begins to ooze out”.Knead the paneer or chenna properly till it forms a dough and no granules are seen. At the same time, do not over-knead as chenna will start releasing oil, resulting in hard rasmalai.To make the kneading process a little easy, transfer the chenna in the blender and pulse it for 15 to 20 seconds, for 4 to 5 times or until it forms a dough ball.While making paneer balls, make sure you do not have any cracks in it. otherwise, the paneer balls would dissolve in sugar syrup while boiling.While making balls, if you notice cracks, knead the chenna for few more minutes. If you find the chenna dough is very dry, sprinkle few drops of milk and knead it some more time.
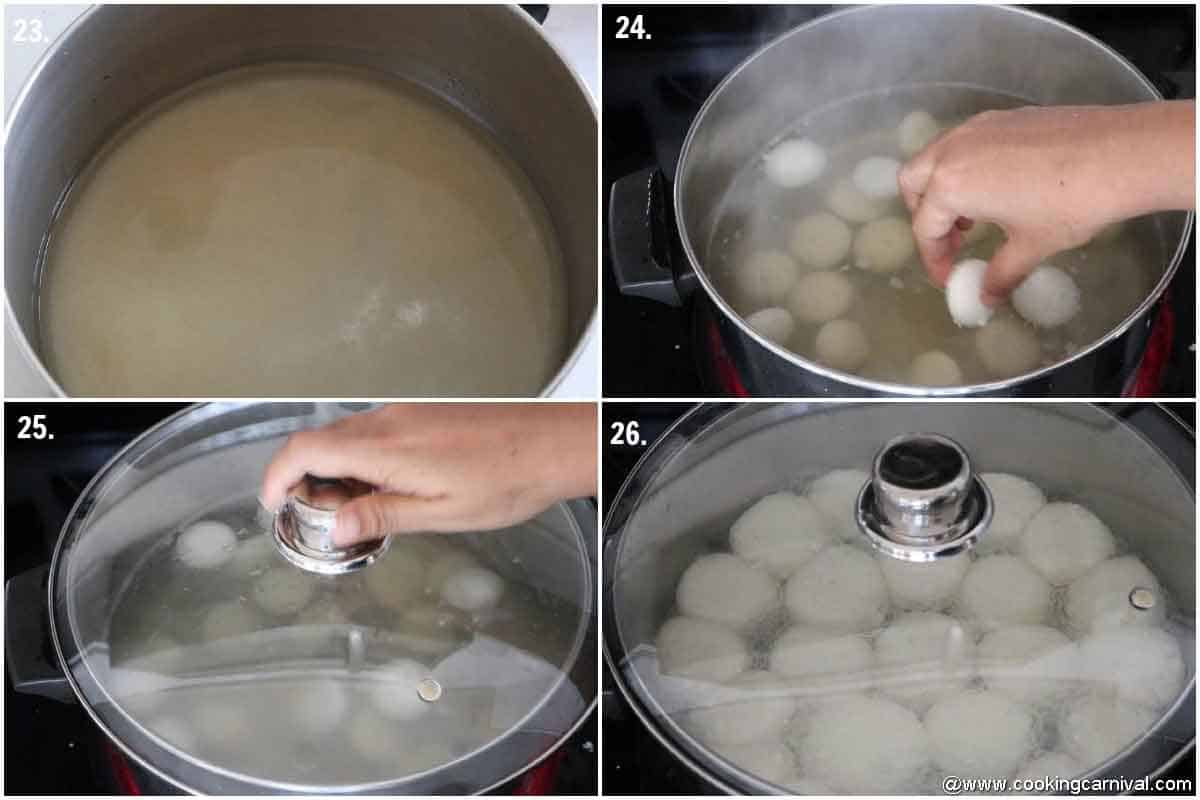
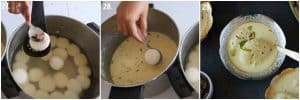
Making the sugar syrup and cooking the chenna balls Take a big wide pot. Add sugar and water. (photo 23) Boil water very well. Drop the flattened balls in boiling sugar syrup. Cover with the lid and let it cook over high flame for about 10 minutes. (photo 24 and 25) After 10 minutes, reduce the flame to medium to low and cook them for 5 more minutes. By now the balls are doubled in size. (photo 26) Set the pot aside for 30 minutes and let it cool down completely. Do not open the pot during the period. Pro-tips
Make sure to have enough room for paneer balls to swell while boiling.The water MUST be rolling boil when you add rasgullas.Don’t overcrowd the rasgullas. Or else It will lose their shape. You can cook the balls in batches.Don’t open the lid in between. Cook them undisturbed.The basic rule is DONT give temperature attack when rasgullas are cooking. The sudden temperature change will result in flattened and hard rasgullas.I make rasgullas in my pressure cooker too. To make it in a pressure cooker, boil the water and sugar in a pressure cooker. Add paneer balls in it. Boil them for 2 whistles over medium to high heat, it will take about 5 to 6 minutes. Slow down the flame to low to medium heat and let it cook for another 5 minutes (This is a very important step). Switch off the flame and let the pressure cooker cools down completely. Open it after 30 minutes.To check if the rasgullas are done or not, take cold water in glass or bowl, drop the one rasgulla in that water. If sinks, it is ready. And if it floats that means it is undercooked and it needs to be cooked further.
Step – 3 Assemble
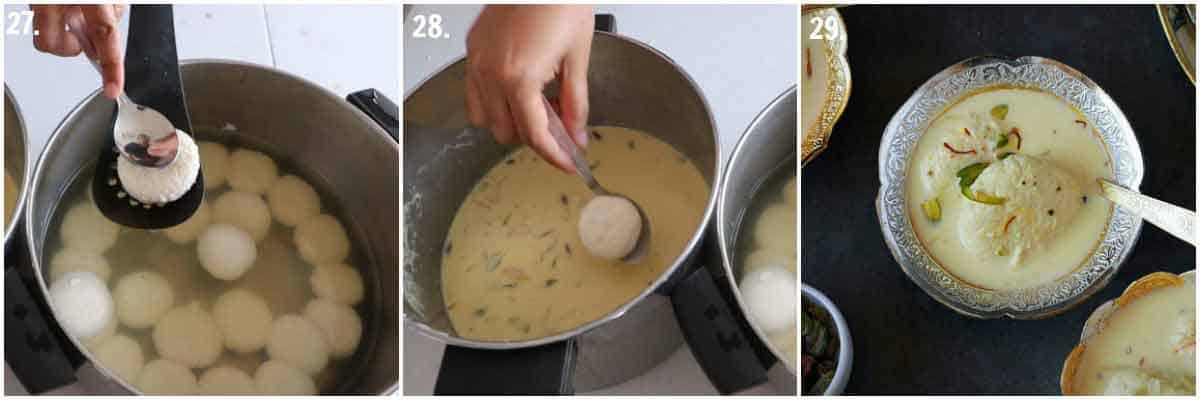
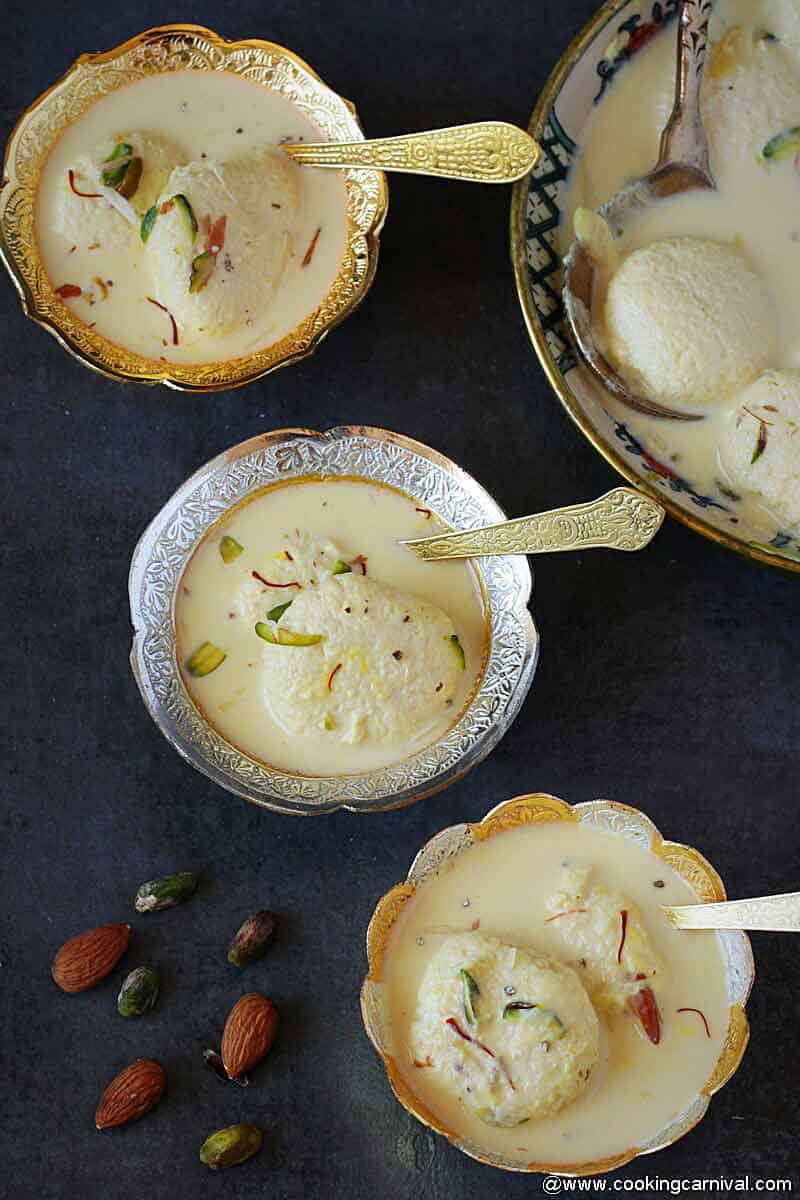
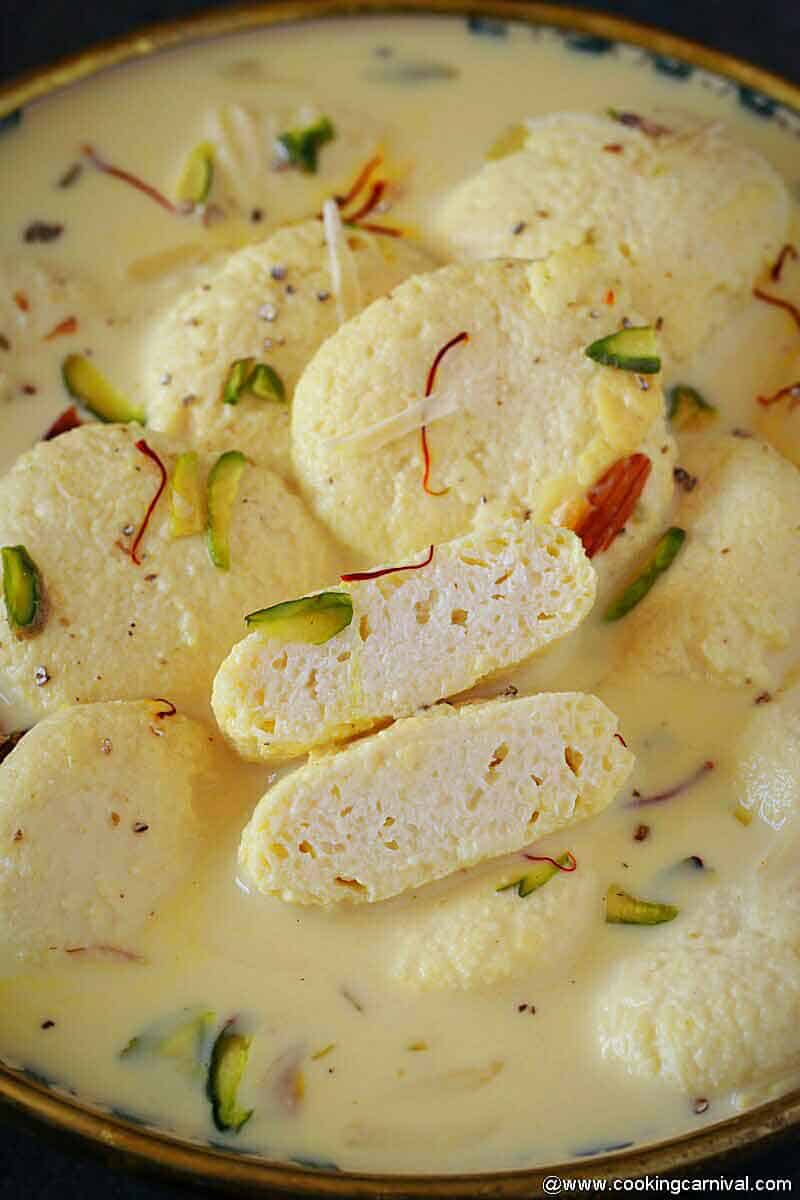
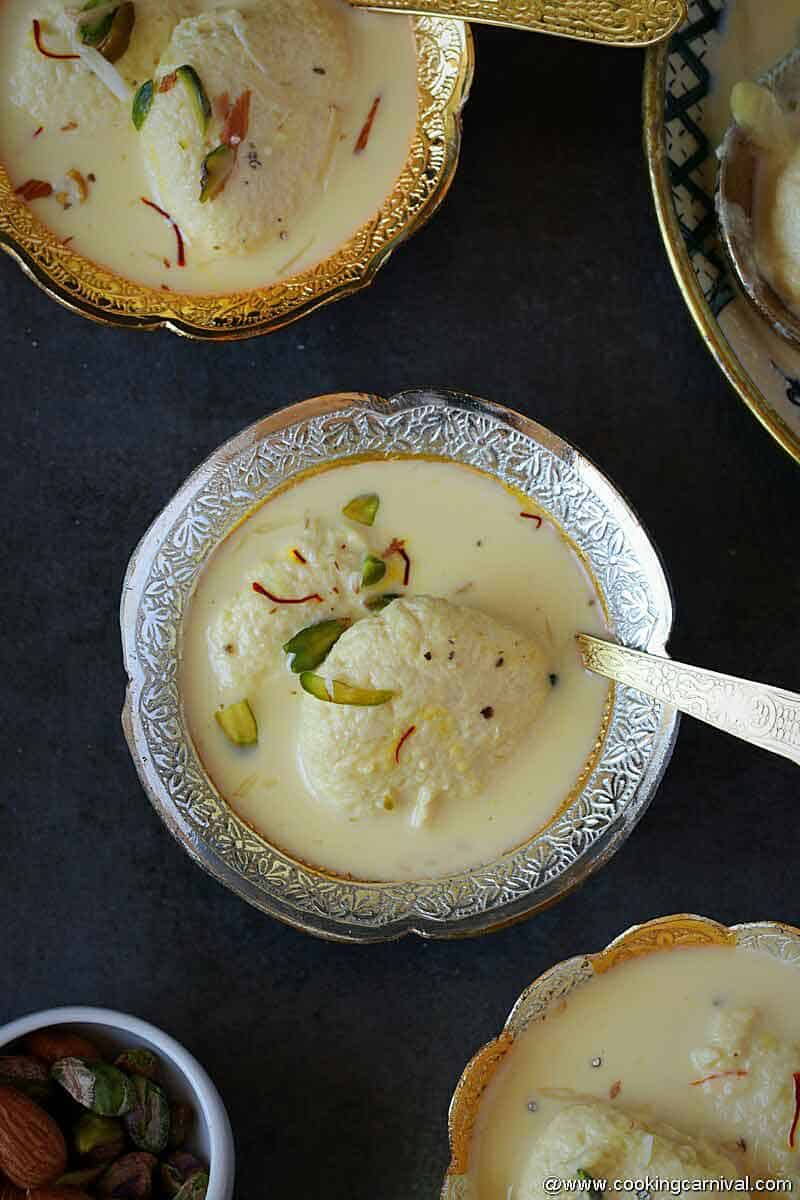
Squeeze out the syrup from the rasgullas with the help of a spoon or with your clean hands. (photo 27) Transfer the rasgulla into prepared warm ras (Flavored milk). (photo 28) Refrigerate the rasmalai for about 5 to 6 hours or until you are ready to serve. Pro-tip
The milk (ras) should be warm when you add the rasmalai balls to it. So the balls should cool down to room temperature but the milk should be warm.Squeeze the sugar syrup from paneer balls well else it will not absorb ras.
More Indian Dessert recipes –
Kesar Malai PendaMotichoor LadooKesar Elaichi ShrikhandDoodhpakMango shrikhand
Warm regards, You can also FOLLOW me on FACEBOOK, INSTAGRAM, and PINTEREST for more fabulous recipes and updates. Subscribe to our YouTube Channel for tasty and easy video recipes. Dhwani.