My sister loves decorated cookies but hates working with royal icing. If you are a person like my sister, who hates working with piping bags and nozzles and still loves to decorate cookies, you will love this recipe. Let me give you a little background on how I came to use this recipe. Necessity! You know what they say, necessity is the mother of all invention. Well, this was my little solution to a small necessity here in my kitchen.
Why use rolled royal icing?
During most of the year, the weather here is hot and humid. And, as we all know, royal icing and humidity really hate each other. This causes a lot of problems like color bleeding, and blotchy spots, and takes FOREVER to dry. Fondant is good, but again, stays really soft in summer humidity.Space! For me, a three-bedroom apartment with two kids and a cake business is tiny. I do not have the place to dry a large batch of cookies with royal icing. Especially, because my two little ones are 2 1/2 and 4 1/2 years old.At such times, I have to use rolled royal icing. It’s just like fondant but dries harder. So, it’s still royal icing, but an easier option for me. Plus, I can stack them when done, unlike fondant that stays soft in summer. This dries rock hard just like royal icing.
Ingredients and substitutes
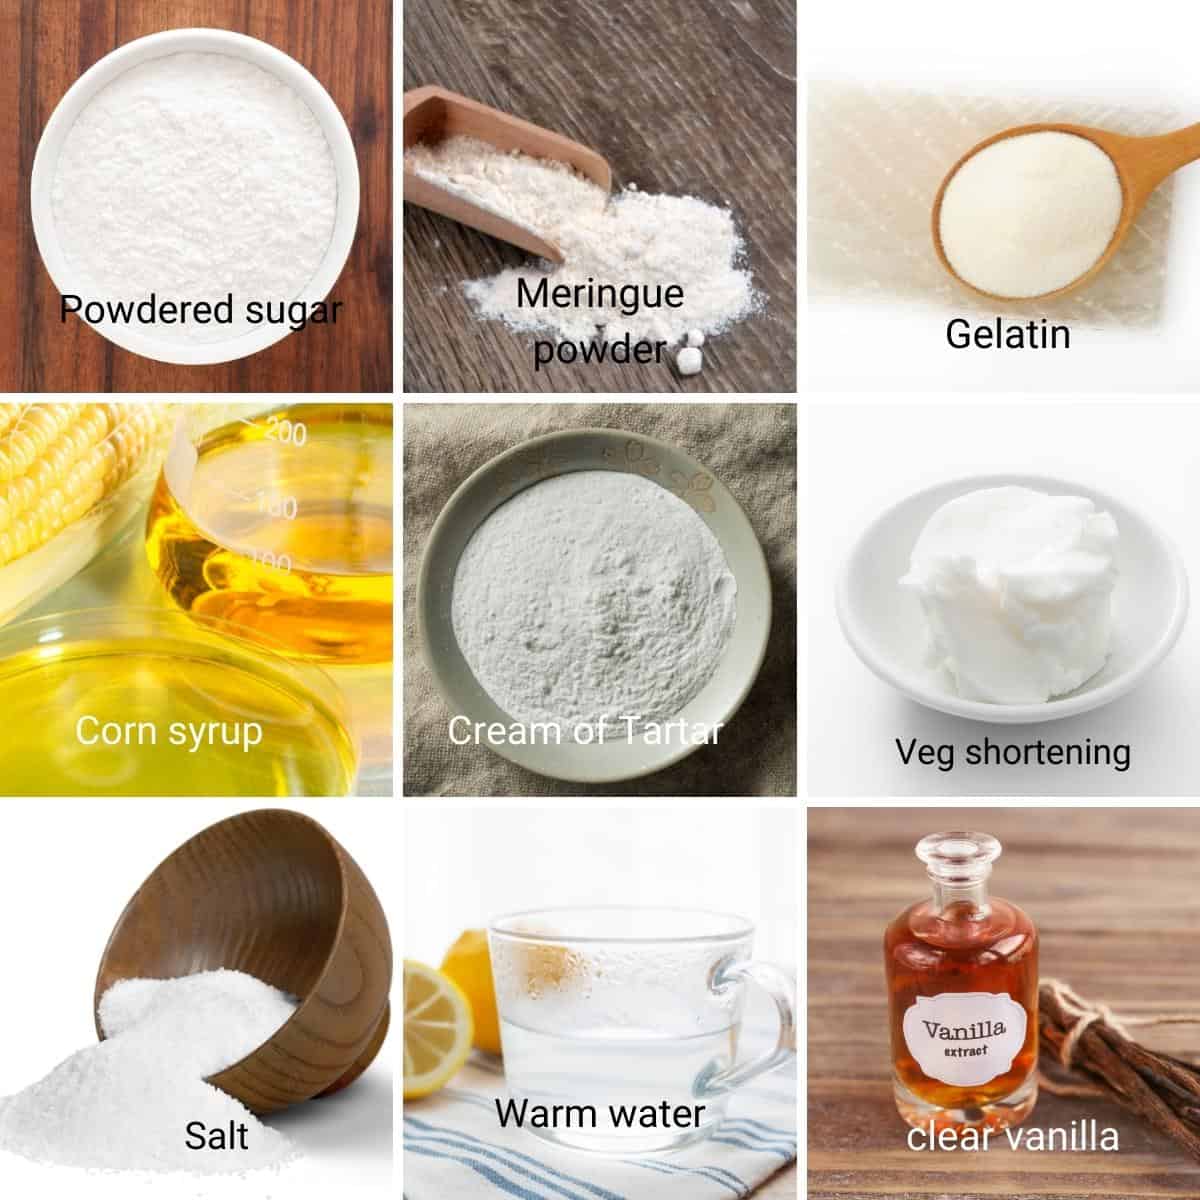
Gelatin – helps give the royal icing elasticity similar to fondant. Meringue powder – You can also use egg white powder too but meringue powder contains stabilizers such as cream of tartar and anti-caking agents. Light corn syrup – this is an invert sugar that prevents the royal icing for crystallizing. Cream of tartar – helps stabilize the meringue powder. It is also present in the meringue powder you can omit it too. Vegetable shortening – this is what helps make it easy to work with. Flavoring – I like to use vanilla, rose, or almond extract with royal icing.
How to make rolled royal icing
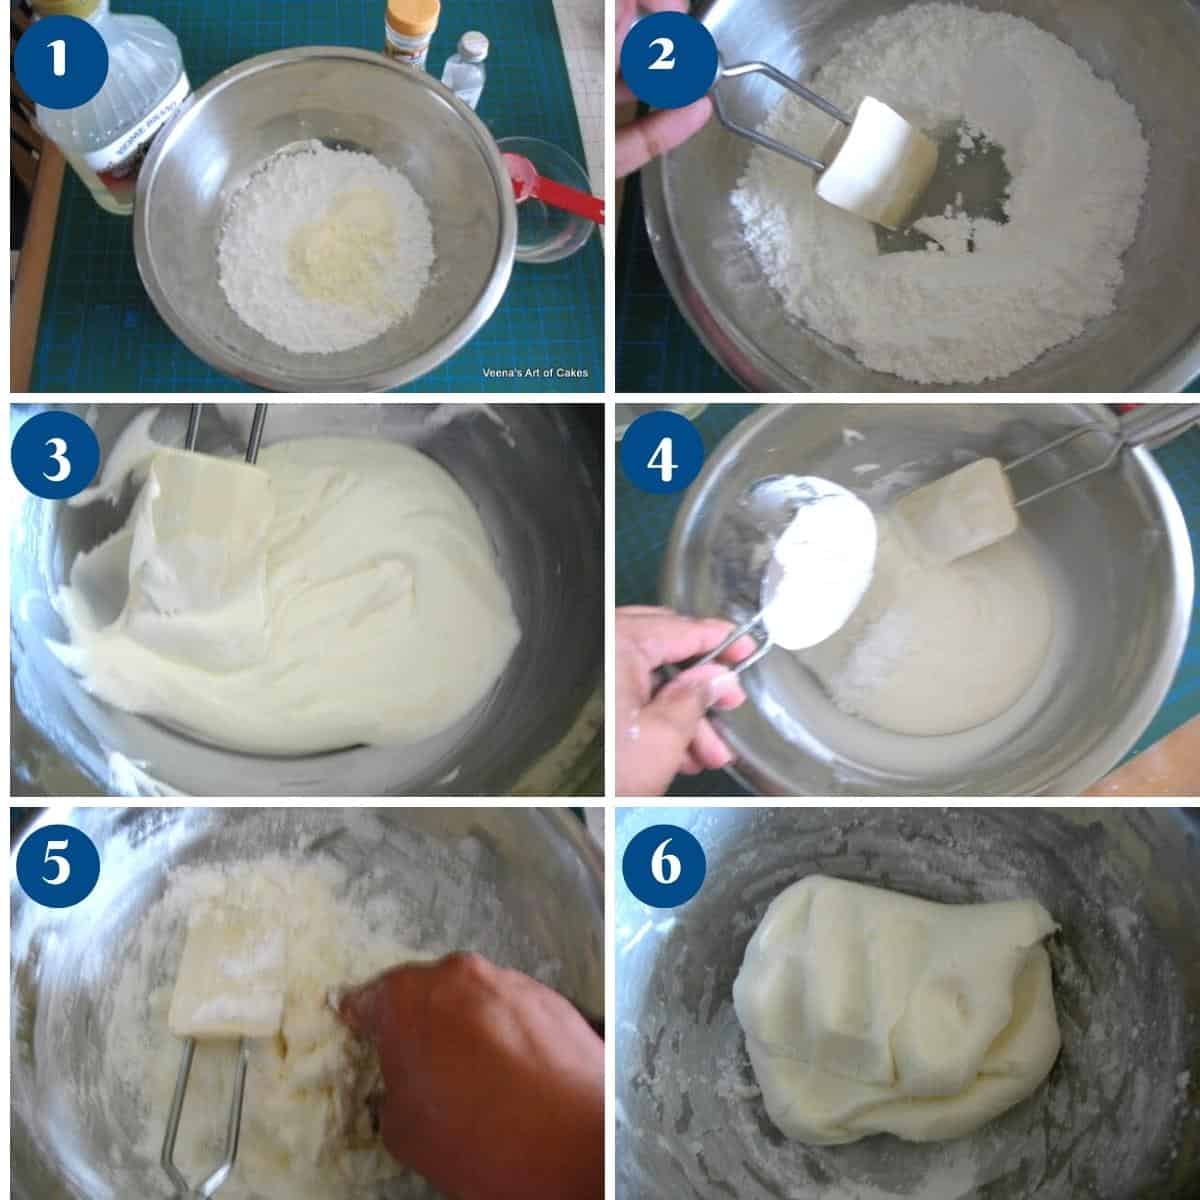
Gelatin – In a small bowl combine the warm water with gelatin. Leave to bloom for 2 minutes then dissolved in the microwave at 50% powder at 30-second intervals.Pro tip – overheating gelatin will become gummy so do not heat for more than a minute.Liquid ingredients – to the gelatin bowl, add the light corn syrup, vanilla, and rose extract.Pro tip – keep the gelatin mixture warm. If necessary, heat in the microwave otherwise it will clump in the powdered sugar.Dry ingredients – In a small bowl combine the powdered sugar, meringue powder, salt, and cream of tartar.Wet to dry – Make the hollow in the center of the powdered sugar mixture and add the gelatin mixture. Starting from the center out, combine the wet ingredients with the dry ingredients.Pro tip – Use vegetable shortening on your hands to prevent sticking.Knead – Continue to knead the icing using vegetable shortening until it is smooth and pliable.Pro tip – the mixture will be thick and slightly sticky but do not add more powdered sugar or it will become dry.Rest – Wrap the icing in plastic wrap and leave it to rest for at least 4 hours to help the gelatin set.Knead – Once rested knead the icing until smooth and pliable using vegetable shortening.Pro tip – This icing dries easily so keep wrapped in plastic wrap at all times.
Thank you for sharing - Save for later
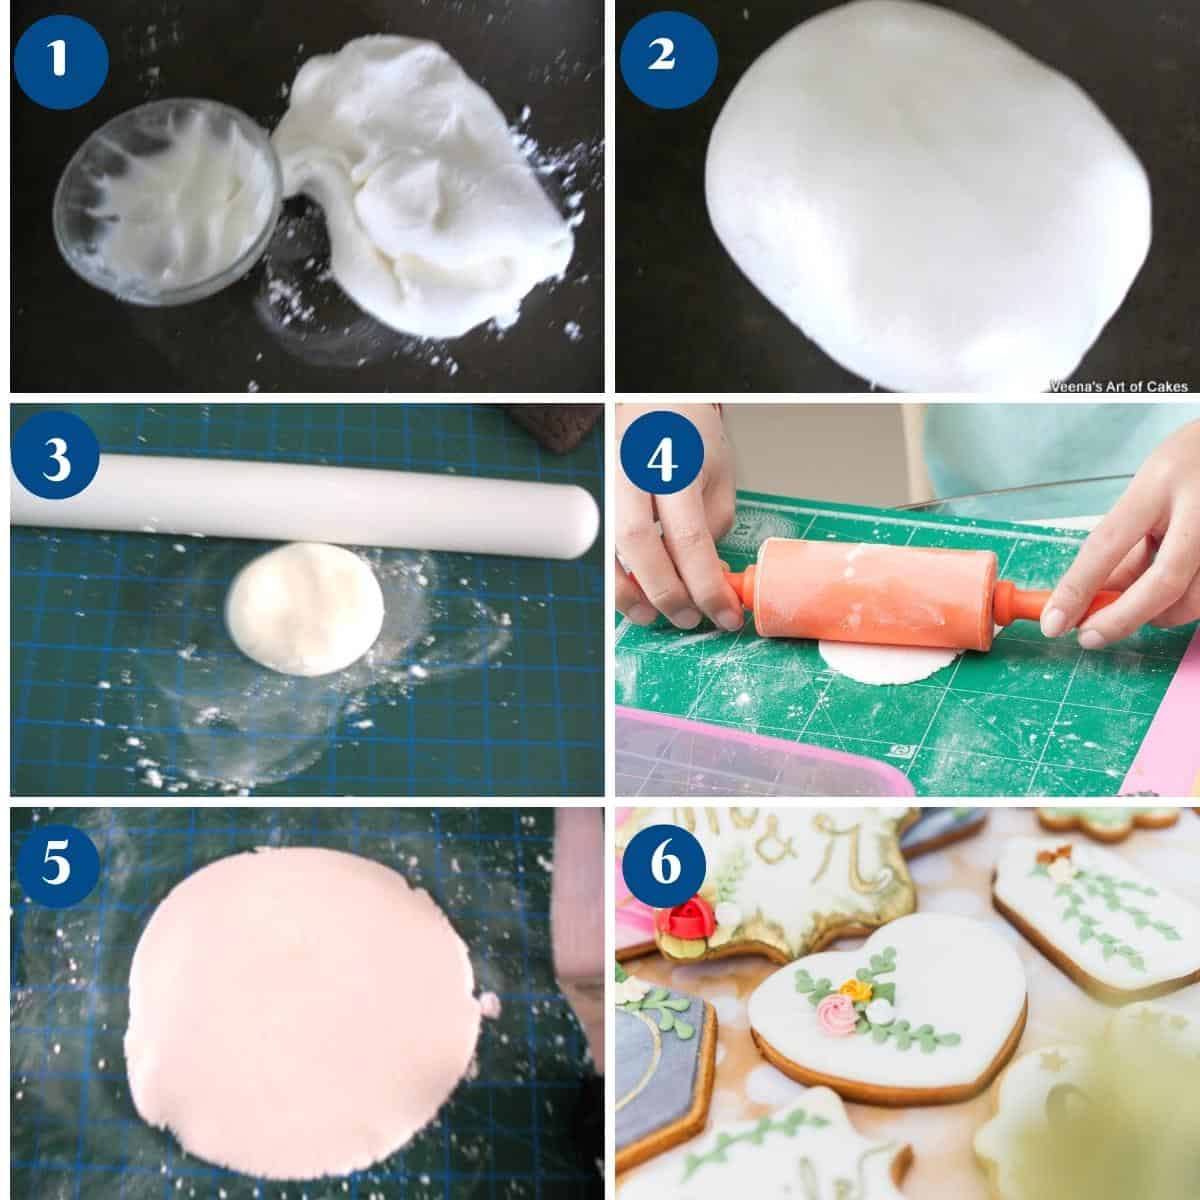
Take a small amount as needed for one or two cookies. (because it dries out easily) Lightly dust your work surface with powder sugar and roll out very lightly.Turning as you go to ensure it does not stick to the work surface.Use a flat art spatula to slide under the paste.I like to roll it thin but still manageable. Pro tip – If you roll it thinner it will dry quicker on the cookies. Plus the cookies won’t be bulkier. Brush some sugar syrup or diluted jam on your cookie to help stick.Use your cookie cutter and cut out your shape.Lift the cut out with a spatula to prevent distorting the shapePlace on the cookie.Gently rub the surface with the palm of your hands.Pro tip -The warmth of your palm with melt the sugar on the surface giving you a smooth cookie.If you need to make a pattern on the cookie do it as soon as you place the dough on while still soft.