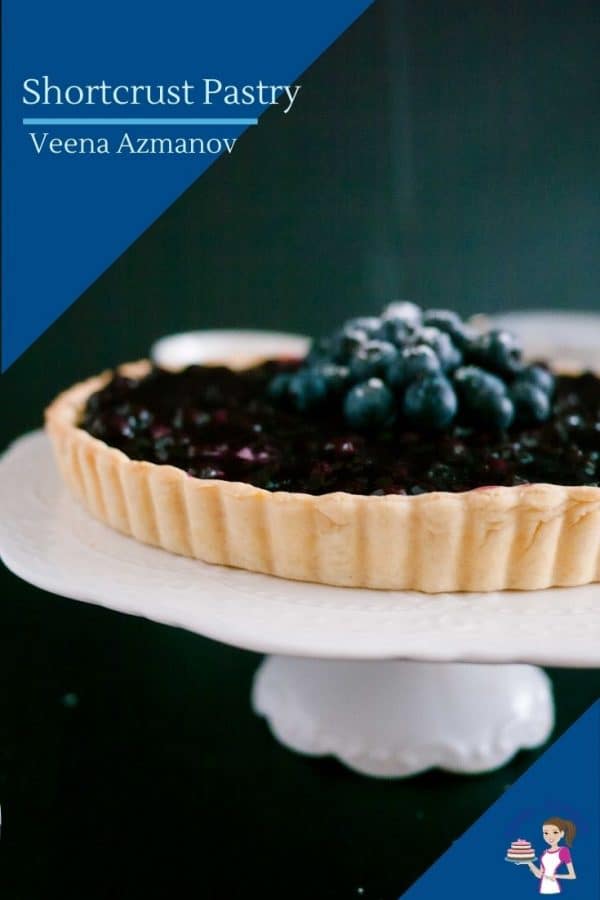
Sweet shortcrust pastry, known as Pâte Sucrée, is a versatile and essential component in every baker’s repertoire. This delicate pastry is characterized by its crisp yet tender texture and subtle sweetness, making it perfect for a variety of desserts and savory dishes alike. Whether used as a base for fruit tarts, custard pies, or savory quiches, Pâte Sucrée provides a stable foundation that enhances the flavors of any filling. Every baker needs to master sweet shortcrust pastry because it offers unparalleled flexibility and flavor. Its buttery richness and ability to hold its shape during baking ensure a professional finish to any tart or pie. Whether you’re a seasoned pastry chef or an enthusiastic home baker, mastering Pâte Sucrée opens up endless possibilities for creating stunning and delicious baked treats that will delight family and friends alike. Read different types of crust for baking or different types of pastry.
Why make homemade shortcrust?
Ease of Preparation: This recipe utilizes the food processor method, which makes it quick and straightforward to prepare the dough. The food processor helps in achieving a uniform texture without overworking the dough, ensuring a tender and flaky crust. Delicate and Flavourful Texture: The combination of chilled butter, icing sugar, and a touch of vanilla extract gives this pastry a delicate sweetness and a rich, buttery flavor. It bakes into a crisp yet tender crust that complements both sweet and savory fillings. Versatility: This pastry is versatile and can be used for various tart and pie recipes. Whether you’re making fruit tarts, custard pies, or savory quiches, this Pâte Sucrée provides a stable base that holds well during baking and enhances the flavors of the filling. Baking Precision: The instructions for blind baking ensure that the crust retains its shape and doesn’t shrink during baking, providing a professional-looking finish to your tart. It also includes optional instructions for fully baking the crust, depending on your recipe needs, ensuring a perfectly cooked base every time.
Ingredients and substitutes
Flour: Provides structure and bulk to the pastry. You can substitute all-purpose flour with pastry flour for a finer texture, or use gluten-free flour blends for a gluten-free version. Almond flour can also be used partially for added flavor and texture. Butter: Adds richness, flavor, and helps create a tender, flaky texture. Margarine or vegetable shortening can be used as substitutes. However, the flavor and texture may slightly differ. For a dairy-free option, use plant-based butter. Sugar: Adds sweetness and helps tenderize the pastry. You can use granulated sugar, caster sugar, or powdered sugar (adjusting quantities for sweetness and texture preferences). For a healthier option, consider using coconut sugar or a sugar substitute like erythritol. Egg (or Egg Yolk): Provides moisture, binds the ingredients together, and adds richness. If you prefer not to use eggs, you can substitute with a mixture of water and cornstarch (for binding) or a commercial egg replacer. For a vegan option, use a flaxseed or chia seed egg (1 tablespoon ground flaxseed or chia seeds mixed with 3 tablespoons water per egg). Water (or Cold Liquid): Adjusts the consistency of the dough to make it easier to work with and roll out. Milk or cream can be used instead of water for a richer pastry. For savory pastry, you can use broth or even chilled white wine for added flavor. Salt: Enhances flavor and balances the sweetness in sweet pastries. Sea salt or kosher salt can be used interchangeably. You can also omit salt if you prefer a low-sodium option, though it may slightly affect the overall flavor.
Step by step: Shortcrust Pastry – Pâte Sucrée
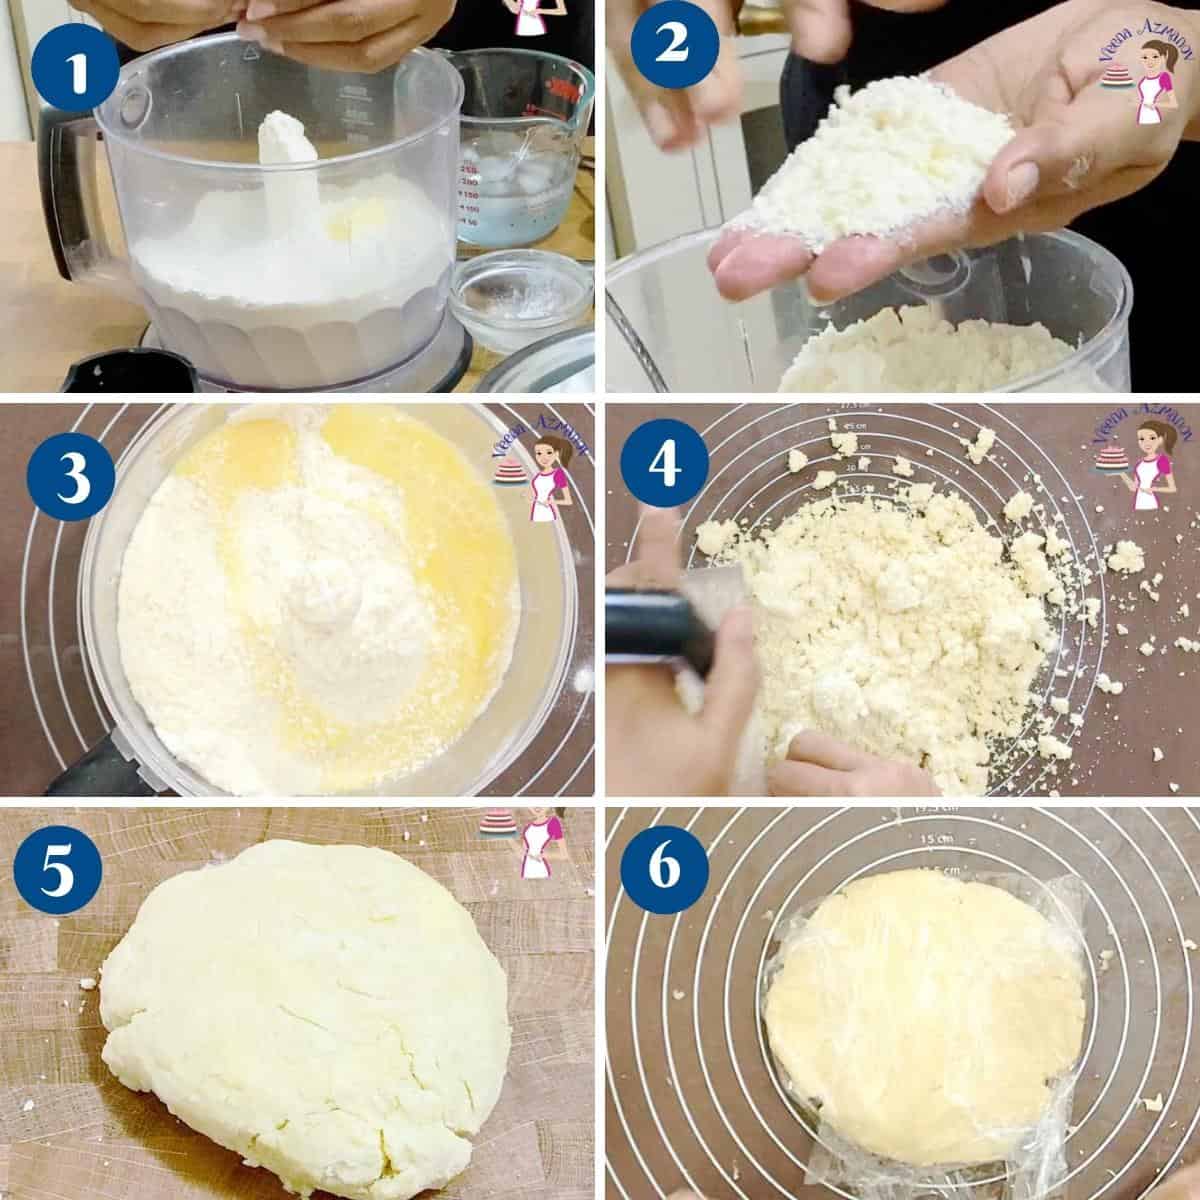
Prepare the Dough: In the bowl of a food processor, combine the flour, icing sugar, and salt. Pulse a few times to mix. Add the chilled butter cubes and pulse until the mixture resembles coarse breadcrumbs. Add Wet Ingredients: In a small bowl, whisk together the egg and vanilla extract. Add the egg mixture to the food processor bowl. Pulse until the dough starts to come together. Avoid overmixing.
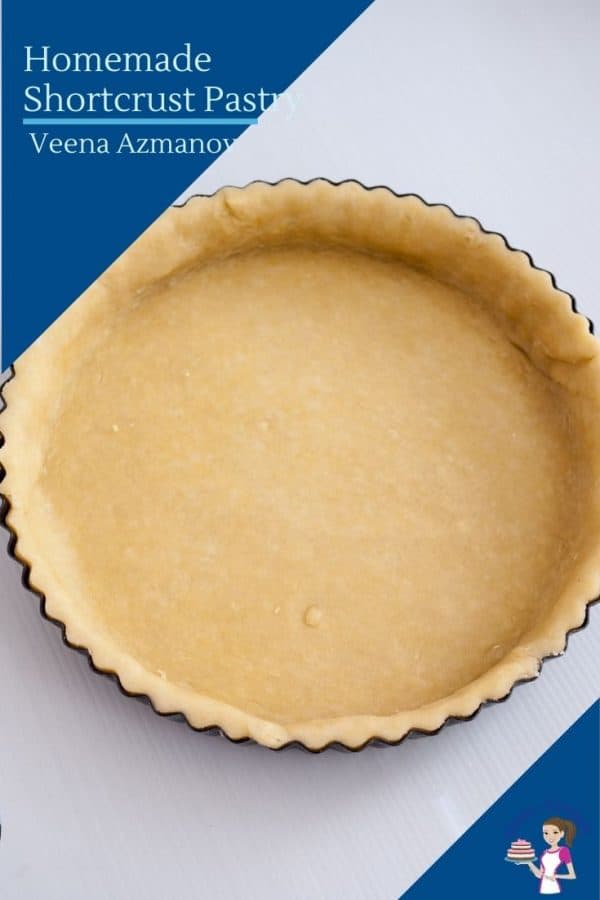
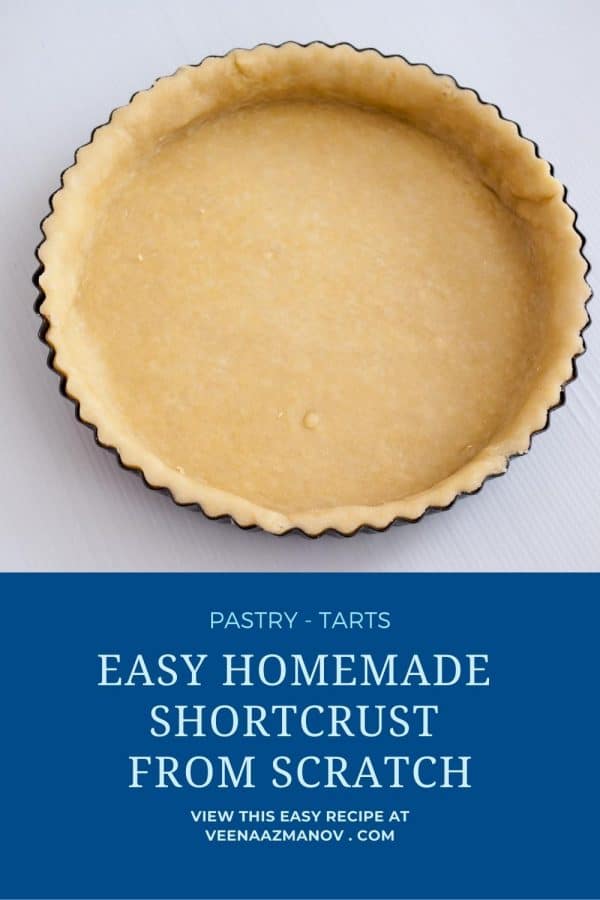
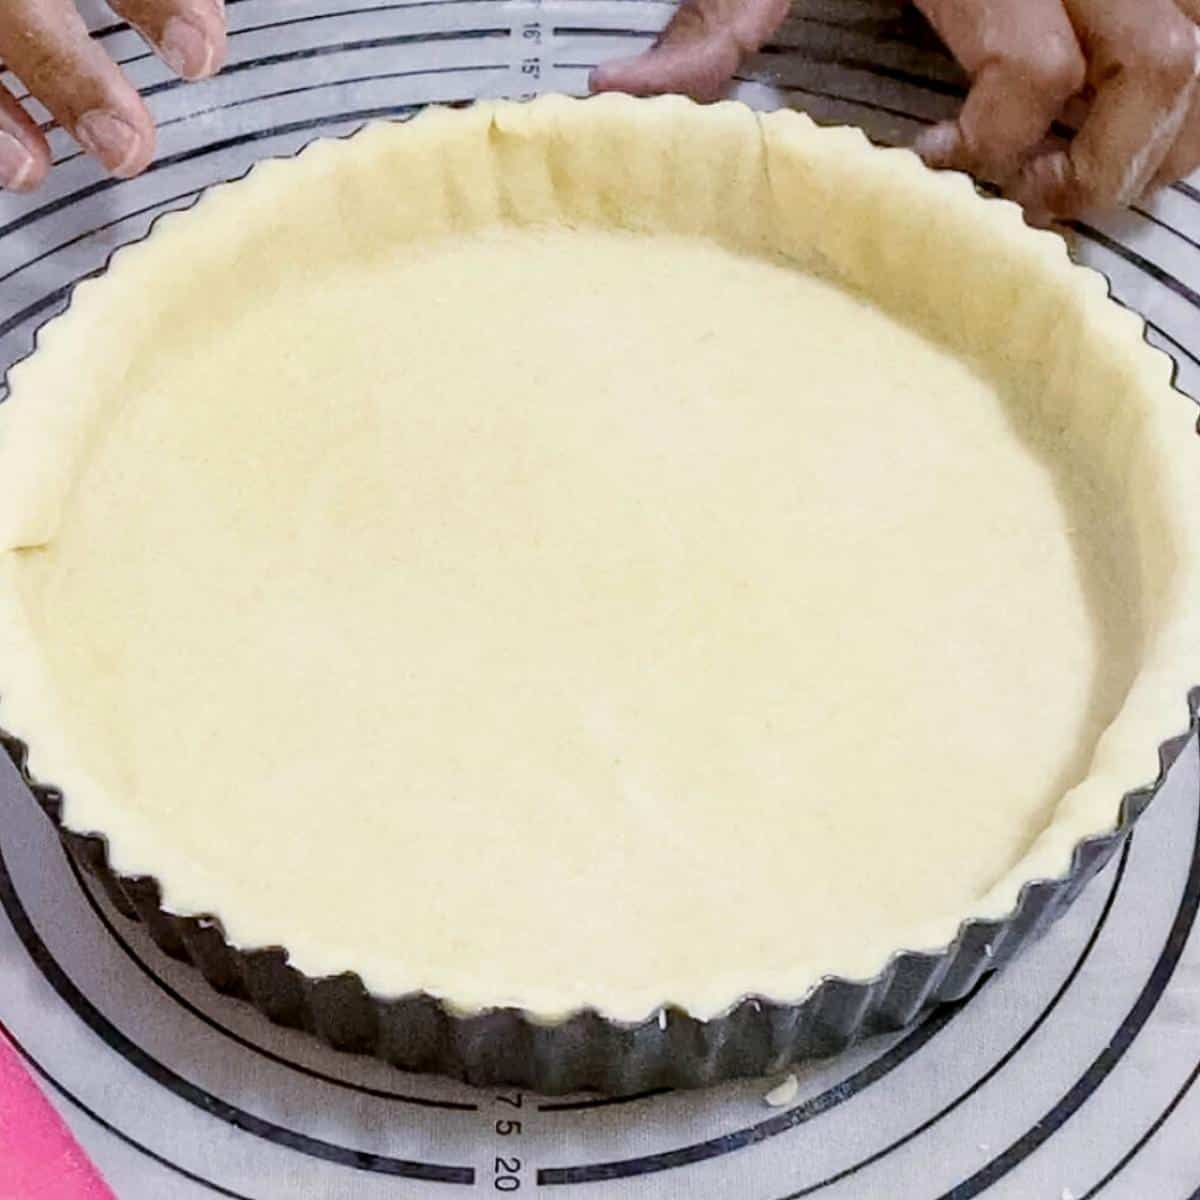
Form the Dough: Turn the dough out onto a clean work surface. Gather it into a ball and flatten it into a disk. Wrap the dough in plastic wrap and refrigerate for at least 1 hour or until firm. Roll Out the Dough: Preheat your oven to 180°C (350°F). On a lightly floured surface, roll out the chilled dough into a circle about 12 inches (30 cm) in diameter and about 1/8 inch (3 mm) thick.
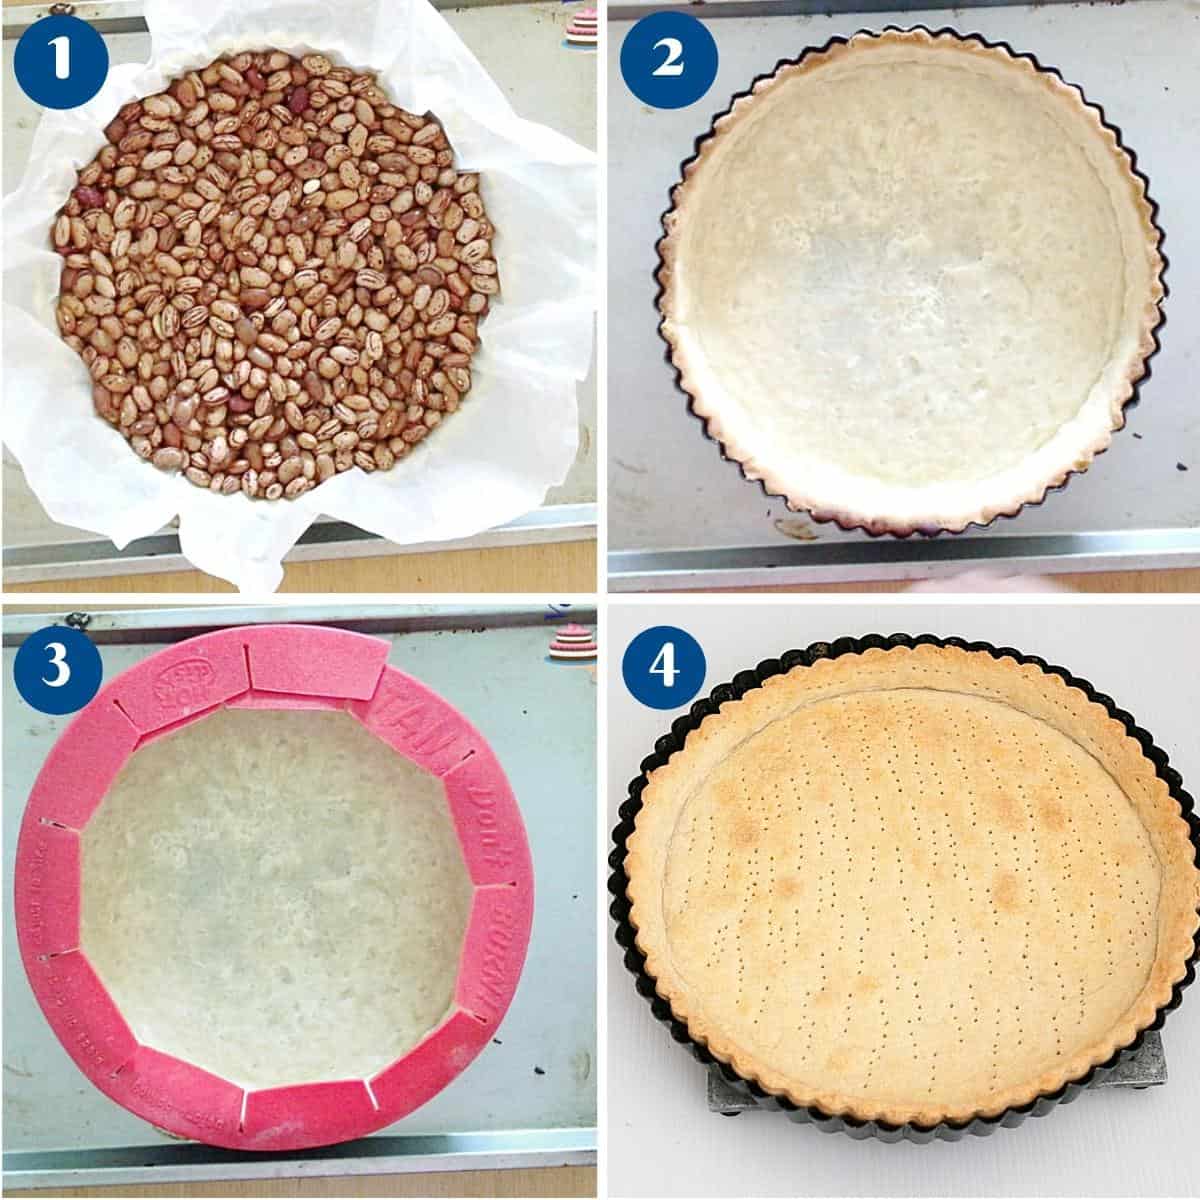
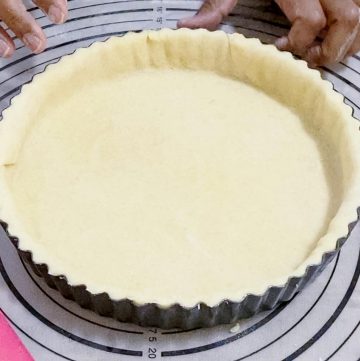
Line the Tart Pan: Carefully transfer the rolled-out dough to a 9-inch tart pan with a removable bottom. Press the dough gently into the corners and sides of the pan. Trim off any excess dough hanging over the edges of the tart pan. Oven: Preheat the oven to 375°F / 190°C / Gas Mark 5. Chilling: Chill the lined tart or pie pan in the refrigerator for about 15-30 minutes. This helps prevent shrinkage during baking.
Blind Bake the Crust: Line the pastry shell with parchment paper or foil, then fill it with pie weights, dried beans, or rice. Bake in the preheated oven for about 15 minutes. This helps the crust keep its shape during baking. Remove the weights and parchment/foil, add the filling, then return the crust to the oven for another 15 to 20 minutes, or until the crust is lightly golden brown and cooked through.
Fully Bake the Tart Crust: If you need a fully baked crust for a recipe that won’t be baked further (like a no-bake tart), remove the parchment and pie weight and continue baking the crust until it is golden brown all over, about 15- 20 minutes more after blind baking. Remove from the oven and let the crust cool completely in the tart pan before removing. Cooling: Allow the baked crust to cool completely on a wire rack before filling as per your recipe’s instructions.
Tips for Success
Keep Ingredients Cold: Ensure that both the butter and any liquid ingredients like eggs are well-chilled before starting. Cold ingredients help maintain the pastry’s flakiness and prevent the butter from melting too quickly into the flour mixture. Use the Food Processor Wisely: Pulse the butter into the flour mixture until it resembles coarse breadcrumbs. Be careful not to over-process; the goal is to maintain small, pea-sized pieces of butter in the dough, which will result in a flaky texture once baked. Resting Time: After preparing the dough, wrap it in plastic wrap and refrigerate it for at least an hour, or even overnight if possible. This resting period allows the gluten to relax and the flour to fully hydrate, resulting in a more tender pastry. Proper Rolling Technique: When rolling out the chilled dough, use a lightly floured surface and rolling pin. Roll the dough evenly and gently from the center outward, rotating it occasionally to maintain a circular shape and prevent sticking. Aim for a thickness of about 1/8 inch (3 mm) for optimal baking results. Blind Baking Technique: For blind baking, line the pastry shell with parchment paper or foil and fill it with pie weights, dried beans, or rice. This prevents the pastry from puffing up or shrinking during baking. Remove the weights and parchment/foil halfway through baking to allow the crust to cook evenly. Cooling and Storage: Once baked, allow the tart crust to cool completely in the tart pan before removing it. This prevents the crust from breaking apart. If not using immediately, store the cooled crust in an airtight container at room temperature for up to 2 days, or freeze it for longer storage.
Troubleshooting
Pastry is Too Tough or Dense: Overworking the dough or using warm ingredients can develop gluten too much, resulting in a tough texture. Handle the dough gently and avoid over-mixing. Ensure all ingredients are chilled before mixing. Let the dough rest in the refrigerator before rolling to relax the gluten. Pastry Shrinks During Baking: The pastry was stretched when fitting it into the tart pan, or inadequate chilling before baking. Roll the pastry out evenly and avoid stretching it when placing it in the pan. Chill the lined tart pan in the refrigerator for at least 15-30 minutes before blind baking to help the pastry hold its shape. Soggy Bottom Crust: Insufficient blind baking or a wet filling. Blind bake the crust for an appropriate amount of time as per recipe instructions. Ensure the filling is not too wet before adding it to the crust. You can also brush the bottom of the crust with a beaten egg white before baking to create a moisture barrier. Pastry Sticks to Tart Pan: Not greasing or flouring the tart pan sufficiently. Ensure the tart pan is well-greased and lightly floured before fitting the pastry into it. Alternatively, consider using a tart pan with a removable bottom for easier removal after baking. Uneven Baking or Browning: Oven temperature fluctuations or uneven distribution of pie weights during blind baking. Use an oven thermometer to ensure accurate temperature. Rotate the tart pan halfway through baking to promote even browning. Ensure the pie weights or beans are evenly distributed over the parchment/foil to prevent uneven baking. Cracked or Overbaked Crust: Baking the crust for too long, especially during blind baking. Follow the recommended baking times closely. Monitor the crust during baking to ensure it reaches a light golden brown color without overbaking. Adjust the blind baking time if necessary to avoid excessive browning or cracking.
Frequently asked questions
Creative ways to use shortcrust pastry
Fruit Tarts: Create elegant fruit tarts by lining tart pans with shortcrust pastry, then filling them with pastry cream or custard and arranging fresh fruits like berries, sliced peaches, or figs on top. Brush with apricot glaze for a glossy finish. Tartlets: Prepare bite-sized tartlets using mini muffin tins or tartlet pans. Fill them with lemon curd, ganache, or caramelized onions and blue cheese for elegant appetizers or dessert bites at parties. Galettes: Make rustic galettes by rolling out shortcrust pastry into a free-form circle, then folding the edges over a mound of seasonal fruits or savory ingredients like tomatoes and herbs. Bake until the pastry is golden and crisp. Decorative Pie Crusts: Use shortcrust pastry to create decorative pie crusts by cutting out shapes like leaves, hearts, or lattice strips. Arrange them over fruit pies or quiches for a visually stunning presentation before baking.
Rich Shortcrust Pastry – Pâte SabléeEasy Strawberry Tart RecipeBlueberry Tart (custard filled)Blueberry Cream Cheese TartletsLemon Cheesecake Tartlets
Did you LIKE this recipe? Save it for later. You can find my recipes on Pinterest. Follow me on Facebook, Twitter, and Instagram.Subscribe, and I’ll send you new recipes right to your inbox. Thank you for sharing - Save for later