Is there such a thing as too many macarons? Well, I don’t think so. In our home, macarons are one of our favorite cookies. And when I am in the macaron mood, I make a few batches.
About these macarons
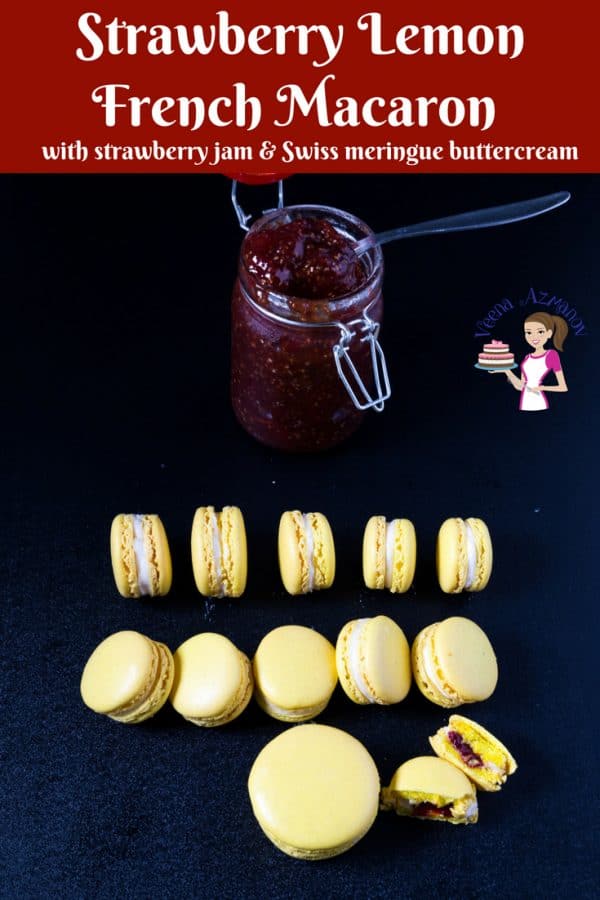
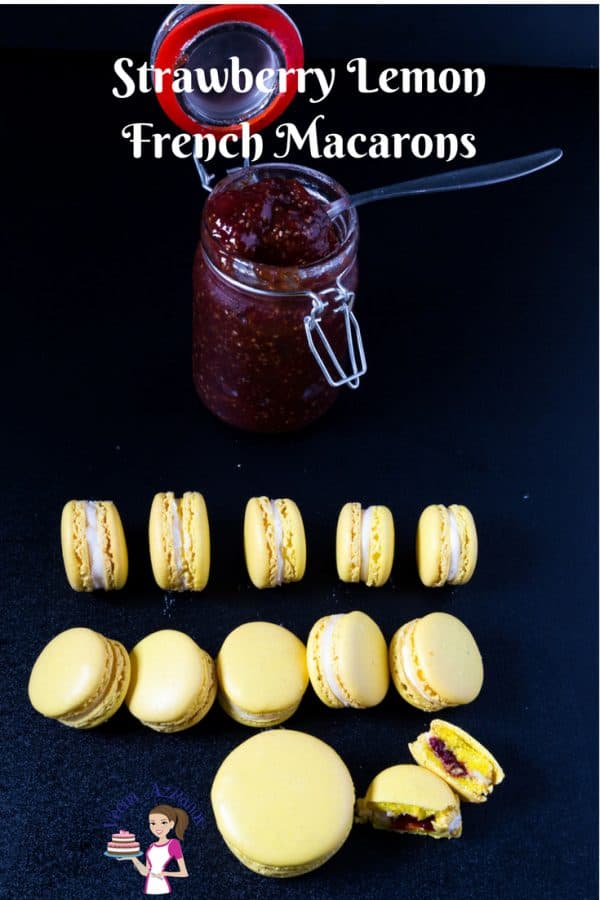
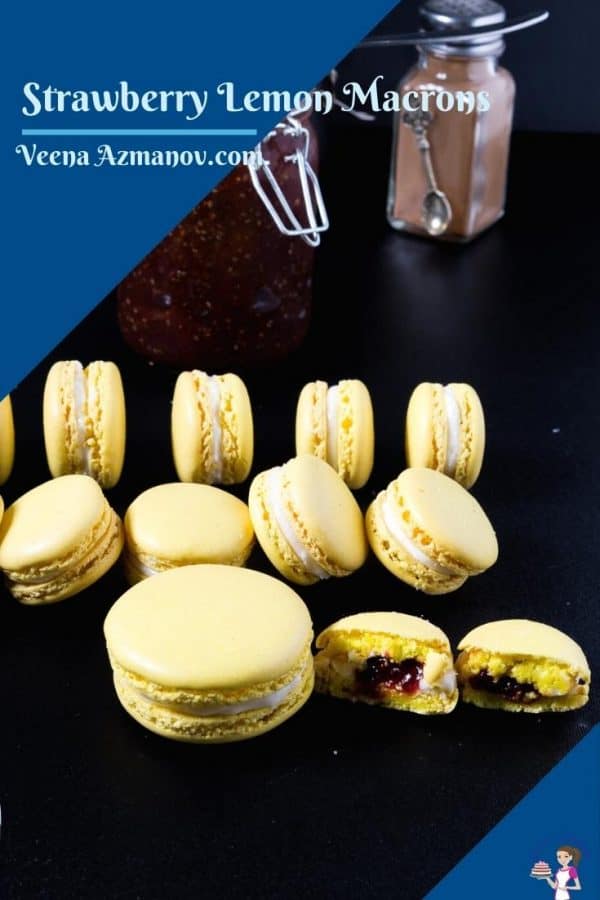
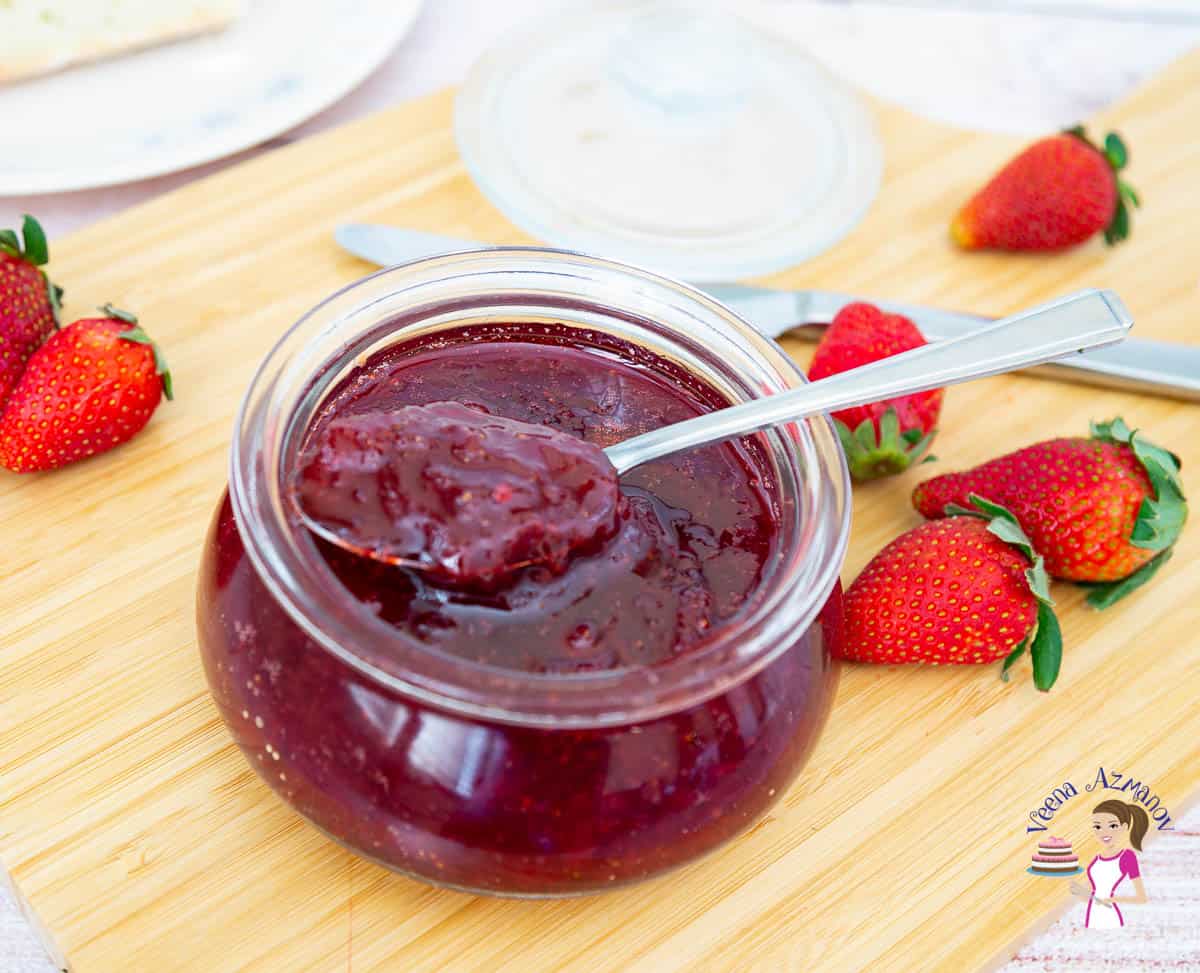
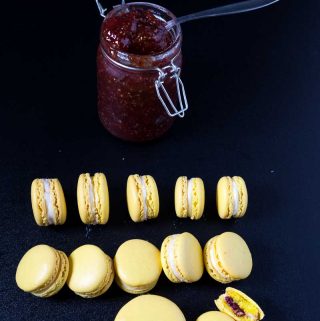
There are three components to these macarons. The shell – These can be made ahead of time and kept in an airtight container or frozen for months in the freezer. The filling – A soft center in the middle of the macarons. I like using fruit fillings and curds in the middle of the frosting. Today, I am using strawberry jam, but strawberry and raspberry filling are also great options. The frosting – You can fill macarons with a simple buttercream or explore different fillings and frosting. Today, I am using Swiss meringue buttercream. My other favorite buttercream recipes are French, Italian, or German. They are rich and less sweet than classic American buttercream. Previously, we made lemon macarons with lemon curd.
Ingredients and substitutes
In my post, 20 tips to successful macarons, we discussed ingredients in detail. I highly encourage you to read this post if you are new to or have ever been frustrated with macarons.
Egg whites – Always use egg whites by weight, not by measurement. As you can see, I have said 110 grams or 3.5 oz. This is very important. Also, you can use fresh eggs, but make sure they are at room temperature. Almond meal – Whether you buy or make it at home, ensure it’s finely ground and sifted. If you make it yourself, use blanched almonds and some powdered sugar from the recipe to prevent the almond meal from becoming too greasy. Sugar – Use fine-grain sugar so it dissolves easily in the egg whites. Cream of tartar – Prevents the separation of protein and water in the whites. It’s also flavorless, so it does not affect the flavor of your baked goods. The best substitute for cream of tartar is a pinch of salt, but lemon juice and vinegar are often used. Extract – Always use an extract that’s not oil-based. If you are not sure, don’t add any extract at all. But do not use any oil-based extract in your whipped egg whites. Food colors – Use gel food colors, not water-based colors. Water-based colors will change the consistency of your macaron mixture. Powdered colors work best with macarons, but gel colors are easier to find.
Step-by-step instructions
Macarons
Place almond meal and powdered sugar in a food processor. Sift it and discard any big or remains that do not go through. However, if you have a lot in the sifter – pulse some more and strain again.Pro tip – Pulsing and staining will ensure you have a flour consistency, so do not skip this step. Whip egg whites—Place the egg whites with cream of tartar in a grease-free bowl of a stand mixer with the whisk attachment. Start whisking on medium speed. (In the video, I am using a hand mixer so you can see better, but a stand mixer is.)Pro tip – The cream of tartar helps stabilize the egg whites. You can omit it, but it is especially helpful when making macarons in warm weather or humid places. After a minute, add the granulated sugar, one spoon at a time.Pro tip – Adding the sugar one spoon at a time will prevent the protein in the egg whites from breaking down. Once all the sugar has been added, turn to medium-high and whip until stiff peaks. Add the extract and food color – mix the color well. Fold in – Next, fold the almond mixture into the whipped egg whites in three batches. Macronage – Once the almond mixture has been incorporated, we need to bring it to the right consistency. See the video on how I do this. Use a spatula to spread the mixture around in the bowl, then bring it back to the center. Do this again and again until you have the right consistency. I usually do this 4 to 5 times with each batch. Consistency—You need what is called a dropping consistency or a thick ‘lava-like’ or ‘cake batter’ consistency. This means when you hold a little batter on the spatula, it drops down like a ribbon that blends back into itself.Pro tip – Getting the right consistency sometimes takes time. So, watch that part of the video carefully. Pipe—Transfer the batter into a piping bag with a large round tip (No.12). Using a template, pipe similar-sized macarons onto a parchment-lined baking tray.Pro tip – Templates ensure all shells are similar in size. This is helpful when we make the finished macarons. You can print free templates found on Google or make your own with a cookie cutter. Piping technique—The best way to pipe the macarons is to hold the piping bag at 90%. Squeeze until you have a good mound, then swirl the tip to one side. But don’t worry if you have a point. When you tap the pan, these usually settle down. Tap baking pan – Tap the baking tray on the counter several times.Pro tip – Tapping helps the air pockets rise to the top and release, so your macarons won’t have big holes. I do three taps on each side, as shown in the video. Rest—Let the macarons sit in a cool, dry place for about 30 to 50 minutes until they form a skin on the top. If you touch the shell, it should not stick to your finger.Pro tip – This can take up to 60 minutes in places with high humidity. As long as it does not stick to your finger when you touch it – you are good to go. While the macarons are drying – preheat the oven to 150 C / 300 F. Pro tip – I usually start my oven at about 20 minutes because that’s how long it takes in my home. Bake the macarons for 12 to 15 minutes, depending on your oven. (Some ovens can take up to 18 minutes.) The tops will look set, but the bottom should not be wet. The top shell should be shiny, and the bottom crusty (also called macaron feet).Pro tip – Do not open the oven door for the first 10 minutes of baking. When you shake the pan, they must look set. Remember that they continue to bake with the residue heat on the baking tray. Cool on the baking tray for at least 10 minutes before you remove and transfer them to a cooling rack.Pro tip – Trying to remove the macarons from the hot tray can cause the tops to separate from the bottom feet. Once you let them cool, they will come off easily, so be patient.
Filling
You can use store-bought or make your own using the classic jam recipe or microwave jam recipe. Alternatively, you can also use strawberry filling, which is less sweet than jam.
Swiss meringue buttercream
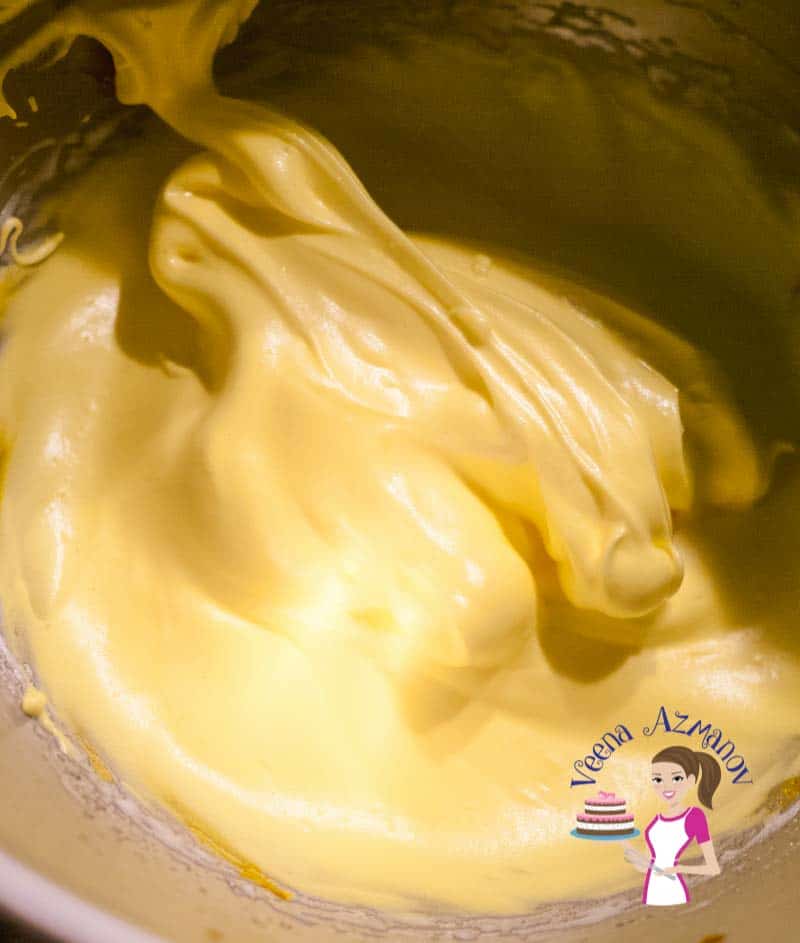
Watch my video and step-by-step progress for Swiss Meringue Buttercream In the bowl of a stand mixer, add the egg whites, salt, cream of tartar, and sugar. Place the bowl over a pot of simmering water. Whisk the egg whites over the simmering water until all the sugar has melted. Place the mixer bowl on the stand and start at medium to low speed with a whisk attachment, gradually increasing the speed. Whisk to firm peaks and shiny meringue. Touch the mixer bowl. If it’s still warm, wait and run the mixer on low until it cools. Once the bowl feels warm to the touch, start adding the butter one cube at a time. Then, add the vanilla extract and whip on medium-high speed for 2 minutes until you have a light and fluffy buttercream.
Fill / Storage
On a baking tray, pair macaron shells of similar size so you have macarons of similar size. Add the filling to one piping bag and the buttercream to another bag. You can use a round piping tip, but it’s not necessary. Pipe a ring of buttercream on one macaron shell, then pipe the filling in the center of that buttercream ring. Place the second shell on top. Continue until you have filled all macarons. Macarons must be stored in the refrigerator and are best eaten one or two days later. (if you can wait) Enjoy.
Did you LIKE this recipe? Save it for later. You can find my recipes on Pinterest. Follow me on Facebook, Twitter, and Instagram.Subscribe, and I’ll send you new recipes right to your inbox. Thank you for sharing - Save for later