Growing up in Mumbai, I was used to what felt like unlimited variety when it came to Vada Pav. As it was pretty common to find street stalls in almost every single nook and cranny of the city, offering many different varieties of the classic Batata Vada, and serving up many combinations of chutneys too.Of-course now there are even more options, what with the ‘Ulta Vada Pav’ (where the bread is sandwiched between the potato filling) gaining popularity across the streets of Mumbai.But honestly, I personally feel that the classic combination is still the best one. And so that’s what I have re-created at home, for all these years, since I moved to US, where it’s impossible to find a good Vada Pav on the street. And so homemade is really the only way to enjoy it.But in a way, I’m glad that I was kinda forced to start making this at home. Because like they say, good food has a way to break barriers and transport you to a different time and place. And a good homemade Vada Pav does just that for me – it takes me back to a different time & place, to the sights & smells of the city that will always be my home. And so this is a recipe I’m especially glad to share with you all. I hope you guys try this one, and enjoy it as much as we do.
What is Vada Pav
Vada Pav is a popular Mumbai street food, that is essentially a fried Batata Vada (potato fritter) placed inside a fresh ladi pav (bread), commonly served with a dry garlic chutney, and fried green chillies.
The Basic Elements of Vada Pav
Batata Vada – A good Batata Vada (potato fritter) is at the very core of the Mumbai Vada Pav. If you get the Batata Vada right, you’ve almost got this dish in the bag. Below, I have shared all the ingredients and step by step instructions to make delicious Mumbai style Batata Vada.Ladi Pav – Ladi pav is essentially just Indian bread. Here in US, I get store-bought bread for vada pav, which is not nearly as good as the ones we get back home in India. But if you are in US, here are a few options, we’ve grown to love – 1. Look for ladi pav or freshly made pav in Indian bakeries / cafes like Hot Breads. That is the closest you’ll get to the taste and look of the Mumbai pav. This has always been our go-to, and what I used for this recipe & photo.2. If you don’t care about the look, then even the Italian bread available in Walmart that is freshly baked in-house is close in terms of the taste. Dry Garlic Chutney – You can make a few different kinds of chutneys to go with vada pav, but the only one you absolutely need is the dry garlic chutney, which is also commonly known as Vada Pav chutney.You get this in the store as-well, but I strongly suggest making this at home. Especially if you are already making Batata Vada at home, it will only take a few additional minutes to put this together.Here is the full recipe for making dry garlic chutney for Vada Pav for your reference. But I’ve also shared how to make it at the end of this post.Fried Green Chillies – This is the final touch you need to complete a Mumbai style Vada Pav.
Other Optional Elements
Spicy Green Chutney – This is optional, but if you want to make & serve a green chutney with vada pav, then you can make a spicy yet basic green chutney using coriander leaves, green chillies, ginger, garlic & salt.Sweet & Sour Dates & Tamarind Chutney – This is optional too, but several street stalls serve a sweet & sour chutney along with a spicy green chutney to balance the flavors. If you want to make a sweet and sour chutney, then make a dates & tamarind chutney using dates, tamarind, jaggery, roasted cumin seeds (bhuna jeera), roasted byadagi chilli & salt.
Those are the basic and a few optional elements for making a Mumbai style Vada Pav.But like I said earlier, the hero of this dish is the Batata Vada. So let’s start with that. Here are the ingredients you’ll need, followed by step by step instructions for making Batata Vada.
Ingredients for making Batata Vada
Ingredient notes
If you want to make more or less quantity than what I have shared, simply use the slider in the recipe card below to adjust the quantities based on your preference.
How to Make Batata Vada – Step by Step
I usually prefer to start with making the gram flour batter, as it needs to be rested for 15-20 minutes, in which I can make the potato masala for the most part. But you can start with mashing potatoes & making the potato masala as well, just factor in the rest time the batter will need before frying.
Making gram flour (besan) batter for Batata Vada
In a wide bowl, take 1 cup of gram flour (besan), and to it add – ½ teaspoon salt, ½ teaspoon of hing / asafoetida powder, and ¼ teaspoon of haldi / turmeric powder. I usually also add ⅛ teaspoon of baking soda, but this is optional. Now to it, add water, a little at a time, and start mixing it all together. I start with ½ cup of water, and then add 2-4 tablespoons more, as needed.Whisk everything till you get a smooth, flowing consistency of batter. Then whisk for an additional couple of minutes, to incorporate some air into the batter.Then cover the bowl with a lid, and let the batter rest for 15-20 minutes, before using it to coat the vadas.
After making the batter, I usually go for making the tadka next, and mashing the potatoes.
Making the tadka for Batata Vada
In a tadka pan, add 1 tablespoon of oil, and lightly heat it up.To the oil, now add 1 teaspoon of mustard seeds, and let it lightly roast for a few seconds, till it starts to crackle & pop.Then add 16 curry leaves & 4 chopped green chillies, and lightly roast them for a few seconds.After which add in chopped garlic (from 16 cloves), and lightly roast for 2-3 minutes, till they start to change color.Finally add in the spice powders (preferably all together, to avoid them from burning) – ½ teaspoon of garam masala powder, ½ teaspoon of coriander powder, ¼ teaspoon of cumin powder, ¼ teaspoon of red chilli powder, and ¼ teaspoon of turmeric powder.Lightly roast the spices for a few seconds (ensuring to not let them burn) and then turn off the flame. The tadka is ready.
Making the potato masala for Batata Vada
At this point, mash the boiled & peeled potatoes, if you haven’t already. Here I have used 1½ pounds of potatoes (boiled).
To the mashed potatoes, add 1½ teaspoon of salt, and mix it in. Next add the prepared tadka to the mashed potatoes, and mix it in.Then finally add ⅓ cup of chopped coriander to the potatoes, and mix everything together to make the potato masala.
Shaping the Batata Vadas & frying them
In a pan, properly heat up the oil for deep frying. And test to see if the oil is hot enough, by putting a little of the gram flour (besan) batter in it. If the batter immediately rises to the top, without getting burnt, then the oil is hot enough.Shape the potato masala into balls. You should be able to get 18 mid sized dough balls.
Now coat the dough balls in the gram flour (besan) batter, and put them in hot oil, one at a time.
Here it’s best to keep the batches small, frying only a few vadas at a time, so as to not over-crowd the pan, which will bring down the temperature of the oil, and also make the vadas retain oil.Fry the vadas for 3-4 minutes per batch, till the vadas are golden & crispy on the outside.When done, place the fried vadas in a plate / bowl lined with paper towel, to get rid of excess oil, if any.
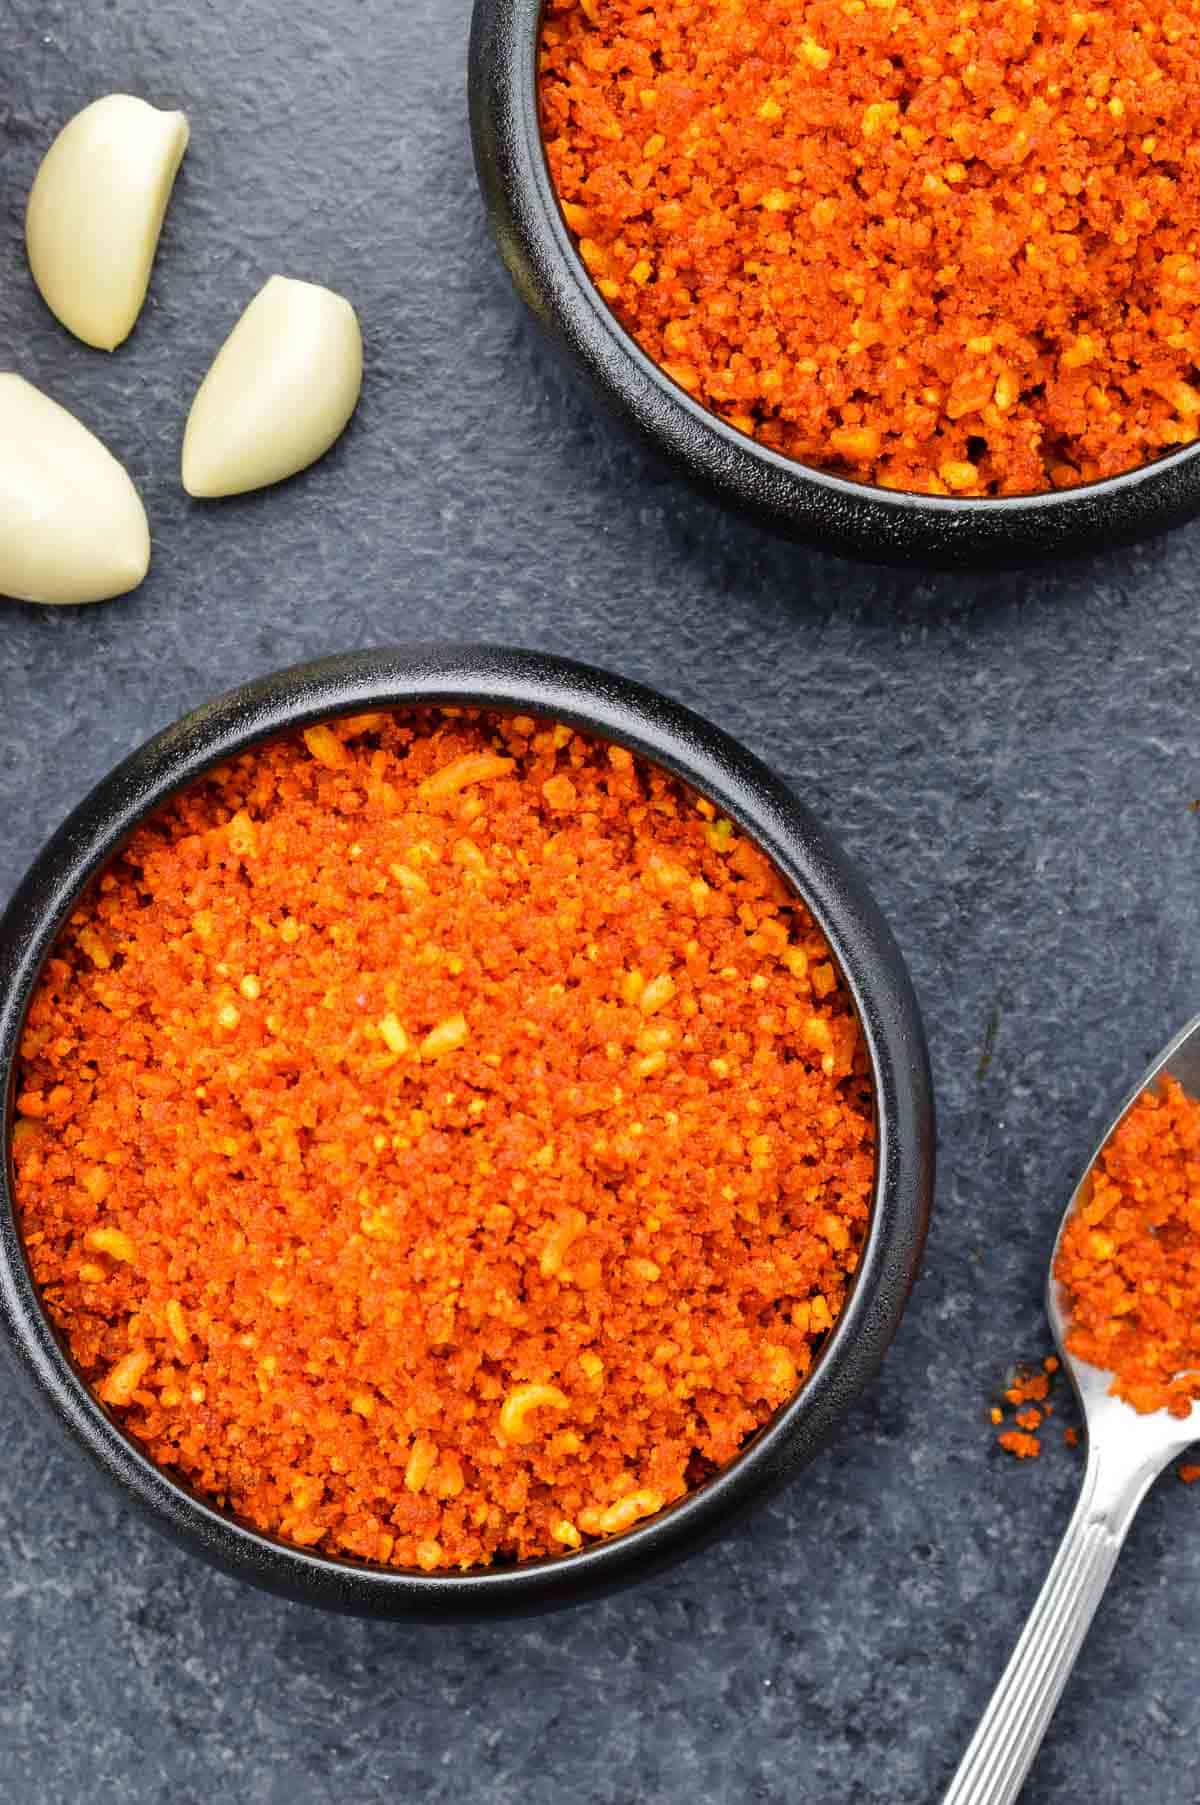
How to Make Vada Pav Chutney
Like I said earlier, you can make multiple chutneys for Vada Pav, like the spicy green chutney or sweet & sour dates & tamarind chutney (all ingredients shared above).. but there is only chutney that is an absolute must for making Mumbai style Vada Pav, and it’s the dry garlic chutney, also known as Vada Pav chutney. Here is the full recipe for an authentic Mumbai street style Vada Pav chutney or dry garlic chutney, shared with exact ingredient quantities, and step by step instructions. But I’ll share a quick recap here.
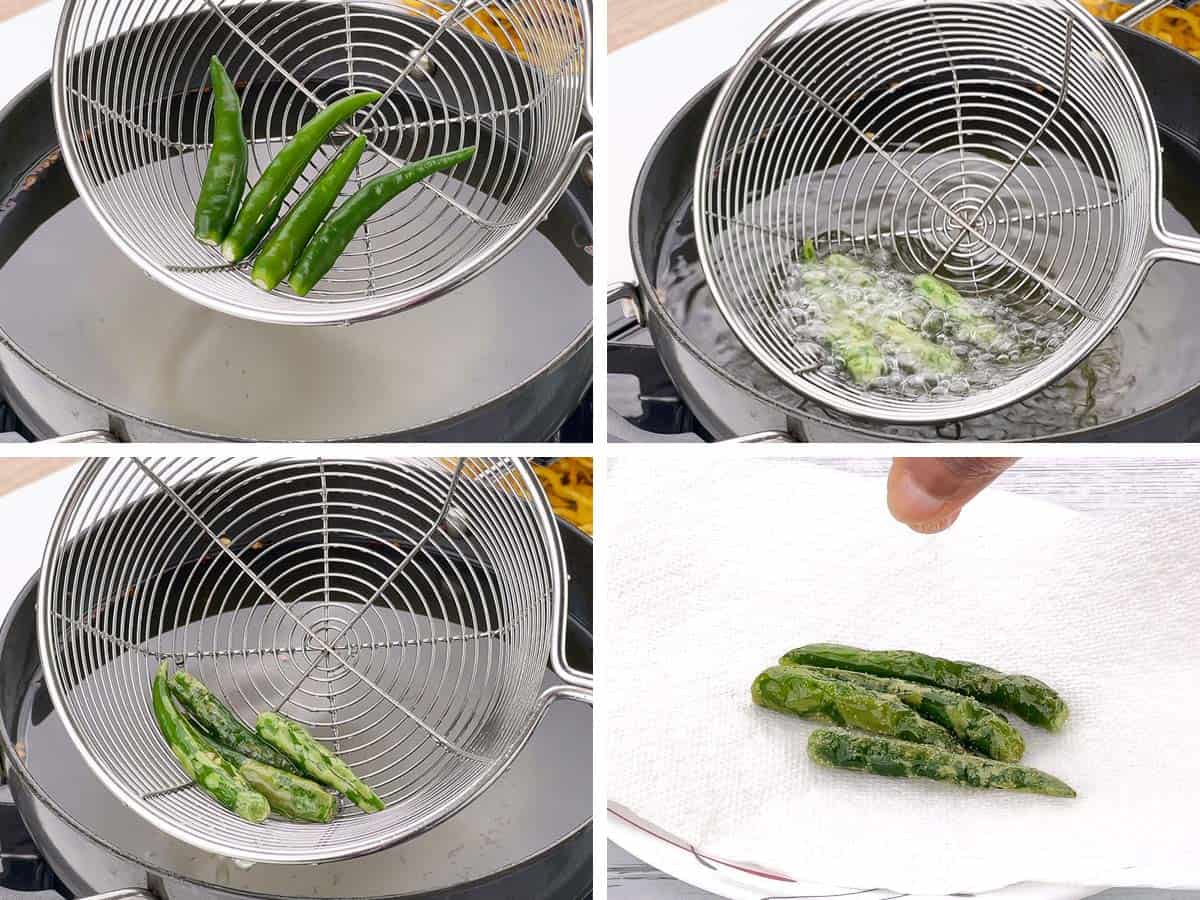
Fried Green Chillies for Vada Pav
Take a few green chillies (as needed), and make a slit in them. It’s important to make a slit in the chillies, so that they don’t pop or burst in the oil.Place them on a strainer / skimmer, and lower them in hot oil, for a few seconds, till they get lightly roasted. It’s best to not put the chillies directly in oil, to avoid them getting burnt, as you only need them to be lightly roasted.Then take them out, and place them on a plate / bowl lined with paper towel, to get rid of the excess oil. And sprinkle a little salt on the chillies, when they are still hot from the oil.
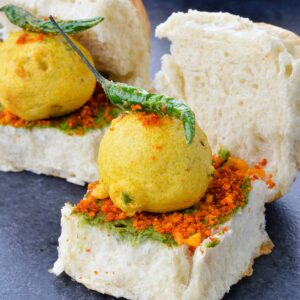
How to Make Vada Pav // How to Put Together a Mumbai Style Vada Pav
Take a pav, open it up, and put some dry garlic chutney on it. You can also use spicy green chutney and / or a sweet and sour dates & tamarind chutney, based on your preferences.Place the Batata Vada on the pav.Sprinkle some more garlic chutney on top of the vada, and place a fried green chilli on top of it too.Vada Pav is ready to serve.
Using Leftover Ingredients
This recipe makes 18 mid sized vadas, which is good if you have a large family, or are hosting a small party. Or like in my case, have a hubby with a huge appetite for Vada Pav especially. 😊 But if you don’t need as many vadas, then you can always halve the recipe, or here are a few alternatives to use the leftover potato masala as well as gram flour (besan) batter. Potato masala – use as filling to make potato sandwiches, stuffed bread rolls, or even stuffed capsicum that can be oven baked or air fried. Gram flour (besan) batter – dip anything to make a fritter. We usually dip everything from potatoes, onions, capsicum etc, and even bread to make bread pakodas – they are my son’s favorite.
Serving Suggestion
Vada Pav, in my eyes, is a complete meal. The only way to make it better, for me personally, is by pairing it with a steaming hot cup of adrak chai. ☕️
Popular Maharashtrian Recipes on the blog..
⭐️ 3 Ways of Making Sabudana Vadas⭐️ Spicy Kolhapuri Style Misal Recipe⭐️ How to Make Non Sticky Sabudana Khichdi⭐️ Kolhapuri Style Chicken Curry As always, I hope you found this recipe useful. If you did, please let me know your rating ⭐️ and feedback 📲 in the comments below, or simply rate the recipe right on the recipe card. I’d really appreciate it. ❤️
📖 RECIPE
If you’d like FREE recipes and meal prep ideas delivered directly to your email inbox every Friday in one short email, then subscribe to the Foodie Friday list HERE, and never run out of ideas on what to cook over the weekend or prep for the week ahead. 🙂