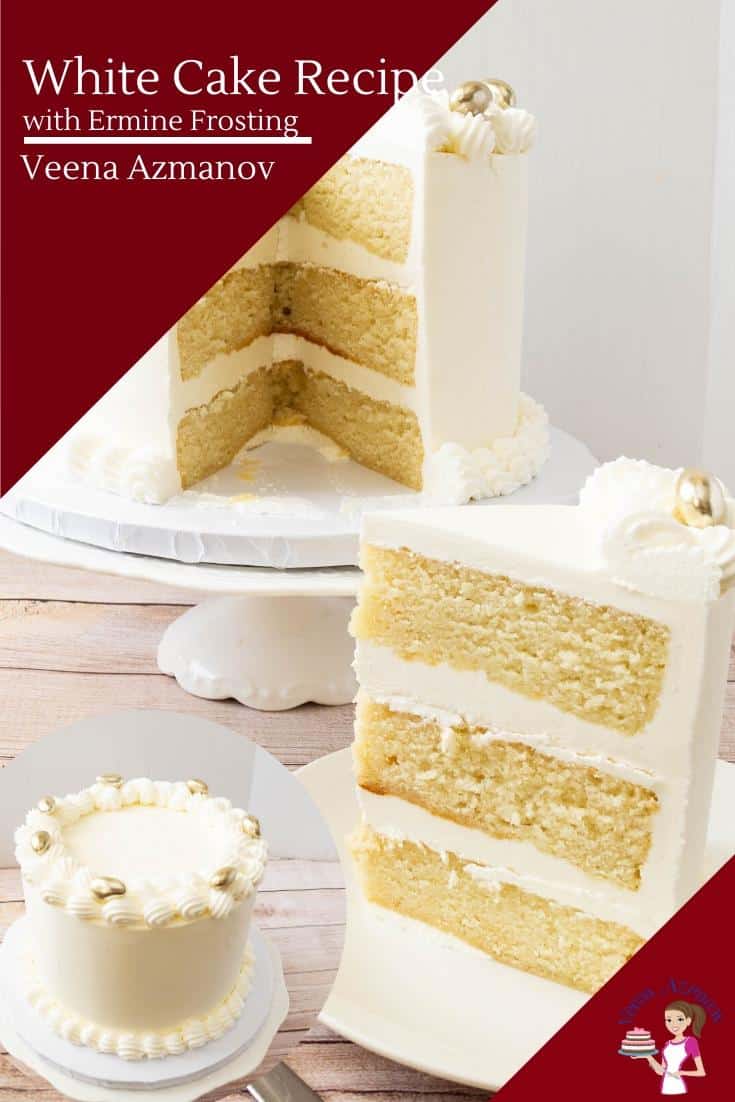
White wedding cake recipe with frosting has been a traditional centerpiece of wedding receptions in many cultures around the world for many years. The significance of a frosted white cake at weddings is rooted in several cultural and historical traditions. Firstly, white symbolizes purity, innocence, and new beginnings. A white cake, especially one that is elaborately decorated with frosting, is considered a symbol of a new beginning for the couple as they embark on their new life together. Secondly, the white wedding cake with frosting is a symbol of luxury and opulence. In the past, only wealthy families could afford such lavish cakes, and having one at a wedding was a way of displaying the family’s wealth and status. Finally, the cake-cutting ceremony itself is a symbolic act that marks the beginning of the couple’s shared life. Cutting and sharing the cake is an act of unity, and it represents the couple’s commitment to share their lives together. Overall, the white frosted wedding cake is a symbol of love, purity, and the beginning of a new life together, and it remains a beloved and enduring tradition in many cultures.
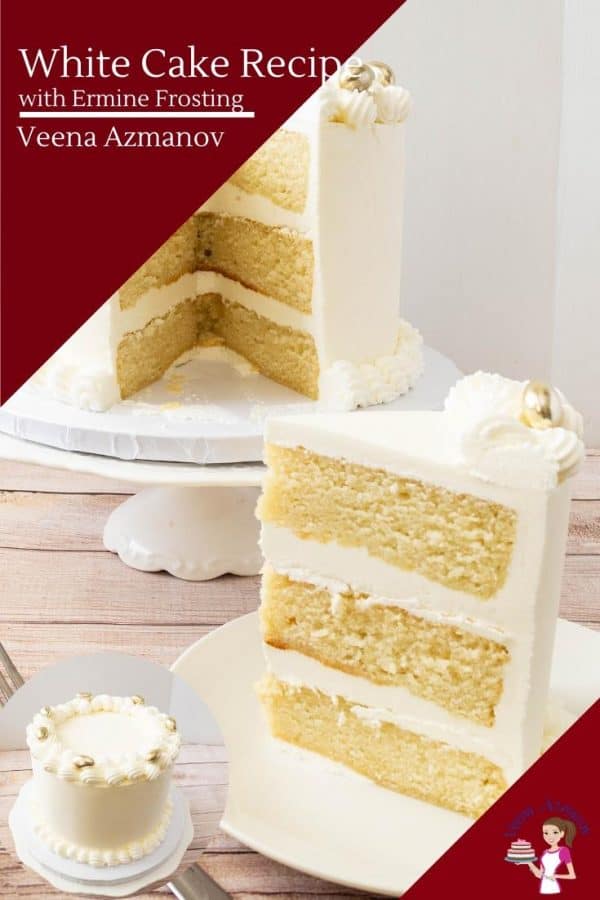
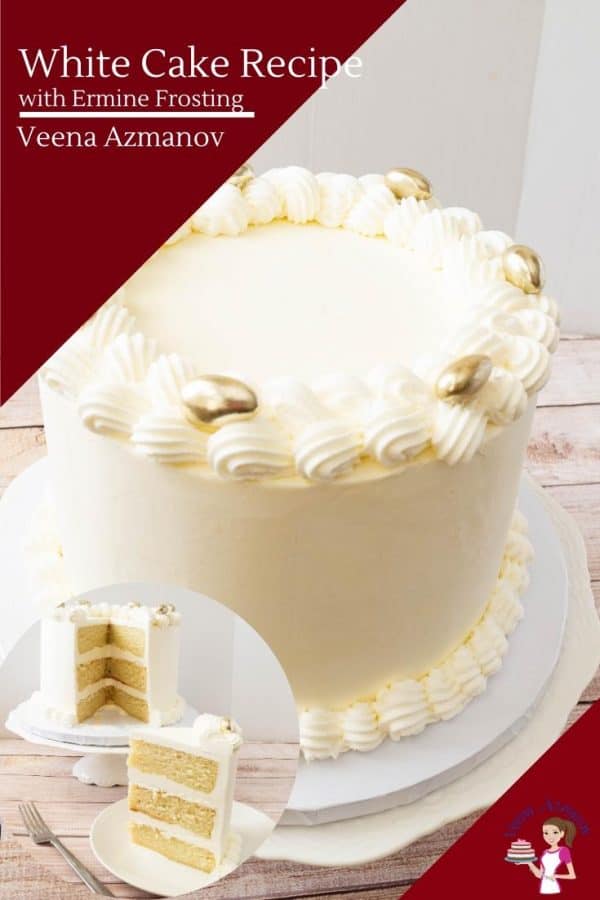
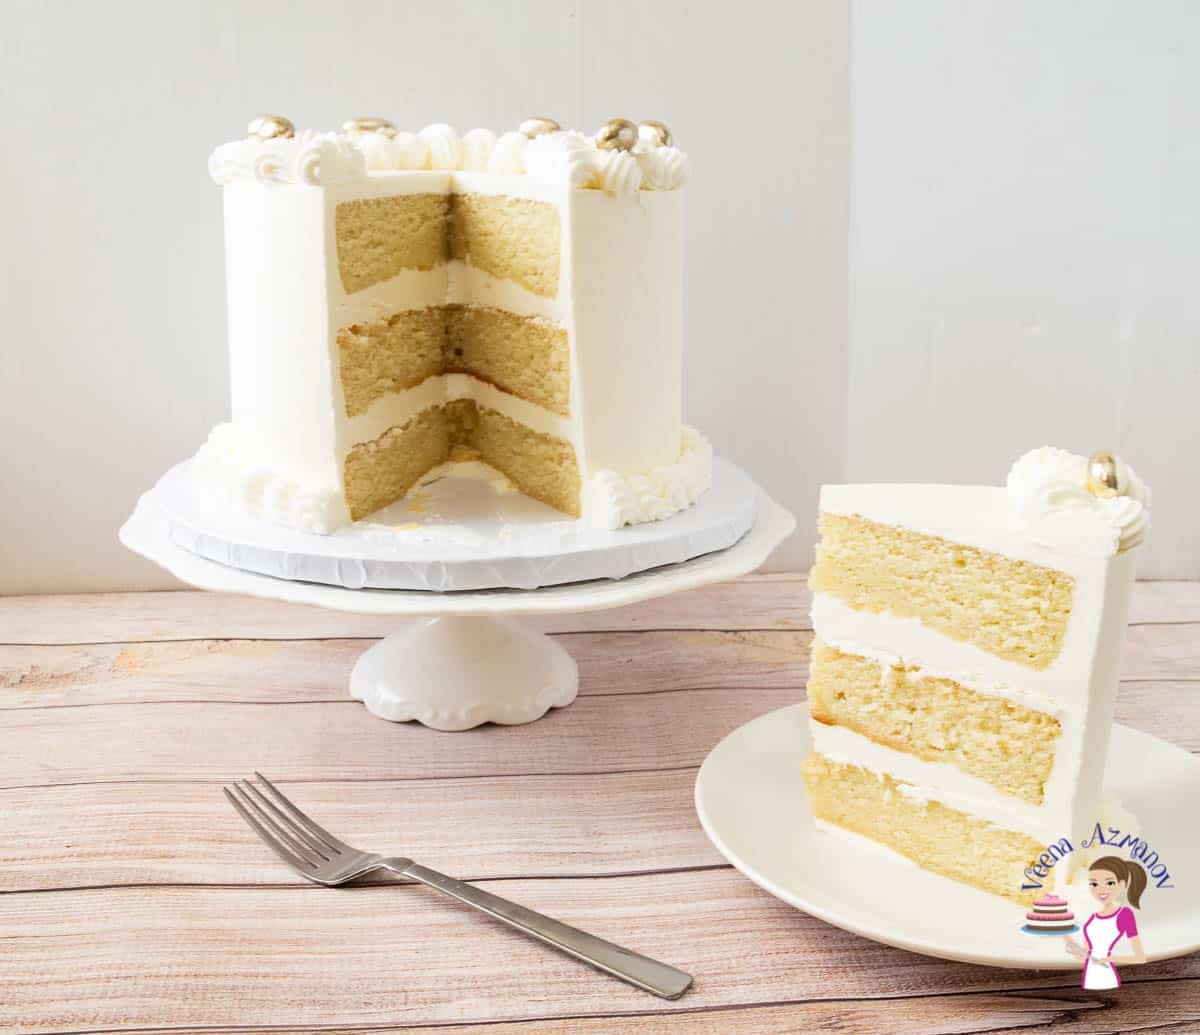
Best White Cake Recipe
Cake
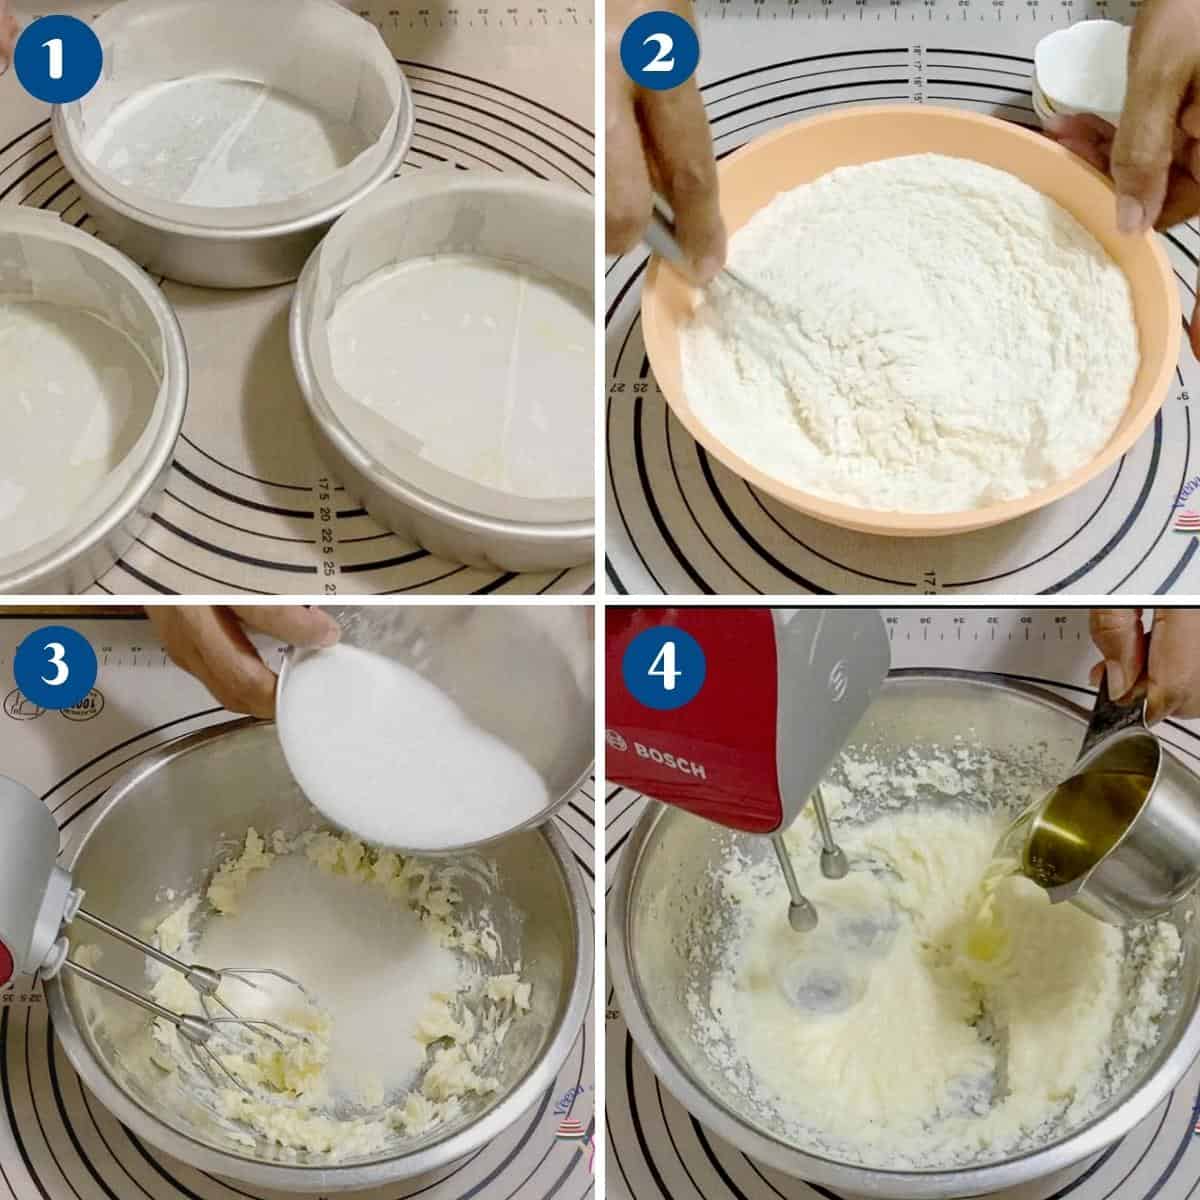
Preheat the oven at 325°F / 165°C / Gas Mark 3 Grease and line 3 x 8-inch round cake pans with parchment paper. You can divide the recipe in half (1/2X) to make 3 x 6-inch round cake layers.
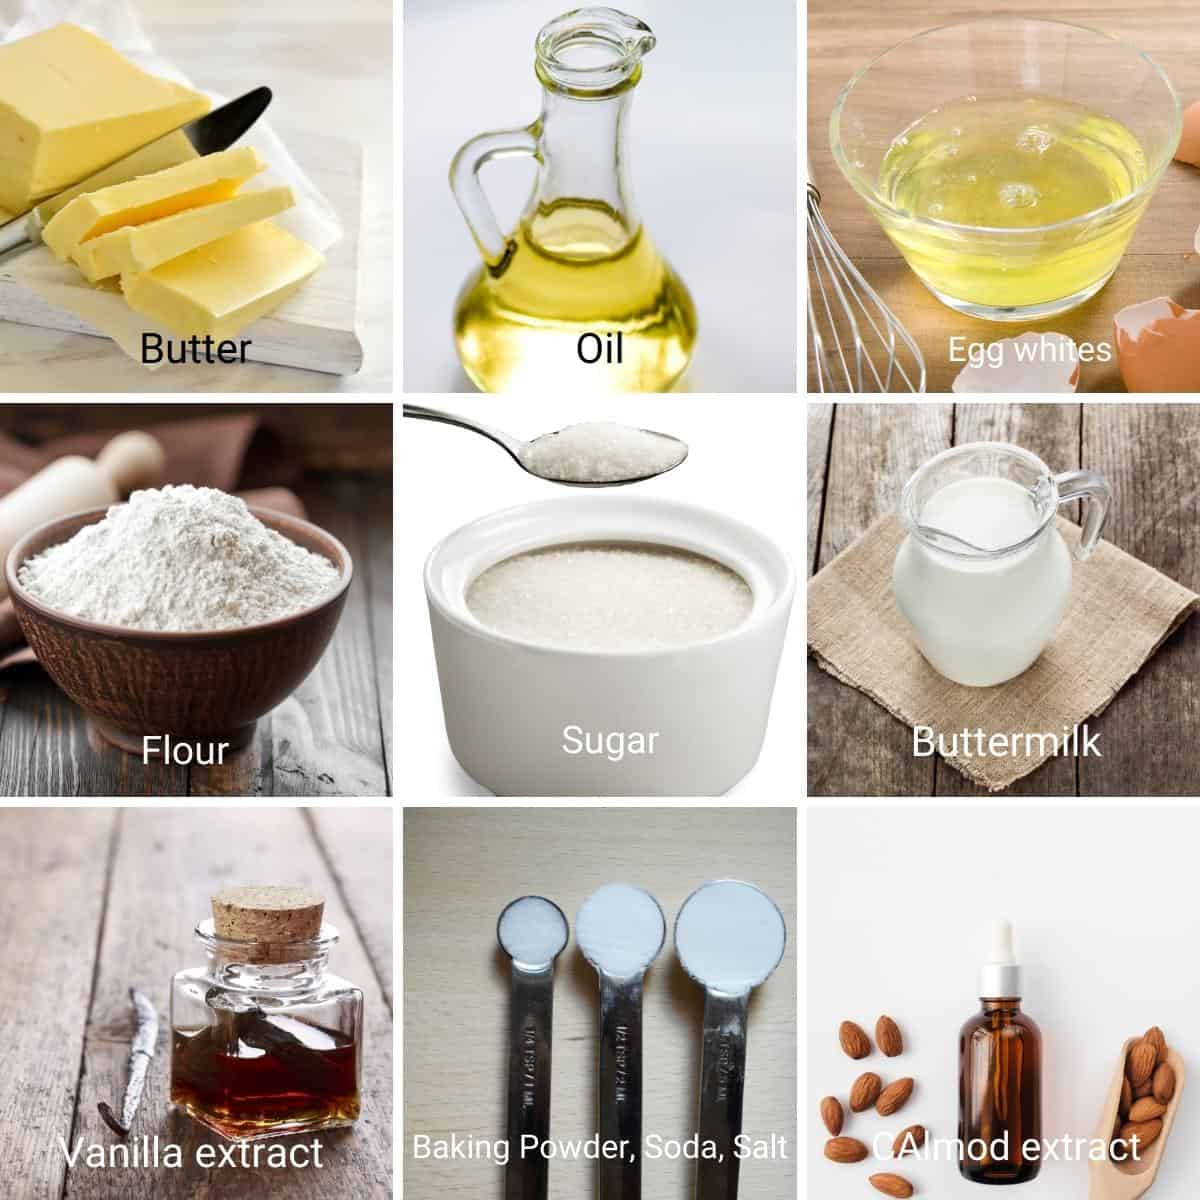
Dry ingredients – in a bowl, combine flour, baking powder, baking soda, salt, – set aside Wet ingredients – In the bowl of a stand mixer with the paddle attachment on medium speed, cream together the butter and sugar until light and fluffy. Gradually add the oil and continue to whip until light and airy. Then, add the vanilla, almond, and rose extract.Pro tip – adding the oil gradually will help the oil whip up some air into the batter similar to making mayonnaise.
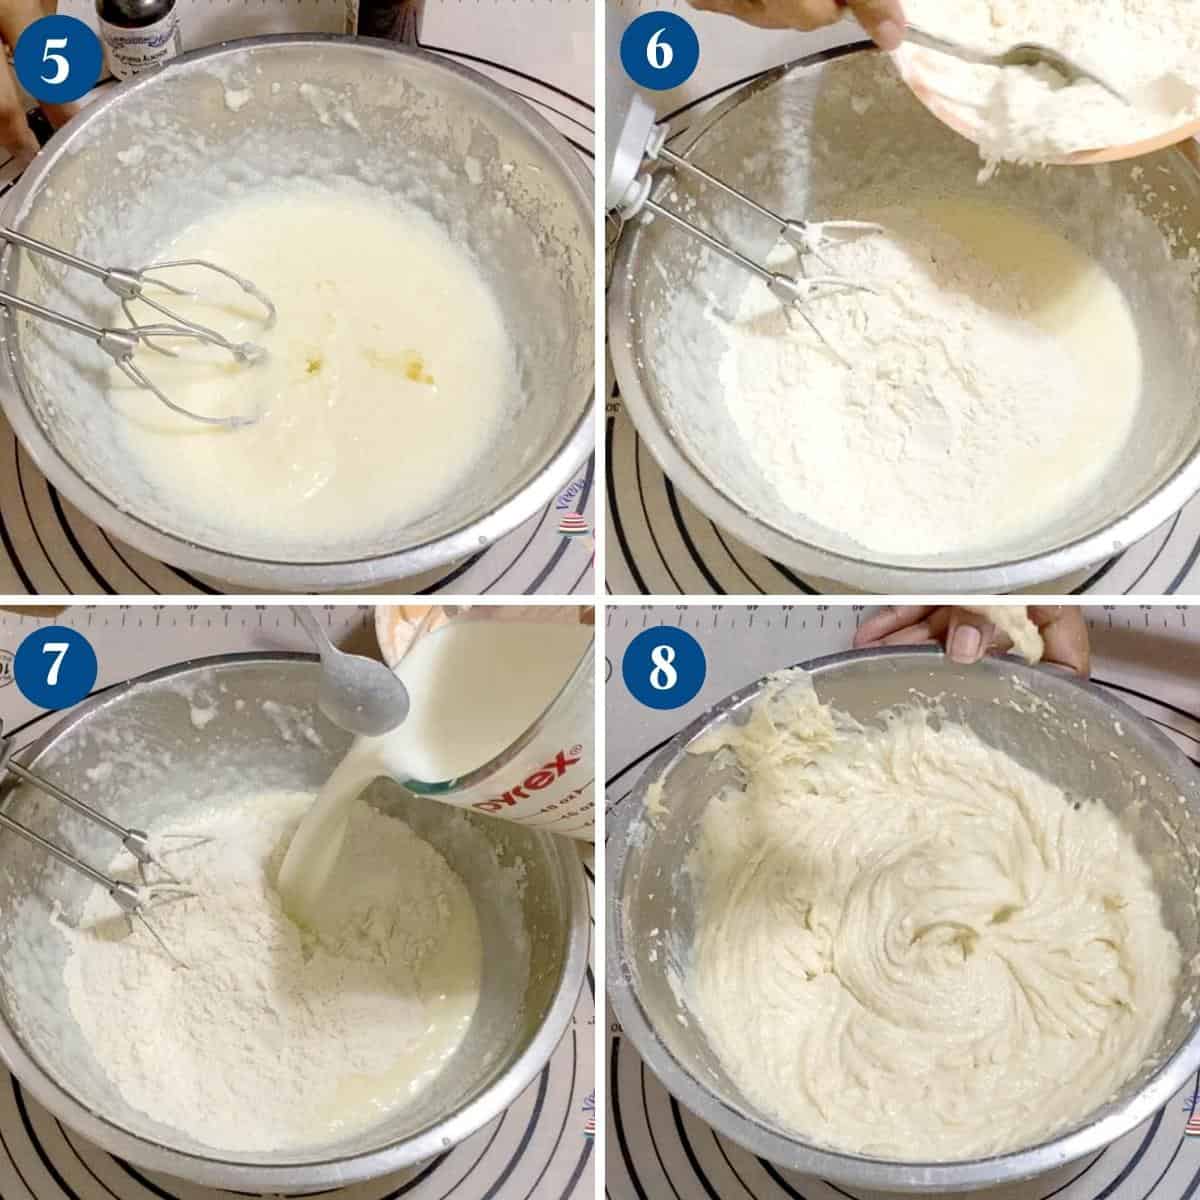
Combine – Next, add the flour mixture and buttermilk in three batches alternating each other – set aside. Whip – Clean the bowl of the stand mixer and whisk attachment, then add the egg whites and cream of tartar. After two minutes, gradually add the sugar, one tablespoon at a time. Once all the sugar is in, whip the egg whites to almost stiff peaks.Pro tip – any grease in the bowl or whisk will not whip the egg whites so clean it properly. Also, add the sugar gradually into the egg whites to get the most volume.
Fold – Gently fold the whipped egg whites into the cake batter with a spatula making sure not to overmix.Pro tip – start by adding a big dollop of egg whites to the batter and give it a rigorous mix. This will lighten the batter. Then gently fold the rest of the batter carefully. Bake – Pour batter into the prepared baking pans – tap a few times to remove any air pockets. Bake on the center rack for 35 to 40 minutes or until a skewer inserted in the center comes out clean. Cool in the pan for 10 minutes then invert onto a wire rack and cool completely.Pro tip – if you use a single pan or tube pan the cooking time will be longer about 60 to 65 minutes
Ermine Frosting
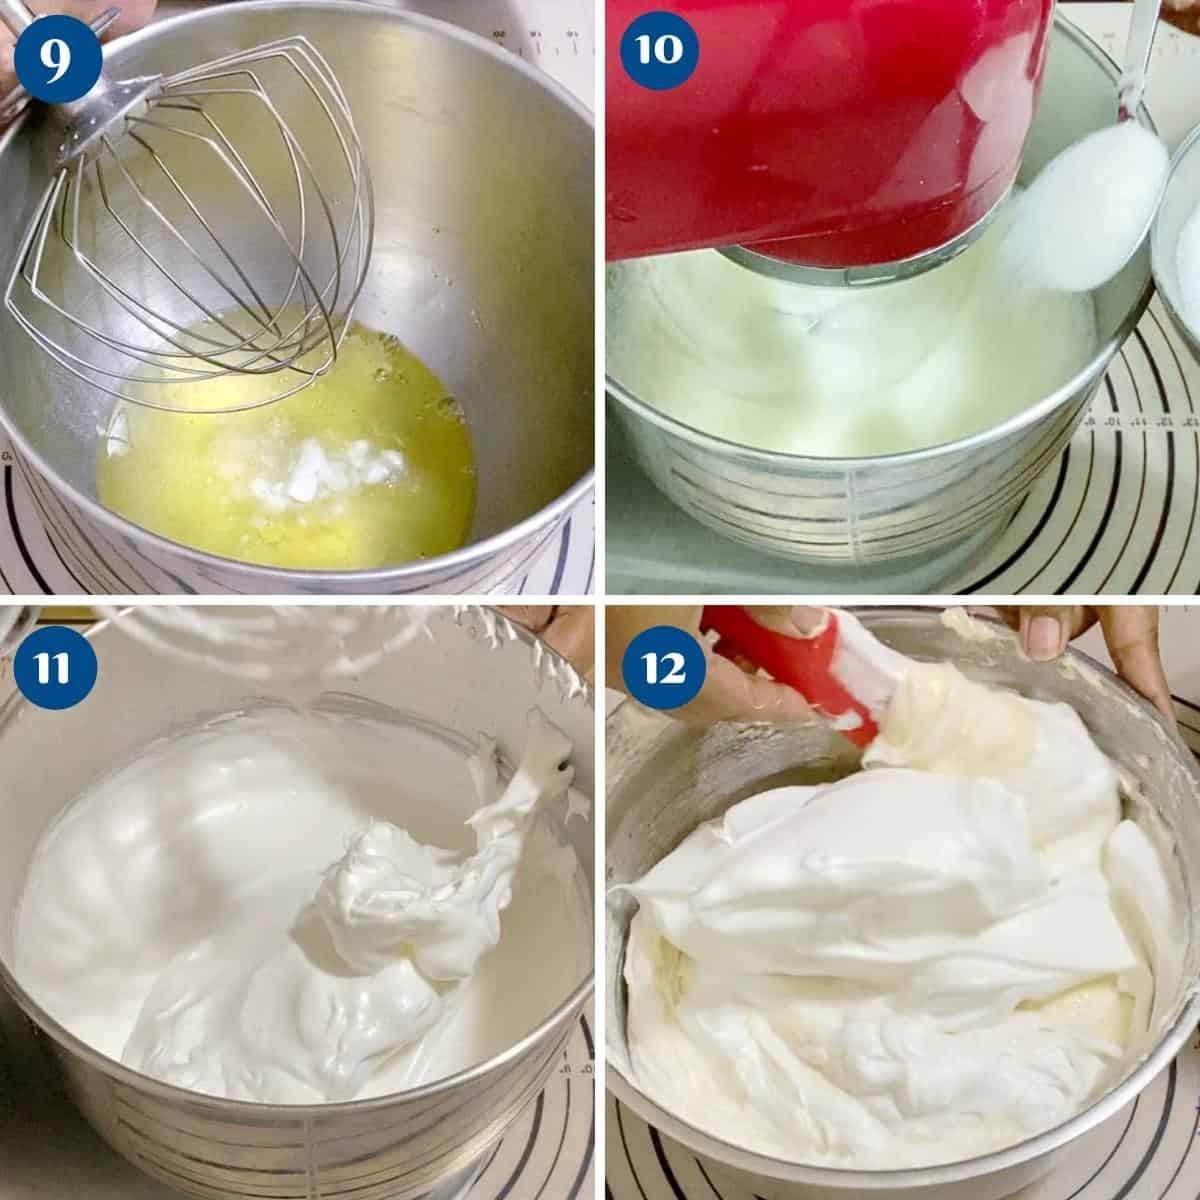
Make the roux – In a saucepan, combine sugar, flour, salt, and milk. Place over medium-low heat stirring constantly. Cook until you have a thick smooth paste about 5 to 7 mins. Remove from heat and transfer to a cool bowl.Pro tip – before you place on heat use a whisk to ensure you have no lump in the milk. Otherwise, the roux will be lumpy. transferring to a clean bowl will ensure the mixture stops cooking and prevent lumps. Watch a video on how to make this Ermine frosting. Cool – Cover with plastic wrap making sure the plastic touches the top surface of the roux. Set aside to cool completely.Pro tip – roux like this can crust and form a skin very quickly similar to custard which can be very lumpy later in the frosting so cover immediately. Whip – In the bowl of a stand mixer with the whisk attachment on medium speed, cream the butter for a minute until light and fluffy.Pro tip – when whipped the butter will be lighter in color as air will be incorporated into it. Combine – Gradually add the cooled roux at low speed – one tablespoon at a time. Making sure to scrape the sides of the bowl for any butter stuck to the bowl. Once all the milk paste/roux has been added, whip the buttercream for 2 full minutes until light and fluffy.Pro tip– it is important to whip the buttercream so you have a consistency similar to whipped cream. Otherwise it mixture will be very soft and won’t be easy to frost. Flavor – Finally, add the vanilla extract and any other flavoring if desired.
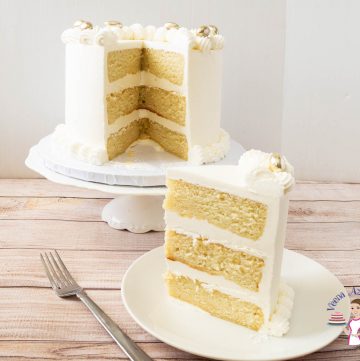
Assemble
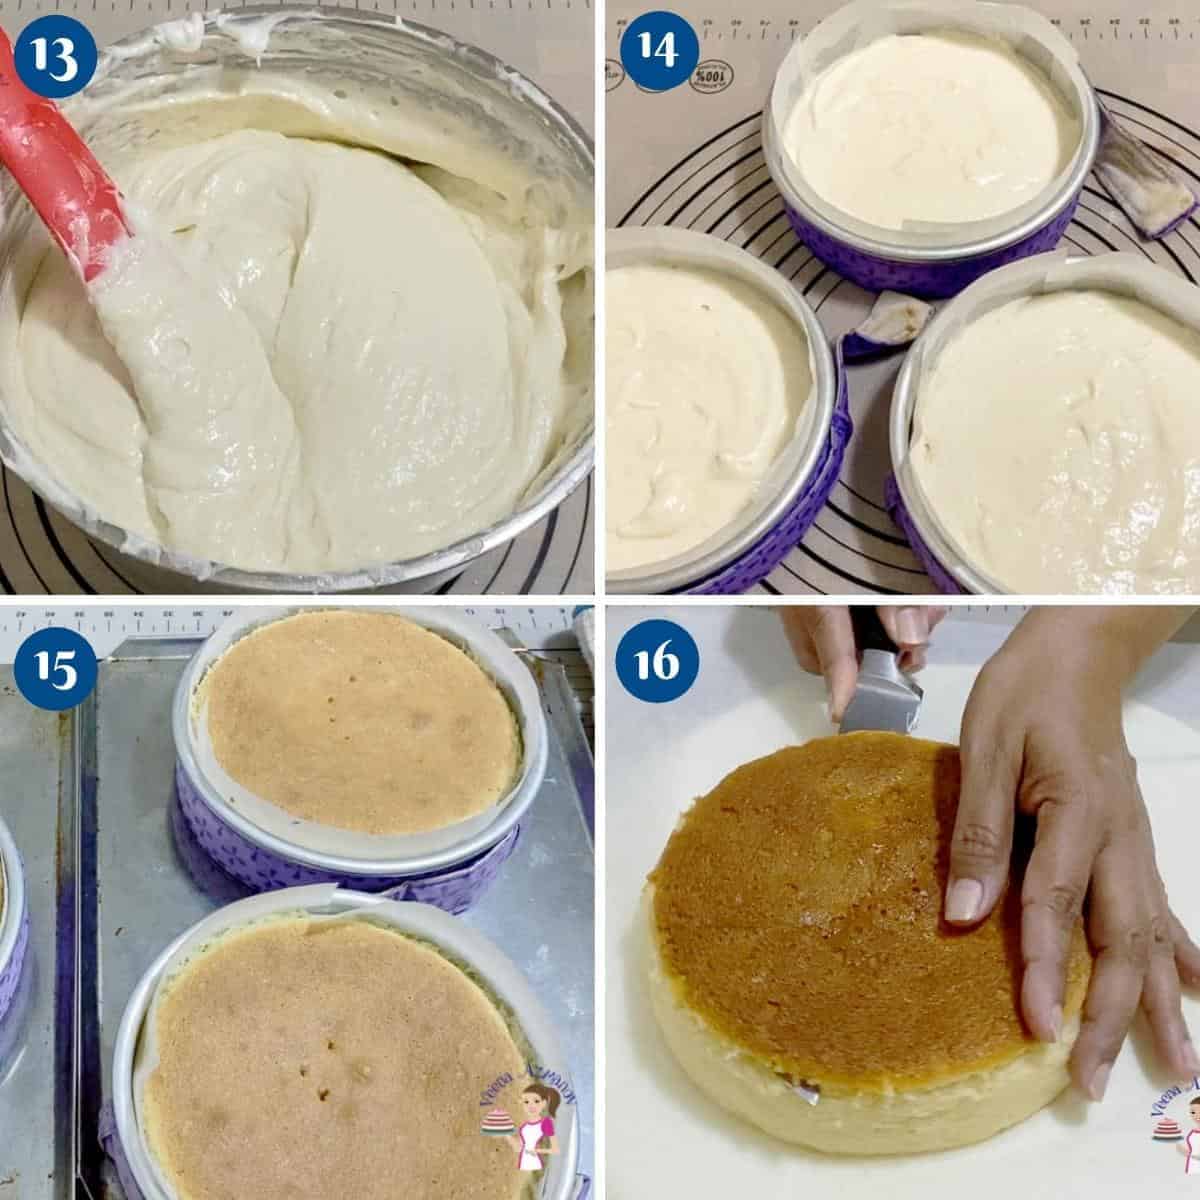
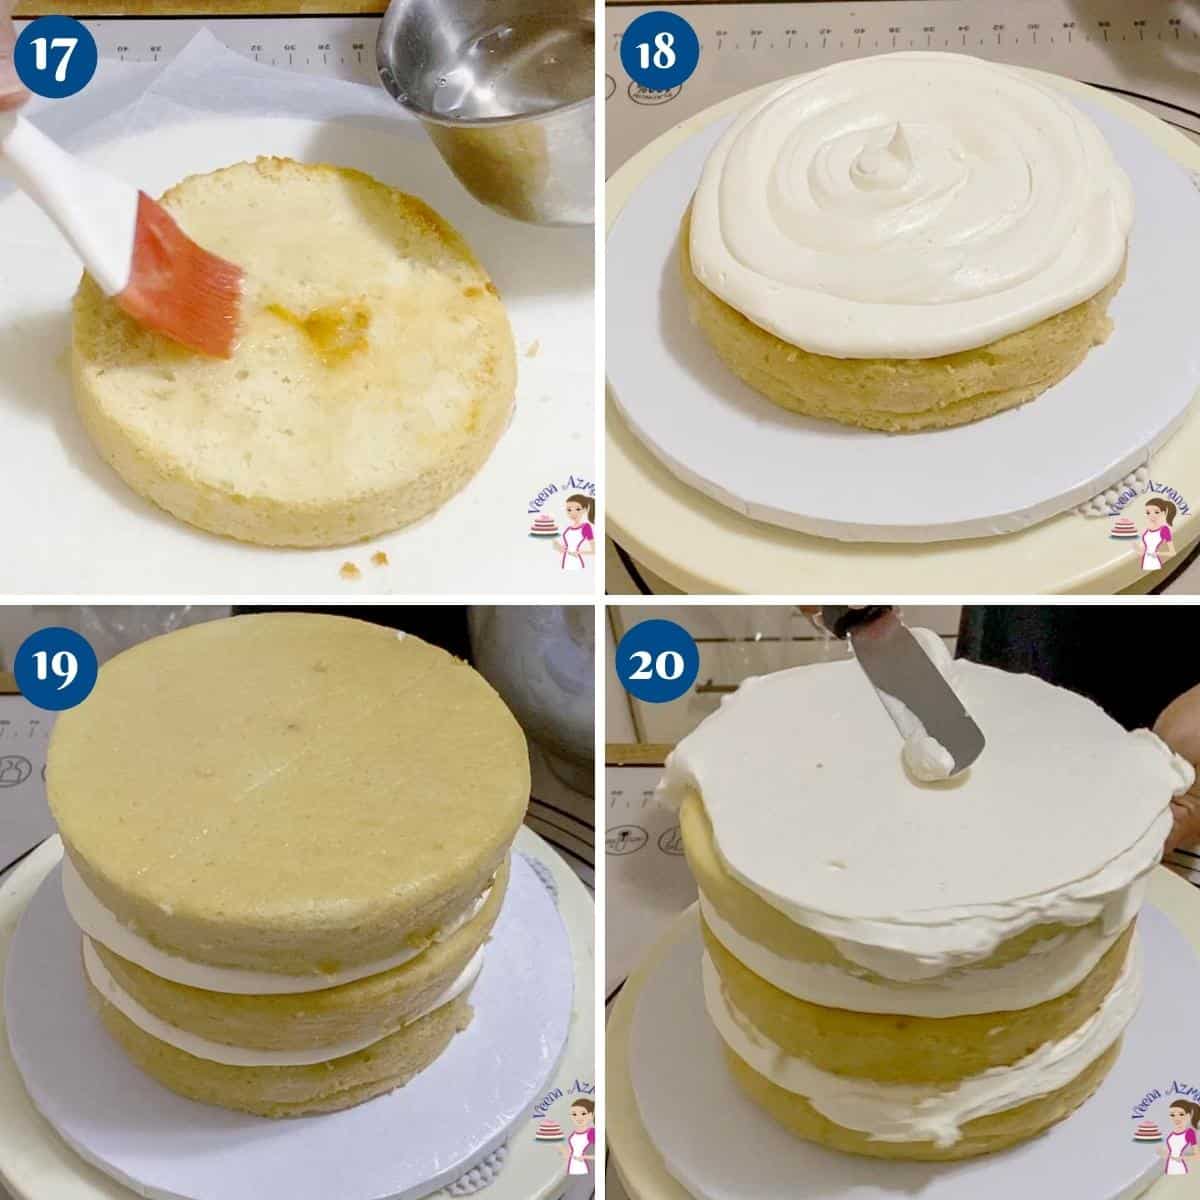
Using a bread knife or cake leveler cut the domes off the cake layers. Brush each layer with the cooled simple syrup, Brush the cakes with simple syrup to keep them moist.Pro tip – Simple syrup is just sugar water that has been boiled and cooled. Used to keep cake layers moist. Stack layers – Place a cake layer on the cake board or cake stand. Top with a big dollop of buttercream – spread evenly using a straight-edge spatula. Then top the second cake layer on top followed by more buttercream and the last layer.
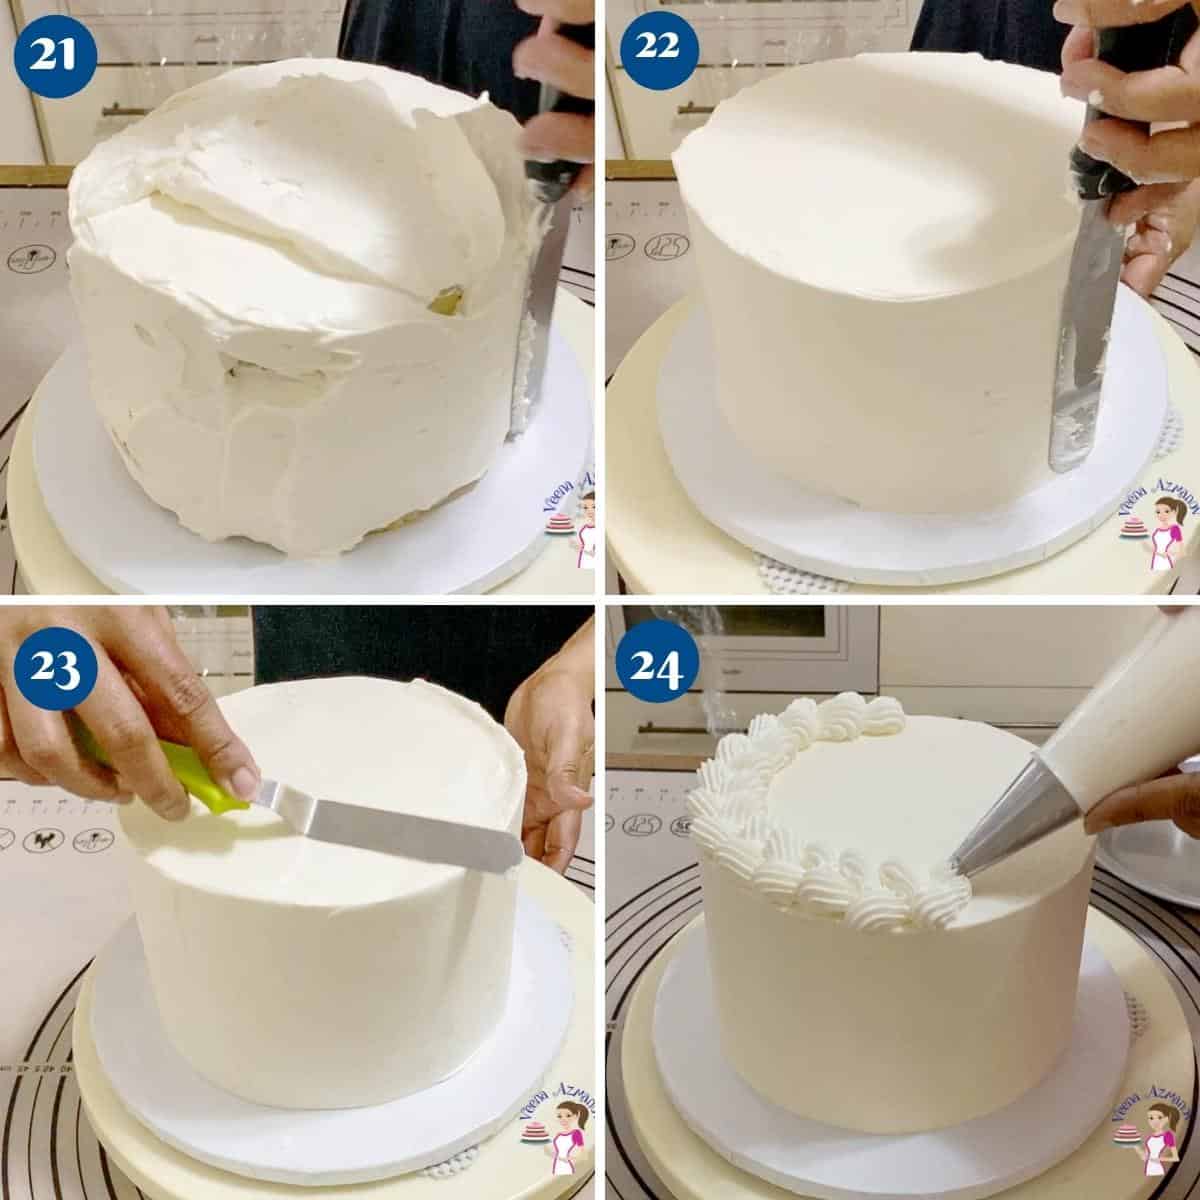
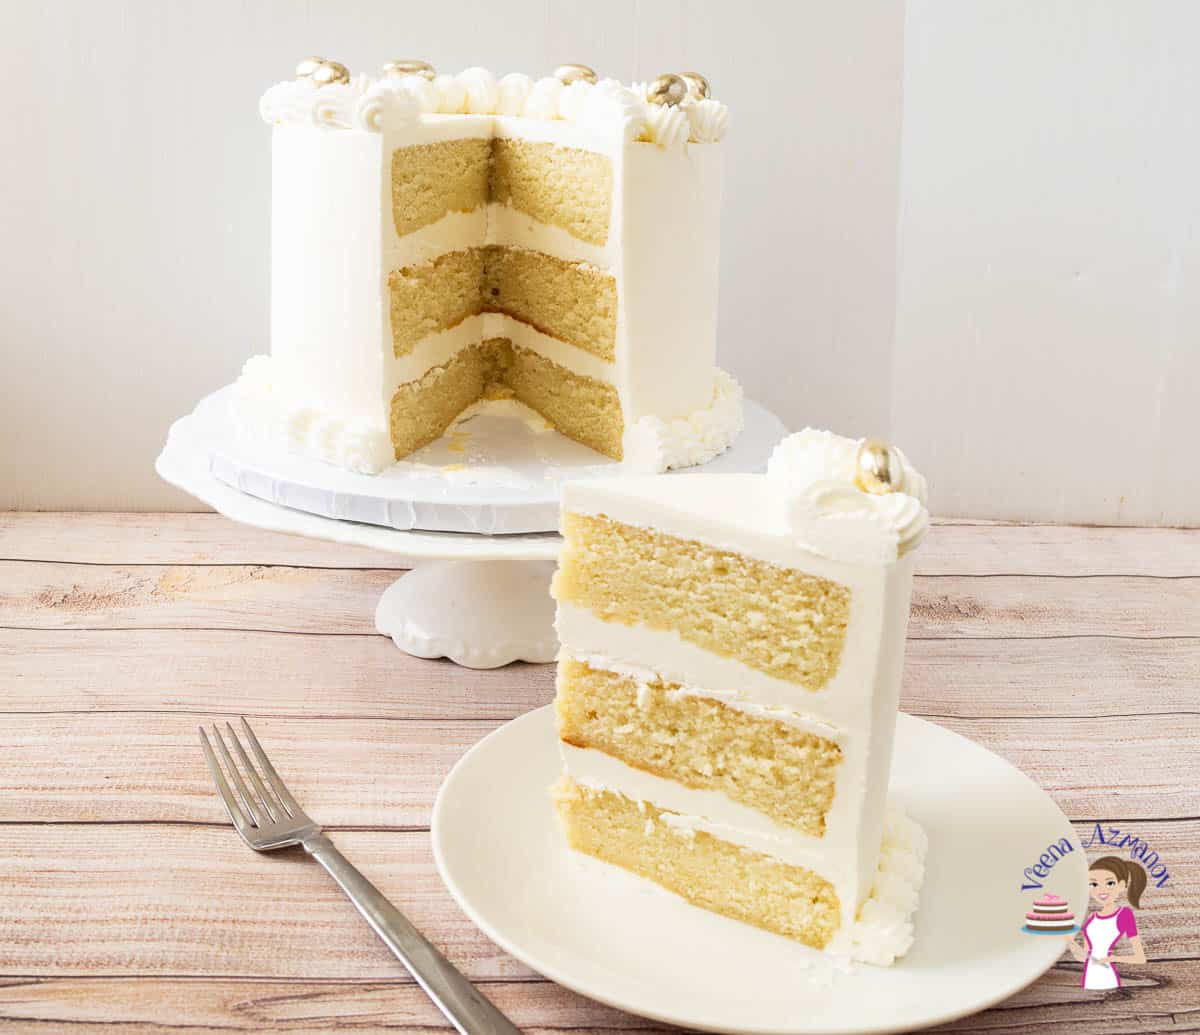
Crumb coat – Spread a thin layer of frosting on top and around the cake. Place the cake in the fridge to chill for 10 to 15 minutes.Pro tip – Chilling the cake at this point will ensure the layers don’t move when you frost the outside. Though, if you leave the cake uncovered in the fridge for too long it can dry out. So, 10 minutes is all you need. Frost – Spread the remaining buttercream around and on top of the cake. Smooth as best you can and chill the cake again for 30 minutes.Pro tip – A straight-edge spatula for the top, an offset spatula, and a bench scraper for the sides work better. Final smoothing – dip an off-set spatula and bench scraper in warm water and smooth the sides and top of the cake.Pro tip – this will help create a nice smooth finish on your cake. Alternatively, you can create a piped pattern around the cake with frosting. Pipe – Add the remaining frosting in a piping bag with the star tip. Pipe a border on top of the cake and at the bottom of the cake (see video). Decorate the top as desired – I added silver-coated chocolate ovals.
Creative ways to serve vanilla cake
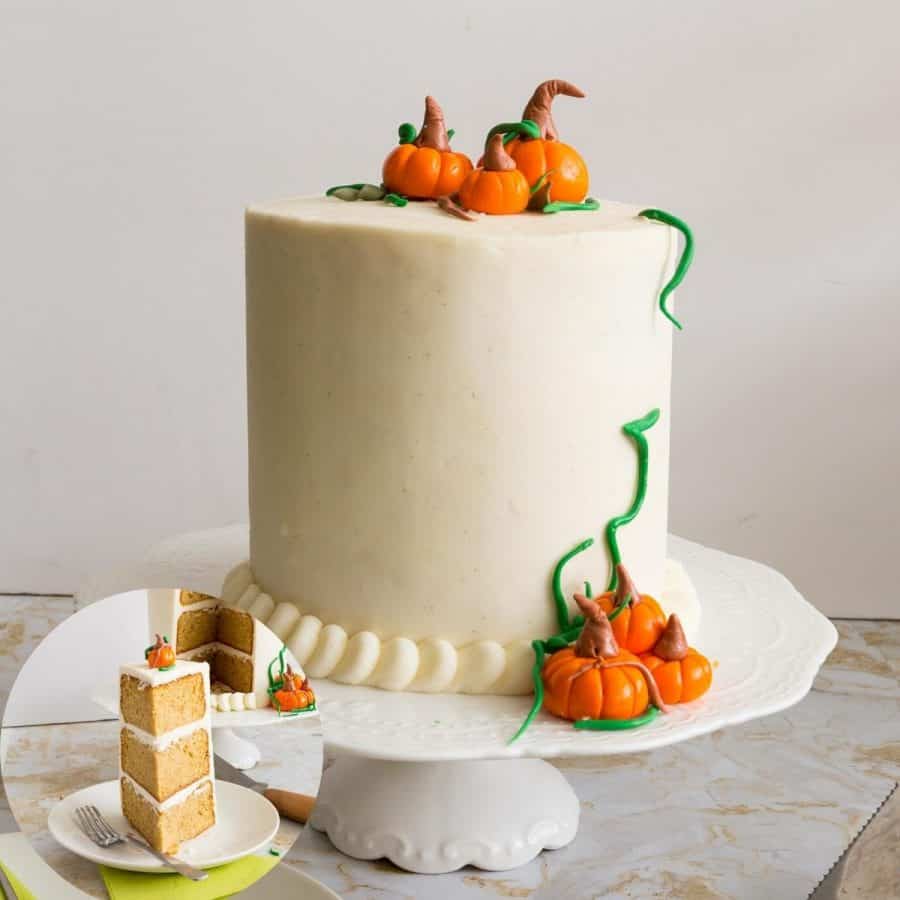
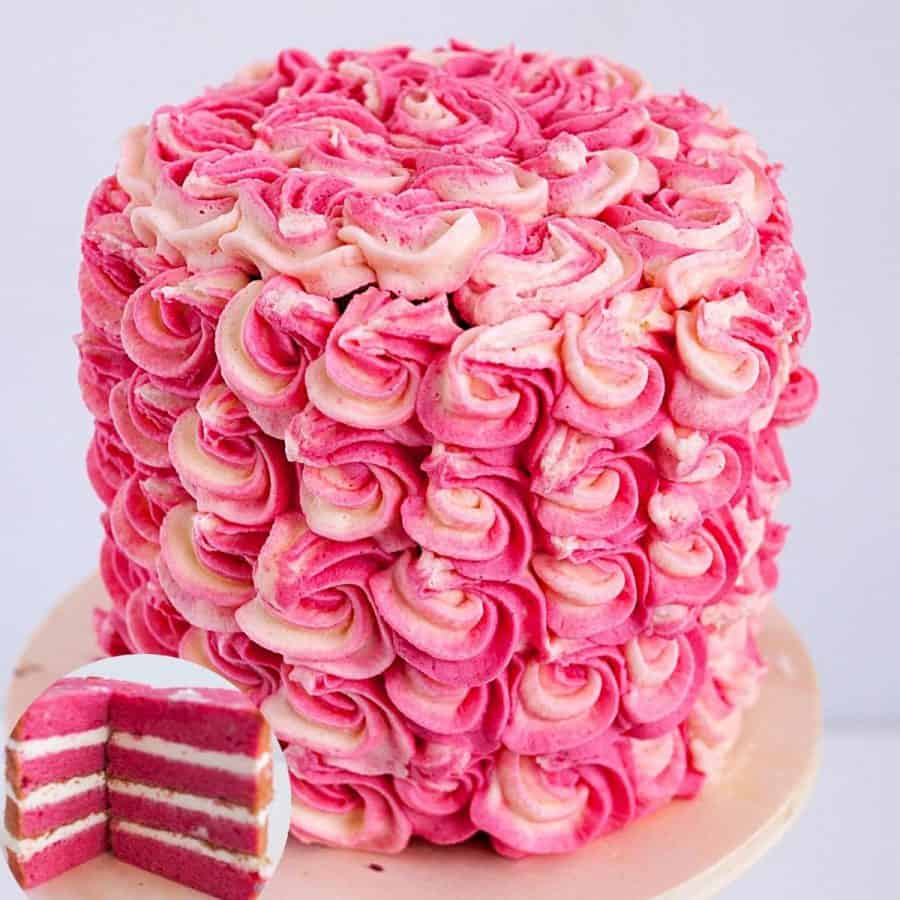
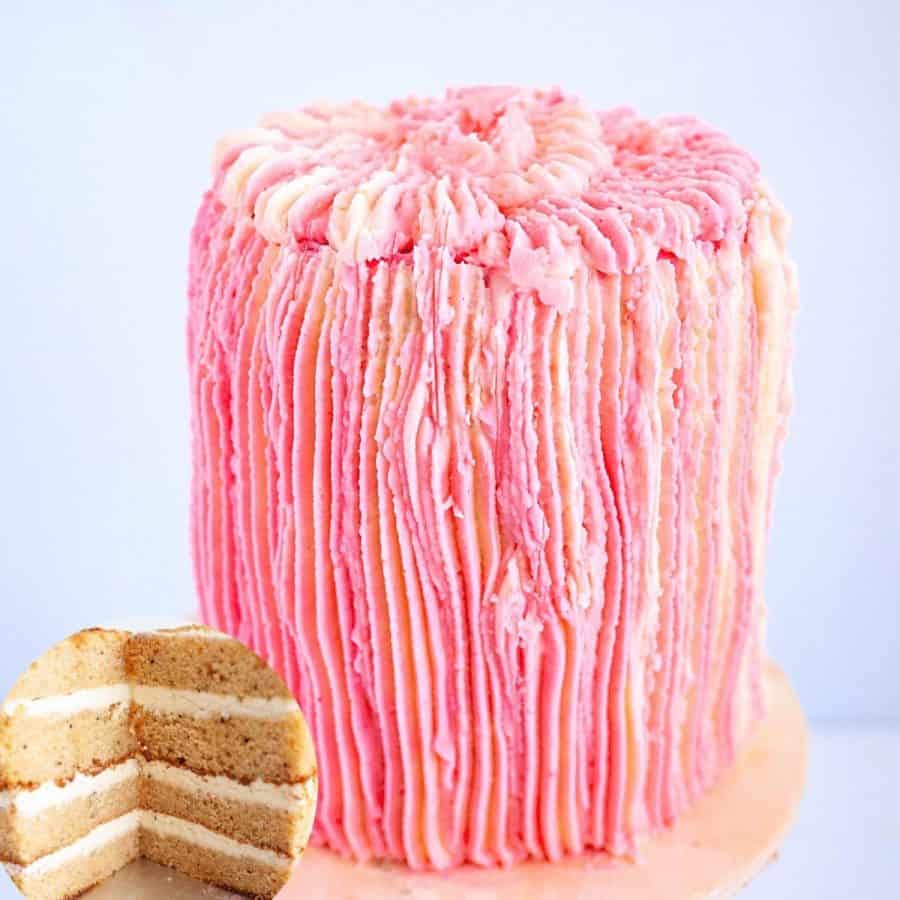
Mini Vanilla Layer Cakes: Create mini vanilla layer cakes using a round cookie cutter to cut out small rounds from the cake layers. Stack them with layers of frosting in between for mini cake towers. Top each mini cake with a decorative frosting swirl, fresh fruit, or edible flowers. Naked Cake: Embrace the “naked cake” trend by frosting the cake layers thinly, allowing the layers to show through. Decorate with fresh berries, edible flowers, or a dusting of powdered sugar for a rustic and elegant look. Cake Push Pops: Serve the cake in push pop containers, alternating layers of cake and frosting. This makes for a fun and portable dessert that guests can enjoy on the go. Cake Parfaits: Layer chunks of vanilla cake with whipped cream, fruit compote, or chocolate ganache in clear glass containers to create visually appealing cake parfaits. Top with a dollop of whipped cream and a sprinkle of cake crumbs. Ice Cream Sandwiches: Slice the vanilla cake into thin layers and use them as the “bread” for ice cream sandwiches. Add a scoop of your favorite ice cream between two cake slices and roll the edges in fun toppings like mini chocolate chips or crushed nuts. Cake Truffles: Crumble the cake layers and mix them with frosting to create cake truffles. Roll the mixture into small balls, dip them in melted chocolate, and garnish with sprinkles, crushed nuts, or colored sugar. Cake Tiramisu: Substitute the traditional ladyfingers in tiramisu with layers of vanilla cake soaked in coffee and layered with mascarpone cheese mixture. Dust with cocoa powder for a delightful twist on a classic dessert. Cake Milkshakes: Blend chunks of vanilla cake with vanilla ice cream and milk to create cake milkshakes. Top with whipped cream and a mini slice of cake for a sweet and creamy treat. Cake Kabobs: Cut the cake into cubes and skewer them with fresh fruit pieces. Drizzle with a complementary sauce, such as caramel or chocolate, and serve as cake kabobs. Cake Fondue: Slice the cake into bite-sized cubes and serve with a warm chocolate or caramel fondue for dipping. Provide an assortment of toppings like chopped nuts, sprinkles, and shredded coconut for guests to coat their cake bites. Deconstructed Cake: Present the cake in a deconstructed form by serving cake cubes, frosting, and various toppings in separate bowls. Guests can build their own cake creations, allowing for customization.
Frequently asked questions
Thank you for sharing - Save for later
Eggs doens’t whip to stiff peaks? This is usually the result of fat getting into the egg whites. The fat could be egg yolks (not separated correctly) or mixer-bowl not clean. You can still use the whipped eggs, the result will be a less light and airy cake or you can use a new batch of egg whites. Curdles batter – You must cream the butter and sugar until light and fluffy. This is done easily if you use fine-grain sugar. The oil needs to be added to the creamed butter and sugar slowly, so it emulsifies the mixture. If you add it too quickly the mixture will be curdled. Having said that, it is not critical and can be saved. Just add a teaspoon or two of flour from the recipe and continue to beat it. The mixture should be smooth and homogeneous again. If your cake is coming out dry, it might be overcooked. Check the cooking time and temperature, and consider reducing the time in the oven by a few minutes. Another possibility is that you’re using too much flour; be sure to measure your ingredients precisely, as too much flour can make your cake dry and dense. On the other hand, if your cake is coming out overly moist, the issue may be with the ingredients. Be sure that your eggs are at room temperature before mixing them into your batter. Cold eggs can cause your cake to be overly damp. You may also want to consider reducing the amount of liquid in your recipe slightly. The cake did not rise. This can happen on three occasions:if you do not whip the eggs to stiff peaks, or if you over-mixed the batter before baking. or if the oven is not at the optimal temperature. If your cake is coming out slightly uneven or lopsided, make sure that your oven racks are level, and that you’re placing your cake pans in the center of the oven. If all else fails, you can try adding a few baking strips around your pans to help distribute the heat more evenly. Finally, if your cake is sticking to the pan, you may not have greased and floured it sufficiently. Be sure to give your pans a generous coating of cooking spray or butter, and then dust them lightly with flour before adding your batter. You can also try using parchment paper to line the bottom of your pans for added insurance.
One easy and classic option is a naked cake! Simply dust the top with powdered sugar and serve with fresh berries or a dollop of whipped cream. If you’re looking for something a bit more unique, try layering sliced strawberries, raspberries, or peaches over the top of the cake for a fruity twist. For a more formal occasion, consider using a piping bag and frosting to decorate the cake with intricate designs or personalized messages. You can also add edible flowers or other decorations to give it a touch of elegance. Another fun option is to cut the cake into fun shapes and designs, such as squares or triangles, and serve on a platter with a variety of toppings and sauces. Whatever your choice for decorating and serving your vanilla cake, be sure to have fun and let your creativity shine.